1:32 Roden Siemens Schuckert D.III - Late
Colorado, United States
Joined: January 25, 2004
KitMaker: 11,669 posts
AeroScale: 11,011 posts
Posted: Sunday, December 22, 2013 - 06:10 PM UTC
Greetings all,
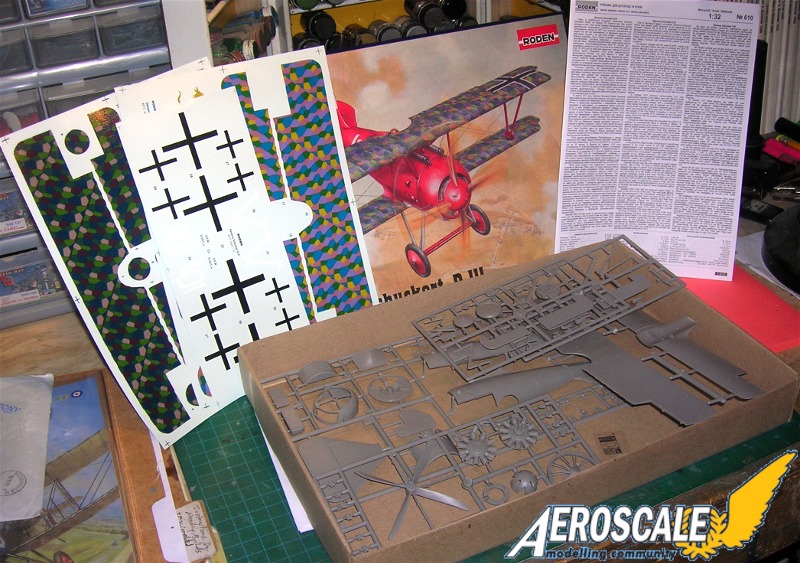
Going back to its appearance in 2009 the all plastic kit has had many comments both pro & con. See the Aeroscale review
here.Next it was Roll Models that commissioned the resin backdate and up-grade kits under their "Loon Models" logo.
The early production set #32006 was reviewed
here.The late production set #32007 was reviewed
here.And finally and most recently the Brengun brass set #32014 was reviewed
here.Here. is another fine build on Aeroscale of the same kit.
Along with a private commission I have made on a couple of 4 bladed propellers I will begin a set of builds here including elements of all of these kits to complete an early version
here. The late production Siemens Schuckert D.III with this thread.
SSW a_c WWI". . .The most important thing is to know why you build and then get the most that you can out of building." via D.D.
Colorado, United States
Joined: January 25, 2004
KitMaker: 11,669 posts
AeroScale: 11,011 posts
Posted: Sunday, December 22, 2013 - 06:16 PM UTC
Base colour applied to part of the interior.
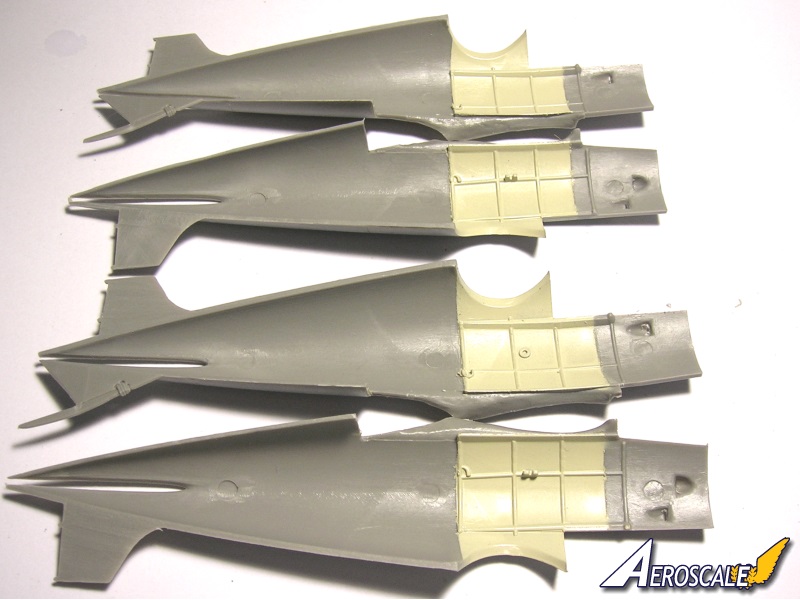
Here the Loon and Roden fabric & wood related parts get their base coats.
Metal parts get their base coats.
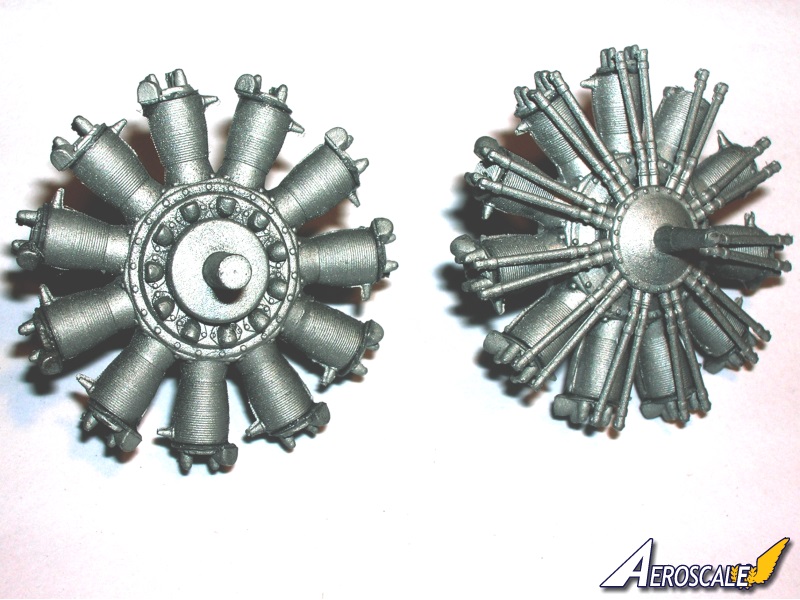
Stock Roden Siemens Halske Sh.III engines
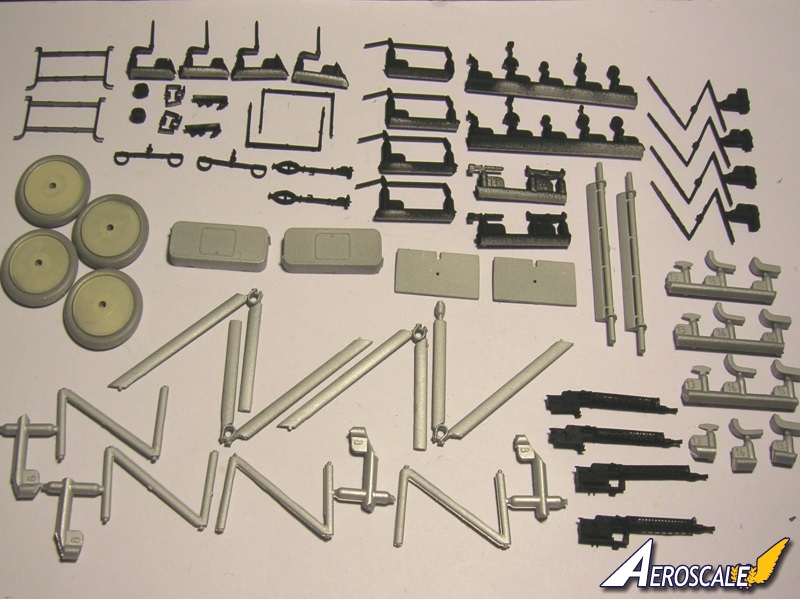
Non-engine related parts .
". . .The most important thing is to know why you build and then get the most that you can out of building." via D.D.
Colorado, United States
Joined: January 25, 2004
KitMaker: 11,669 posts
AeroScale: 11,011 posts
Posted: Sunday, December 22, 2013 - 06:37 PM UTC
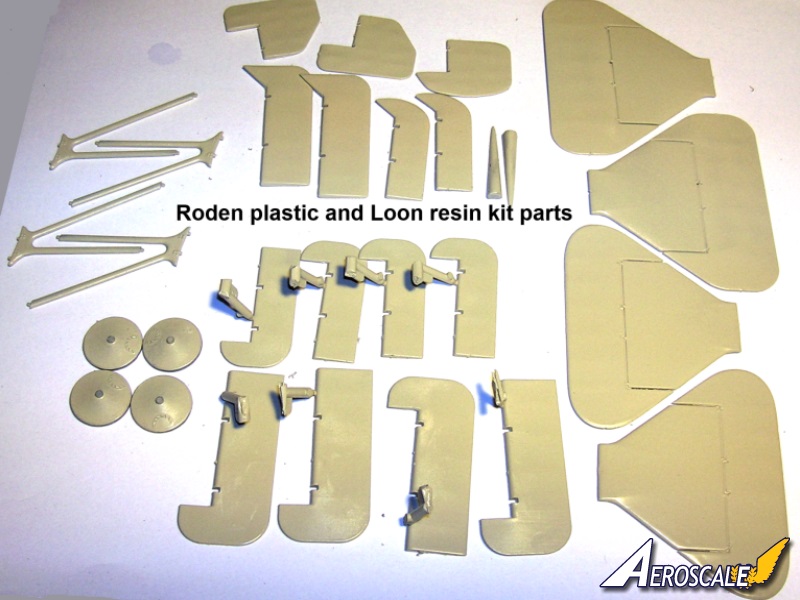
Here are the attached Loon Models late production wings for the Roden kit. The loon early wing tips are to illustrate the type of change that was made. The Late production wings were smaller in area that the early production.

". . .The most important thing is to know why you build and then get the most that you can out of building." via D.D.
Colorado, United States
Joined: January 25, 2004
KitMaker: 11,669 posts
AeroScale: 11,011 posts
Posted: Sunday, December 22, 2013 - 07:04 PM UTC
Next the HGW rib tapes are going to be attached to all wing and tail unit upper surfaces.
". . .The most important thing is to know why you build and then get the most that you can out of building." via D.D.
Colorado, United States
Joined: January 25, 2004
KitMaker: 11,669 posts
AeroScale: 11,011 posts
Posted: Saturday, February 21, 2015 - 06:01 PM UTC
Finally getting back to these builds. HGW Rib tapes have been added to show some stitching relief like I did on the old Eduard 1/48 kit.
". . .The most important thing is to know why you build and then get the most that you can out of building." via D.D.
Colorado, United States
Joined: January 25, 2004
KitMaker: 11,669 posts
AeroScale: 11,011 posts
Posted: Sunday, March 01, 2015 - 08:03 PM UTC
PE is never meant to stand alone. Here the rear cockpit screens and seat pans are augmented with .040 thou plastic sheet.

". . .The most important thing is to know why you build and then get the most that you can out of building." via D.D.
Colorado, United States
Joined: January 25, 2004
KitMaker: 11,669 posts
AeroScale: 11,011 posts
Posted: Sunday, March 01, 2015 - 08:04 PM UTC
Basic colors added.

". . .The most important thing is to know why you build and then get the most that you can out of building." via D.D.
Colorado, United States
Joined: January 25, 2004
KitMaker: 11,669 posts
AeroScale: 11,011 posts
Posted: Sunday, March 01, 2015 - 08:05 PM UTC
PLacements have started.

". . .The most important thing is to know why you build and then get the most that you can out of building." via D.D.
Colorado, United States
Joined: January 25, 2004
KitMaker: 11,669 posts
AeroScale: 11,011 posts
Posted: Wednesday, March 04, 2015 - 11:08 AM UTC
Here is the right & left sides of the upper cowling with the Brengun brass.

The brass plate for the chin has to be added to the kit part then I'll push out the louvres.

". . .The most important thing is to know why you build and then get the most that you can out of building." via D.D.
Colorado, United States
Joined: January 25, 2004
KitMaker: 11,669 posts
AeroScale: 11,011 posts
Posted: Wednesday, March 04, 2015 - 11:09 AM UTC
Adding some color to the various Roden kit & Loon resin parts.

". . .The most important thing is to know why you build and then get the most that you can out of building." via D.D.
Colorado, United States
Joined: January 25, 2004
KitMaker: 11,669 posts
AeroScale: 11,011 posts
Posted: Sunday, March 08, 2015 - 05:39 AM UTC
Cockpit basics. Kit & Brengun PE


". . .The most important thing is to know why you build and then get the most that you can out of building." via D.D.
Colorado, United States
Joined: January 25, 2004
KitMaker: 11,669 posts
AeroScale: 11,011 posts
Posted: Sunday, March 08, 2015 - 05:43 AM UTC
Dick Bennett's sketch. This type of auxilary throttle was on prototype & some early production airframes.

". . .The most important thing is to know why you build and then get the most that you can out of building." via D.D.
Colorado, United States
Joined: January 25, 2004
KitMaker: 11,669 posts
AeroScale: 11,011 posts
Posted: Sunday, March 08, 2015 - 05:48 AM UTC
I have heard od a couple of modelers giving up and throwing this kit back in the box or one fellow threw his in the trash Because he says he couldn'y get the lower wing to fit.


". . .The most important thing is to know why you build and then get the most that you can out of building." via D.D.
Colorado, United States
Joined: January 25, 2004
KitMaker: 11,669 posts
AeroScale: 11,011 posts
Posted: Sunday, March 08, 2015 - 05:52 AM UTC
". . .The most important thing is to know why you build and then get the most that you can out of building." via D.D.
Colorado, United States
Joined: January 25, 2004
KitMaker: 11,669 posts
AeroScale: 11,011 posts
Posted: Sunday, March 08, 2015 - 05:57 AM UTC

Micro Group's effort to build me a SH.IIIa wood laminated propeller. I think this one drove him to needing a vacation.

". . .The most important thing is to know why you build and then get the most that you can out of building." via D.D.
Colorado, United States
Joined: January 25, 2004
KitMaker: 11,669 posts
AeroScale: 11,011 posts
Posted: Sunday, March 08, 2015 - 06:00 AM UTC
Same propeller different lighting.
Front

back

". . .The most important thing is to know why you build and then get the most that you can out of building." via D.D.
Colorado, United States
Joined: January 25, 2004
KitMaker: 11,669 posts
AeroScale: 11,011 posts
Posted: Sunday, March 15, 2015 - 06:49 PM UTC
My approach to the late production build benefits from the early production build. Here the modified kit chin pan is fitted with just the louvres cut out. The advantage is to add more area to the attachment points and helps line up the Brengun brass to the point you eleminate any possibility of errors.


". . .The most important thing is to know why you build and then get the most that you can out of building." via D.D.
Merlin
 Senior Editor
#017
United Kingdom
Joined: June 11, 2003
KitMaker: 17,582 posts
AeroScale: 12,795 posts
Posted: Monday, March 16, 2015 - 03:42 AM UTC
Hi Stephen
Nice progress.

A bit of a step to work on at the front, but I've had plenty of practice at worse on my Reppu, so no worries there.

I'm wondering, though, at the wisdom of applying the lozenge decals so early - they're clearly taking a real battering in the course of construction...
All the best
Rowan
BEWARE OF THE FEW...
As I grow older, I regret to say that a detestable habit of thinking seems to be getting a hold of me. - H. Rider Haggard
Colorado, United States
Joined: January 25, 2004
KitMaker: 11,669 posts
AeroScale: 11,011 posts
Posted: Tuesday, March 17, 2015 - 11:49 AM UTC
It completely illustrates the fragile nature of modern ink topped decals. Working here on kit motor mods. The kit motor fits under the kit cowling. But if you use the Loon cowling you will have to take 1/16" off the top of the tappets. Also I "twist" the push rod stems so they are slightly off set. Unless you cut them free and reposition them entirely this is the best choice.

". . .The most important thing is to know why you build and then get the most that you can out of building." via D.D.
Merlin
Senior Editor #017
United Kingdom
Joined: June 11, 2003
KitMaker: 17,582 posts
AeroScale: 12,795 posts
Posted: Wednesday, March 18, 2015 - 12:18 AM UTC
Quoted Text
It completely illustrates the fragile nature of modern ink topped decals.
Hi Stephen
I reckon any decals would struggle to survive the amount of handling they must be enduring.
All the best
Rowan
BEWARE OF THE FEW...
As I grow older, I regret to say that a detestable habit of thinking seems to be getting a hold of me. - H. Rider Haggard
Colorado, United States
Joined: January 25, 2004
KitMaker: 11,669 posts
AeroScale: 11,011 posts
Posted: Wednesday, March 18, 2015 - 05:18 AM UTC
I find Aviattic does extremely well. I just wish they had been available when I started. I recon that you will be using them on your build. I look forward to that. I just receieved the 1/32 set two days ago. I recommend them as I have already done the 1/48 versions. Tough, durable and definately the right colors. I will do a review when I have the time.
". . .The most important thing is to know why you build and then get the most that you can out of building." via D.D.
Merlin
Senior Editor #017
United Kingdom
Joined: June 11, 2003
KitMaker: 17,582 posts
AeroScale: 12,795 posts
Posted: Wednesday, March 18, 2015 - 02:45 PM UTC
Hi Stephen
I don't think I'd want to risk them so early if I were doing the amount of modifications and corrections in this build.
All the best
Rowan
BEWARE OF THE FEW...
As I grow older, I regret to say that a detestable habit of thinking seems to be getting a hold of me. - H. Rider Haggard
Colorado, United States
Joined: January 25, 2004
KitMaker: 11,669 posts
AeroScale: 11,011 posts
Posted: Thursday, March 19, 2015 - 06:21 PM UTC
5 color cover, chordwise application on an upper wing for a SSW D.IV.
Generally speaking, the Siemens Schuckert Werke D.IV type fighter was the marriage of several great ideas. First the "monococque" fuselage was a wooden frame with 3mm plywood panels as a skin. The rudder, elevators and wings were fabric covered and conventionally built. Ailerons were in both upper and lower wings. The S.S.W. D. IV differed from its predecessor the D.III in that the top wing of the D. IV was built narrower in chord and had 60% more wing ribs than the D.III in both upper and lower wings. The resultant airfoil added 500 -1000 ft to its maximum ceiling. On the D. IV, the average rib spacing was decreased from 250 to 170 mm, although some of the rib bays on both aircraft were at odd dimensions. Note tyhe rib tapes in the foreground of the image below. The machine guns were closer to the center line that in the D.III and there were three vertical dispersal tubes in the cockpit where the D.III had only one tube. The indication is that the empty belt collection and the spent shell extraction were changed.
Siemens experimented with a lot of wingspans and chords, and according to one test record, the D.III could climb faster and had a higher ceiling than the D. IV. This makes sense, because of the added wing area. However, that was a sacrifice SSW was willing to make, because the D.IV was considerably faster (193 vs.173 km/h at 2000 m). Interestingly, as altitude increased, the D. IV speed fell off more quickly. The two were even at about 7300 m, and the D. III was faster above that, but it wasn't of much consequence because very little fighting took place at those altitudes.

". . .The most important thing is to know why you build and then get the most that you can out of building." via D.D.
Merlin
Senior Editor #017
United Kingdom
Joined: June 11, 2003
KitMaker: 17,582 posts
AeroScale: 12,795 posts
Posted: Friday, March 20, 2015 - 01:51 AM UTC
Hi again
Yeah - that looks a bit tougher than any decals!

You've got to wince at the foreman at the background, not getting his hands dirty. Thank goodness H&S and sexual equality has relegated such a scene to the dark-ages in most civilised and informed work-places...
All the best
Rowan
BEWARE OF THE FEW...
As I grow older, I regret to say that a detestable habit of thinking seems to be getting a hold of me. - H. Rider Haggard
Colorado, United States
Joined: January 25, 2004
KitMaker: 11,669 posts
AeroScale: 11,011 posts
Posted: Sunday, March 22, 2015 - 03:48 AM UTC
The Old Propeller / Wood & Wire decals on this build definately take extra consideration. As you may note on the early production build thread. Using the HGW lozenge decals, it hardly has any chips or concerns.
". . .The most important thing is to know why you build and then get the most that you can out of building." via D.D.


