_GOTOBOTTOM
Early Aviation
Discuss World War I and the early years of aviation thru 1934.
REVIEW
Printed Sworl Camouflage
JackFlash
_VISITCOMMUNITY
Colorado, United States
Joined: January 25, 2004
KitMaker: 11,669 posts
AeroScale: 11,011 posts
Posted: Tuesday, April 19, 2011 - 05:48 PM UTC

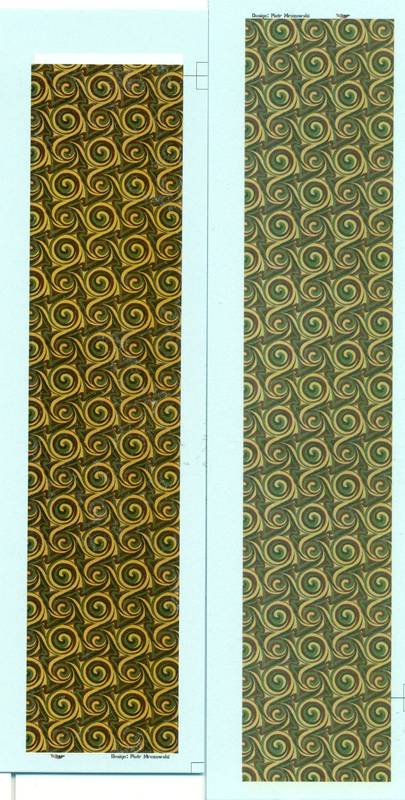
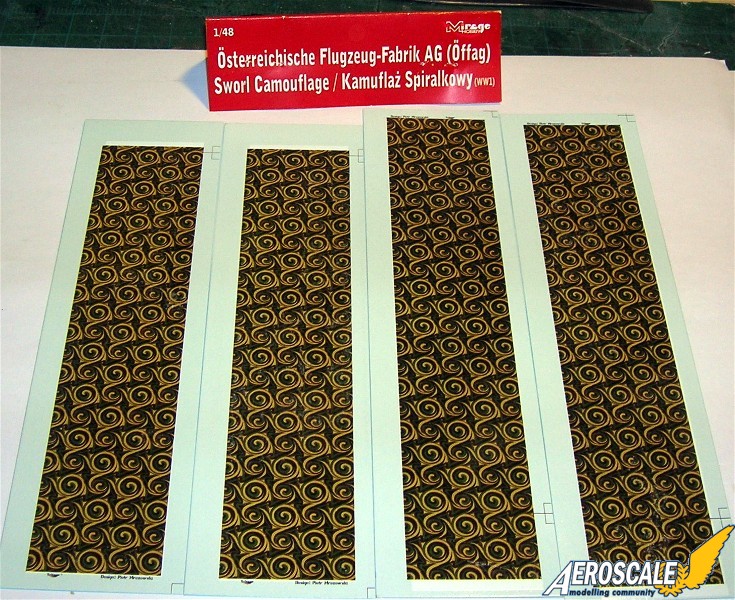
Mirage''s 1:48 decal of the "spring leaf" 4 coloured Austrian Sworl Camouflage has arrived. This represents preprinted fabric from the Oeffag factory and applied to the wings and horizontal tail unit of late production 253 series Albatros D type machines.

Link to Item

If you have comments or questions please post them here.

Thanks!
jamieg
_VISITCOMMUNITY
Ontario, Canada
Joined: May 08, 2011
KitMaker: 2 posts
AeroScale: 1 posts
Posted: Sunday, May 08, 2011 - 04:59 AM UTC
Hi Stephen;

I would like to make an addendum to your review. I also purchased two of these packages and was surprised to note a substantial difference in the colours of the two packages. They would probably be mutually incompatible on a model. One is very brown and when enlarged has more 'artifacts' from whatever source the decal was created. The other is very green and has fewer 'artifacts' when viewed at higher resolutions. Clearly this represents an actual change in the design between one batch of decals and another since there is a strip of white on one end of the brown ones and no such strip on the green ones.

Each set of decals is consistent within the set.


Jamie
JackFlash
_VISITCOMMUNITY
Colorado, United States
Joined: January 25, 2004
KitMaker: 11,669 posts
AeroScale: 11,011 posts
Posted: Sunday, May 08, 2011 - 06:44 AM UTC
Thank you Jamie for the additional input. While Mirage is only "releasing the spring leaf" version your muted version appears to be a one off type. The variation due to the decal manufacturer quality control certainly gives you a "faded" or weathered look. Kind of interesting.
JackFlash
_VISITCOMMUNITY
Colorado, United States
Joined: January 25, 2004
KitMaker: 11,669 posts
AeroScale: 11,011 posts
Posted: Monday, October 31, 2011 - 08:51 AM UTC
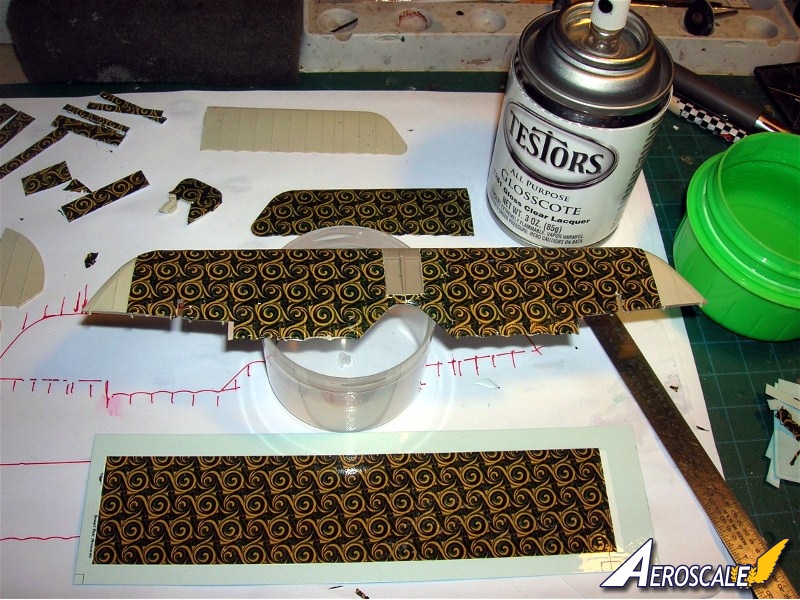
One lower wing and a start on the top wing.
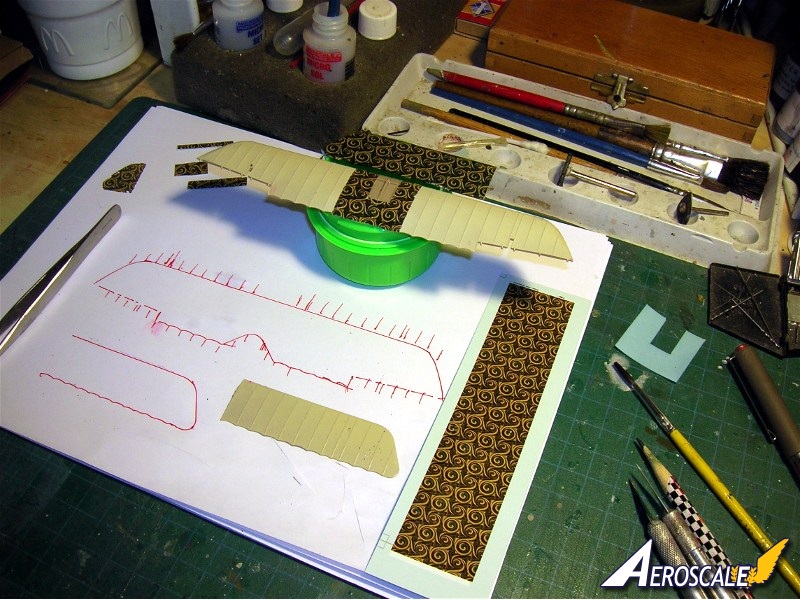


As I mentioned on the Eduard 153. series build thread here these decals are some of the best rendered I have seen. That said lets go to the application of these decals.

They are typical in their make up of modern ink printed decals. Their worst problem can be compound curves or surfaces. But the method that you use to lay them down makes all the difference.

First, do yourself a favor and spray the strip your working from with a clear gloss. Once this begins to dry it bonds the surface and when dry to the touch will keep fracturing on the edges to a minimum. Also if you use clear lacquer plan on using this strip with in 12 hours of the application.

Second, remember always use a "new" blade to cut the sections of the strip. Do not use scissors on this type of decal.

Third, always use hot water to submerge the cut decal section in. Work one piece / section at a time.

Fourth, Lay down liberally a decal setting fluid (Microscale blue script on the bottle).

Fifth, Move the decal section in place and after a few minutes roll the brush you applied the setting fluid with - over the decal and smear any excess fluid out over the adjacent areas.

Sixth, add liberal amounts of decal solvent or Sol (Microscale red script on the bottle). I usually hit the decal at least twice or even three times. When the decal wrinkles its working - Don't Touch the Decal At this Point.

When you get good at this you will be able to lay down upto three decal sections at one time with very pleasing results.
JackFlash
_VISITCOMMUNITY
Colorado, United States
Joined: January 25, 2004
KitMaker: 11,669 posts
AeroScale: 11,011 posts
Posted: Tuesday, November 01, 2011 - 05:52 PM UTC


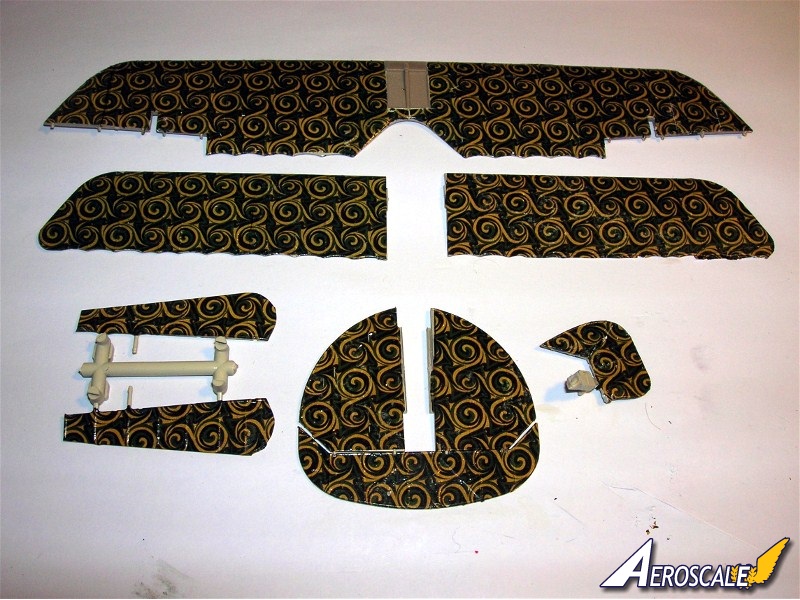
Here is the result. Please remember it is essential that you clear coat these decals for added strength.
lcarroll
_VISITCOMMUNITY
Alberta, Canada
Joined: July 26, 2010
KitMaker: 1,032 posts
AeroScale: 1,025 posts
Posted: Wednesday, November 02, 2011 - 02:53 AM UTC

Quoted Text


Here is the result. Please remember it is essential that you clear coat these decals for added strength.


Stephen,
I note you used a Laquer Clear Coat; I've had some bad results using a laquer top coat in the past (wrinkled/distorted decals) albeit when applied as a top coat over already installed decals, any cautions or does this only work prior to using the decal?
What ever methods you used the results look great.
Cheers,
Lance
JackFlash
_VISITCOMMUNITY
Colorado, United States
Joined: January 25, 2004
KitMaker: 11,669 posts
AeroScale: 11,011 posts
Posted: Wednesday, November 02, 2011 - 09:49 AM UTC
Greetings Lance,

I have that all outlined in the review, but you spray the decal strip before you do anything. Here is the text.


Quoted Text

". . . They are typical in their make up of modern ink printed decals. Their worst problem can be compound curves or surfaces. But the method that you use to lay them down makes all the difference.

First, do yourself a favor and spray the strip your working from with a clear gloss. Once this begins to dry it bonds the surface and when dry to the touch will keep fracturing on the edges to a minimum. Also if you use clear lacquer plan on using this strip with in 12 hours of the application.

Second, remember always use a "new" blade to cut the sections of the strip. Do not use scissors on this type of decal.

Third, always use hot water to submerge the cut decal section in. Work one piece / section at a time.

Fourth, Lay down liberally a decal setting fluid (Microscale blue script on the bottle).

Fifth, Move the decal section in place and after a few minutes roll the brush you applied the setting fluid with - over the decal and smear any excess fluid out over the adjacent areas.

Sixth, add liberal amounts of decal solvent or Sol (Microscale red script on the bottle). I usually hit the decal at least twice or even three times. When the decal wrinkles its working - Don't Touch the Decal At this Point.

When you get good at this you will be able to lay down upto three decal sections at one time with very pleasing results. . ."


Always use a hobby lacquer never use a lacquer meant for outside metal appications. I use Testors and it never yellows over time.

 _GOTOTOP