REVIEW
Albatros D.V Dual Combo
Merlin
 Senior Editor
#017
United Kingdom
Joined: June 11, 2003
KitMaker: 17,582 posts
AeroScale: 12,795 posts
Posted: Sunday, August 12, 2007 - 08:11 AM UTC
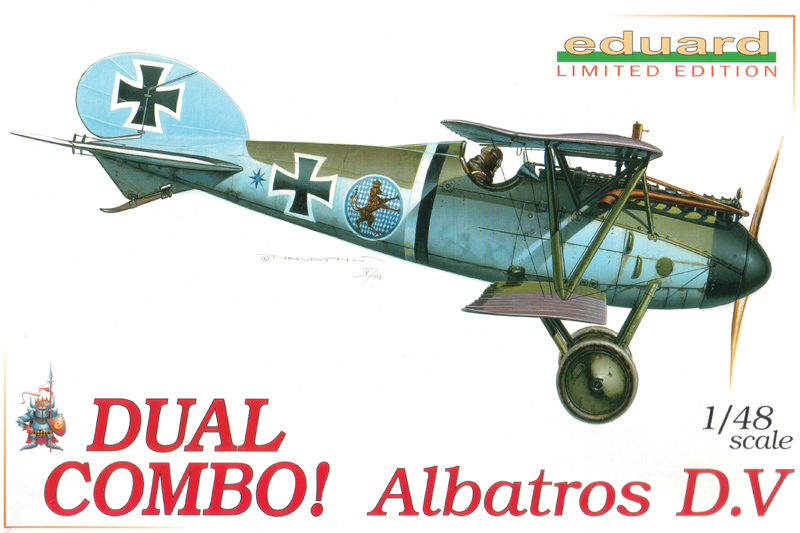
Here's a First Look at Eduard''s new 1/48 scale Albatros D.V Dual Combo. With all the wonderful Albatros builds we've seen lately in various scales lately, I just can't resist having a crack at this one - so I'll be nagging Stephen for guidance on the colour schemes and details...
Link to ItemIf you have comments or questions please post them here.
Thanks!
BEWARE OF THE FEW...
As I grow older, I regret to say that a detestable habit of thinking seems to be getting a hold of me. - H. Rider Haggard
Colorado, United States
Joined: January 25, 2004
KitMaker: 11,669 posts
AeroScale: 11,011 posts
Posted: Sunday, August 12, 2007 - 08:52 AM UTC
Ok first thing quickly now before its too late. Get some plastic sprue and heat stretych it . cut one end off and with a generous dollop of cyano - "gel type" super glue plug that sucking chest wound!

". . .The most important thing is to know why you build and then get the most that you can out of building." via D.D.
Colorado, United States
Joined: January 25, 2004
KitMaker: 11,669 posts
AeroScale: 11,011 posts
Posted: Sunday, August 12, 2007 - 09:12 AM UTC
Really folks this is a great kit. I look forward to Rowan FINISHING this build as his shelf for unfinished kits is already full.

One minor fix is that the pilots step in the left side of the fuselage needs to be moved back. The instructions show this.

Also the prop attachment pins are attached to the wrong face of the hub. This reverses the propeller profile . The flat profile should be at the back of the prop paddle not in the front. At least from the image posted on their website these are not changed from this molds first issue. Very easy to fix and some incredible schemes. Someone finally got von Schleich's bird done correctly! Great Job Eduard.!

". . .The most important thing is to know why you build and then get the most that you can out of building." via D.D.
Merlin
Senior Editor #017
United Kingdom
Joined: June 11, 2003
KitMaker: 17,582 posts
AeroScale: 12,795 posts
Posted: Sunday, August 12, 2007 - 09:13 AM UTC
Hi Stephen
Don't...worry......... it's only a flesh... wound!...... I'll make... it back to...
To be fair, Eduard do say the pilot figure's among the parts not needed - and that's the only sink-mark in the whole kit - but it is a whopper!

All the best
Rowan

BEWARE OF THE FEW...
As I grow older, I regret to say that a detestable habit of thinking seems to be getting a hold of me. - H. Rider Haggard
Merlin
Senior Editor #017
United Kingdom
Joined: June 11, 2003
KitMaker: 17,582 posts
AeroScale: 12,795 posts
Posted: Sunday, August 12, 2007 - 09:19 AM UTC
Quoted Text
Really folks this is a great kit. I look forward to Rowan FINISHING this build as his shelf for unfinished kits is already full.
Hi Stephen
I can always put up another shelf!

There's a chance I might have a quiet day at work tomorrow, so I'll take the kit along in case I can make a start.

All the best
Rowan
BEWARE OF THE FEW...
As I grow older, I regret to say that a detestable habit of thinking seems to be getting a hold of me. - H. Rider Haggard
North Carolina, United States
Joined: June 19, 2007
KitMaker: 604 posts
AeroScale: 600 posts
Posted: Sunday, August 12, 2007 - 11:53 AM UTC
I love this Albatros Kit! I have 3 of the original Mold, and a few of the newer mold. I think I will make these a near future build. Looking forward to your progress,
RAGIII
Merlin
Senior Editor #017
United Kingdom
Joined: June 11, 2003
KitMaker: 17,582 posts
AeroScale: 12,795 posts
Posted: Sunday, August 12, 2007 - 11:55 PM UTC
Quoted Text
... Also the prop attachment pins are attached to the wrong face of the hub. This reverses the propeller profile . The flat profile should be at the back of the prop paddle not in the front. At least from the image posted on their website these are not changed from this molds first issue. Very easy to fix ...
Hi Stephen
I see what you mean when comparing kit Part #A15 with photos of the a/c. The curve should be on the leading edge.
All the best
Rowan
BEWARE OF THE FEW...
As I grow older, I regret to say that a detestable habit of thinking seems to be getting a hold of me. - H. Rider Haggard
Queensland, Australia
Joined: August 30, 2006
KitMaker: 285 posts
AeroScale: 281 posts
Posted: Monday, August 13, 2007 - 12:18 AM UTC
Whilst I love the Albatros and I indeed do like this kit very much, for me it is just a few more decal options and maybe a cost saving for buying two kits.
For me, it is dissapointing that Eduard couldn't issue a small correction / enhancement sprue to fix the obvious errors in the kit - for example, new longer undercarriage struts, slightly larger wheels, radiator pipe etc. Foot steps and so forth I don't really worry about as these are easy to fix from a modellers perspective. Also, it wouldn't hurt to augment the already lovely engine bay with a fuel tank behind the engine - this is just a big empty hole on the stock-standard kit and really stands out. Another thing that Eduard should have carried over from their D.III Limited Edition release was the inclusion of photo-etched hatches - this makes it much easier when painting wood grain fuselages to not have to try and paint around the hatches, or at least have the option.
But maybe I'm just being picky again, we are after all quite spoilt by this kit as it stands.... it is after all, still the best Albatros on the market!
BC
Merlin
Senior Editor #017
United Kingdom
Joined: June 11, 2003
KitMaker: 17,582 posts
AeroScale: 12,795 posts
Posted: Monday, August 13, 2007 - 01:36 AM UTC
Quoted Text
But maybe I'm just being picky again, we are after all quite spoilt by this kit as it stands.... it is after all, still the best Albatros on the market!
Hi Brad
Picky is good! It's the only chance most of us get to learn how to improve our models.
How far out is the undercarriage - and is there an easy source for larger wheels? Apart from obviously needing to drill out the end of the exhaust pipe for a better appearance, how did the original differ from what's supplied in the kit?
All the best
Rowan
BEWARE OF THE FEW...
As I grow older, I regret to say that a detestable habit of thinking seems to be getting a hold of me. - H. Rider Haggard
Indiana, United States
Joined: May 14, 2007
KitMaker: 3,117 posts
AeroScale: 2,270 posts
Posted: Monday, August 13, 2007 - 04:54 AM UTC
Hey Rowan, Doesn't that pilot look like he got hit by a MK 103 30mm cannon? Got an extra pair if you need it for one of those Albatri.
"Treat 'em Rough", Current Builds--Wingnut Rumpler
I am frequently seen with blood shot eyes from staying up past my nap time to get the right colour scheme on my latest WWI model?
Merlin
Senior Editor #017
United Kingdom
Joined: June 11, 2003
KitMaker: 17,582 posts
AeroScale: 12,795 posts
Posted: Monday, August 13, 2007 - 05:00 AM UTC
Quoted Text
Hey Rowan, Doesn't that pilot look like he got hit by a MK 103 30mm cannon? Got an extra pair if you need it for one of those Albatri.
Hi Carl
So
that's what happened!
All the best
Rowan
BEWARE OF THE FEW...
As I grow older, I regret to say that a detestable habit of thinking seems to be getting a hold of me. - H. Rider Haggard
New York, United States
Joined: December 15, 2006
KitMaker: 365 posts
AeroScale: 344 posts
Posted: Monday, August 13, 2007 - 01:40 PM UTC
Fellow Albatros builders,
I have another pick and it has to do with the molds. There is a bit of mold shift on this kit and it shows more on the sprue that has the cabane and interplane struts, it shows up more on one side of the sprue tree than the other. Its just a little time with the exacto and emory board to correct but it is noticeable if not corrected. It should be noted though that the kit goes together exceptionally well and for those of us who can only marvel at the work that is posted here, the kit provides many hours of pleasure to assemble and will reward us OOTB modelers with a very handsome looking replica.
Model on, Dwayne
Queensland, Australia
Joined: August 30, 2006
KitMaker: 285 posts
AeroScale: 281 posts
Posted: Tuesday, August 14, 2007 - 12:05 AM UTC
G'day Rowan,
When I built my Albatros DV, I lengthened the U/C struts by about 3 mm - this gives the right sit compared to photos and the datafiles - otherwise the albatros looks too low (and almost looks "fat"!).
I have not found a source for larger wheels, but I think CSM did some a while ago?
The exhaust isn't a problem, the radiator pipe I refer to was the the pipe that runs from the radiator on the top wing to the front of the engine - although I would probably replace the kit part with wire or solder, it is a prominent feature that would be nice to have if the kit was being built out of the box.
BC
Merlin
Senior Editor #017
United Kingdom
Joined: June 11, 2003
KitMaker: 17,582 posts
AeroScale: 12,795 posts
Posted: Tuesday, August 14, 2007 - 09:59 AM UTC
Hi Brad
That explains why I always thought my original D.V always looked a bit stocky and pugnacious from some angles.
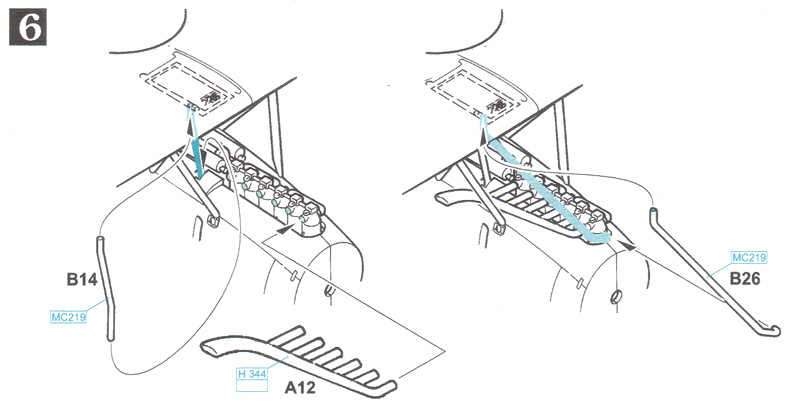
Sorry - I completely mis-read radiator pipe! Do you mean they got it wrong or that it's missing? (isn't it shown here in the instructions?)
All the best
Rowan
BEWARE OF THE FEW...
As I grow older, I regret to say that a detestable habit of thinking seems to be getting a hold of me. - H. Rider Haggard
New York, United States
Joined: December 15, 2006
KitMaker: 365 posts
AeroScale: 344 posts
Posted: Tuesday, August 14, 2007 - 11:31 AM UTC
Rowan,
In the Eduard Albatros D V kit the radiator feed and return are provided but they are not in the D III kit. Maybe Brad was speaking in terms of scale thickness?
Dwayne
Merlin
Senior Editor #017
United Kingdom
Joined: June 11, 2003
KitMaker: 17,582 posts
AeroScale: 12,795 posts
Posted: Tuesday, August 14, 2007 - 06:37 PM UTC
Cheers Dwayne
As you can tell, I'll be learning all the way on this build. I had a quite day at work on Monday and prepared some of the major parts, so I hope to make a proper start later this week.
All the best
Rowan
BEWARE OF THE FEW...
As I grow older, I regret to say that a detestable habit of thinking seems to be getting a hold of me. - H. Rider Haggard
Texas, United States
Joined: August 16, 2007
KitMaker: 83 posts
AeroScale: 80 posts
Posted: Friday, August 17, 2007 - 03:03 PM UTC
Greetings all,
Someone please convince me that this kit is worth the $49.95 plus shipping Eduard wants for it, (yes I realize you get two..lol) It is the same kit as #8110 and the only difference is a couple of decals we havent seen before. For the life of me I cant figure out why they included von hipples dragon AGAIN. Dont get me wrong, the #8110kit (Loerzer alb) is a fantastic easy kit to build, and the Albatros DV is my favorite german aircraft. But, I still dont see the big attraction to this dual kit. You can buy the weekend edition for $8.00USD and make your decals, and with the exception of the PE it's the same kit.
Ok sorry, rant off
Colorado, United States
Joined: January 25, 2004
KitMaker: 11,669 posts
AeroScale: 11,011 posts
Posted: Saturday, August 18, 2007 - 03:38 AM UTC
Quoted Text
Greetings all,
Someone please convince me that this kit is worth the $49.95 plus shipping Eduard wants for it, (yes I realize you get two..lol) It is the same kit as #8110 and the only difference is a couple of decals we havent seen before. For the life of me I cant figure out why they included von hipples dragon AGAIN. Dont get me wrong, the #8110kit (Loerzer alb) is a fantastic easy kit to build, and the Albatros DV is my favorite German aircraft. But, I still dont see the big attraction to this dual kit. You can buy the weekend edition for $8.00USD and make your decals, and with the exception of the PE it's the same kit.
Ok sorry, rant off
Greetings Ritterbach
Its good to see you here. Truth be told its good for me to be here. The last few days have been VERY busy for me personally . So ya want a convincer? Take a good look at the Aurora / Monogram mold. Then the early Eduard kit that needed its PE to look good. The second version has plastic soooo nice PE can be an option. What we are buying today is options in a kit. plastic or PE details for better scale appearance. A better detailed von Hippel (exFlashar) dragon. Who ever is providing the Eduard stable with schemes is starting to break away from just the Datafile profiles hence the von Hippel Jasta 71 scheme. More and more the "Silent Old Birds" are allowing precious images to come to light (because they are getting paid for their troubles.) From what I have seen and been privy to recently, there will be some great kits and unique schemes surfacing in the next few years. As for the landing gear - I totally agree with the additional length being needed. I tend to use cut, bent an shaped (extruded) brass rod. Aeroclub STRUTZ seen at our advertizer "Roll Models" (see at right) .
". . .The most important thing is to know why you build and then get the most that you can out of building." via D.D.
Texas, United States
Joined: August 16, 2007
KitMaker: 83 posts
AeroScale: 80 posts
Posted: Saturday, August 18, 2007 - 08:20 AM UTC
Stephen you are so right when it comes to comparing Eduards earlier offerings and Aurora's ventures. The Eduard Alb has come a long way. Even from those pesky PE cabane struts. I would have liked to have seen this as a single kit. But, like I said this is essentially the #8110 kit and I absolutely loved that kit. I wasnt aware that the von hipple dragon was different and better. I guess I cant complain too much. After all the 8110 kit is OOP, and the weekend kit doesnt have the nice PE, so I'll be happy with that. Thanks for pointing the way here, and the nice welcome comment. Here's to a less busy day and more modeling time.
New York, United States
Joined: December 15, 2006
KitMaker: 365 posts
AeroScale: 344 posts
Posted: Monday, August 20, 2007 - 02:04 PM UTC
Brad,
I know what you mean by "fat" and agree that the landing gear looks much better lengthened. My question is about the geometry of the process. In particular, if you lengthen the struts then the ends will no longer match up with their terminating points on the fuselage, they will be further out from them. Do you build new ones from scratch with a reduced degree of angle at the base or do you lengthen the existing kit part and then cut the base where the struts join by the landing gear?
Dwayne

Queensland, Australia
Joined: August 30, 2006
KitMaker: 285 posts
AeroScale: 281 posts
Posted: Monday, August 20, 2007 - 07:46 PM UTC
G'day Dwayne,
I lengthened the struts on my Albatros by curttng the kit parts at both ends of the bend radius of the strut (ie cutting the strut into 3 pieces), then splicing in two inserts using strip plastic. Whilst the glue was drying on the inserts, I re-set the angles to make sure that they still met up with the attachment points on the fuselage. Once the glue had dried, I cleaned up the inserts to match the contours of the rest of the strut.
This is a relatively easy, but tedious, process - I think it is worth it however to avoid the overweight look.
BC
Merlin
Senior Editor #017
United Kingdom
Joined: June 11, 2003
KitMaker: 17,582 posts
AeroScale: 12,795 posts
Posted: Monday, August 20, 2007 - 09:16 PM UTC
Hi Brad
Thanks for the extra explanation - I'll try encorporating the mod on the model. I also bought some brass Strutz material recently, which Stephen suggests - I've not used it yet, so this'll be a good excuse to try.
All the best
Rowan
BEWARE OF THE FEW...
As I grow older, I regret to say that a detestable habit of thinking seems to be getting a hold of me. - H. Rider Haggard
New York, United States
Joined: December 15, 2006
KitMaker: 365 posts
AeroScale: 344 posts
Posted: Tuesday, August 21, 2007 - 12:39 PM UTC
Rowan,
Let us know how it goes with the strutz, I think I'm ready to finally modify something in this scale. This will go along well with Stephens "Never say never again to PE machine guns" thread.
Haya Dooin* Brad,
Thanks for sharing your technique.
Dwayne
* New Yorkese
Colorado, United States
Joined: January 25, 2004
KitMaker: 11,669 posts
AeroScale: 11,011 posts
Posted: Monday, September 17, 2007 - 04:46 PM UTC
Hey Rowan,
How are things?
". . .The most important thing is to know why you build and then get the most that you can out of building." via D.D.
Merlin
Senior Editor #017
United Kingdom
Joined: June 11, 2003
KitMaker: 17,582 posts
AeroScale: 12,795 posts
Posted: Monday, September 17, 2007 - 06:47 PM UTC
Quoted Text
Hey Rowan,
How are things?
Hi Stephen
There's been no chance to do anything for a week or two. Once work's quietened down and I'm up-to-date with Aeroscale stuff, I should be able to do some modelling again.
All the best
Rowan
BEWARE OF THE FEW...
As I grow older, I regret to say that a detestable habit of thinking seems to be getting a hold of me. - H. Rider Haggard