Background
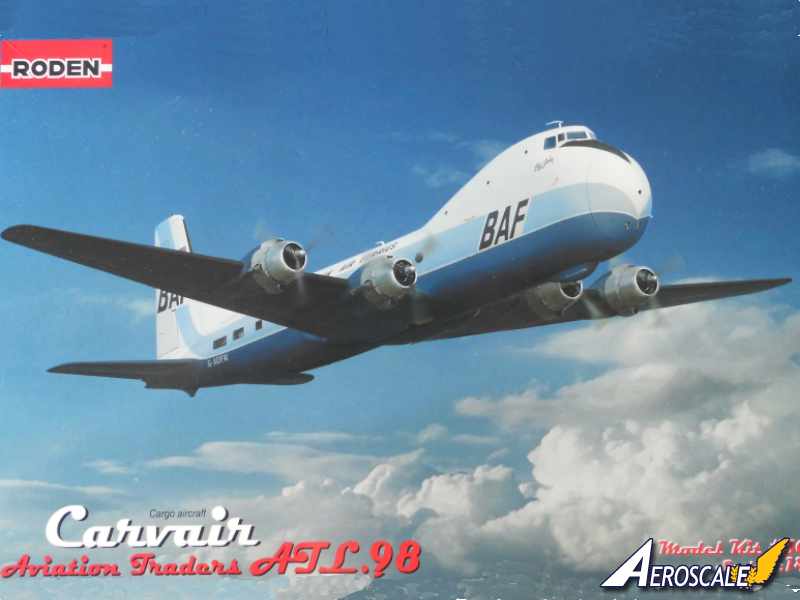
I have always had a fascination for oversized aircraft. By oversized I mean aircraft that have been redesigned to carry larger loads. This interest stems from seeing the Boeing 377-derived Aero Spacelines Super Guppy aircraft. The Super Guppy was regularly visitor at Manchester Airport picking up wings for the A300in the late 1970s. Lately I see daily the Airbus Beluga arriving and departing at Hawarden in North Wales. One of the early examples of an oversized aircraft is the subject of this kit: the ATL.98 Carvair. The Carvair was designed by Sir Freddie Laker to carry cars from the UK to the Continent. The design was based on the Douglas DC-4 and involved the fitting of a new forward fuselage. A Bristol Freighter-type nose-loading cargo door enabled cars to be driven into the cargo bay via a lift. The redesign also involved replacing the DC-4's original tail fin with a larger DC-7 fin and the fitting of more powerful brakes and a stronger undercarriage. Twenty one airframes were built and they served with various airlines and the United Nations all over the world. They were also utilised for their cargo carrying capability rather than what they were designed for: carrying cars. There is some excellent footage of the Carvair operating in British
Columbia on
Youtube including a close
mid-air flypast.
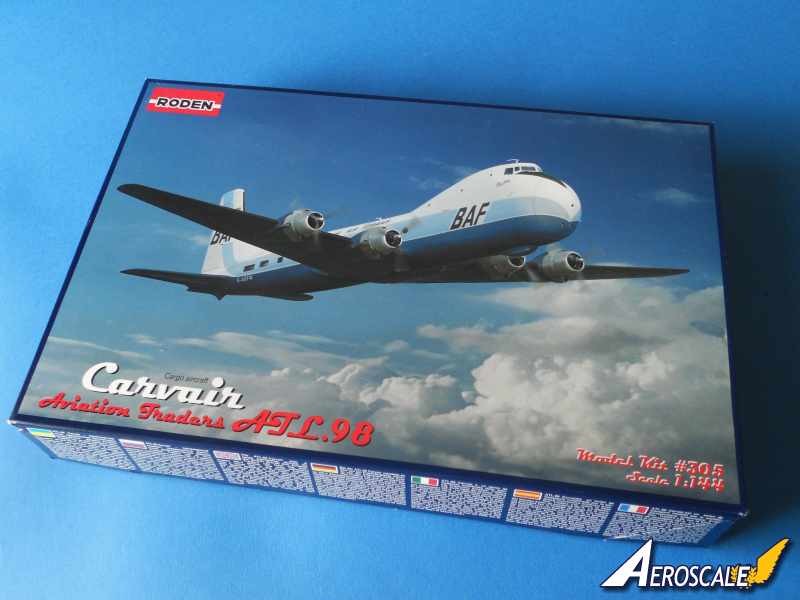
The kit
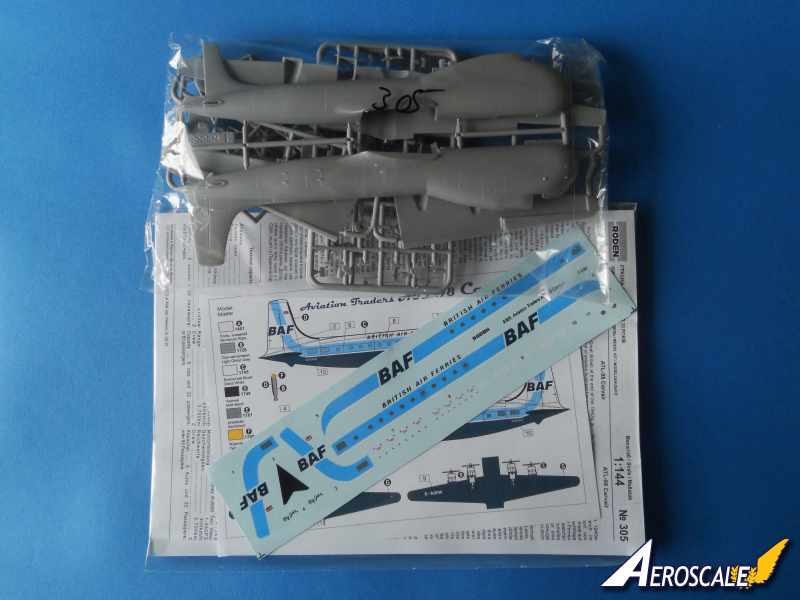
The kit comes in a sturdy top opening box. The box top illustration is superb, well worth cutting out and hanging in your play space. The seven various sized sprues are packed into a single bag. The single clear part is packed separately. The decals are also packed separately.
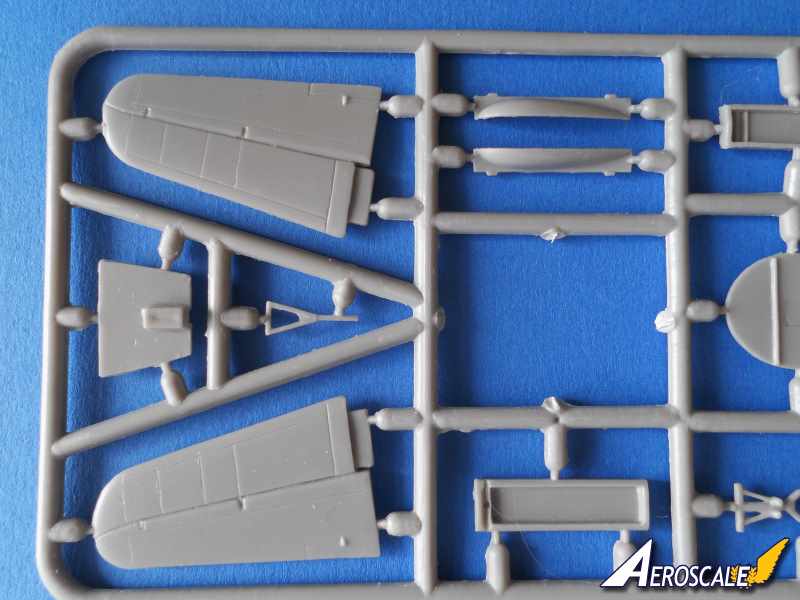
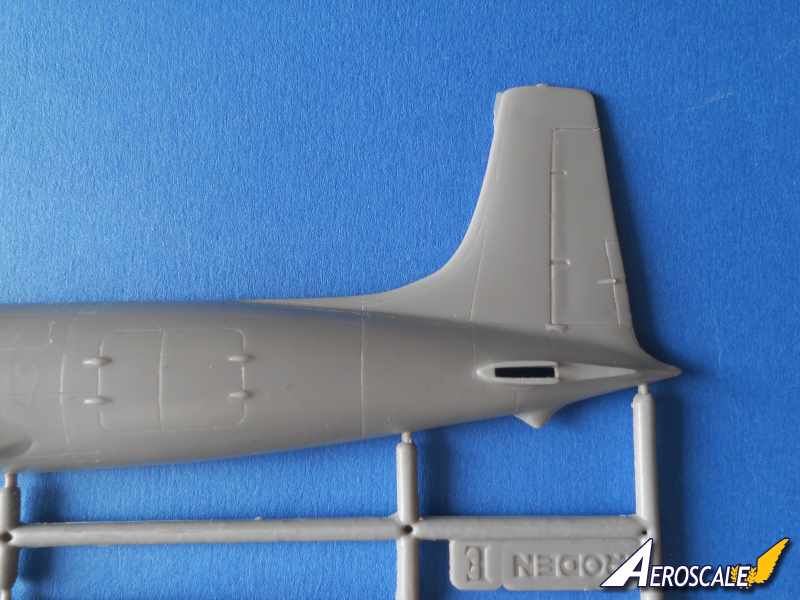
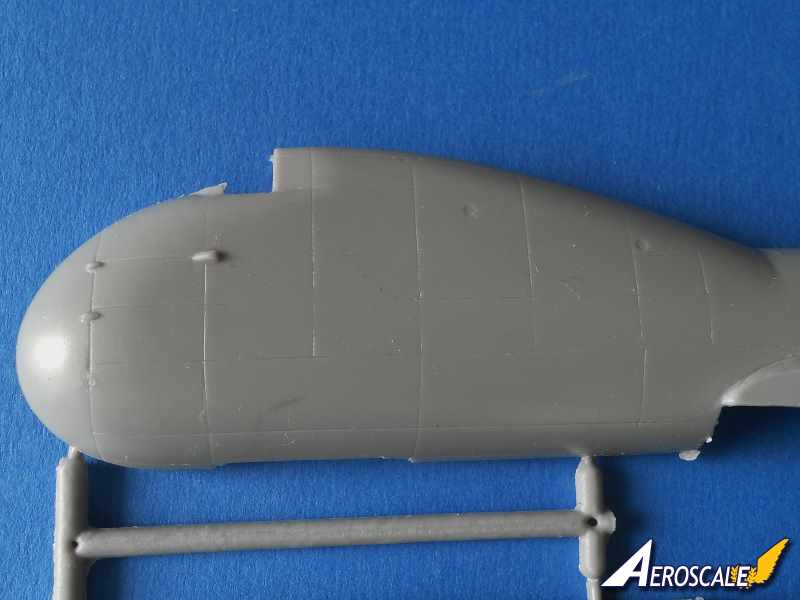
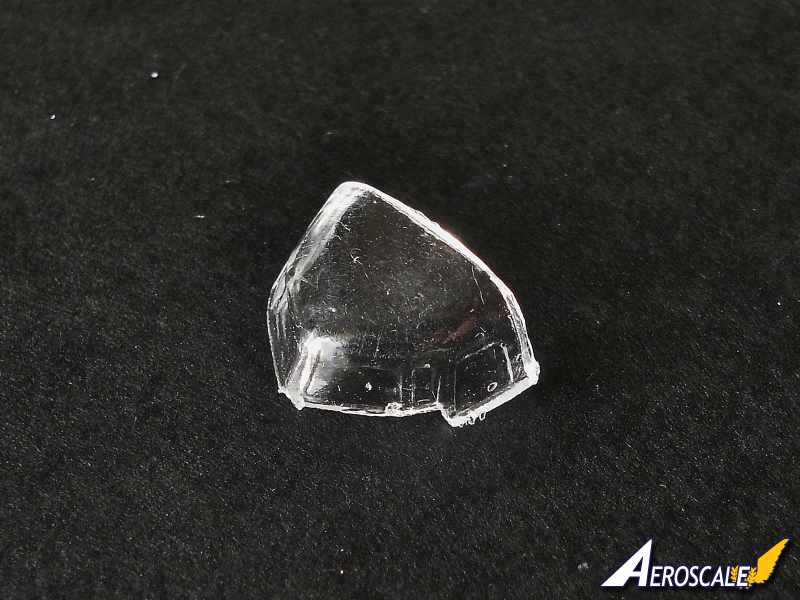
The fuselage comprises of two vertically split halves. The entire rudder and fin tip is moulded onto the right half of the fuselage. The fin top looks too square, but this can be easily rectified with some sanding. Watch out for a shrinkage line along the rudder. The large nose cargo door is moulded in the closed position. As a result there is no internal detailing at all with this release. Also noticeably lacking is any cockpit detail, but I think in this scale this will be very acceptable to the majority of modelers. Once the sprue attachment points and flash have been removed a dry fit of the fuselage halves reveals an inconsistent fit. The separation of the fuselage halves from the moulds may have been too quick resulting in a slight step along the joint. It is nothing that a good session of sanding wont cure. The recessed panel lines are finely done, if a little inconsistent. The separate front undercarriage bay and moulded tail skid to the rear provides a great aid when lining the halves up, which is handy as there are no locating pins. The cockpit glazing incorporates a small part of that distinctive hump. Its good to see that there are no holes representing the cabin windows. Instead the windows are printed on the light blue decal stripe. There are numerous antennae included on the sprues.
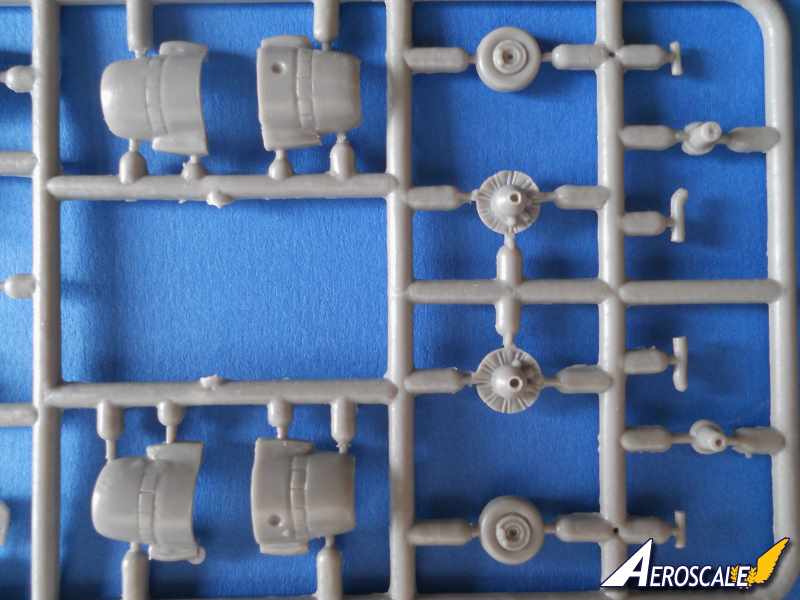
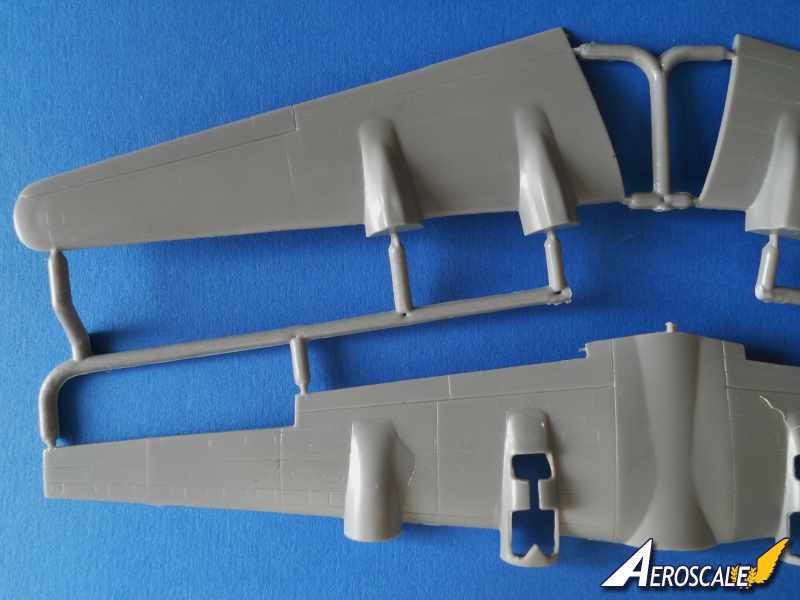
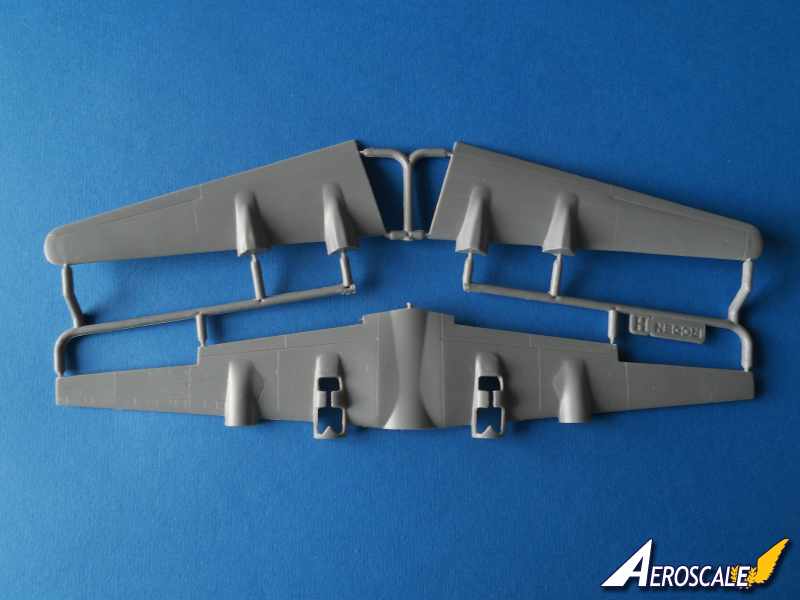
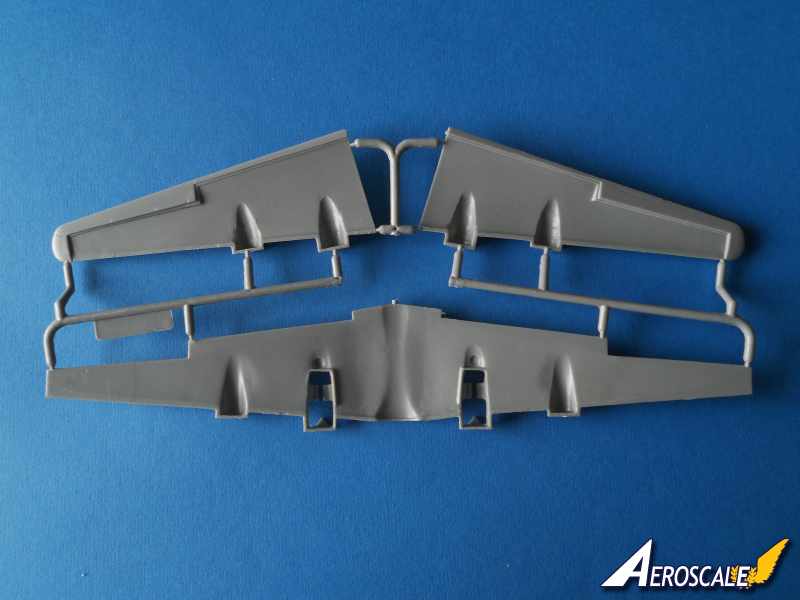
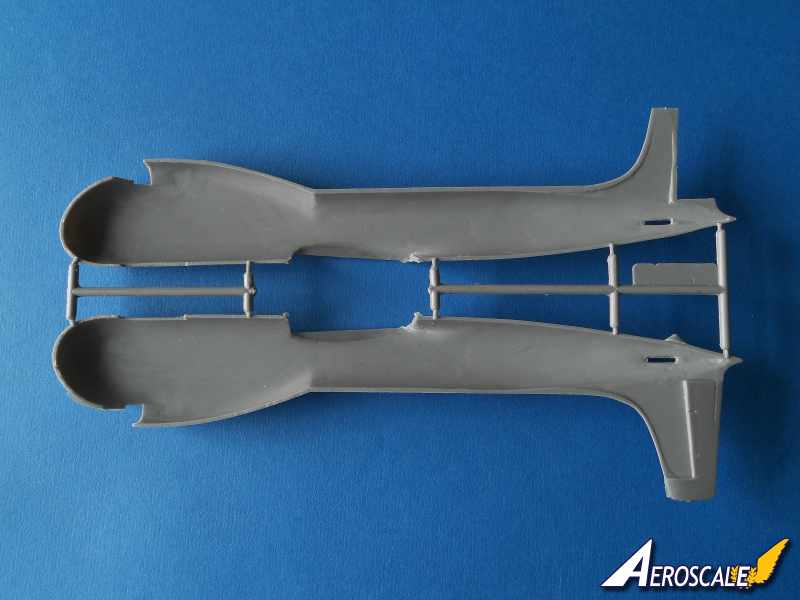
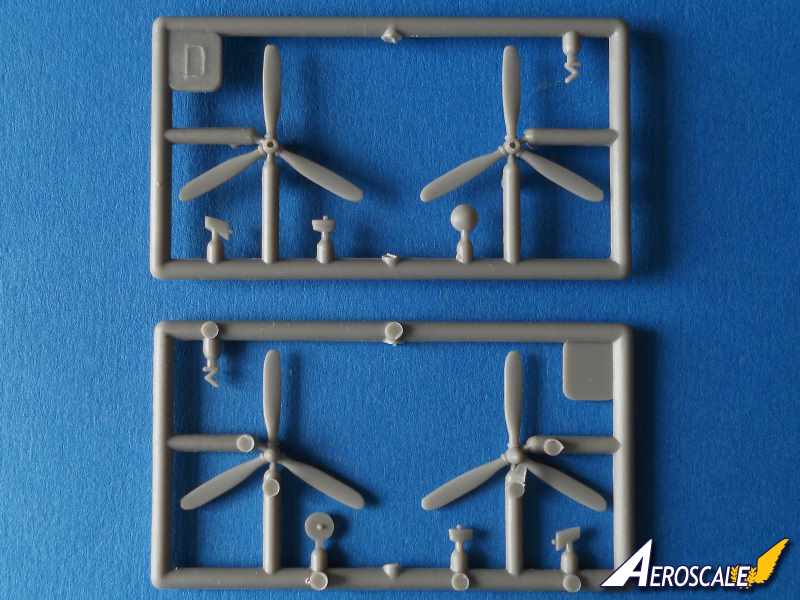
The lower part of the wing is full span and the fit into the fuselage is pretty good. I do like the wrap around trailing edges on the upper wing which results in a sharp trailing edge. There are large gaps at the join between the upper wings and the fuselage. The engine nacelles look a little crude and the engines vaguely look like P&W twin Wasps. The engine nacelles are in two halves and the fit is not too bad. There is a fair bit of shrinkage on the upper air intakes that need some attention. The propellers are one piece and are nicely shaped. The exhaust pipes look a bit crude and will need some cleaning up and refining. The horizontal stabilisers are each one piece. The fit into the fuselage is very good. There some fine recessed panel lines and detail on the wing. There are no landing lights represented in the wing. They should be located between the outer engines and the wing tip in the leading edges.
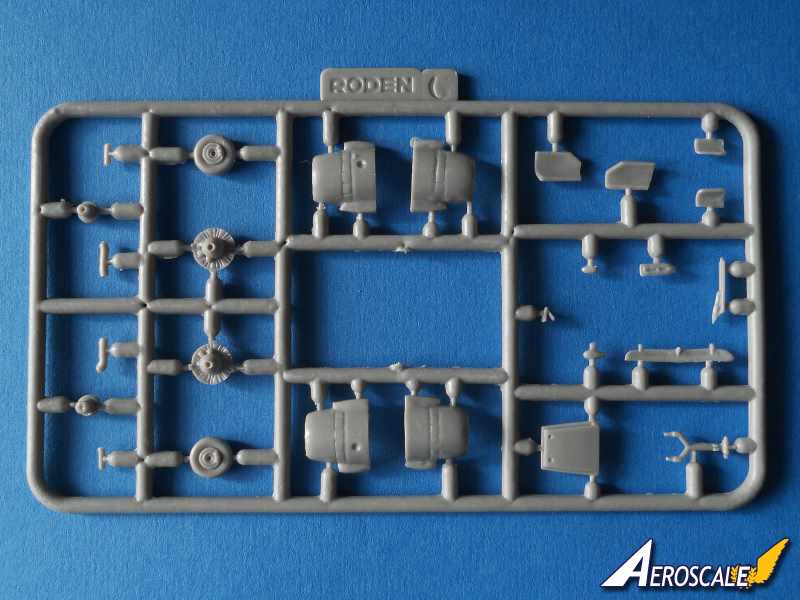
The undercarriage legs look acceptable, and the one piece wheel hubs display some refined detail. The undercarriage doors could do with thinning as they look a bit slab like. The distinctive bulged front undercarriage doors are nicely shaped.
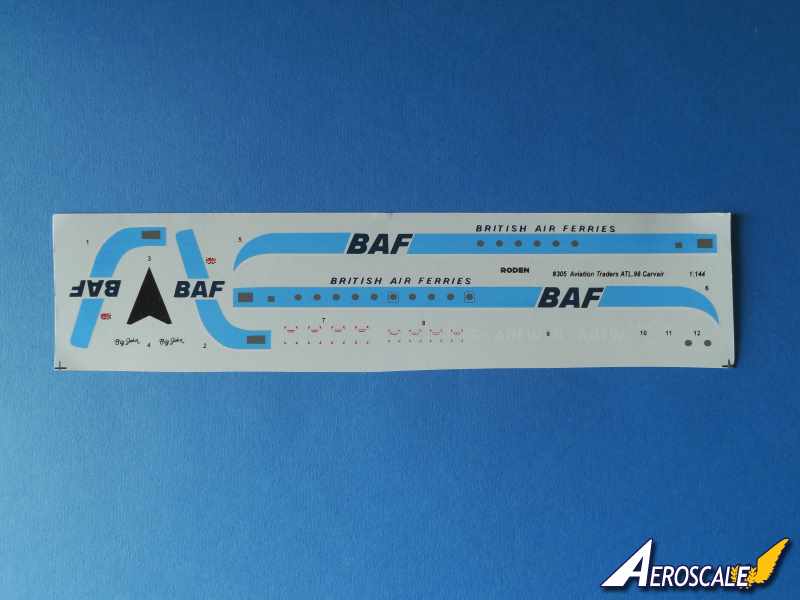
Markings comprises just the one set for British Car Ferries aircraft G-AOFW known as Big John. Not only is this a very attractive scheme, but there is minimal natural metal finish applied to this particularly aircraft. The only natural metal finish is on the engine nacelles.
The water slide decals provide the light blue cheat line that runs along the fuselage and up the tail. The cargo bay and passenger cabin windows are printed on the light blue cheat lines. Also included is the anti-glare panel situated in front of the windscreen and the emergency exit stencils. G-AOFW was nicknamed Big John and there are decals for the name as well. Sadly it was broken up in December 1983.
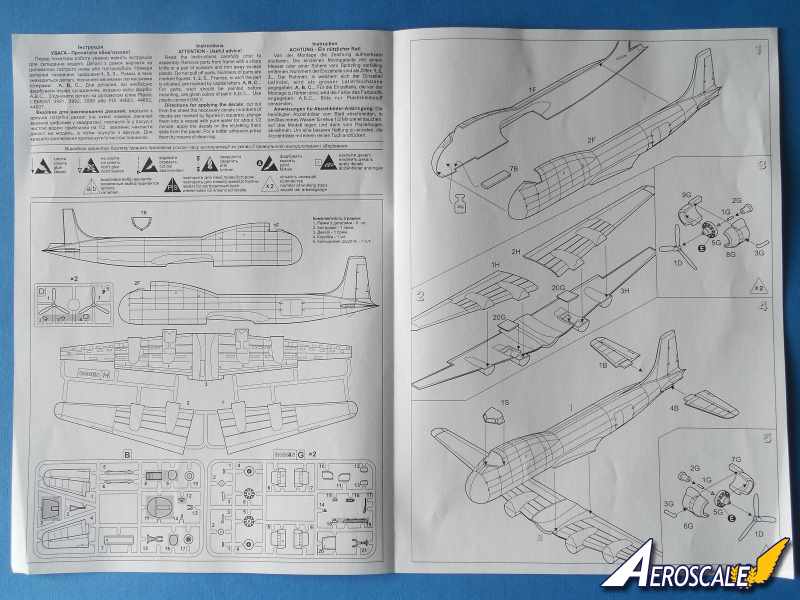
Instructions are printed on both sides of an A3 folded sheet. The exploded black line drawings are clear and unambiguous. The marking instructions are printed in colour on a separate sheet. Paint
references are for the Model master paint range. One thing that may be missing are the deicing boots on the leading edges of the wing. They are easily depicted as black painted areas. The placement guide for each of the numbered decals is straightforward to follow.
Conclusions
It might read as if Im not too impressed with the contents, but the challenging nature of this release is getting my building juices going. Roden has selected one of the most attractive liveries sported by the Carvair fleet. Yes this kit will need a little TLC during building, but the rewards will be well worth your trouble. Another plus that may attract modelers is that there is little natural metal finish on this particular kit. The overall look of the assembled kit seems to capture the lines of the aircraft. I cannot see any glaring mistakes in shape. I doubt we will see this kit manufactured by any major injection moulded manufacturer anytime soon. So make the most of this rough diamond. Nicely done Roden. If you fancy representing the nose cargo door open, I would suggest you look at
F-RSINs. The release includes the car loader and other marking options. Not cheap but worth considering.
When contacting retailers or manufacturers, please remember to mention that you saw their products highlighted in review here on Aeroscale.


Comments