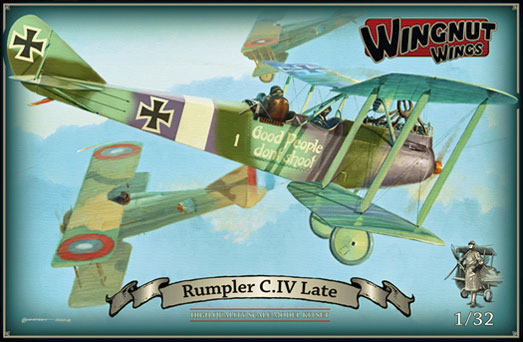
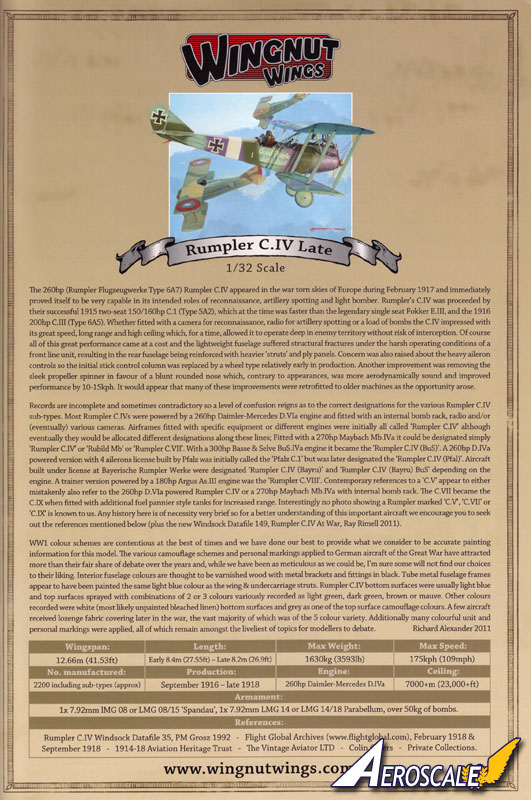
Arguably the best looking of WW1's two-seaters, the Rumpler C.IV revealed an outstanding performance when it first flew in the Autumn of 1916. With a full war load, the prototype could climb rapidly to 5,000m, had an endurance of three and a half hours, and could reach a top speed of 165km/h.
In service, the C.IV soon gained a formidable reputation, the Idflieg report stating that it was the best of the current C-types, while German pilots found that they could outrun most Allied fighters in a shallow dive. However the high performance came at a cost, as the Rumpler could be unforgiving for novice pilots to fly, with poor aileron control, and needed to be flown with extreme caution in turns. Allied test pilots considered the fin was too small when they flew captured examples, which may account for the type's propensity for spinning.
Ironically, the pointed spinner that contributed to the racy lines of early machines was actually found to have a detrimental effect on performance, so a simple blunt nose cowling was introduced which raised the top speed by some 15km/h. Ceiling and endurance were also improved over the prototype, and reconnaissance missions were often flown at heights up to 7,000m and could last for over five hours in temperatures as low as -50°C, the crews relying on electrically heated flying suits to bear the intense cold.
By late 1917, Allied fighters were beginning to reach the Rumpler's previously unassailable operating altitudes, but production continued well into the summer of 1918, although late aircraft suffered from falling standards in both materials and workmanship. Nevertheless, the C.IV soldiered on to the end of the war, and after the Armistice a number entered civilian service, helping to establish the fledgling passenger and airmail services in post war Germany.
In kit form
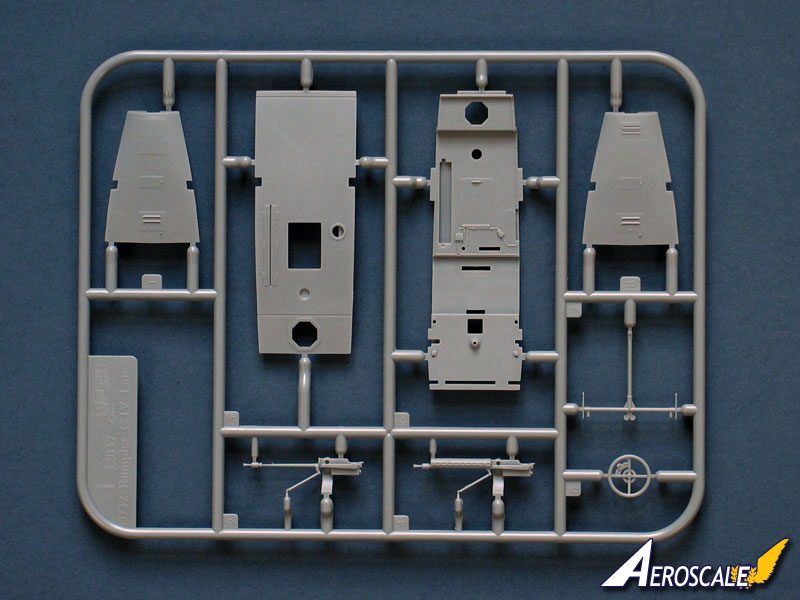
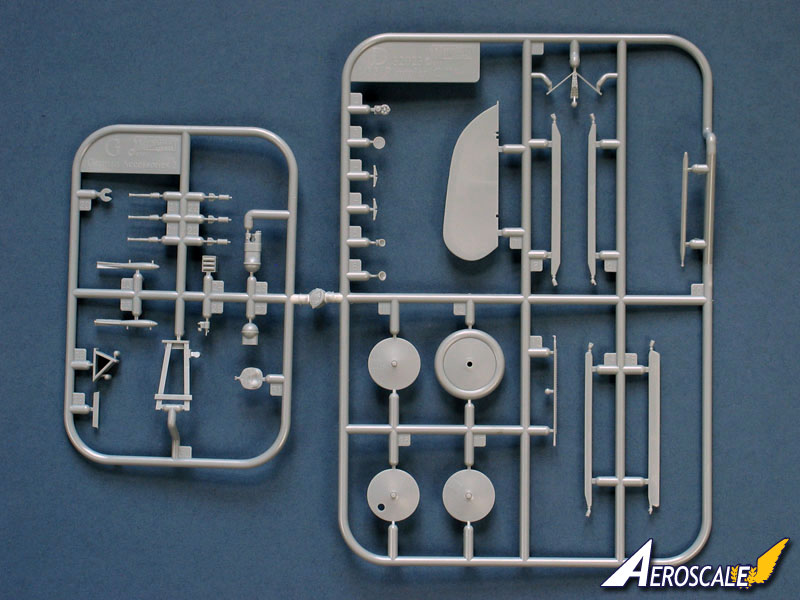
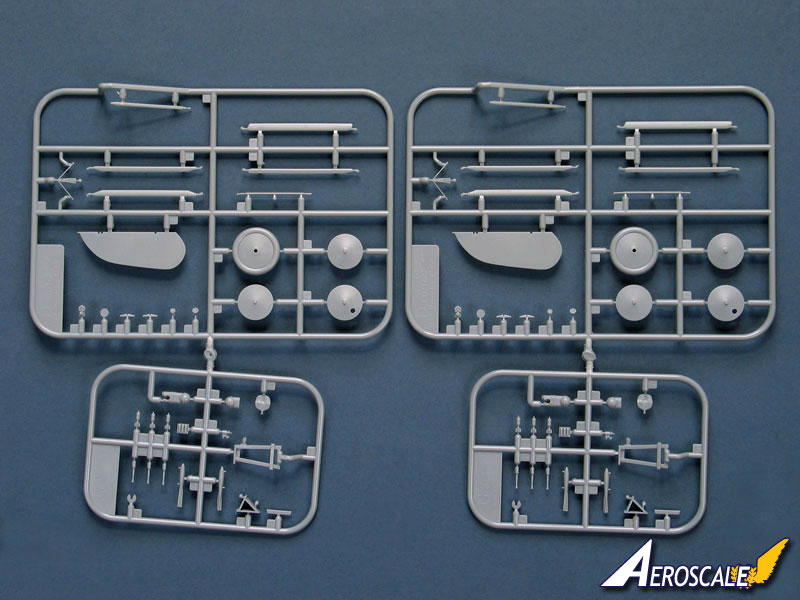
Wingnut Wings' Rumpler arrives in a very stylish and solid top-opening box. With no less than 11 sprues inside it's a tight squeeze. The kit comprises:
221 x grey styrene parts (plus another 31 spare)
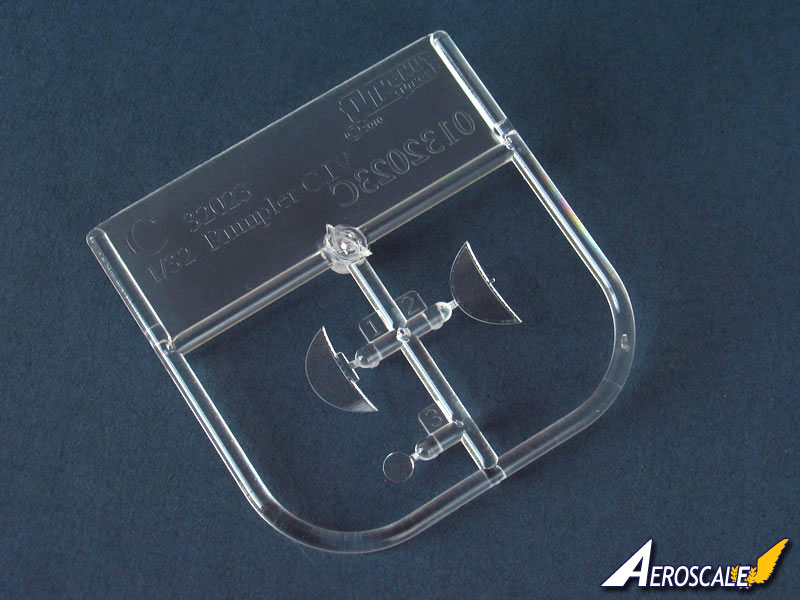
2 x clear styrene parts (plus 1 unused)
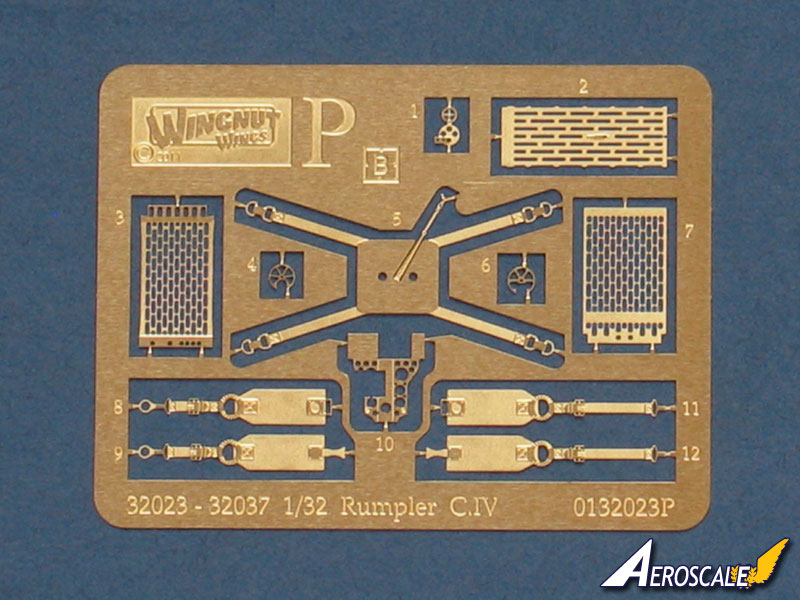
12 x etched brass parts
Decals for 5 x colour schemes
A comprehensive 26-page instruction manual
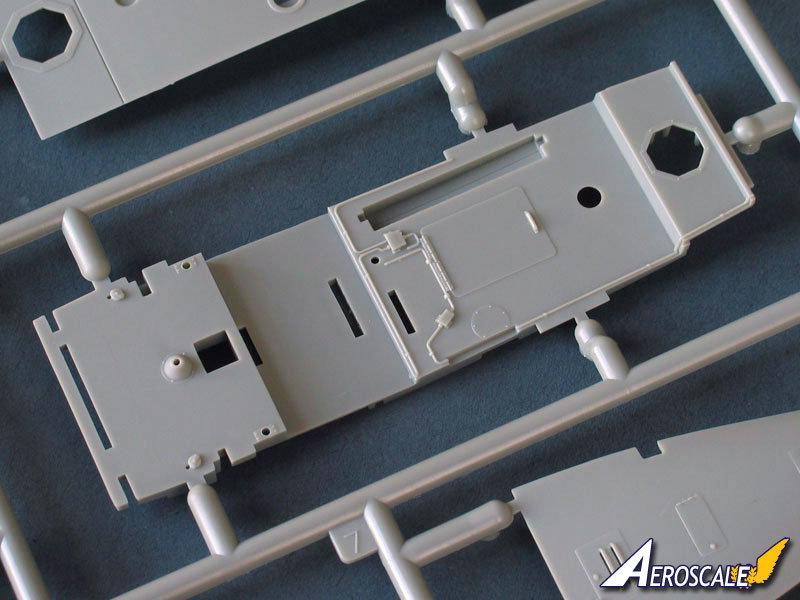
The moulding is basically flawless, with no signs of sink marks on the review sample, and no more than light mould-lines to clean up. Inevitably, there are some ejector pin marks, but the designers have kept them clear of the cockpit sides and out of sight as far as possible.
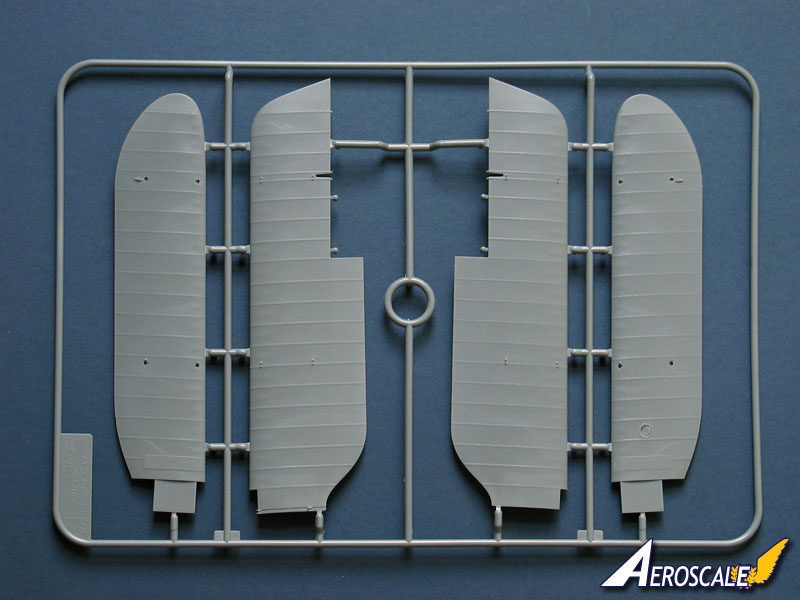
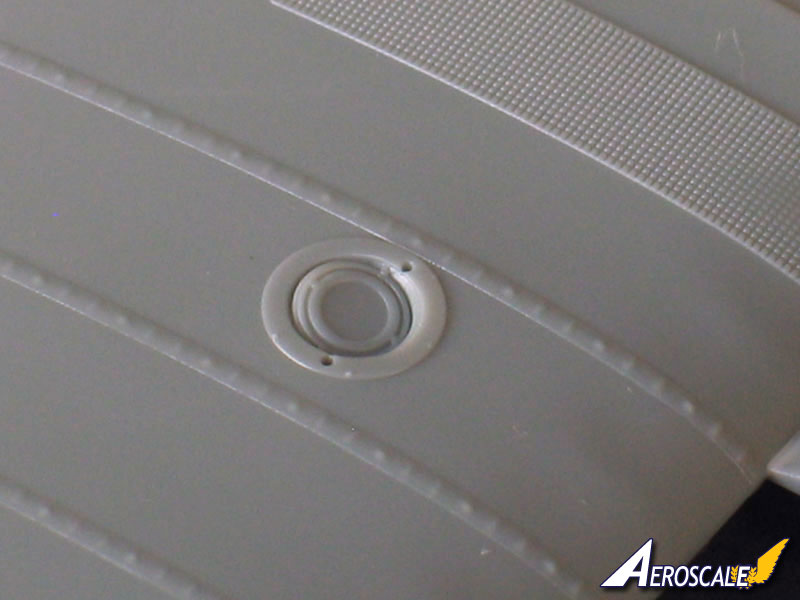
The surface finish is very fine, with crisply engraved panel lines and appliqué panels, with a beautiful representation of the fabric surfaces drum tight on the wings, with delicate rib tapes and stitching, and laced panels on the fuselage. There's even subtle wrinkling on the interior canvas dividing screen.
test fit
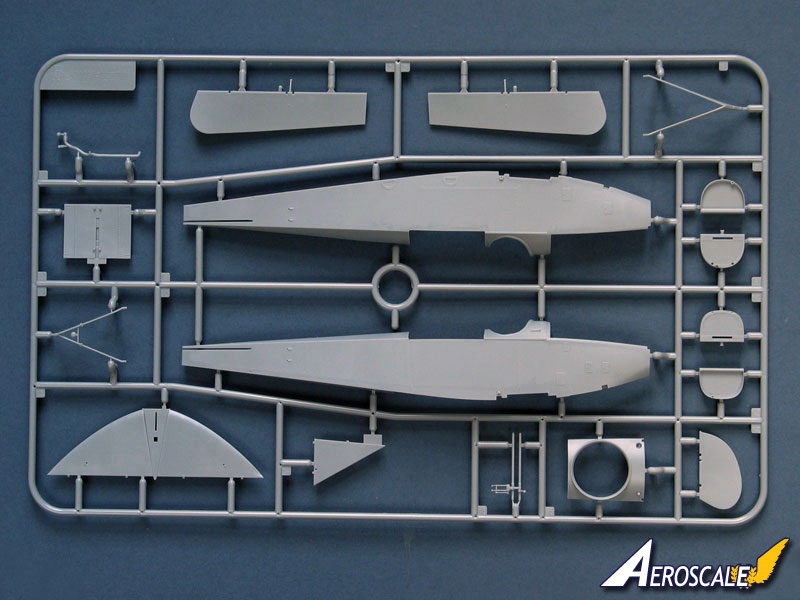
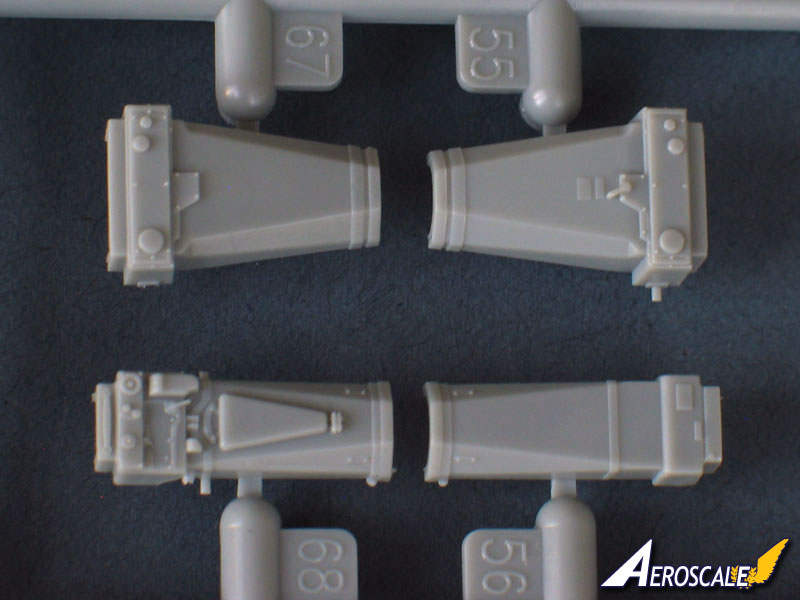
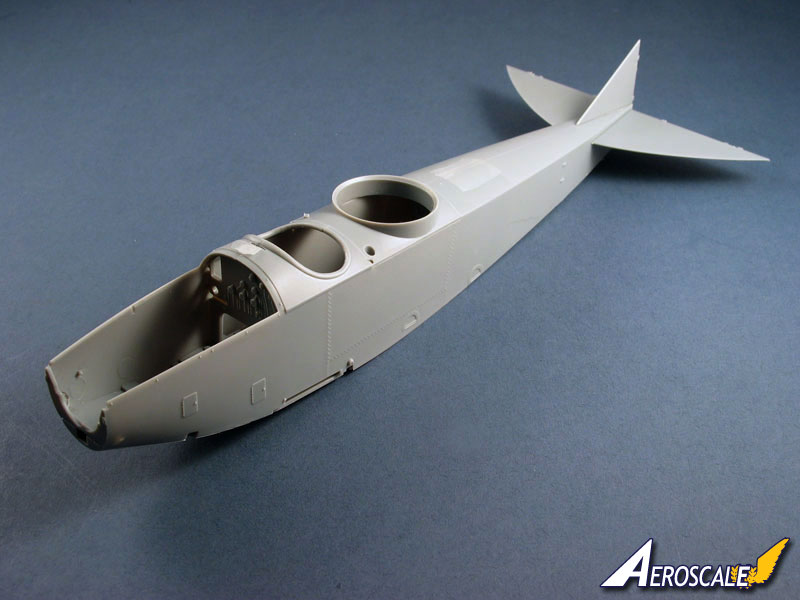
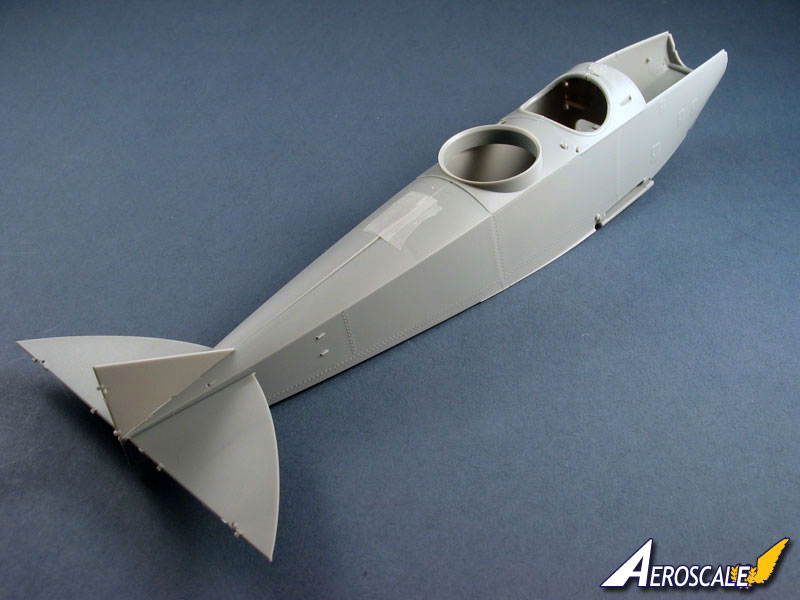
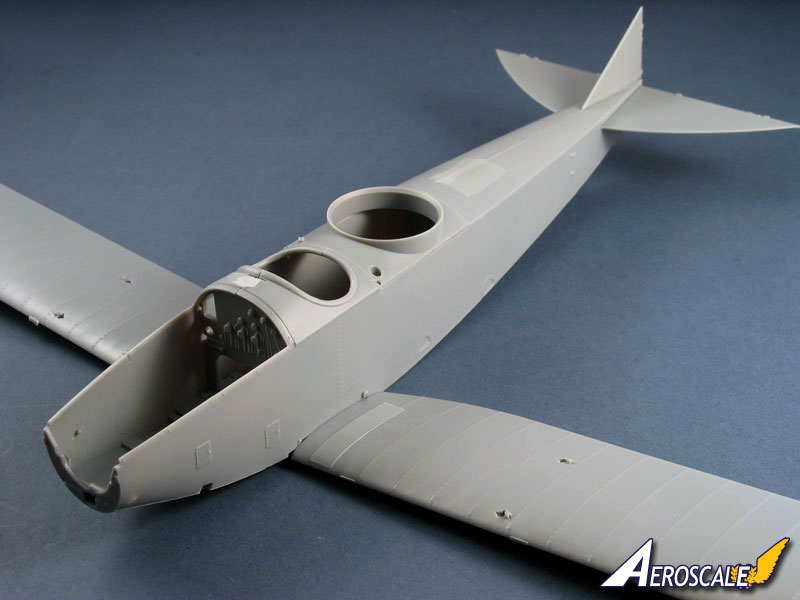
Overall, dry fitting the main components is very encouraging. The fuselage is moulded as thin as possible for a true-to-scale appearance, with a large separate belly panel, so it is pretty flexible, but with the basic interior fitted it firms up nicely.
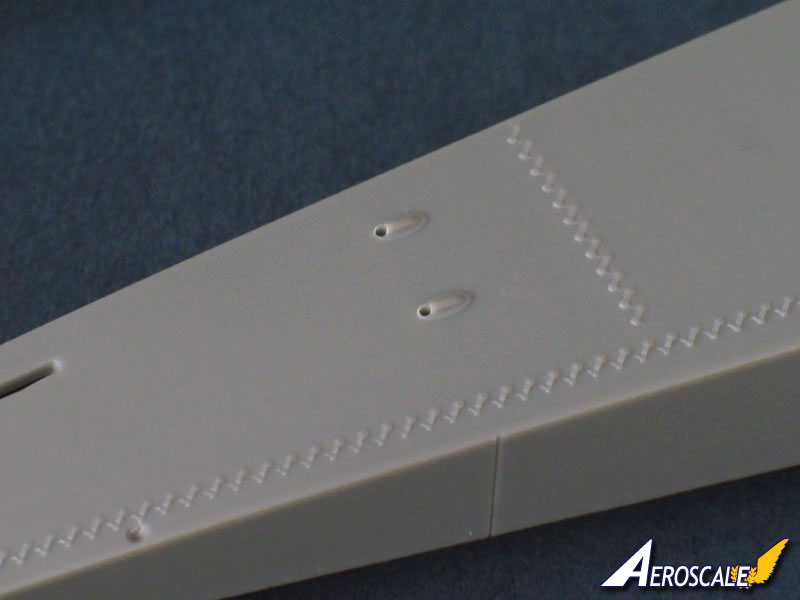
However, as you can see in the photos at bottom-right, on the sample kit the long upper rear fuselage joint has a slight step to it. There are no locating pins along the length of it, so I'll add a strip of styrene, vacuform-style, along the inside to support it. To be fair though, the sample kit had clearly suffered a rough ride in the post, with the box being damaged - so, while I can't see any signs of damage, there is the chance that one fuselage half has been slightly distorted.
The locating tabs for the lower wings sandwich tightly between the cockpit floor and the separate belly panel, and with ample area for glue should be very solid. The tailplane is cleverly designed to only slot in the correct way up as, rather counter-intuitively; the Rumpler's tail has an inverted aerofoil section.
The upper wing is moulded in two halves beautifully straight with thin trailing edges. To join the halves there's a substantial separate centre-line "block" extending out for approximately two ribs on the undersurface to ensure the correct dihedral. This is a good tight fit, and the small joint to fill is a price worth paying as the part doubles as a solid foundation for the central pylon struts.
a few details
It's worth reading through the lavish instructions carefully from start to finish, because with five colour schemes to choose between, each with a range of different equipment, there's a myriad of optional parts and you have to decide which version you're going for right from the beginning.
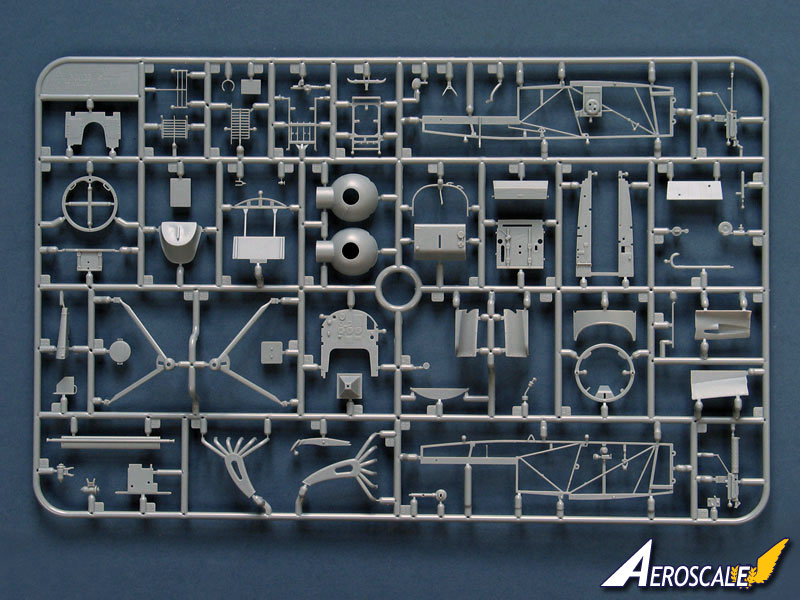
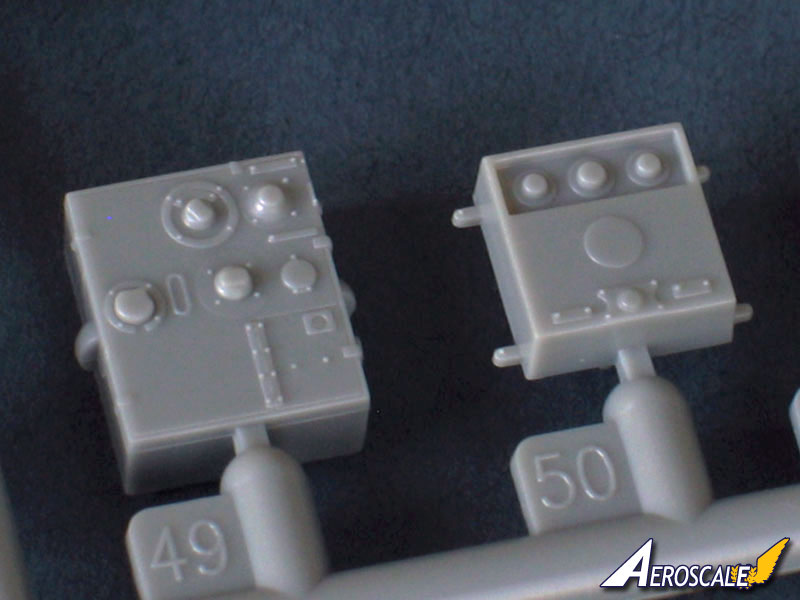
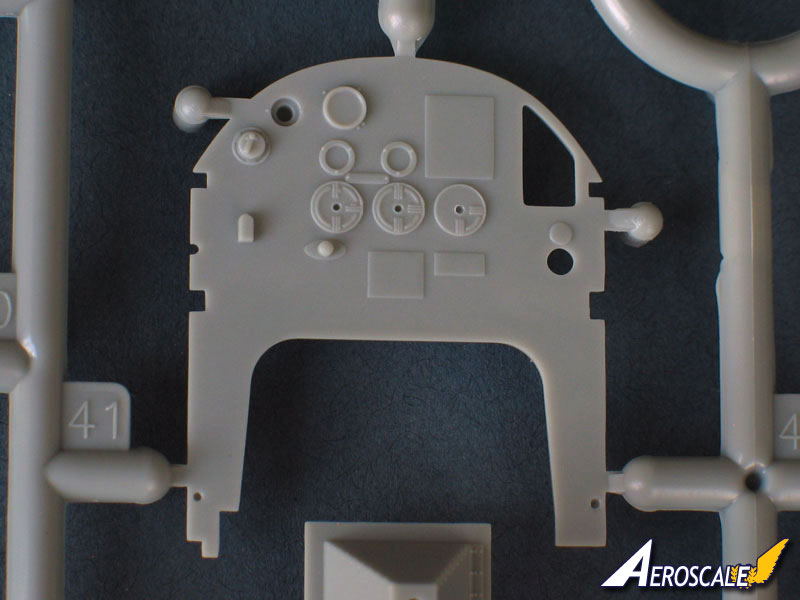
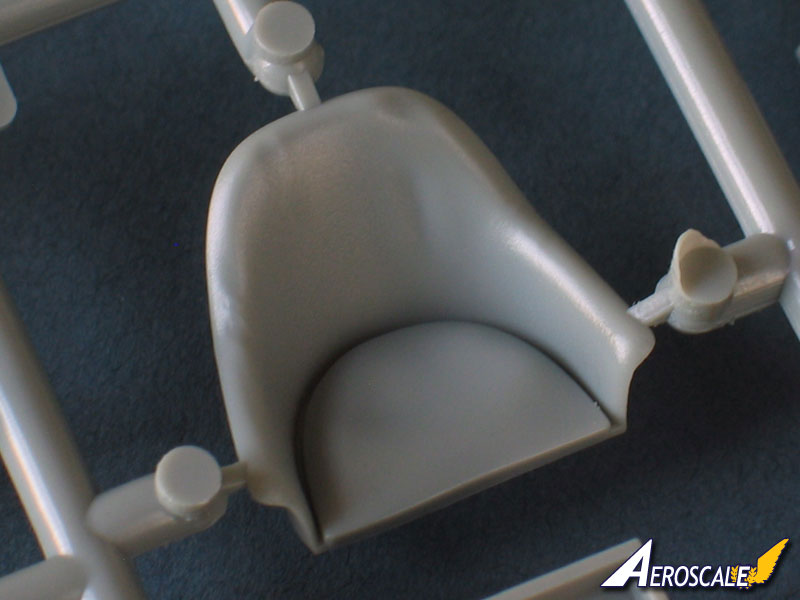
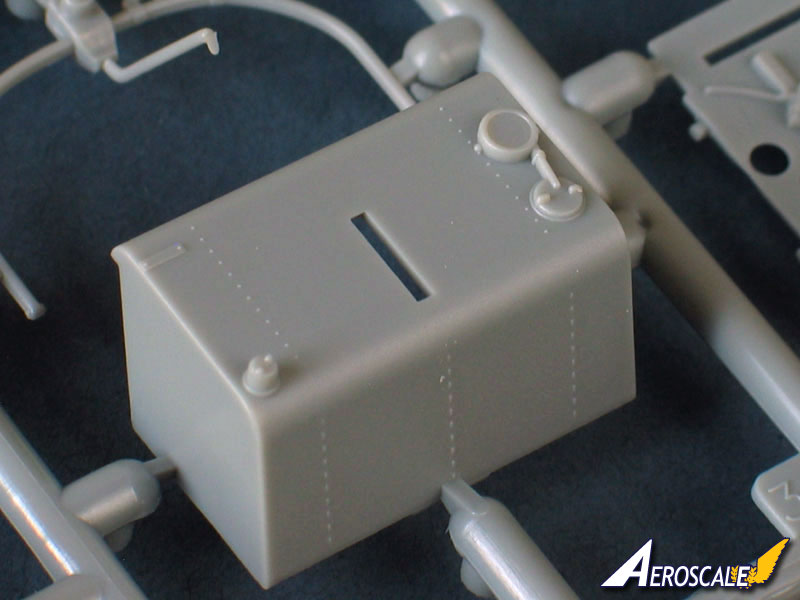
Stages 1 & 2. Not surprisingly, construction begins with the cockpit interior which is beautifully fitted out with over 30 parts. There's a choice of wireless amplifier or camera, and an optional auxiliary fuel tank. The observer is provided with either a pedestal stool or an etched sling with a cushion to sit on, while the pilot has very convincingly moulded leather-padded seat. This really is among the best and most subtle bits of "soft-look" moulding I've seen.
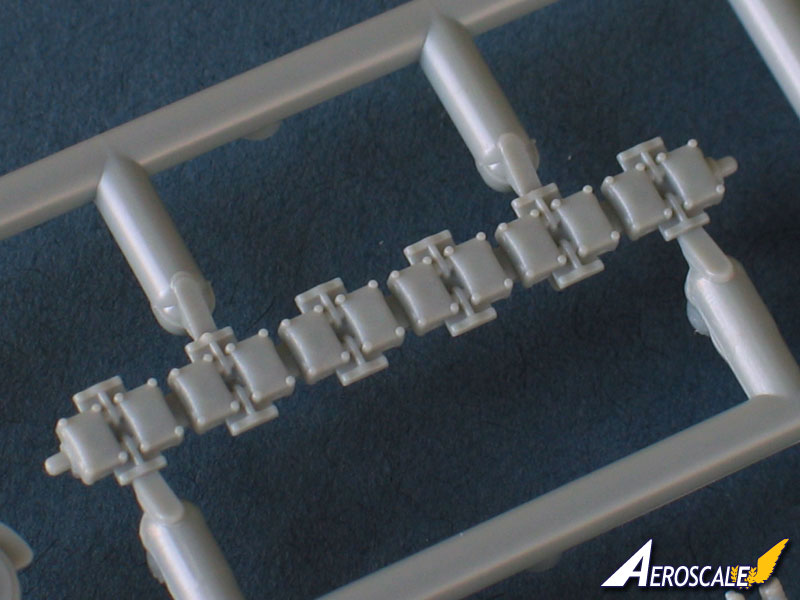
The simple instrument panel has nicely moulded bezels and controls, with excellent decals for the faces and data plaques. The rear of each instrument and the associated wiring is moulded on the reverse of the panel. Purists may want to add individual wires, but the area should be all but hidden once the engine covers are fitted. The neatly detailed bombsight is provided with a decal gauge and data plate, while the bomb rack holds four crisply moulded 12.5 Kg PuW bombs.
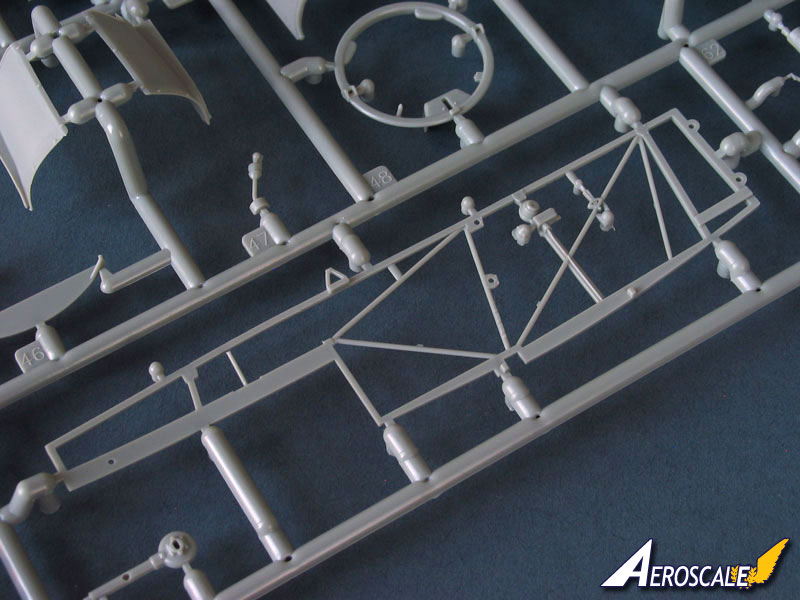
The delicate side frames are well protected on the sprues, and once removed interlock with the floor and bulkheads to form a sturdy assembly that fits snuggly inside the fuselage halves.
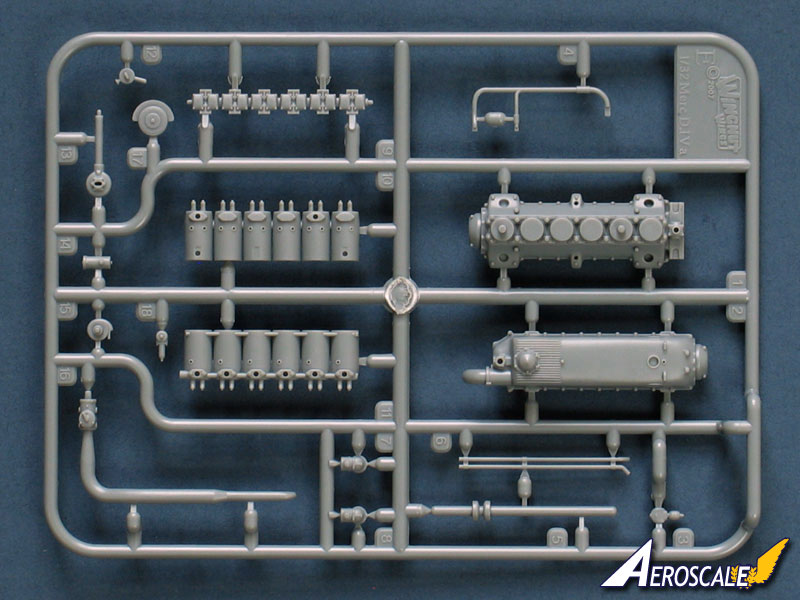
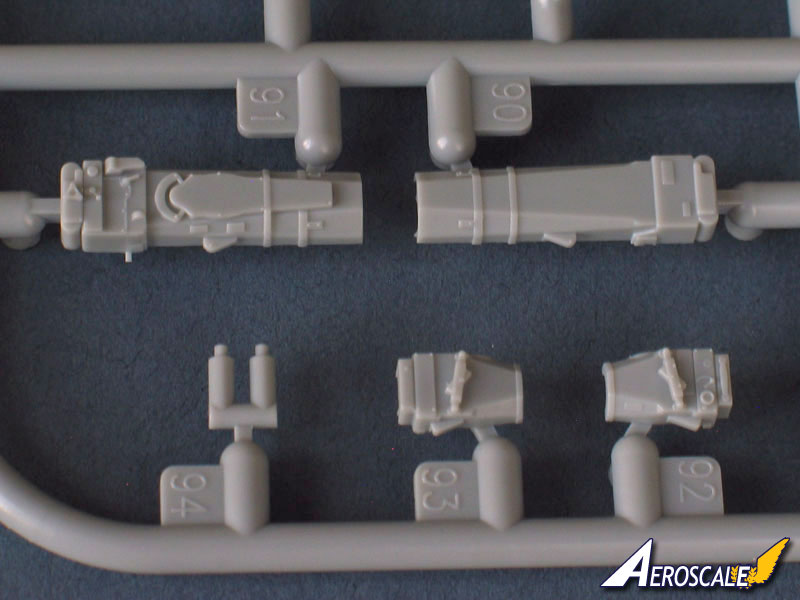
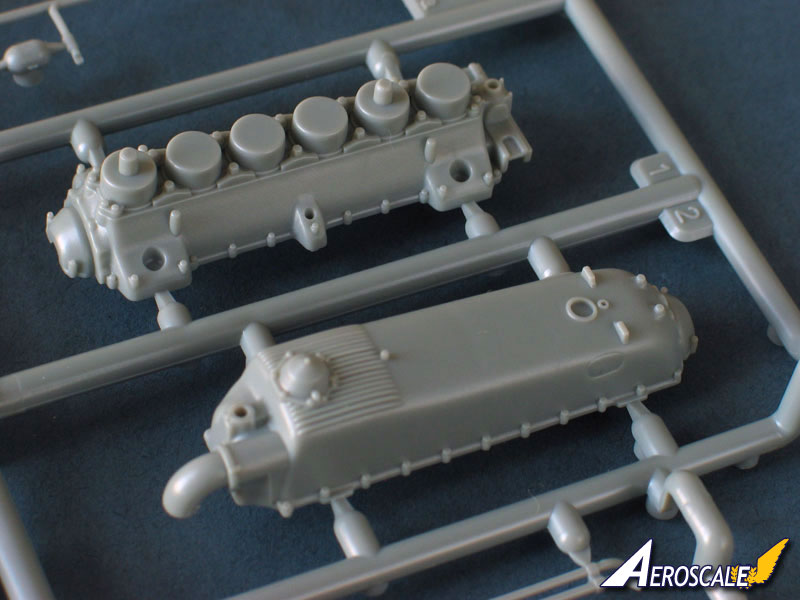
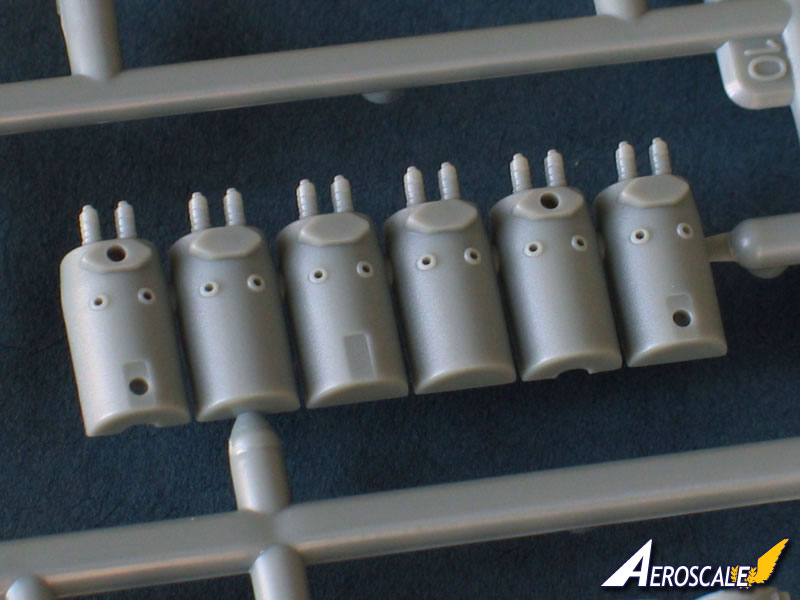
Stages 3 & 4. The 260hp Daimler-Mercedes D.VIa engine comes on its own fret, consisting of 15 crisply detailed parts with a choice of air pumps. The completed unit sits alongside the oil tank and generator, and it looks like there's plenty of space to allow you to fit it after the fuselage is assembled and painted if you wish.
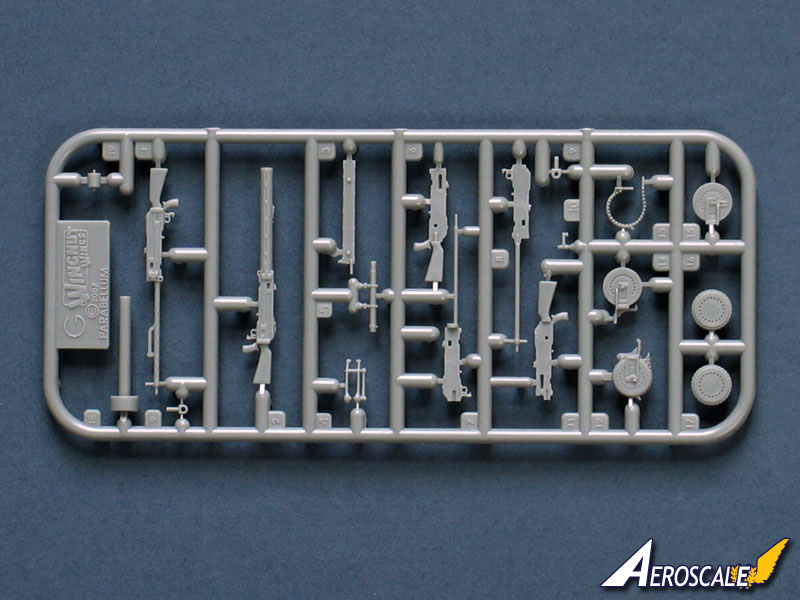
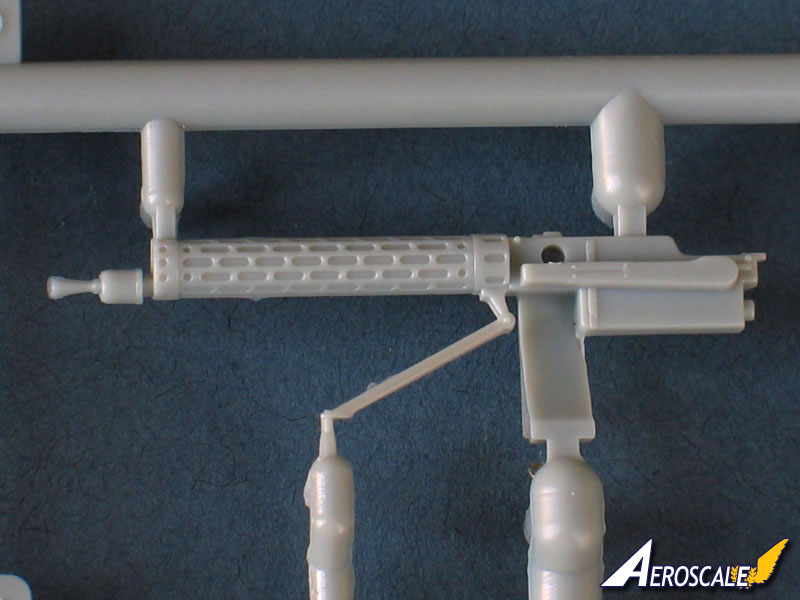
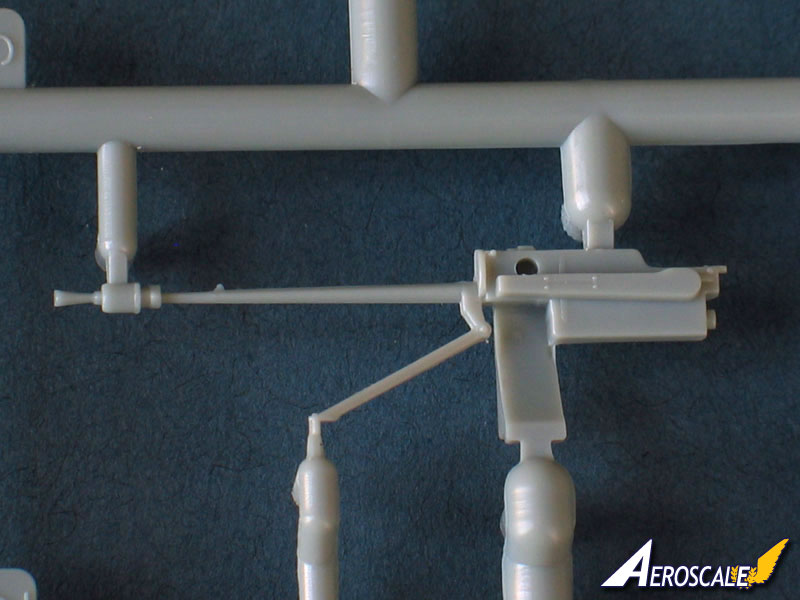
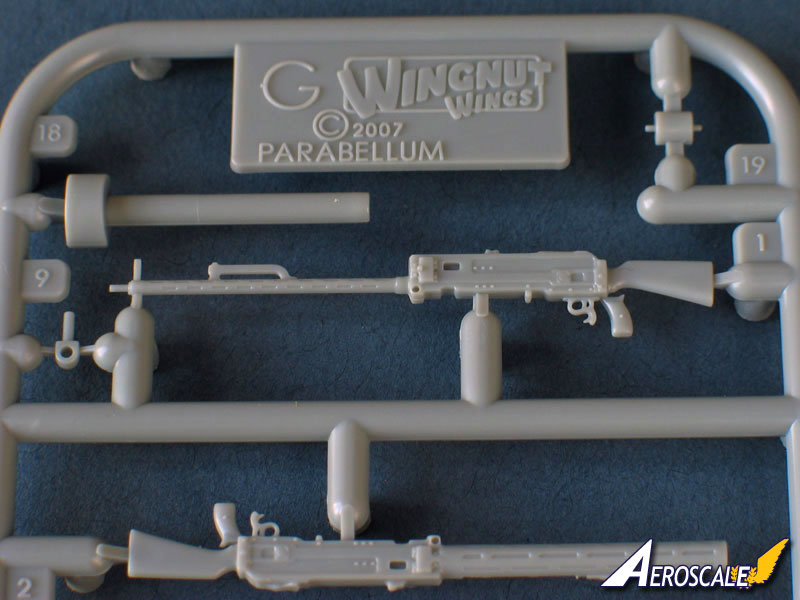
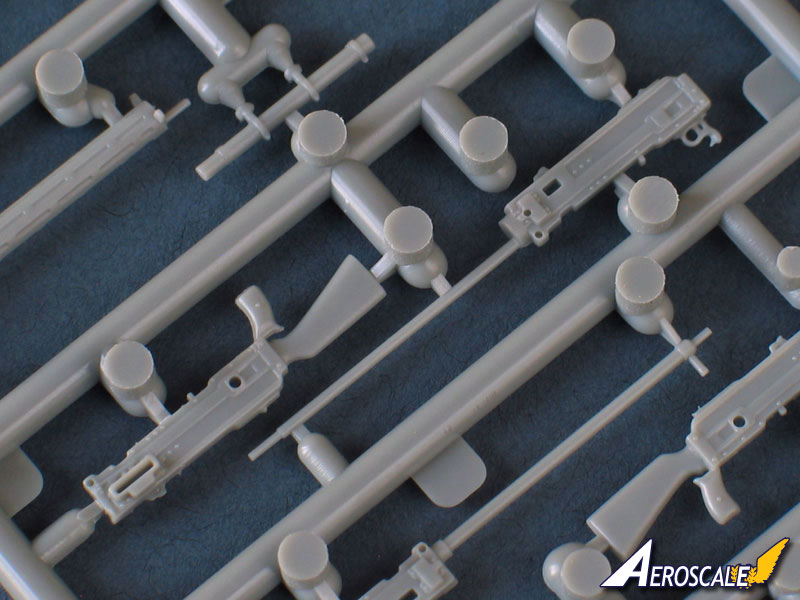
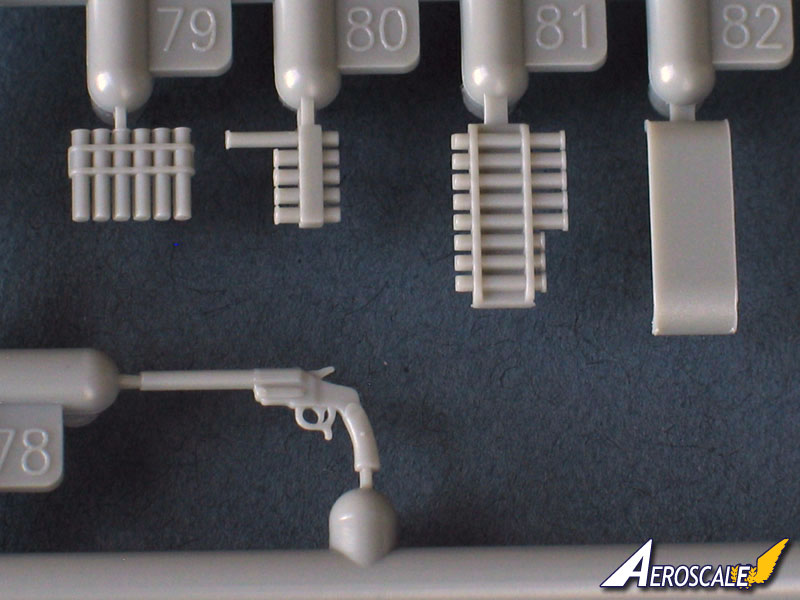
The forward-firing armament comprises either an IMG 08 or LMG 08/15 "Spandau", each provided in two forms standard or high detail, the latter featuring an etched cooling jacket, complete with a section of styrene rod of the correct diameter around which to roll it.
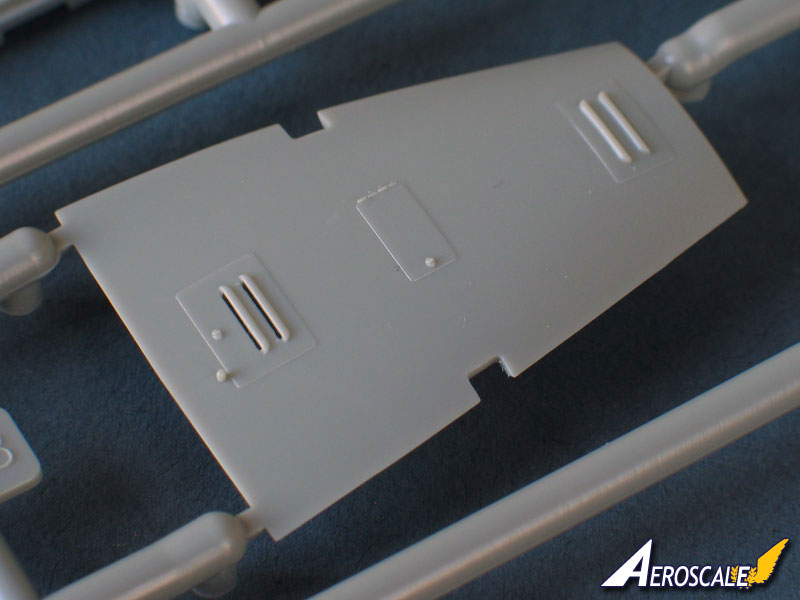
Stage 5. The fuselage preparations require a few holes drilling, depending on the version being modelled, but the most complicated part will be the careful removal of some of the moulded lacing on the exterior of the right half to depict either the original or reinforced type. There's no avoiding this, as the part is supplied as a sort of hybrid, with both types of lacing present, so some careful surgery is the order of the day so as not to damage the remaining detail.
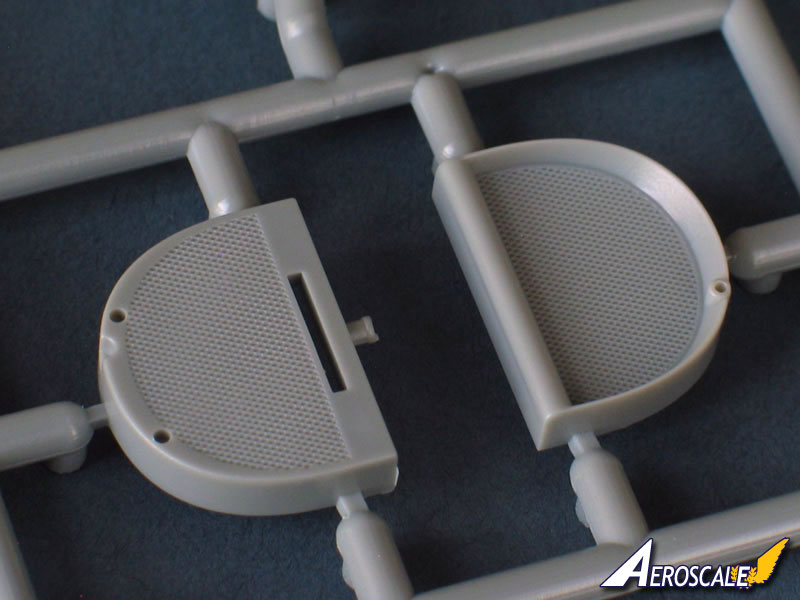
Stages 6 & 7. There's a choice of two styles of observer's position, with either a standard coaming ready for a gun ring, or a cut-down style to accommodate a sliding-bar type gun mount.
The horizontal tail and fin and rudder are fitted at this stage, and as noted above, the stabilizer features the unusual inverted aerofoil. Wingnut Wings have moulded it with subtle ribs on the underside and quite plain on top, with no rib-tapes on either. This is something you may want to check your references on, because while I haven't spotted any tapes yet in period photos, they are shown in the scale drawings in Windsock Datafile #149 and can be seen in the photos of the Deutsches Museum exhibit in the same issue (although this is a restored airframe with some non-original features).
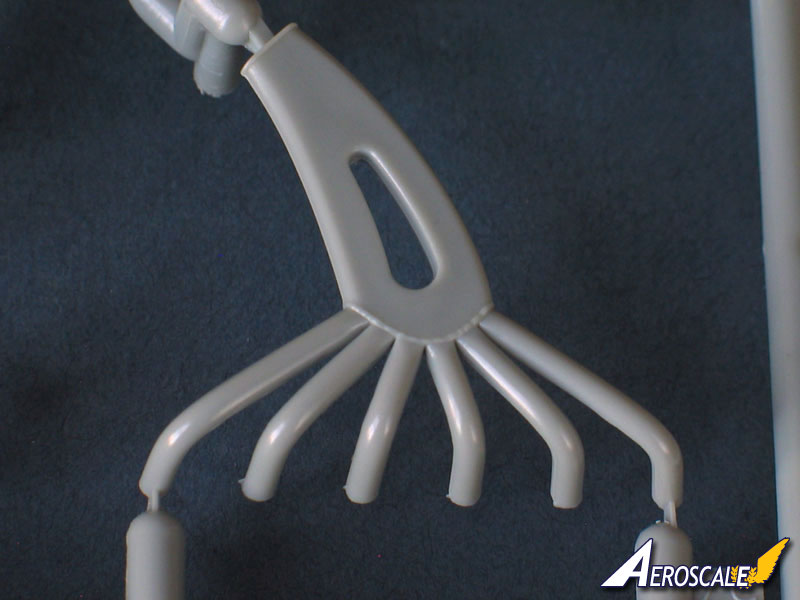
The tailplane is completed with the addition of the struts, the lower pair featuring saw-tooth edges to deter ground crew from lifting the aircraft with them " a thoroughly Hunnish alternative to painting "Lift Here"", as Aeronautical Engineering noted in 1918!
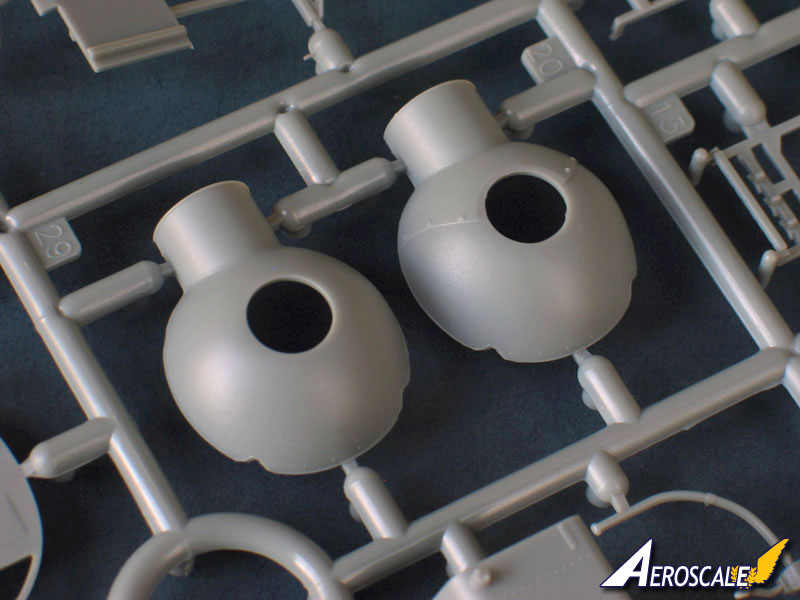
The basic fuselage is completed by the belly panel and a choice of engine cowls under the nose. The latter are yet more evidence of Wingnut Wing's moulding skill, as the louvres are actually open vents, not the usual lumps seen in most kits.
Stages 8, 9, 10 and 11. Work turns now to the wings, which look reasonably straightforward for a 2-bay design. Once again there's a choice of parts this time with early- or late-style interplane struts.
Before attaching the upper wing, it's time to fit the upper engine covers (unless you want to display the interior details), along with smaller items like the crystal clear windscreen, external fuel gauge, Eisfeld flares and the cocking lever for the "Spandau".
With the wing in place, the prominent Windhoff radiator and water pipe can be attached and, surprise, surprise, you once again have a choice of parts, with two different styles of shutters. Both short and tall exhausts are provided, along with a stay-bar. The sprue attachment is on the exhaust outlet, so the instructions recommend drilling it out for a better appearance.
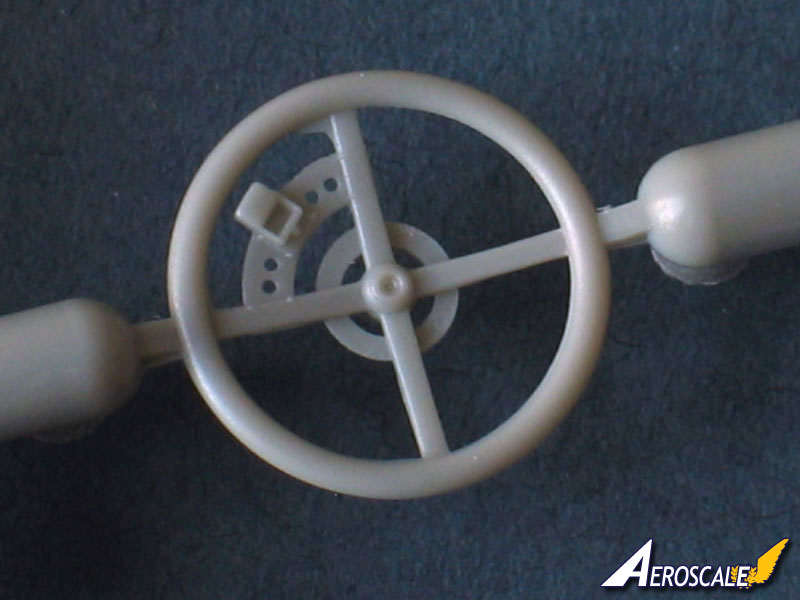
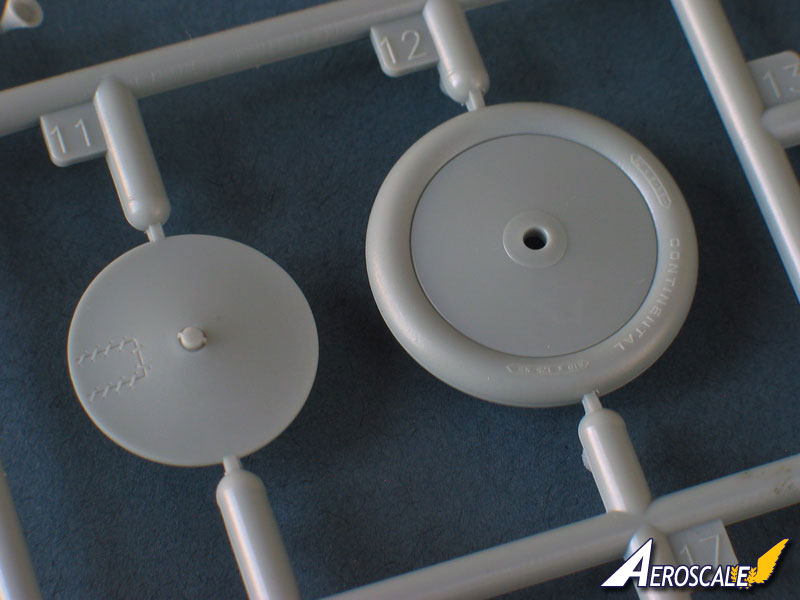
Stage 12. The undercarriage is straightforward and looks good and sturdy. The wheel disks have neatly marked lacing, while the tyres feature lightly raised maker's marks.
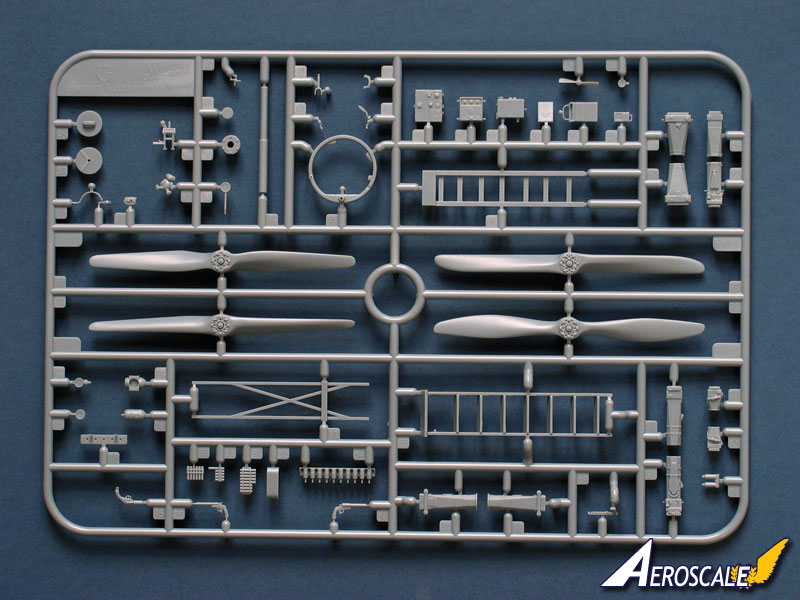
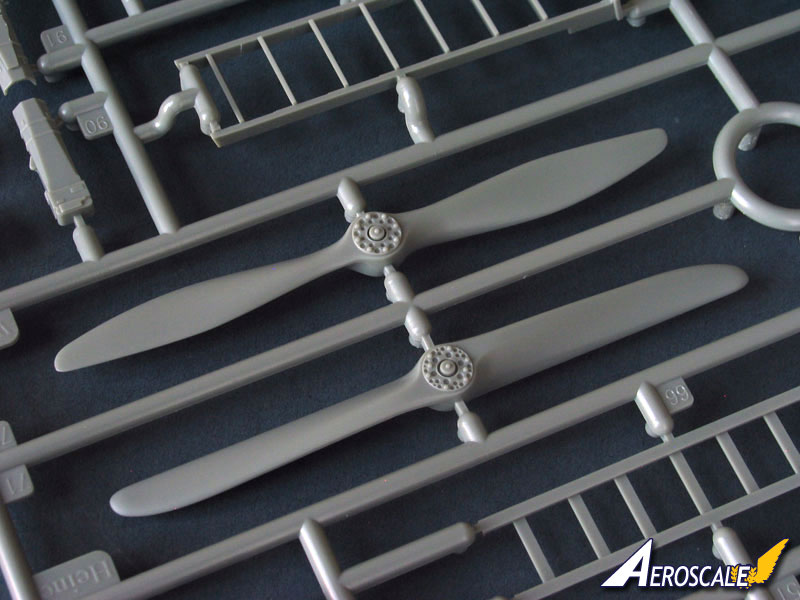
Stage 13. The kit provides four different types of propeller Heine, Axial, Astra and Wolff each with makers' logos as decals. The propellers are beautifully moulded, with sharply defined hubs and only a minor mould-line to clean up.
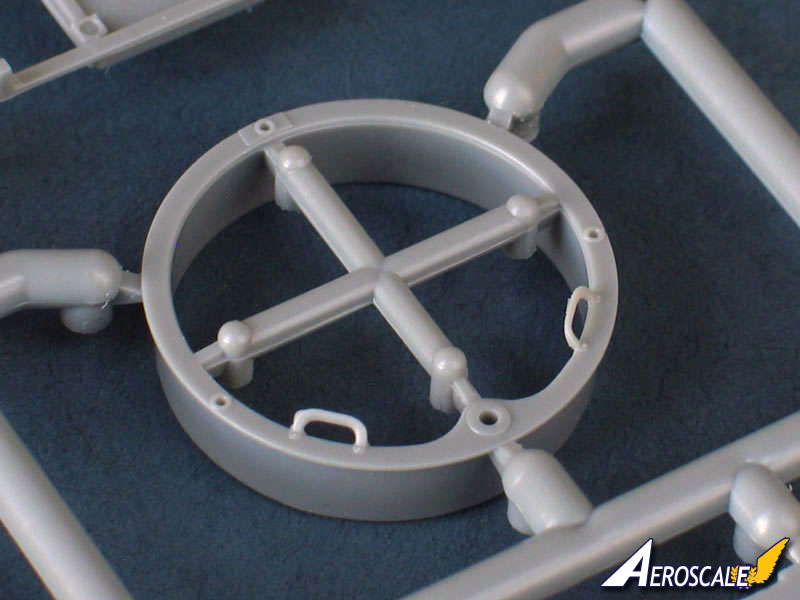
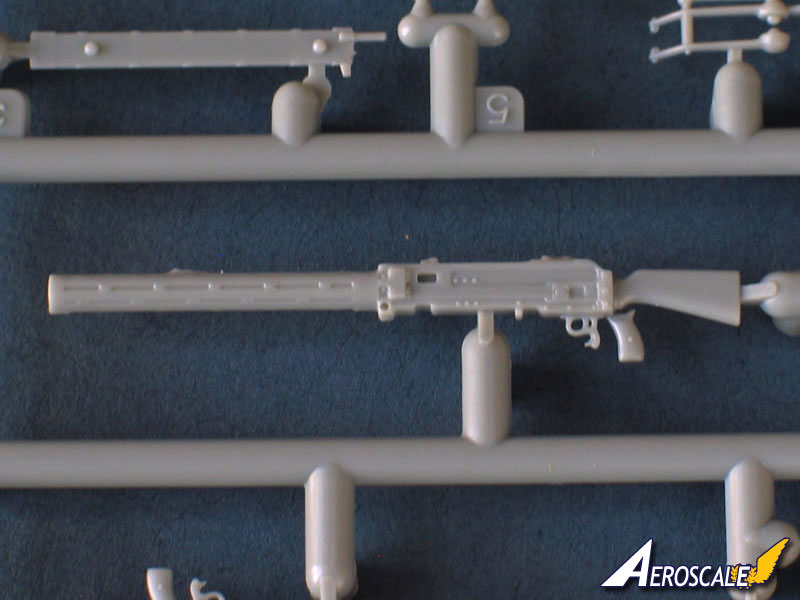
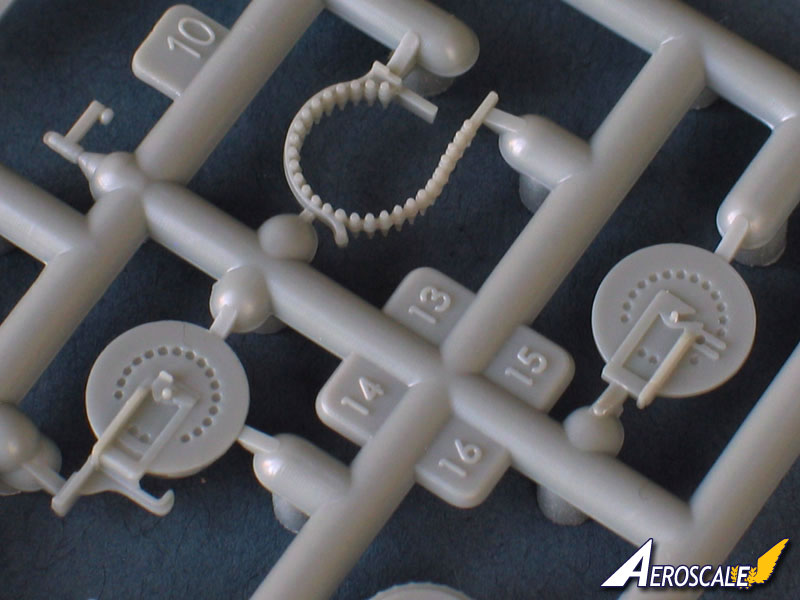
Stage 14. The observer's position comes with a choice of Parabellum LMG 14 or LMG 14/17, the former once again as a simple one-piece moulding, or in high detail form with etched jacket and sight. There are three styles of gun mounts supplied Rumpler or LVG style gun rings, or a specialised sliding-bar type which seems to have allowed for a more open position and consequently more space for equipment and greater freedom of movement.
Construction of the airframe concludes with a full-page rigging diagram, which isn't overly complicated so it should present an enjoyable challenge for even relative newcomers to biplane kits.
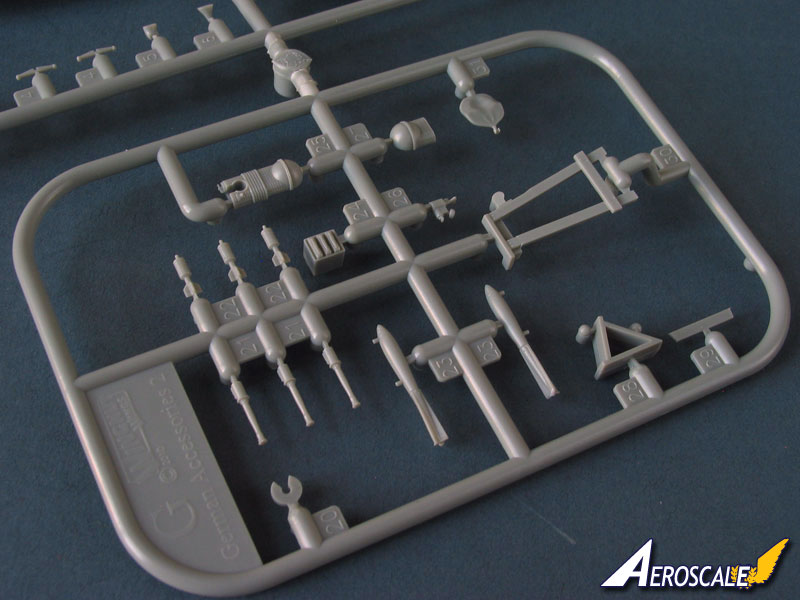
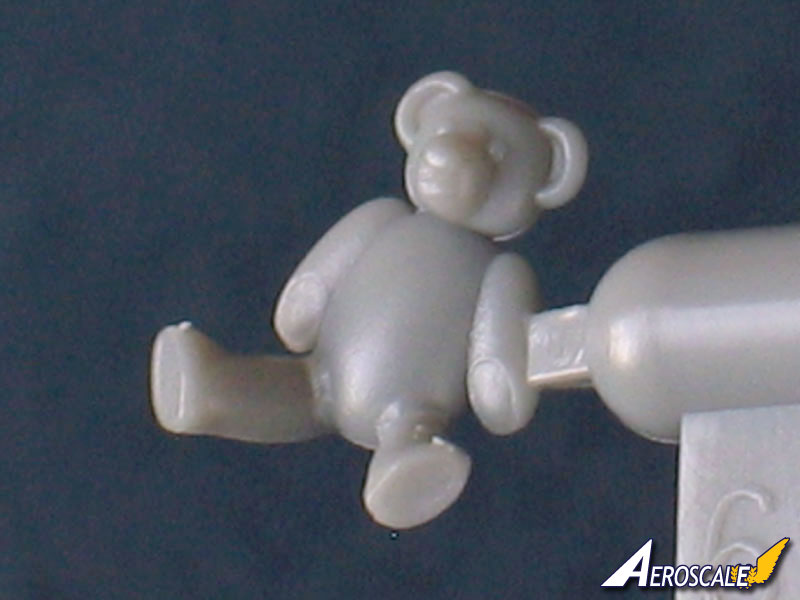
Stage 15. Rounding everything off is a great set of optional accessories. There's a selection of four types of camera plus a box for the photographic plates, a first aid kit, a homing pigeon carrying box, a barograph, an anemometer, a pair of oxygen bottles and wheel chocks, three types of flare pistol, a trestle and two types of step ladders and, last but not least, Wingnut Wings' first "crew figure" a cute little teddy bear mascot!
instructions & decals
The instructions are simply superb. The 26-page A4 booklet is illustrated in colour throughout, with shaded diagrams of each stage, and packed with useful reference photos of many of the details. Detailed English captions accompany many of the diagrams, with parts named (rather than being merely anonymous numbers as in so many modern sets of instructions) so that reading the assembly guide serves to inform you about the subject as you go. Colour matches for Tamiya, Humbrol and Misterkit paints are keyed to every detail throughout.
Five very attractive colour schemes are illustrated with top quality profiles by Ronny Bar:
A. Rumpler C.IV 1421/17, mid to late 1917, with white comet markings.
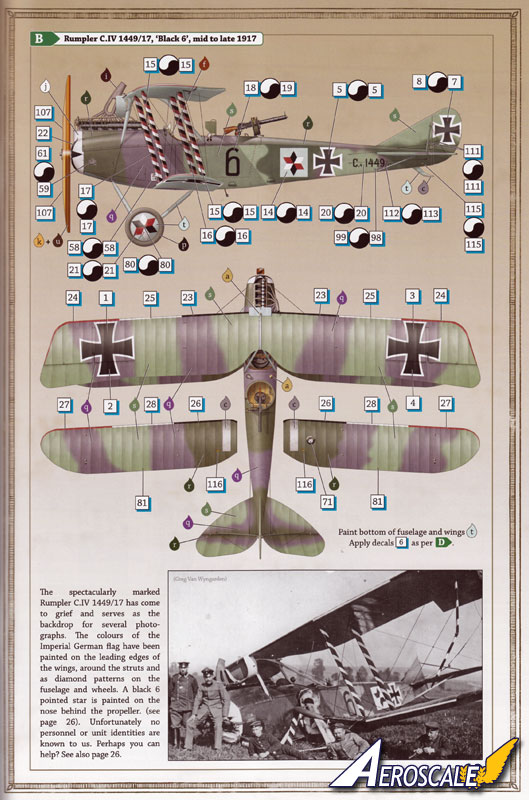
B. Rumpler C.IV 1449/17, "Black 6", mid to late 1917, with Imperial German colours decorating the struts, wing leading edges, fuselage and wheels
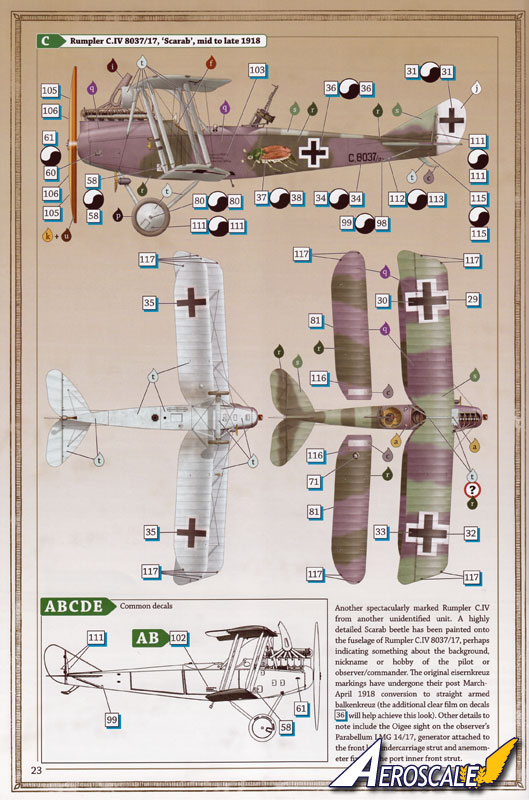
C. Rumpler C.IV 8037/17, mid to late 1918, with spectacular scarab beetle markings.
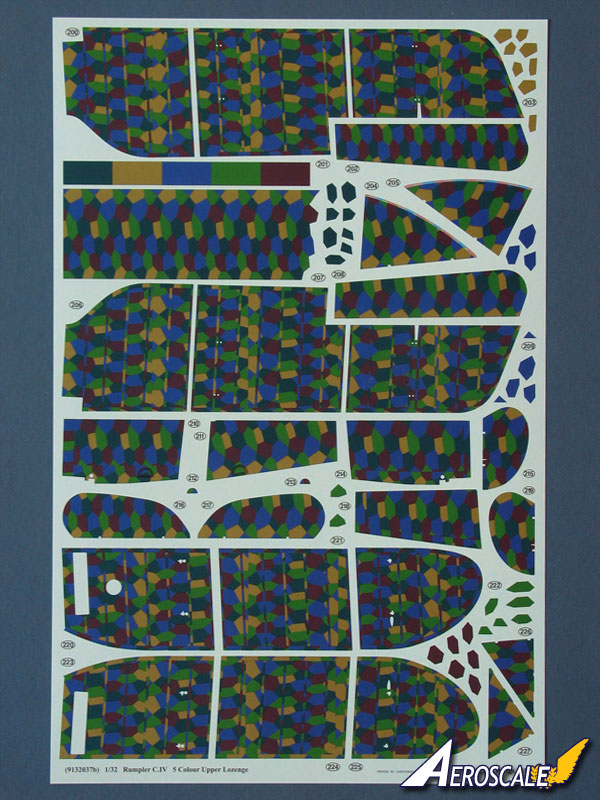
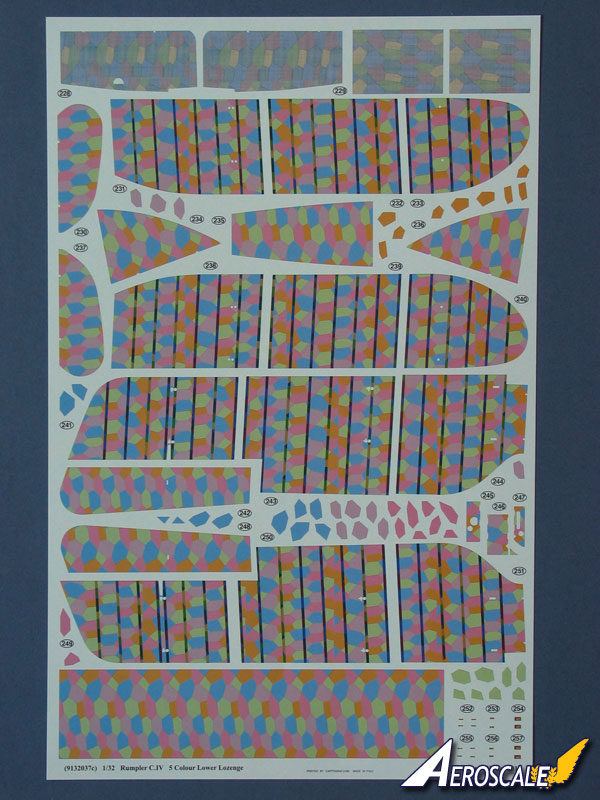
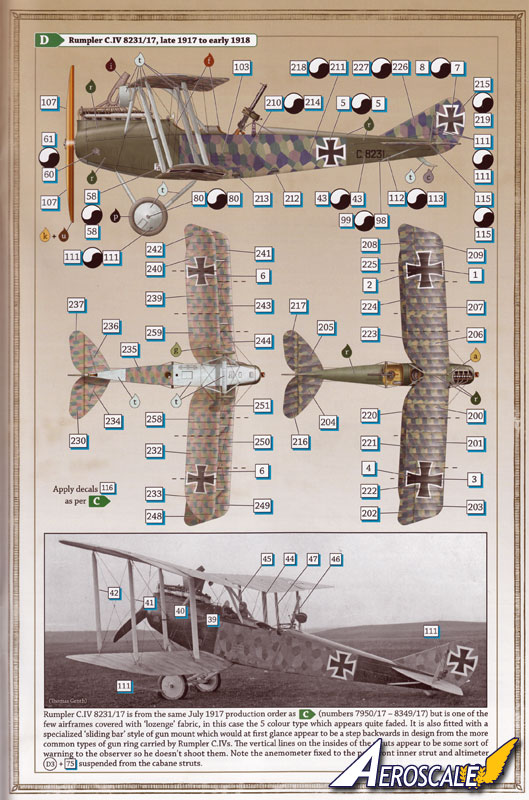
D. Rumpler C.IV 8231/17, late 1917 to early 1918, sporting a lozenge fabric finish.
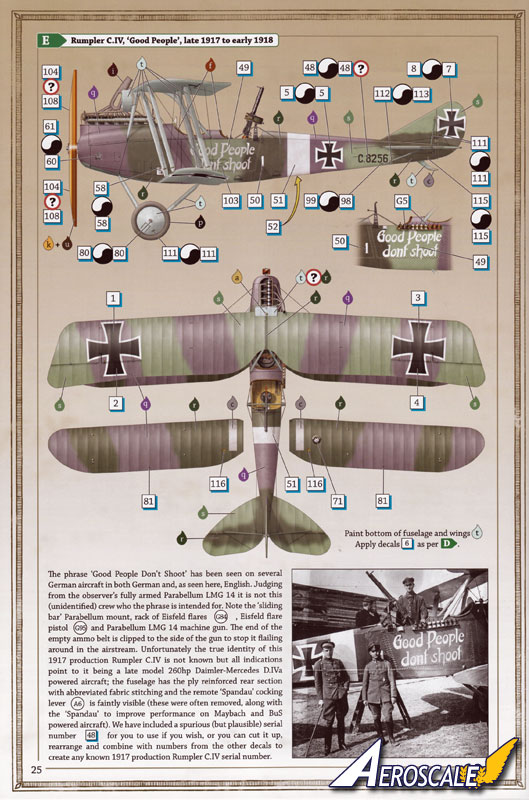
E. Rumpler C.IV, late 1917 to early 1918, carrying the phrase "Good People Don't Shoot" in English on the fuselage sides..
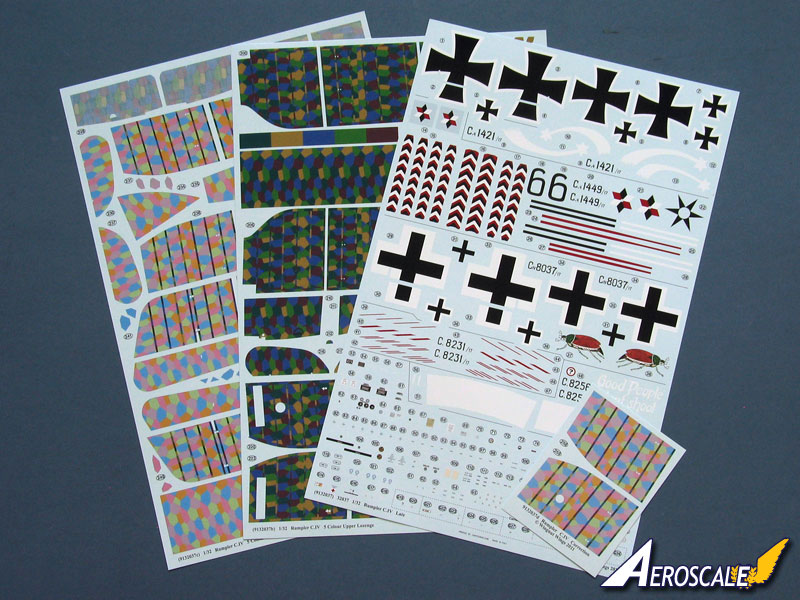
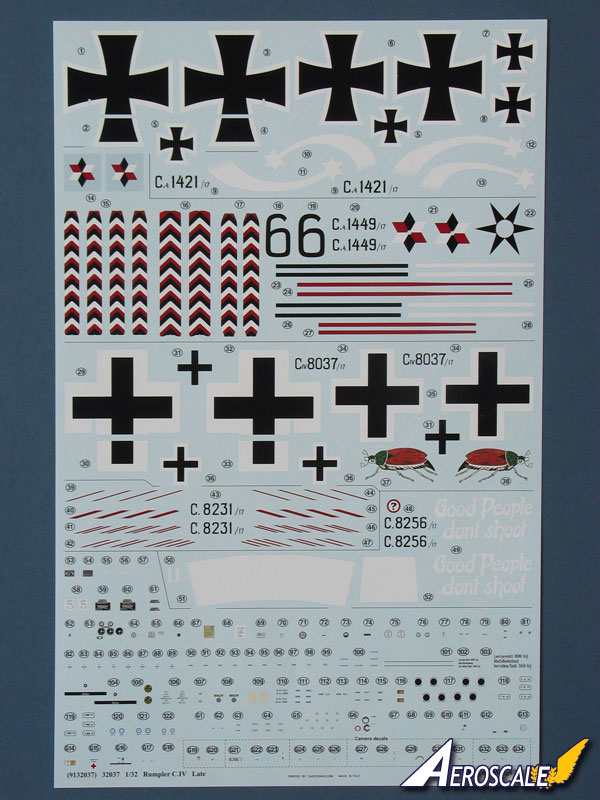
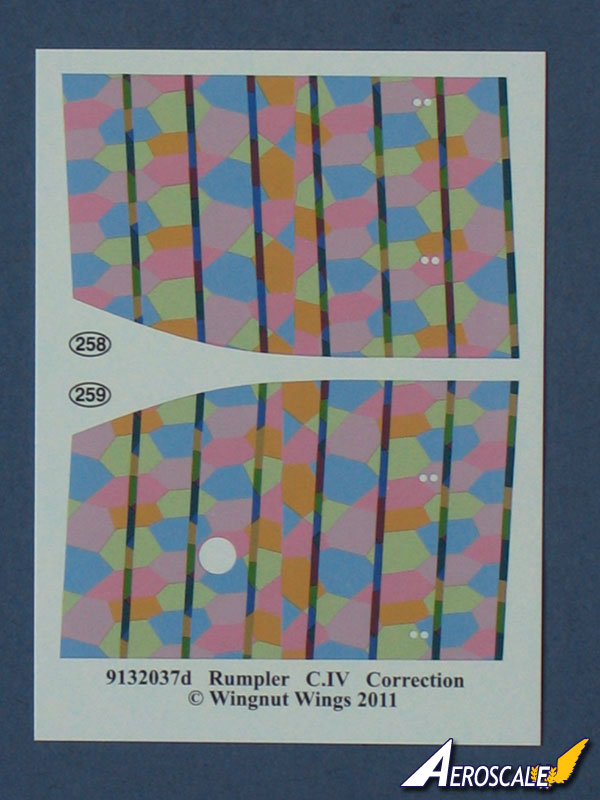
The decals arrive on no less than three immense sheets, plus a small correction sheet. The first main sheet carries national and individual markings, stencils and instrument faces. The next two sheets provide full "cookie cutter" style lozenge patterns for Scheme D. With lozenge fabric colours being such a contentious subject I won't step into the debate, but what is noteworthy is that Wingnut Wings state that the fabric in their reference photo of 8231/17 appears to be quite faded (and indeed a couple of panels of very faded reversed lozenges for the interior of the fuselage are included), but the decals are "full strength", so they presumably represent the aircraft earlier in its career.
The decals look excellent quality thin and glossy, and printed in perfect register in the sample kit. There are cut-outs in the lozenge panels for raised moulded details, and with almost no carrier film evident they should hopefully fit with little trouble.
conclusion
Wingnut Wings' Rumpler is a beautiful kit, packed with detail but still promising a reasonably straightforward build that should both satisfy the experts while remaining manageable for less experienced modellers. The inclusion of the accessories pack opens up a world of diorama and vignette possibilities now all we need is Wingnut Wings' eagerly awaited resin figures to accompany it. Thoroughly recommended to all WW1 aviation enthusiasts.
Reference Datafile #149 Rumpler C.IV At War, by Ray Rimell, Albatros Productions, 2011.
Please remember, when contacting retailers or manufacturers, to mention that you saw their products highlighted here - on AEROSCALE.
SUMMARY
Highs: Beautifully moulded and highly detailed. Superb instructions and excellent decals.Lows: A couple of extra locating pins in the rear fuselage would help support the long joint.Verdict: This is another stunning release from Wingnut Wings, detailed enough and with sufficient options to satisfy the most demanding WW1 enthusiasts, while promising to be straightforward enough to be tackled by average modellers.
Our Thanks to Wingnut Wings! This item was provided by them for the purpose of having it reviewed on this KitMaker Network site. If you would like your kit, book, or product reviewed, please contact us.
About Rowan Baylis (Merlin) FROM: NO REGIONAL SELECTED, UNITED KINGDOM
I've been modelling for about 40 years, on and off. While I'm happy to build anything, my interests lie primarily in 1/48 scale aircraft. I mostly concentrate on WW2 subjects, although I'm also interested in WW1, Golden Age aviation and the early Jet Age - and have even been known to build the occas...
Great review Merlin.
Now if Parcelforce get their finger out I'll be able to second your comments. After poring over your pics my sweaty little mits are twitching to start my early Rumpler if it gets here soon.
TY for such a straight forward review.
Keith
Cheers guys
@ Keith - I'll be very interested to see how your "Early" compares, and if the kit also suffers the slight mismatch along the fuselage seam. As I noted in the review, I've a sneaking suspicion mine could have resulted from the box being crushed in transit.
If I can make some space and time I'll get cracking on my kit after Christmas. I'm itching to build it, but I don't want to stall through having too many uncompleted projects on the go.
All the best
Rowan
Thanks for posting the review Rowan!
This Rumpler is looking more tempting every time I look at it. Like you say, the extra diorama parts in the kit are just fantastic and the teddy mascot wow I could almost buy the kit for the sake of these parts alone... Yes WNW where are the figures???
A Merry Christmas to you all
Mikael
The fuelage halves will be the first thing I check Rowan and post my findings, I'll adopt the strnghening strip anyway, I always do now after an Albie cracked on me after painting.
Well it might not be the first thing I check if I ever get my kit that is... humiliating I could have waited, ordered one from Hannants and got it before I get it through Parcelfarce.
Got her at last (early Rumpler.) Not bad, shipped 2nd dec, and after poking Parcelforce I got my mitts on it on the 11th Jan
Anyway, as I promised I'd check the fuselage halves and they are fine, perfect in fact but I think a strengthening strip is advised.
As for the rest of the kit... well its okay I suppose... NOOOO Its beautiful
K
Hi Keith
That's good to hear about the kit fuselage. Over a month in the post!? - well, it's certainly a kit worth waiting for! I've been tinkering with it doing a little prep work when I've had free moments and it really promises to be a beauty.
All the best
Rowan
Hi
Mark. Quite likely yes, I've put a few hours in tonight on her. If I get home at a reasonable time tomorrow I might snap a few shots and start the blog.
Rowan. Yes, Frustrating but well worth the wait.
I've got a couple of broken bits in the box, nothing unrepairable I hope, ines the tail support stnchion , just hoping its a clean enough break to Cyano and sand smooth.
One thing I have noticed... already. The Undercarriage looks a little odd, compared to pics it seems to be overextended? Thoughts?
I saw a few glaring ejection marks then after cleanup realised they'd be hidden anyway
1AM and I'm surrendering to the bed god, take care all.


Comments