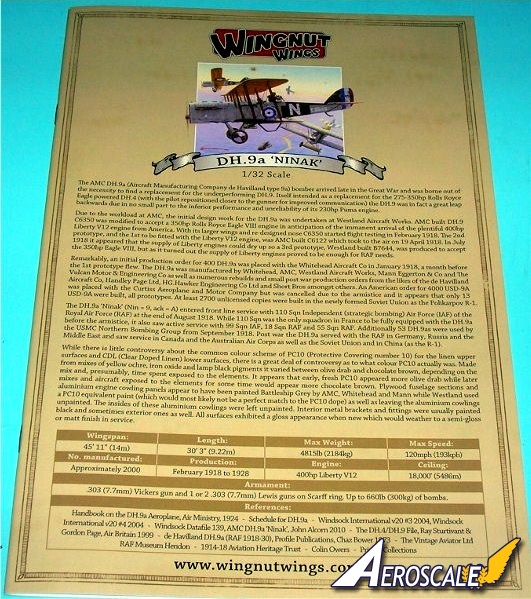
The AMC DH.9a (Aircraft Manufacturing Company de Havilland design 9a) bomber arrived late in the Great War and was borne out of the necessity to find a replacement for the underperforming DH.9. Intended as a replacement for the 275-350hp Rolls Royce Eagle powered DH.4, with the pilot and gunner repositioned closer together for improved communications, the DH.9 was in fact a great leap backwards due in no small part to the inferior performance and unreliability of its 230hp Puma engine.
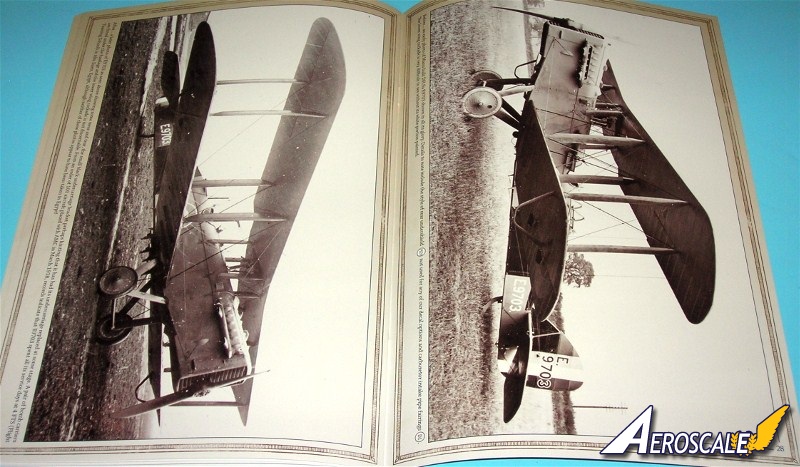
Due to the workload at AMC, the initial design work for the improved DH.9a was undertaken at Westland Aircraft Works. AMC built DH.9 C6350 was modified to accept a 350hp Rolls Royce Eagle VIII engine in anticipation of the imminent arrival of the plentiful 400hp Liberty V12 engine from America. With its larger wings and re-designed nose C6350 started flight testing in February 1918. The 2nd prototype, and the 1st to be fitted with a Liberty engine, was AMC built C6122 which took to the air on 19 April 1918. In July 1918 it appeared that the supply of Liberty engines could dry up so a 3rd prototype, Westland built B7644, was produced to accept the 350hp Eagle VIII, but as it turned out the supply of Liberty engines proved to be enough for RAF needs.
Remarkably, an initial production order for 400 DH.9a was placed with the Whitehead Aircraft Co in January 1918, a month before the 1st prototype flew. The DH.9a was manufactured by Whitehead, AMC, Mann Eggerton & Co and The Vulcan Motor & Engineering Co as well as numerous rebuilds and small post war production orders from the likes of the de Havilland Aircraft Co, Handley Page Ltd, HG.Hawker Engineering Co Ltd and Short Bros amongst others. An American order for 4000 USD-9A was placed with the Curtiss Aeroplane and Motor Company but was cancelled due to the armistice and it appears that only 13 USD-9A were built, all prototypes. At least 2700 unlicensed copies were built in the newly formed Soviet Union as the Polikarpov R-1.
The DH.9a Ninak (Nin = 9, ack = A) entered front line service with 110 Sqn Independent (strategic bombing) Air Force (IAF) of the Royal Air Force (RAF) at the end of August 1918. While 110 Sqn was the only squadron in France to be fully equipped with the DH.9a before the armistice, it also saw active service with 99 Sqn IAF, 18 Sqn RAF and 55 Sqn RAF. Additionally 53 DH.9as were used by United States Marine Corps (USMC) Northern Bombing Group from September 1918. Post war the DH.9a served with the RAF in Germany, Russia and the Middle East and saw service in Canada, the Australian Air Corps and the Soviet Union and China (as the R-1).
The kit
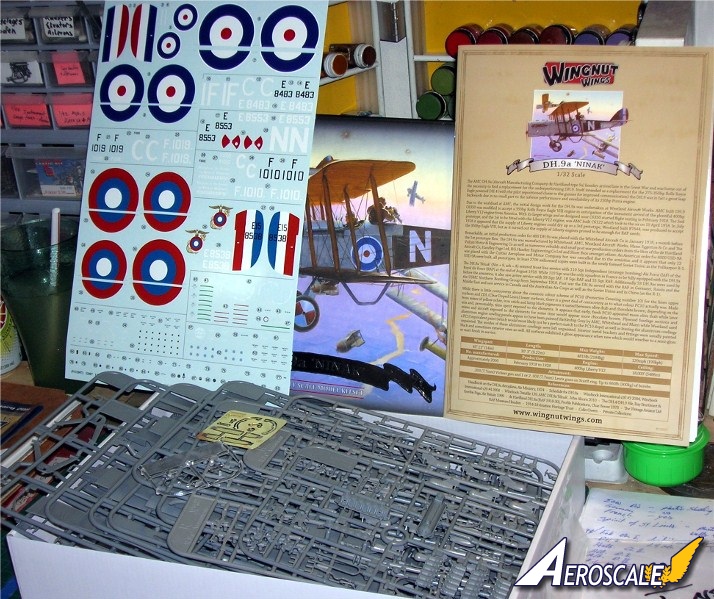
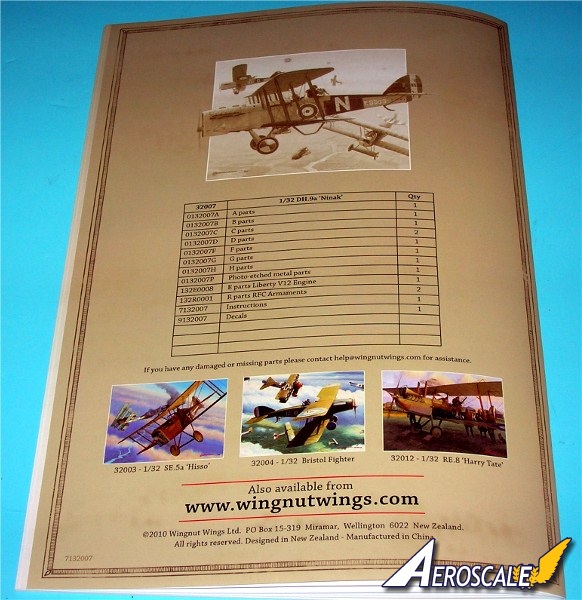
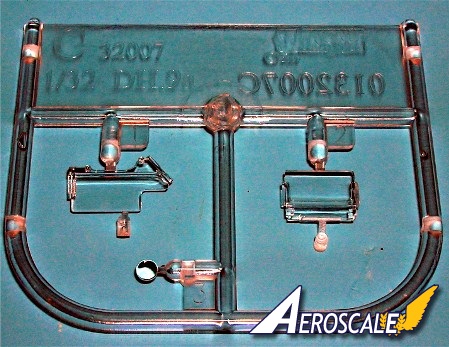
Wingnut Wings DH 9a kit #32007 arrives packed in the typical top-opening box that is tightly packed with sprues!
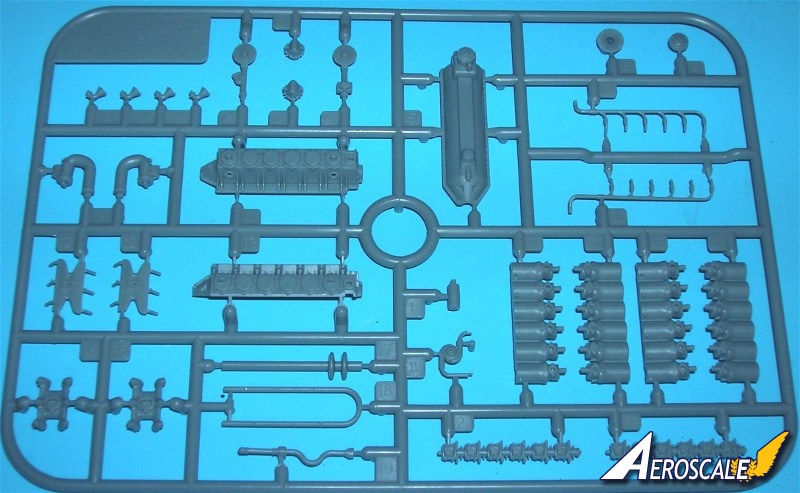
1.295 high quality injection moulded plastic parts
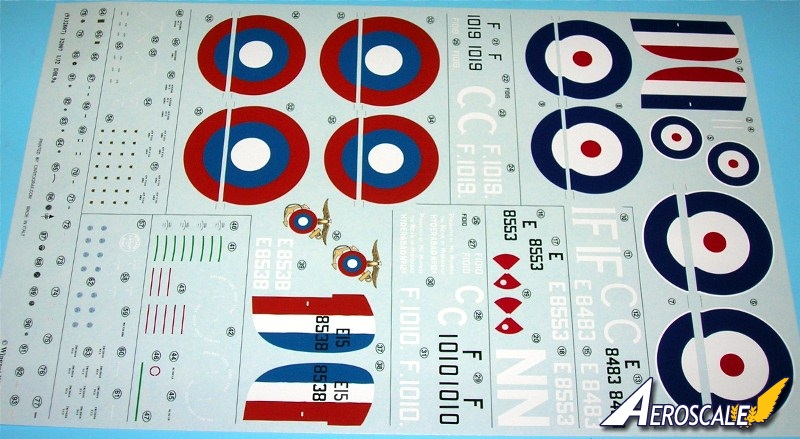
2.High quality Cartograf decals for 4 RAF and 1 USMC aircraft .
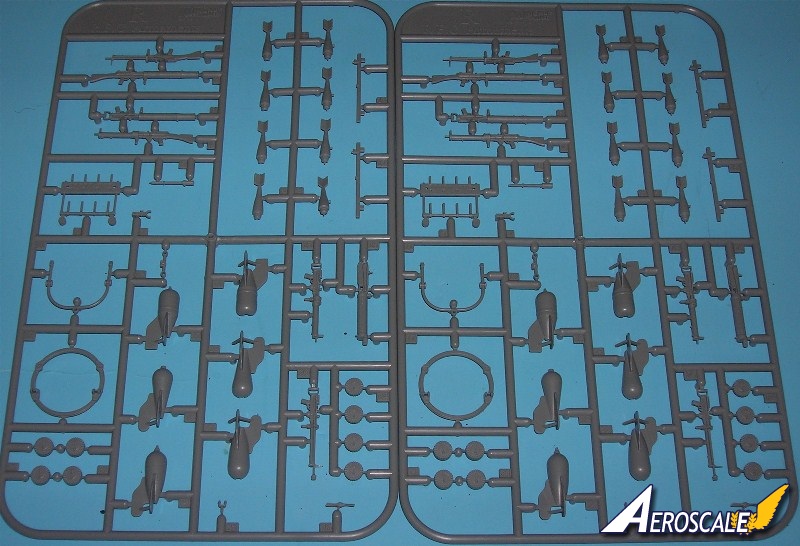
3.Optional engine cowlings, bombs and early and late production exhaust and fuselage parts.
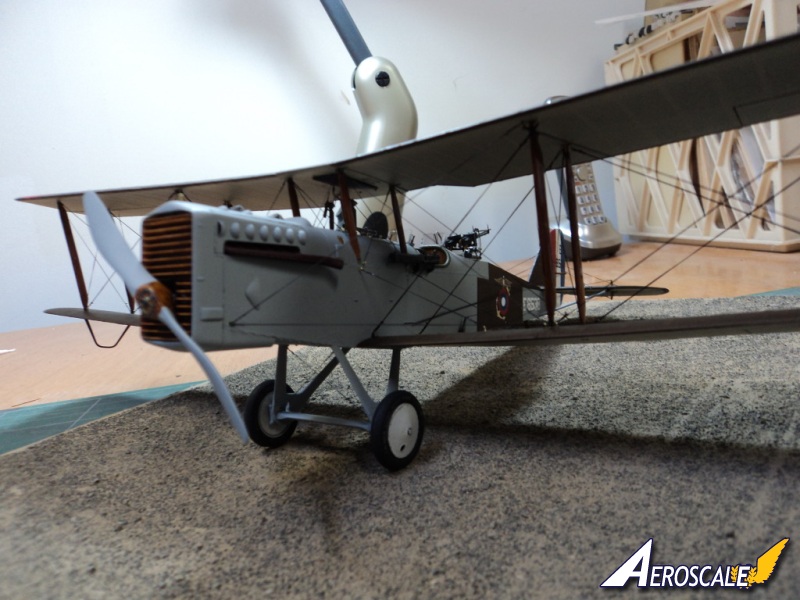
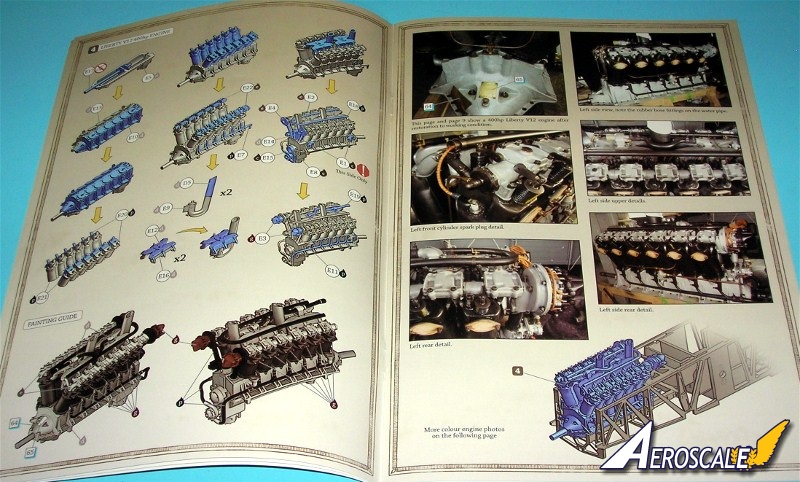
4.Highly detailed Liberty V12 400hp engine.
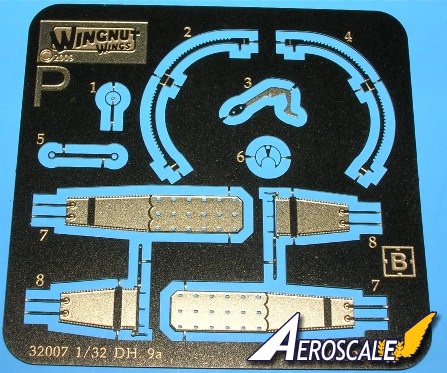
5.10 photo-etched metal detail parts.
6.Full rigging diagram.
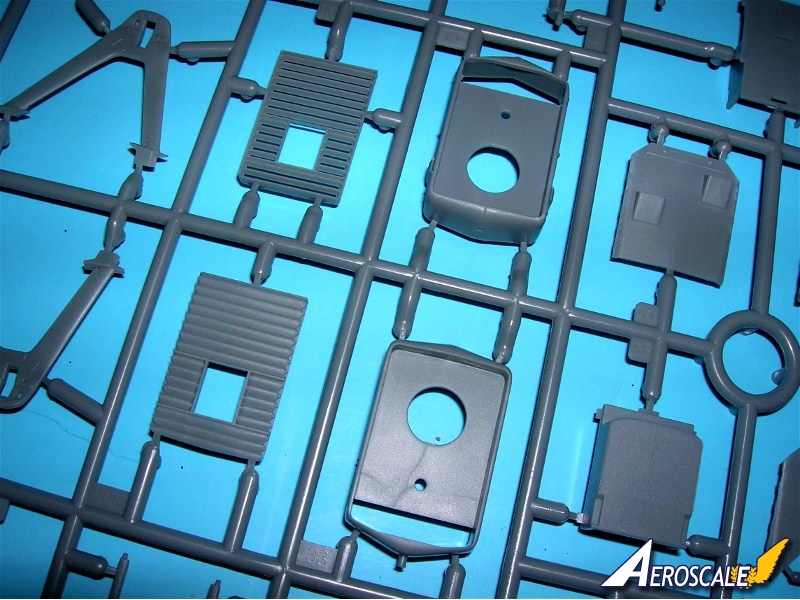
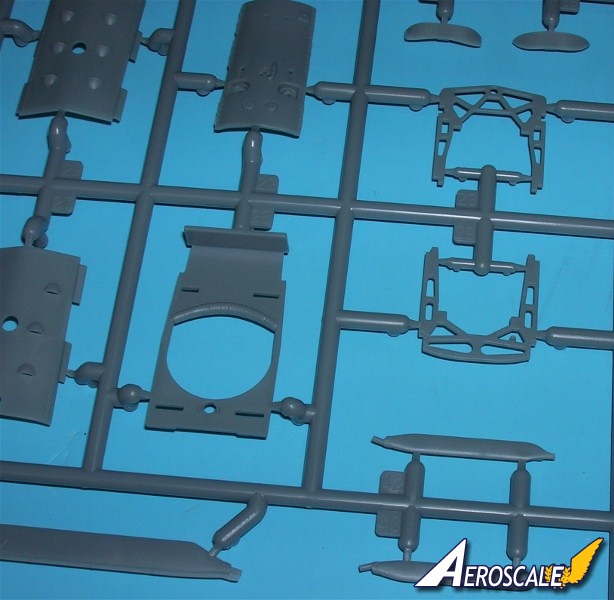
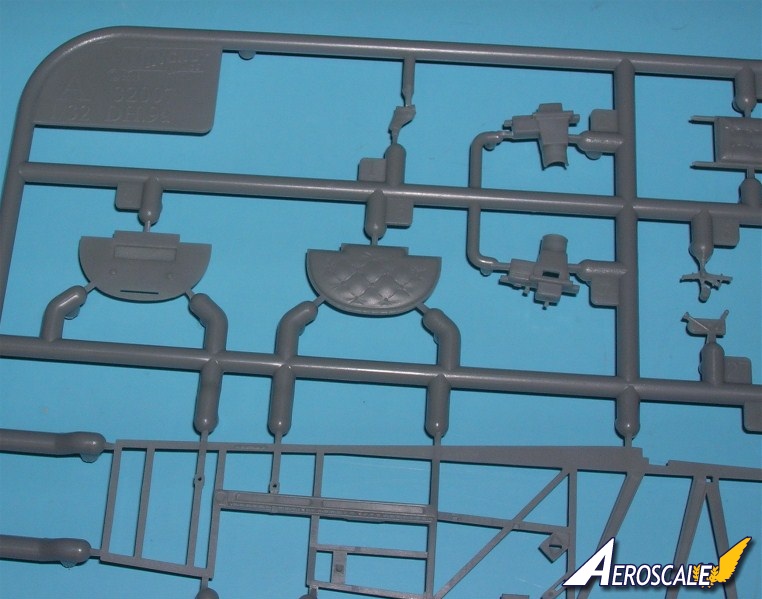
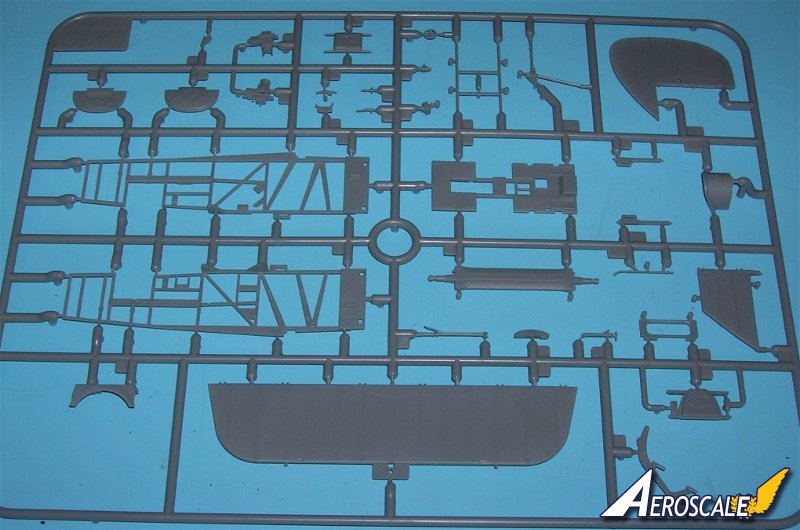
The parts are quite cleanly moulded. On the plus side, ejector-pin marks are few and far between and kept pretty much out of sight. Generally, there's little to worry experienced modellers and clean-up should be quite straightforward.
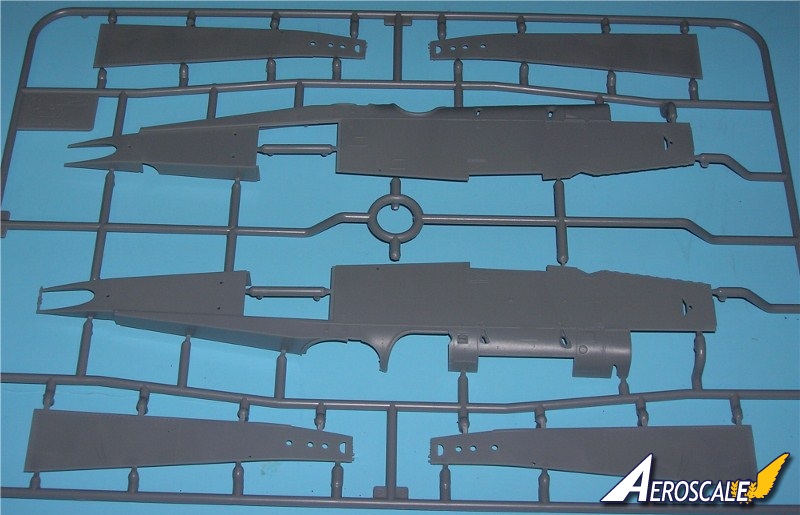
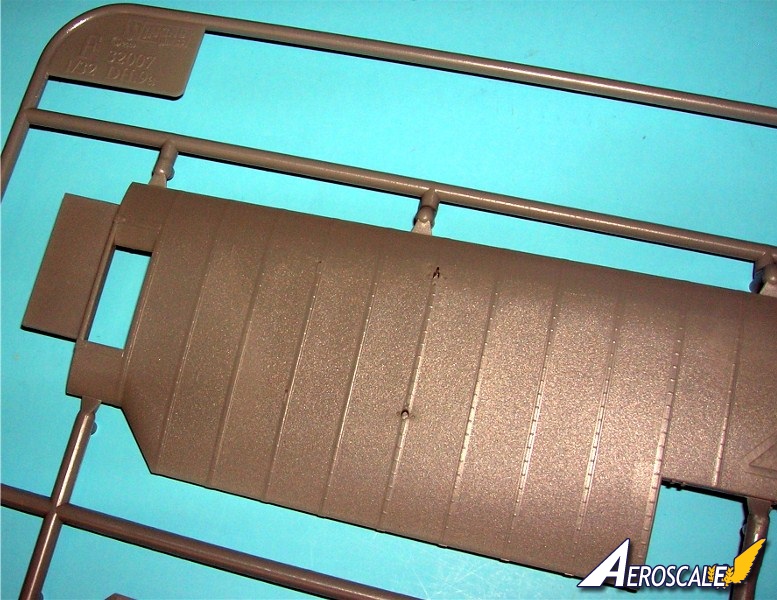
Detail consists of some finely engraved lines, separate items like louvres and subtle lacing on the fuselage and finely depicted fabric effect on the flying surfaces. Wing ribs are slightly raised on upper surfaces and subtle on the undersides There are rib tapes depicted.
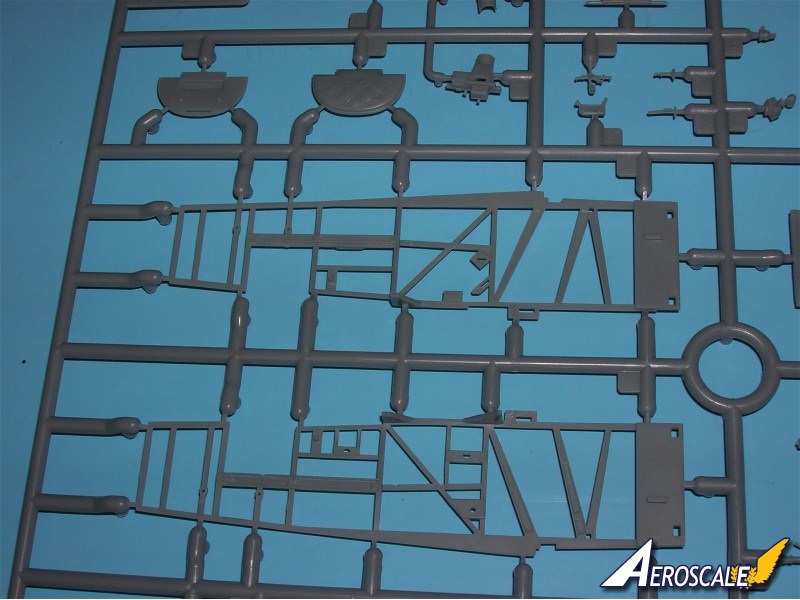
As Aeroscale Managing Editor Rowan Baylis once said ". . . full test fit is impractical because, if nothing else, this kit is all about options. . ." It could be built in two basic varitions (early & late) and this means a choice of radiators and nose panels and etc. Surprisingly the fuselage halves have great rigidity when fitted for real. Taping the fuselage parts together is encouraging and they fit snugly on the lower wing.
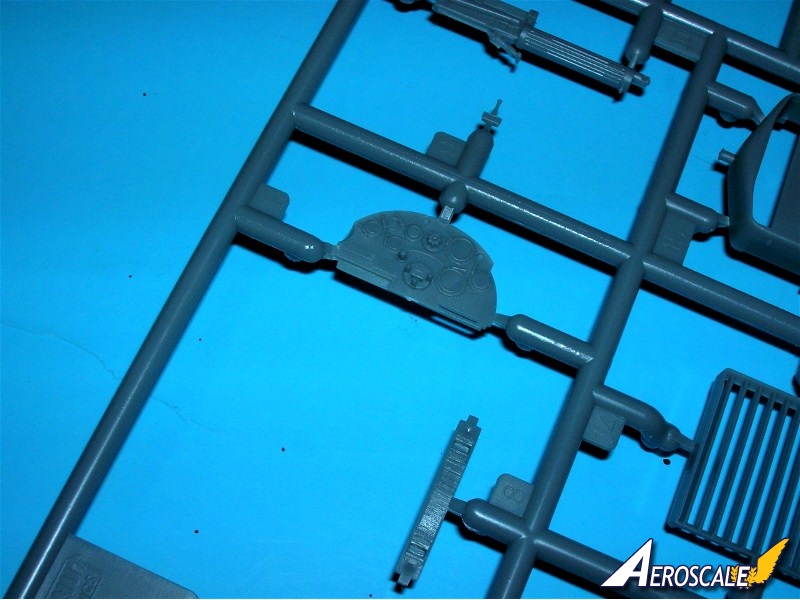
The kit features a highly detailed cockpits and the inclusion of the photoetched details such as seat harness is a nice touch. Theres a selection of machine guns, a single forward-firing Vickers gun, but there are two types of Lewis guns and two types of Lewis gun mounts. and a two types of bombs. I really like the detailed instrument panel and the liberty motor is finely engraved.
As may be becoming clear, this kit is not suitable for beginners - and probably wouldn't really make a good choice for a first biplane kit for modellers with a little experience either. While the overall construction isn't particularly complex, in my opinion the two-bay wings will be best done using a "lego" block jig. There are no safe short cuts to an easy assembly - all the struts are separate and using the jig I mentioned a good idea to keep everything lined up straight and plum. WNW recommends the upturned box top for alignment. Alo there is a hints and tips section on their website to help with some errata and addenda.
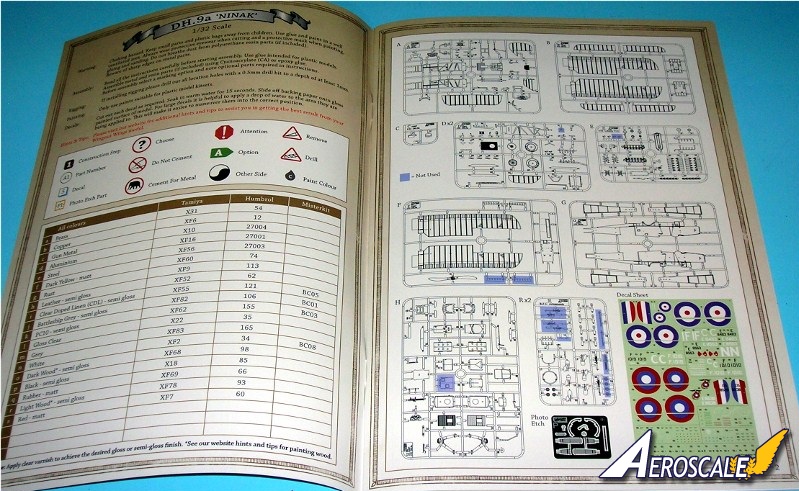
Instructions
The instructions are well drawn, but careful study is paramount due to the number of options offered. They include helpful rigging diagrams, and does show the double-wires RAFwires as noted on the original aircraft type. Colour matches call for Tamiya, Humbrol & Misterkit paints.
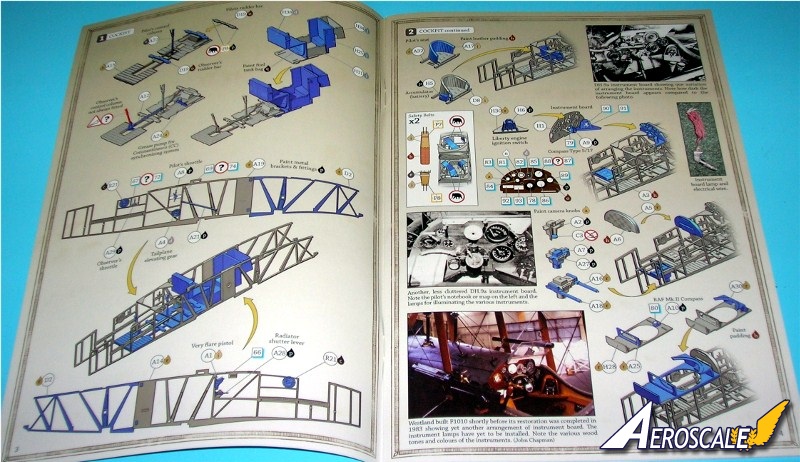
Step 1. Engine bay supports (D 2 X 2 ) & fuselage skeletal structures (A 14 & 19). These are fairly straight forward and the WNW instructions list the items by name with thumbnail image and text for identification. First clean up any mold lines. Check page 6 for possible rigging paths. Start by spraying all the wood and metal parts of the skeletal structures with a base coat, note WNW colour recommendations. These can be done on the sprue as it is easier to handle the small bits, and check that you have identified all the wooden parts.
Give it a base coat for the wood and let dry. The parts were then stroked with a fan brush for the final finer grained effect. An easy technique it allows a lot of control. The engine mount s (D 2 X 2) are connected to the fuselage side frames (A 14 & 19). Add the wooden flooring (A 15) Individual parts include; Pilot & observer rudder bars ( D 19 X 2), control column (A 22)Fuel & oil tank and ammo box combination (H 38) Pilots throttle (A 8 ), Observers throttle (A 29), flare pistol (A 1), spare Lewis ammo drums ( R 21 X 2 ) and tailplane adjusting wheel (A 4).
Step 2. Pilot=s cockpit adds the instrument panel can be a little darker in colour as per the instructions. When dry, the bezels, switches and knobs were picked out in brass, black and silver. WnW supplies superb Cartograph made instrument decals that are so well printed, they need no trimming to fit the tiny bezels. Once dry, a drop of clear seals them on and creates the glass. You need a good magnifier, but these dials are readable. And you even get a scale topographical map. The seat (A 17) attaches to the support frame (A 32) and instrument panel (H 1, 6 & 30), rear cockpit shelf (A 10,25, 30 & H 28) and camera (A 2,7, 27 & C 3) are assembled . PE lap belts (P 7 & 8) can be annealed and attached. See the WnW website hints and tips section to improve the pilots wicker seat (A 17 & 32, D 8 X 2 ) details. Finally, the pilots wicker seat was made. A more expert modeler may remove the back moulded seam that supports the upper and lower portions of the seat back, but as this would be hardly noticeable. The wicker can be painted with a thin matt dark brown paint. Then it was dry brushed with yellow ochre oil paint to bring out the cane effect well. The seat and top capping can be painted flat brown.
The pilots lap belts (P 7 & 8) are typical for most installations. Very late 1918 British machines may have had the Sutton farm straps type A.
Step 3. Here we detail the engine compartment. (D 33 X 2, H 8, 13, 23, 29).
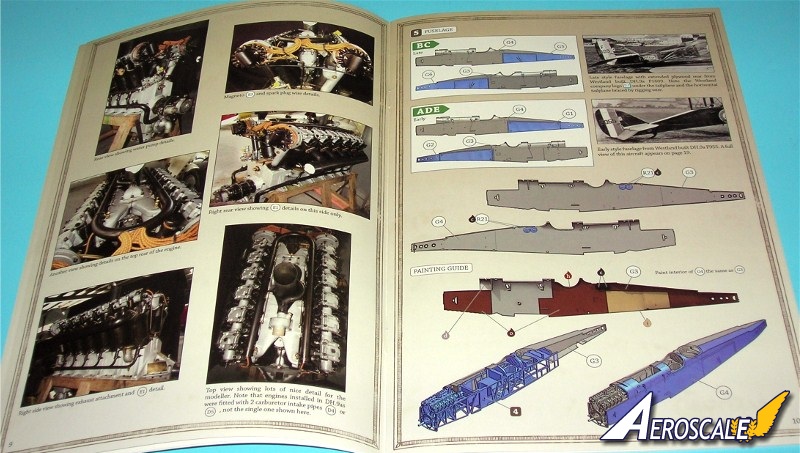
Step 4. Next is the Liberty V12 400hp engine build up. Start with crankcase ( E 5), simplified crank (E 17 ), cylinder banks ( E 20 X 2 & 21 X2), carburetors ( E 12 X 2 & 16 X 2 ) and intakes (D 5 X 2 & E 9 X2 ), Engine accessories ( E 1, 2, 3, 4, 8, 11, 14, 15 & 19). Gather the key components and painted them before final assembly. Reference photos tell us that there is little to be added to this assembly other than plug cables.
Page 8. Engine assembly is installed here.
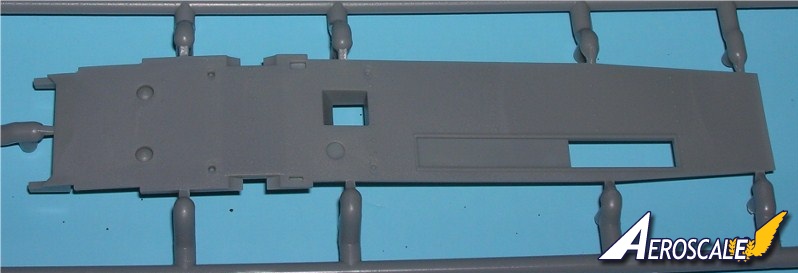
Step 5. Fuselage halves (G 1-6) and inner surfaces are detailed here. Then the completed cockpit structure & engine assembly is installed and the fuselage halves closed. I am told the fit is excellent on the completed kit. You just need to sand down a little of the cockpit frame to allow the two halves to fit together.
Step 6. This details the cowling (H 22 ) above the fuel tank and the fuselage under surface ( F 5 ).
Page 12. This details the outward variations of the early and late versions of the DH 9a.
Step 7. Here we apply the radiator ( H 15 0r 33 )and their various details for the profile you have chosen. I would replace the plastic support arms (D 34 X 2) for metal rod.
Step 8. This is where we chose and build the engine cowling (F1 & 2, H 21 or 27)
Step 9. Next add various vent shrouds. There are also 3 different types of exhaust manifolds (D 21 X 2, 24X 2, 36 X 2). Chose the set for your build profile.
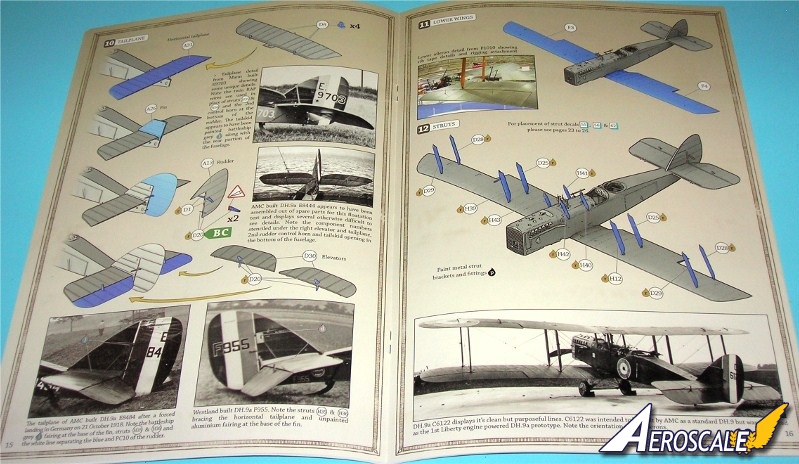
Step 10. Here you add the tailplane and its external fixtures. This includes the rudder (A 13, D 1 X 2 & 20 X 2 ) horizontal stabilizer (A 31), Vertical fin (A 26 ) Elevators (D 20 X 2, 30 X 2).
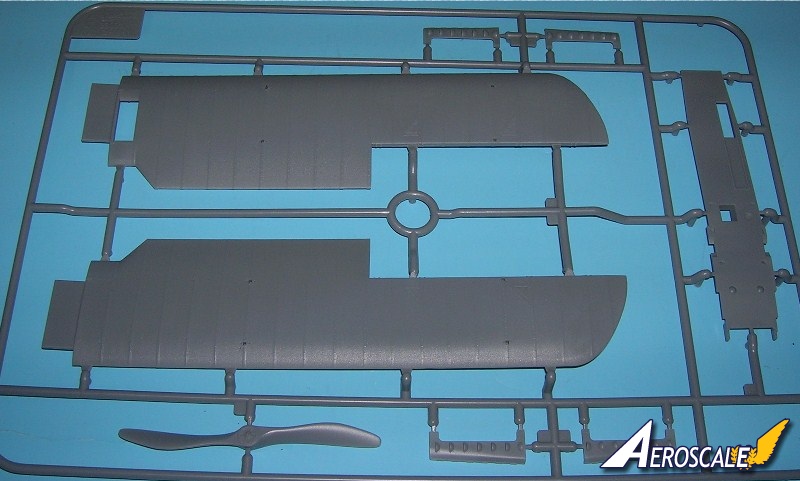
Step 11. Lower wings (F 1 & 3) are next. The lower wing is a two piece item, again, excellently moulded with fine rib stitching details.
Step 12. Next add the interplane (D 25 X 2, 28 X 2 & 29 X 2), cabane (H 12, 39 43) struts
Step 13. Here you assemble the upper wing and the center section gravity feed fuel tank (B 3, 4 & 6)
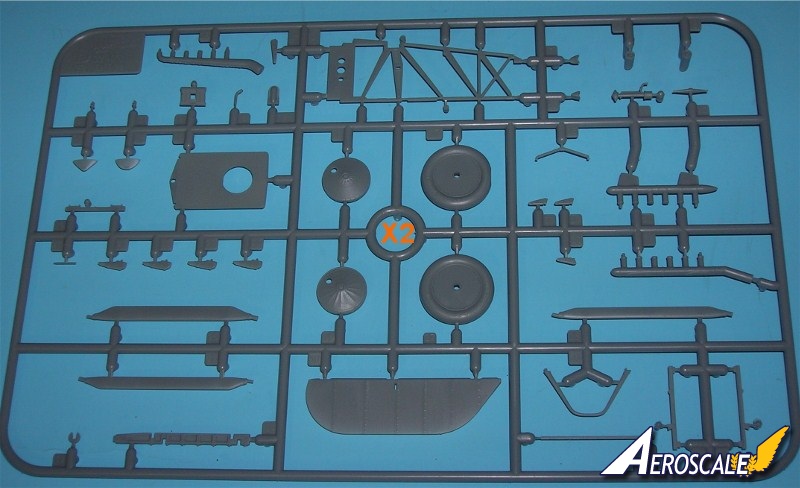
Step 14. Here we address the undercarriage / landing gear and wheels (A 19, 20 & 24, D 7 X 2, 17 X 2 or 27 X 2 ) and lower ailerons (B 7 & 8) and cable shrouds ( D 23 X 4). It is best to pin the ailerons for strength. The undersurface chin cowling comes in 2 pieces, the fore-section ( H 16 ) is added here.
Step 15. The we add the aft section of the undersurface chin cowling (H 26) Tailskid ( A 33 ) stabilizer bracings ( H 35 X 2), camera cover / door ( H 4) and wing tip skids ( D 31 X 2 ).
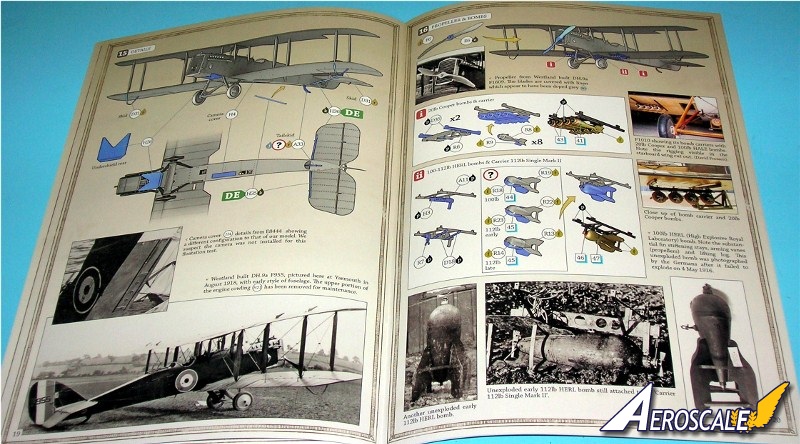
Step 16. This shows the Propeller (F 6 & E 6). general layout of bombs / munitions and added details.
Step 16i. Is the assembly and painting of the 20 lbs Cooper Bombs and carrier / racks.
Step 16ii. This assembles the larger 100 112 lbs Hale Bombs and carrier / racks.
Step 17. This assembly includes the Lewis machine gun(s) (R 20 & 21 optional single or dual set up and Scarff ring ( p 2 & 4, R 11).
Step 18. Next upper wing ailerons (B 1 & 2, D 23 X 4)and Vickers machine gun (H 10, P 3 & 6).
Step 19. The rigging diagram details the two types of rigging materials needed and their locations on the airframe by colour key.
Decals
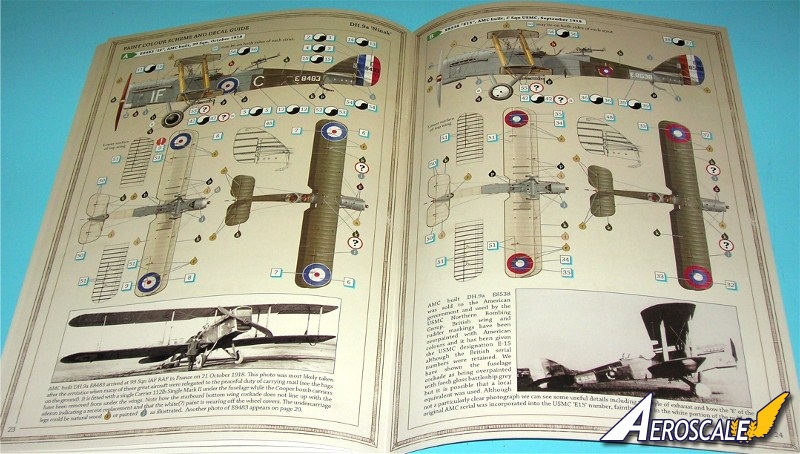
1. AMC (de Havilland) DH9a, E8483 1F, 99 Sqn, Oct 1918.
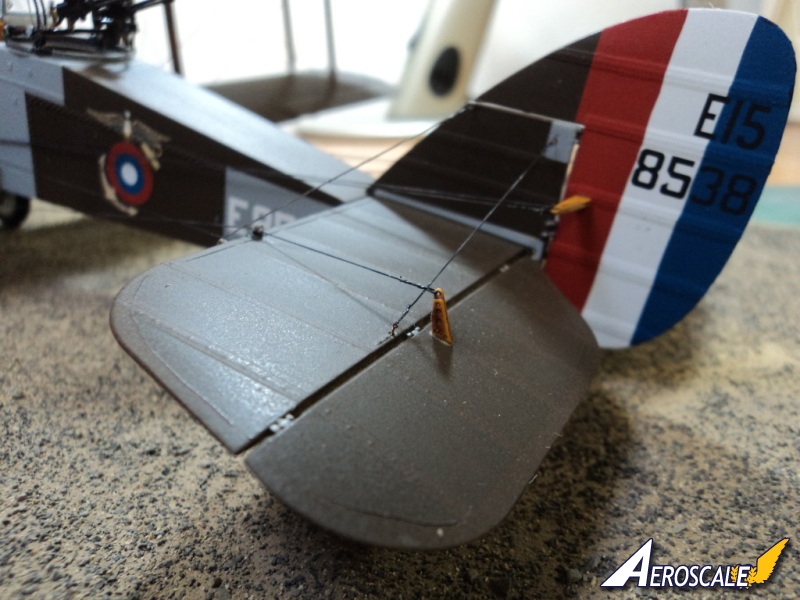
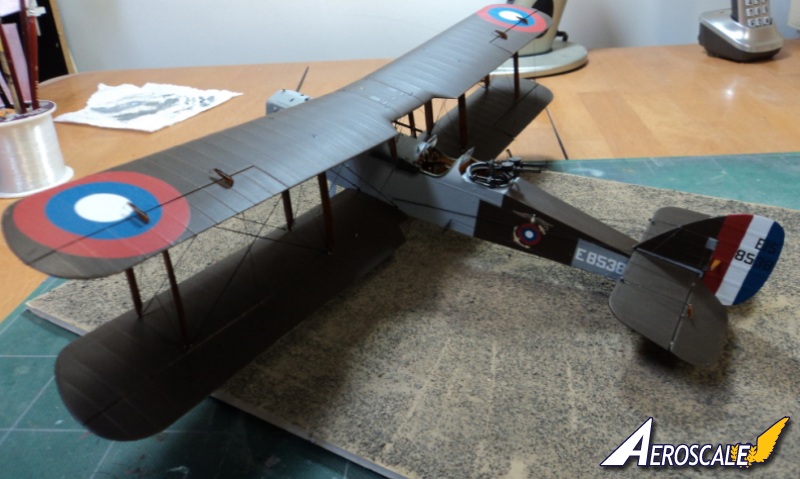
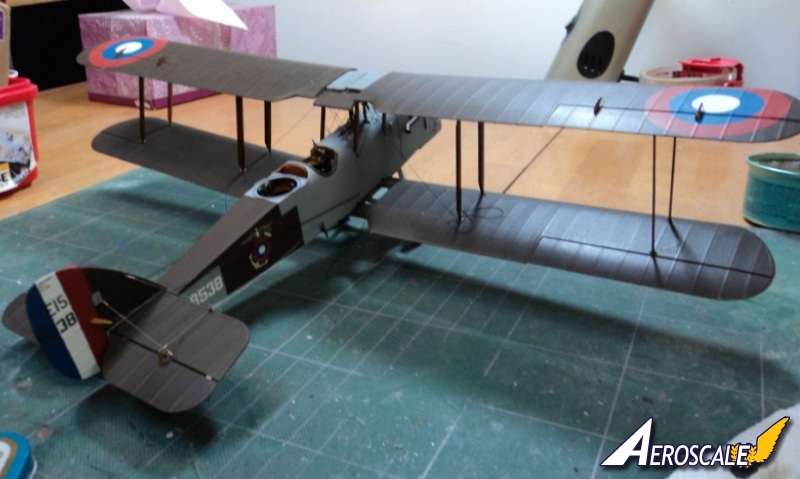
2. AMC (de Havilland) DH9a, E8538 E15, C Sqn USMC , Sept. 1918.
3. AMC (de Havilland) DH9a, E8553 N, 155 Sqn, Oct. 1918.
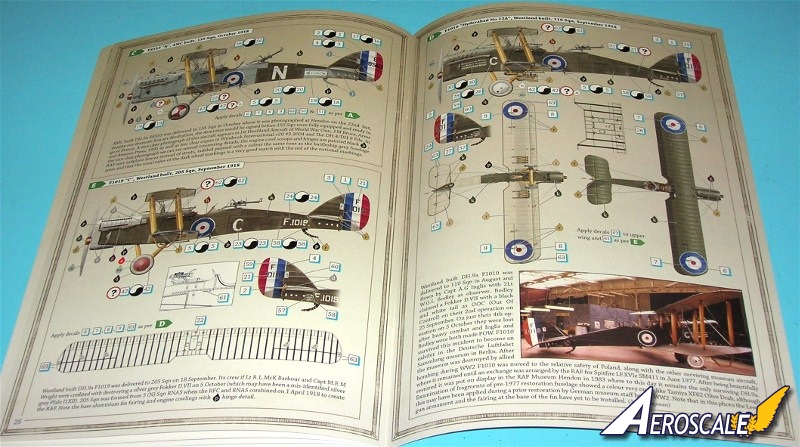
4. Westland (de Havilland) DH9a, F1010 Hyderabad No. 12A, 110 Sqn, Sept. 1918.
5. Westland (de Havilland) DH9a, F1019 C, 205 Sqn, Sept. 1918.
References
1.Handbook on the DH.9a Aeroplane, Air Ministry, 1924.
2.Schedule for DH.9a - Windsock International v20 #3 2004.
3.Windsock International v20 #4 2004.
4.Windsock Datafile 139, AMC DH.9a Ninak, John Alcorn 2010.
5.Windsock Datafile 141, AMC DH.9a Ninak, John Alcorn 2010.
6The DH.4/DH.9 File, Ray Sturtivant & Gordon Page, Air Britain 1999.
7.de Havilland DH.9a (RAF 1918-30), Profile Publications, Chaz Bower 1973.
8.The Vintage Aviator Ltd.
9.RAF Museum Hendon - 1914-18 Aviation Heritage Trust.
10.Colin Owers - Private Collections.
11. In the box review done by Aeroscale member Mgunns see;
https://aeroscale.kitmaker.net/review/5968] here. (Cut & paste)
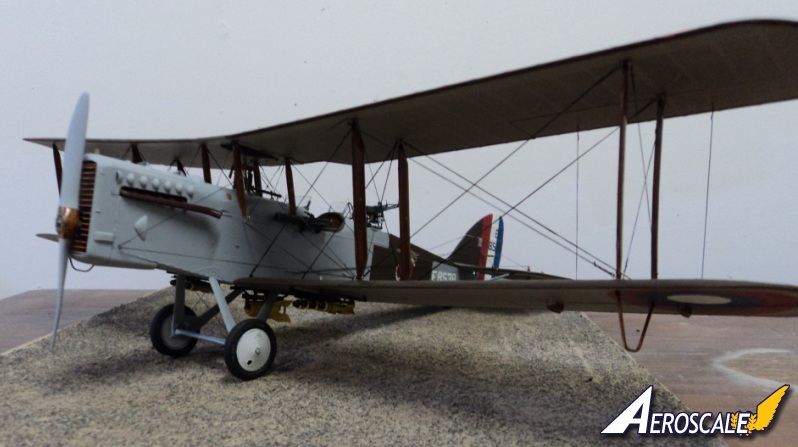
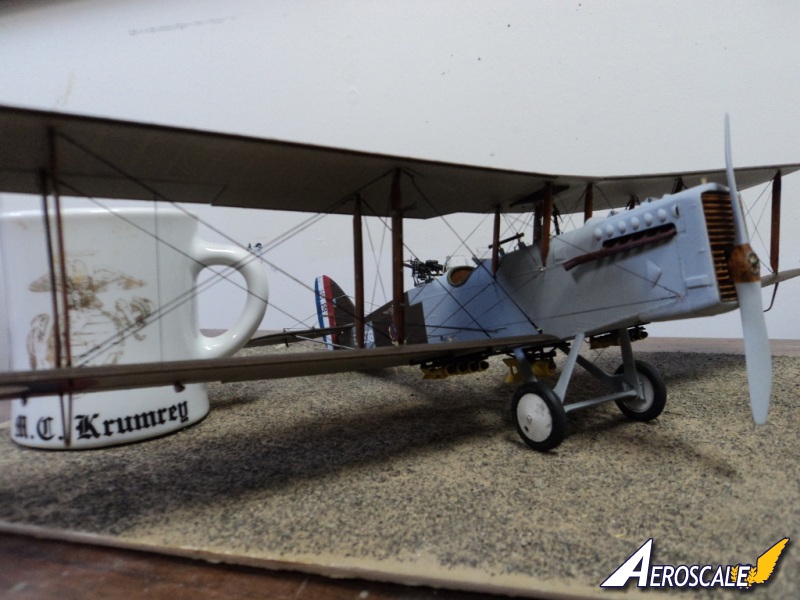
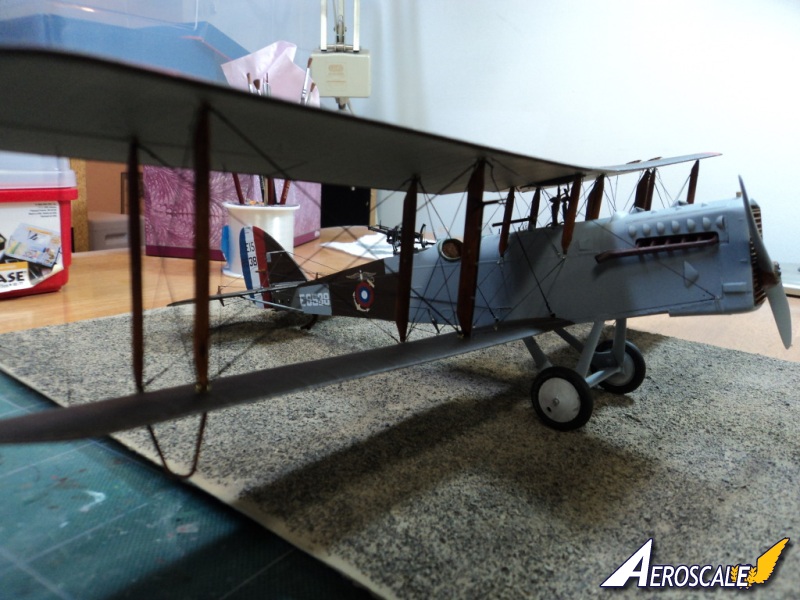
My thanks to Aeroscale member Mark Krumery (Mgunns) for the use of his build images here.
Please remember, when contacting retailers or manufacturers, to mention that you saw their products highlighted here - on AEROSCALE.
Highs: Great subject matter, Fine design at details. Clear instructions. Quality plastic. Details interior and engine.Lows: Minor typos for a couple of kit parts in the instructions.Verdict: If you are a fan of the genre and even if your not This kit presents a great opportunity for any modeler.
Our Thanks to Wingnut Wings! This item was provided by them for the purpose of having it reviewed on this KitMaker Network site. If you would like your kit, book, or product reviewed, please contact us.
About Stephen T. Lawson (JackFlash) FROM: COLORADO, UNITED STATES
I was building Off topic jet age kits at the age of 7. I remember building my first WWI kit way back in 1964-5 at the age of 8-9. Hundreds of 1/72 scale Revell and Airfix kits later my eyes started to change and I wanted to do more detail. With the advent of DML / Dragon and Eduard I sold off my ...
James you are right. I did go back an "fix" a couple of words about the same time you began writing your comments here. By the way a 96 is one of the highest ratings I have ever given. I look forward to seeing your review of the same kit here.


Comments