Described generically as an all-purpose reconnaissance biplane the FF 33E, was used for bombing and reconnaissance, with and without wireless. In general arrangement it is similar to the 29 and 39 types. While the first machine of this type still retained the tail float but later machines were found not to require this on because of the long main floats with which they were fitted. The radiator was mounted on the leading edge of the top plane. Generally speaking, the fuselage, wing bracing, wings and ailerons were designed to give good aerodynamic efficiency.
The most famous of this manufacturers 33e series was #841 HFT ( radio equipped ) airframe. assigned to the SMS Raider Wolf from 30 Nov.1916 to 24 February 1918. It is one of the very few German aircraft from this time era to have been in several oceans during its limited service career. The crew of the SMS Raider Wolf sacrificed more than man hours to keep her cub fit for duty. On the far side of the globe they served each other well enough to get home safe with a clean sweep after16 months at sea.
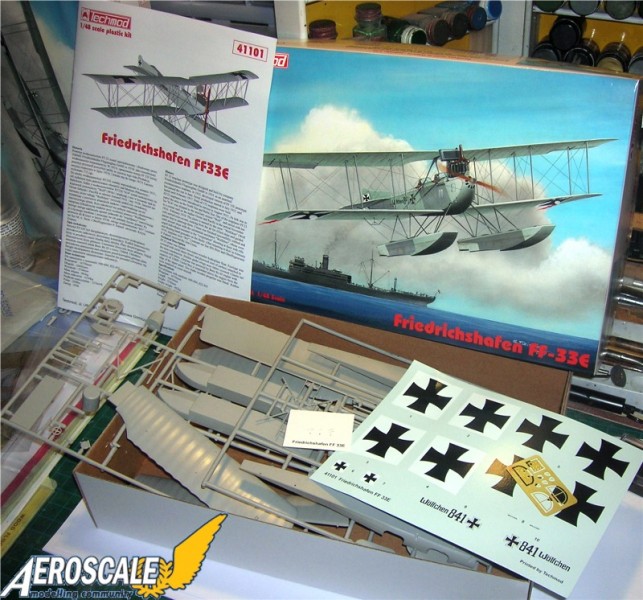
Kit History,
This kit was first mentioned back in 2006 and sprues seen in 2007 on the internet. Coming from the Polish cottage of Techmod it is a great first WWI aviation subject with multiple possibilities for post war subjects.
Box Contents,
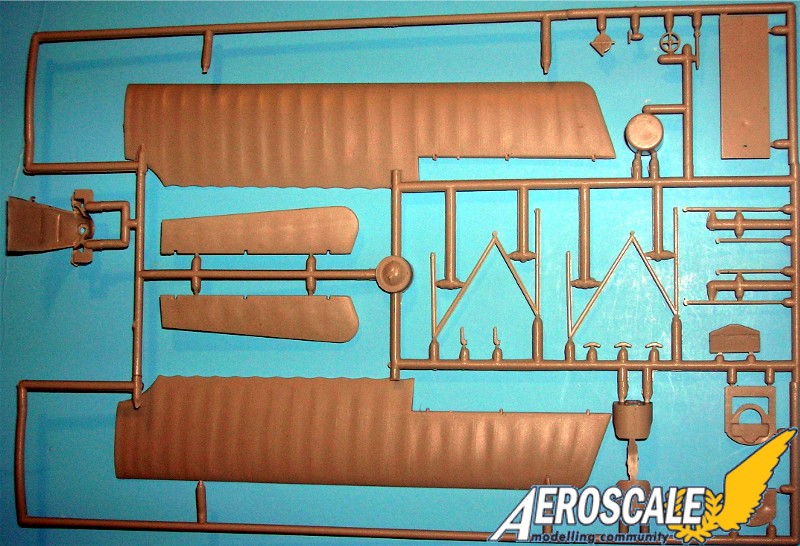
96 plastic parts
9 Photoetch parts
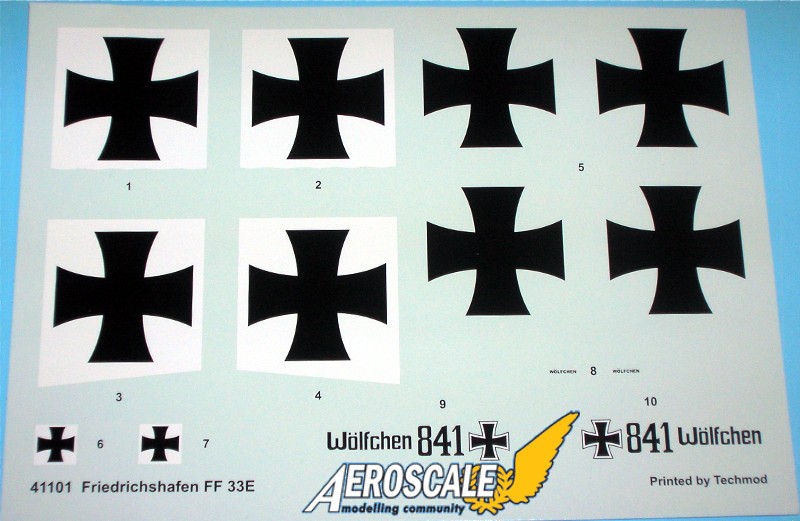
Decals for 1 scheme
8 page instruction booklet.
The build,
Predrill all holes for the rigging and also for brass pins to represent the unions for the wing attachment points. Corresponding holes for these unions in the fuselage must be drilled as well. I would like to add that a well stocked spares box is one of the secrets of enjoying a build.
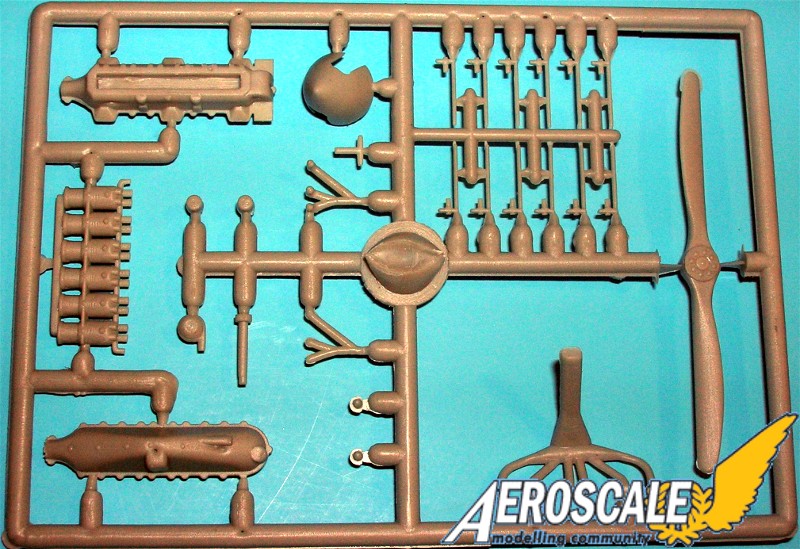
Steps 1 - 5.) Begins with the assembly of the Benz III inline six motor. On the basic motor ( PP D 1 - 4 ) water jackets ( PP D 3 ) covering the cylinders should be painted a blued gun metal color. The crank housing (PP D 1 . 2 & 4 ) would be a bare aluminum color. The overhead cam & rockers on the cylinder tops will be steel and aluminum tinged with a grey wash. The air induction pipes ( PP D 6,7 & 8 ) appear to be copper / aluminum based items. The twin magnetos and tower assembly will need to be scratchbuilt and will be aluminum with a black wash and fitted behind the rear cylinder. Later you will find that the engine cowlings dont really permit a view to the crankcase. Use fine wire to add small sections to each side of the cylinders and paint to represent spark plug wires. The Carburetors (PP D 12 X 2 ) seem slightly simplified.
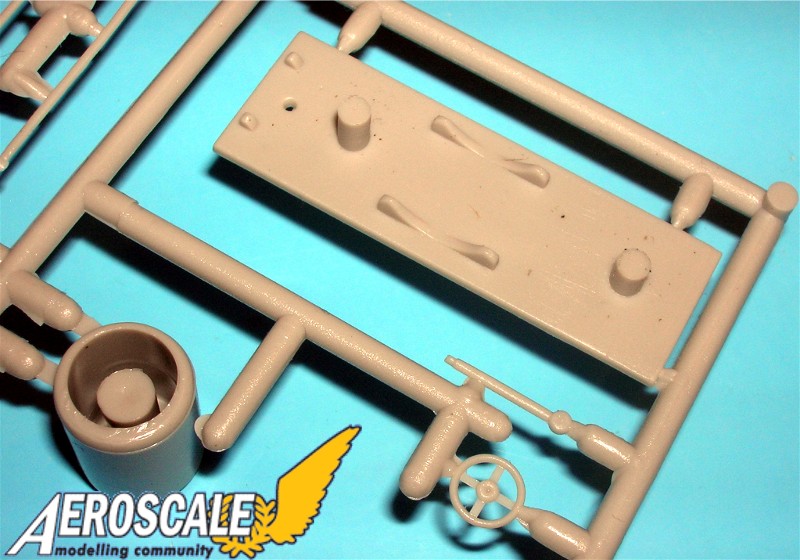
Step 6.) Also the wiring and fuel lines need to be manufactured from thin brass wire and solder these should appear to run forward into the engine compartment. Switch levers ( PE F 6 X 2 ) need to be added on the instrument panel (PE F 2 & G 1 ) are for the fuel and air delivery systems for the main and auxiliary fuel supplies. Also the starting magneto switch ( PE F 4 ) on the left side of the panel. You could add a solder air hose to a scratchbuilt hand pump assembly on the right side of the front and rear cockpits.
Step 7.) This is the Radio / telefunken facade ( PE F 3 & G 2 ) as it is added to the rear compartment bulkhead / former.
Step 8.) The production type control column ( PP B 17 ) has a steering wheel (PP B 19 ) and will have one aileron control cable running parallel to the column on either side down through the flooring (PP B 16.)
Step 9.) The cockpit flooring ( PP B 16 ) is next and should be a varnished wood colour. Though not much if it is seen when the fuselage halves ( PP C 1 & 2 ) are together. Also the main fuel tank (PP B 18 ) is between the seats( PP B 9 & 10 ) There needs to be lap belts added to the seats (PP B 9 & 10.) I went with Eduard s pre-painted aftermarket items. All basic cockpit skeletal structures should be painted to look like they are varnished wood or painted metal. Add a scratchbuilt rudder bar ahead of the control column (PP B 17 ). Note the control column assembly is mis-marked as step 7 here. Check your references.
Step 10.) Is the application of the instrument panel facade (step 7 ) to the fuselage bulkhead / former (PP B 12 ). This represents station B from Ian R. Stairs drawings in the Datafile.
Step 11.) Is the application of the radio / telefunken to the rear cockpit fuselage upper deck bulkhead / former (PP B 11 .) This is a portion of the station ahead of C from Ian R. Stairs drawings in the Datafile.
Step 12.) Is a general arrangement of the previous assemblies to give you the idea of their ultimate locations for the HFT type aircraft.
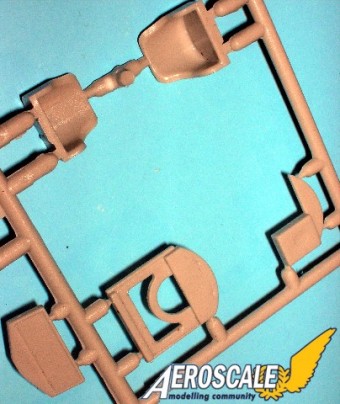
Step 13 & 14 ) Concerning the pilots cockpit I erased the molded item and added a more detailed throttle quadrant to the pilots left side, interior cable bracing wires and map holder on the pilots right side. Now concerning the observer cockpit, it is barren of any equipment except the radio facade. To be a more detailed build you will need to manufacture a scratchbuilt bomb storage rack, stowage bins and camera. I have some resin items knocked up from previous projects. From the Datafile it is mentioned there were 2 types of the FF33e that were labeled either BFT or HFT.
1. On the BFT the antenna reel was always under the front cockpit (left side) it had the radio and a bombing rack set up. so the observer sat in the front.
2. On the HFT the antenna reel was always on the rear cockpit (left side.) Wölfchen was an HFT type. This is a radio equipped machine with no internal bomb stowage. So the observer sat in the rear. The radio transmitter was removed from FF 33e #814 "Wolf Cub" as it would not function and it saved fuel to do so. It was reinstalled when the "Wolf" and its "Cub" returned home. This was in the end of cruise scheme provided by Techmod decals.
Then there are the types without any radio equipment that have no suffix at all.
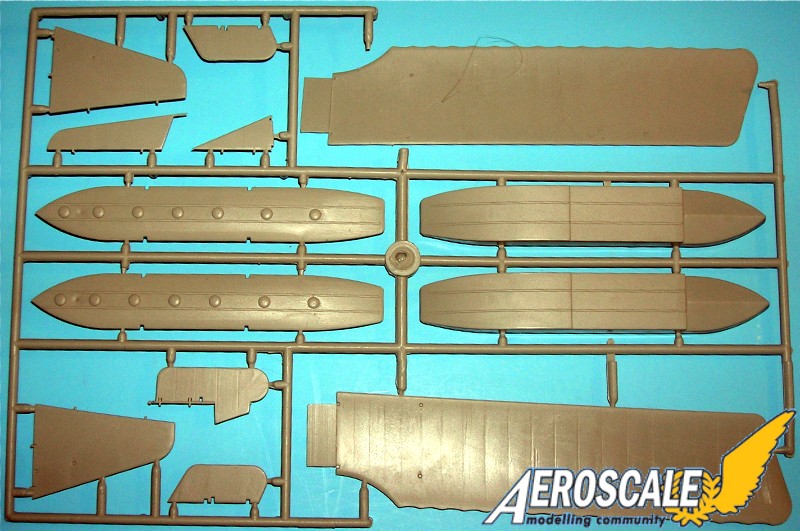
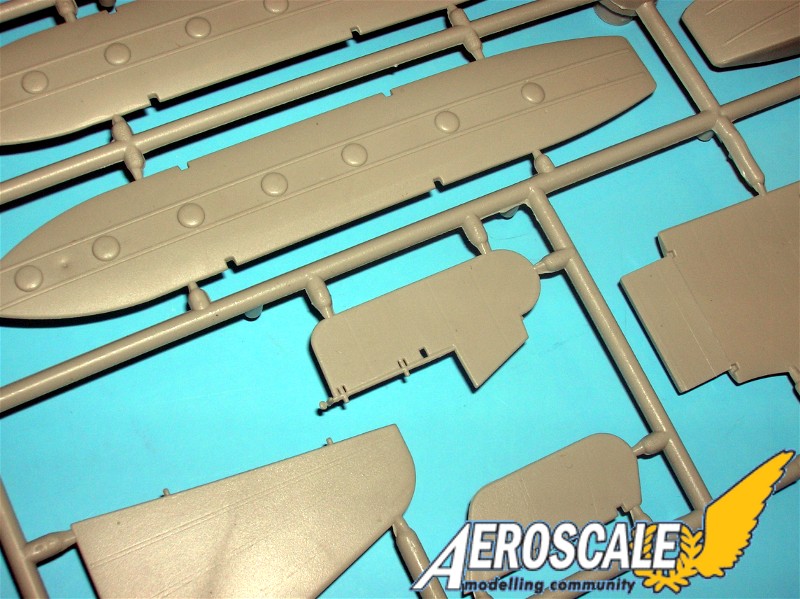
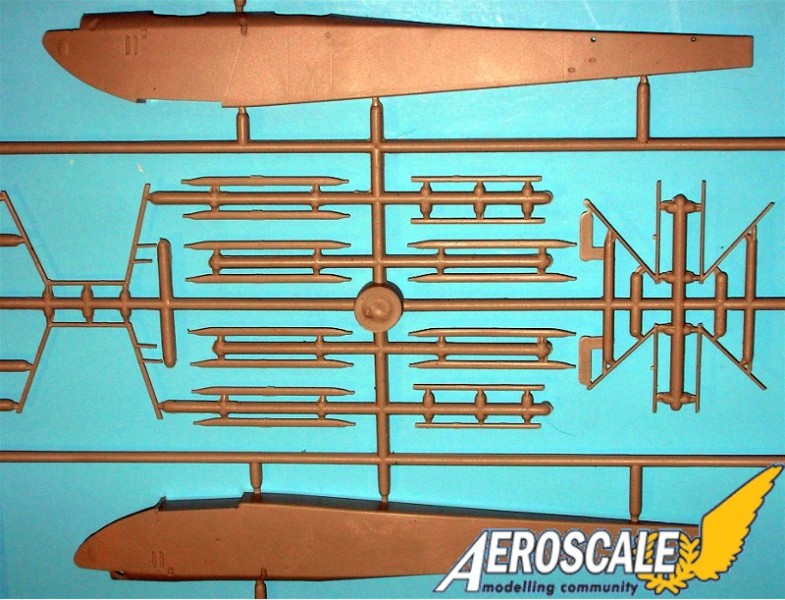
Step 15.) Now assemble the tail surfaces ( PP A 3 - 9 ) I will finish / paint the upper surface of the lower wings ( PP A 1 & 2 ) and the under surface of the upper wings (PP B 1 & 3 ). At this juncture I assembly a jig from childrens Lego type building blocks. Keep the leading edge of the lower wings at a slight stagger back to the fuselage side. The tail control surfaces should sit in a complemented attitude for the steering wheel column in step 8 and a scratch built rudder bar. While the model is in the jig of building blocks insure the lower wing tips ( PP A 1 & 2 ) are raised 4 degrees from the horizontal plane. The assembled Benz Bz.III motor from step 5, sits in the shelf formed by the united fuselage halves. And the engine cowling ( PP B 5) fits over this nose assembly.
Step 16.) The wind screens (PP E 1 X 2 ) are clear plastic and can have the frames (PE F 1 X 2 ) attached. This is a task that needs care to keep them from being spoiled.
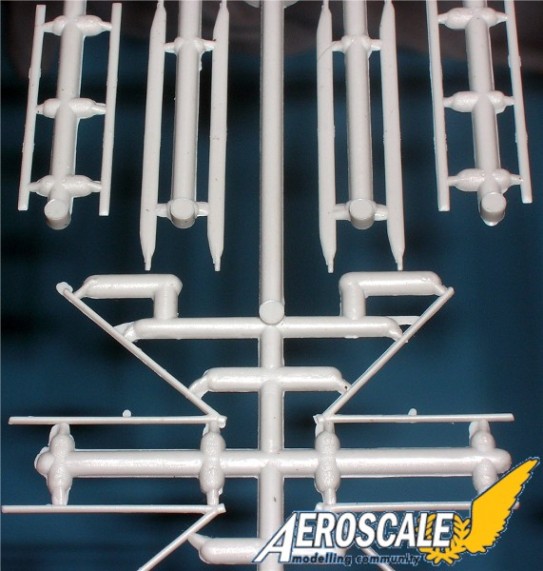
Step 17.) Either way you can still use the kit provided wing trestle ( PP C 3 & 4 ) or scratch build your own. Then move on to the interplane struts ( PP C 5 X 12.) I would either add brass pins in each end of the struts or replace them with entirely brass items. You can set the top wings ( PP B 1 & 3 ) in place now. Let it set up in the jig until rigid. The ailerons ( PP B 3 & 4 ) are next. Set them to the desired angle to mimic the steering wheel in step 8. Dont add the competed windshields yet.
Step 18 .) If you use the kit supplied under carriage parts ( PP A 6 & 7 X 2, B 6 X 12.) treat them the same way as the plastic interplane struts ( PP C 5 X 12 ) inserting the ends into the pre drilled holes. Now finish with the interplane rigging.
Step 19.) I scratch build support struts (PP B 14 X 2 & 15 X 2) from extruded brass rod.
Step 20.) While the radiator ( PP B 13 ) screen is good, I like to use Detail Master's mesh screen and scratch build a radiator facade on the basic kit item. Using the basic radiator ( PP B 13 ) I remove all details. Then glue small strips of screen on front and back faces. Over this I add small shutter details from strip plastic stock. Also add a filler spout from sprue at the appropriate location. Next the exhaust stack ( PP D 5 ) and the propeller ( PP D 13 ) is in the Check your references.
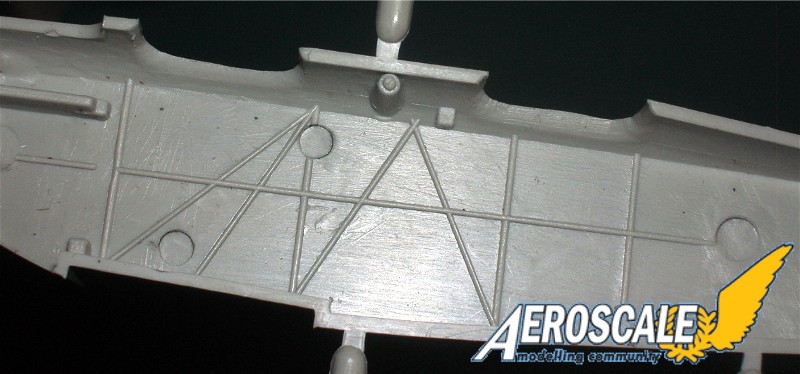
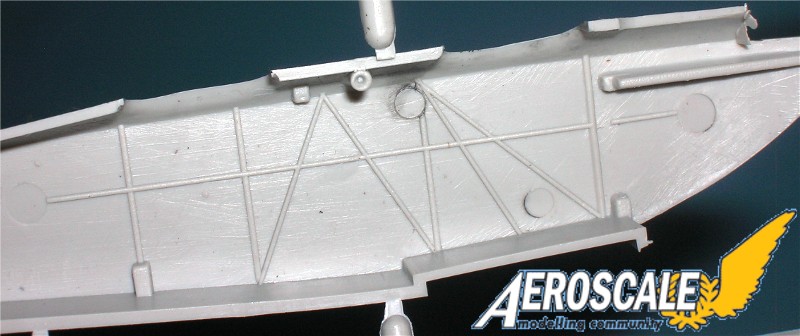
Rigging diagrams and water pipe locations;
Note rudder cables attach to the rudder control assembly and go back along the interior sides of the fuselage to their exit at the rear. The elevator cables are attached to the control column under the flooring and pass back through the fuselage to their exit ports in the fuselage sides at the rear.
Camouflage,
As these were large seaplanes the overall factory scheme seemed to be a shade of light sea blue (that may have been tinged with a sea foam green.) The scheme of this machine was completely changed on several occasions due to repairs and the over all grey appearance is a general description.
Decals,
Upon the return leg of the cruise she was repainted in her iron crosses and the nickname Wölfchen emblazoned across the fuselage. They arrived back in Kiel on 24 February 1918.
References,
Eisernes Kreuz und Balkenkreuz by Nowarra, Hoffmann Pub 1968.
Pictorial History of the German Army Air Service by A.Imrie, Allan Pub. 1971.
The German Army Air Service in WWI by Rimell, Arms & Armour Press, Vintage Warbirds #2, 1985.
World War One in the Air by R. Rimell, Arms & Armour Press, Warbirds #9, 1988.
Windsock Datafile #73 FF 33e. by P.M. Grosz, 1999.
Variations of the FF types;
http://en.wikipedia.org/wiki/Friedrichshafen_FF.33
Comments,
Sleek and sharp this aircraft has much in common with later high altitude reconn aircraft. They always seem to look better in flight than just static on the ground. If you are lucky enough to get your hands on one do yourself a favor and build it. Techmod has gone to the heights with their first WWI kit. The other Top Gun manufacturers of this genre will have to play catch up to beat this little bird.
When contacting distributors please mention that you saw this review at Aeroscale.
SUMMARY
Highs: Fine details and great subject matter. Informative instructions are easy to read. Great potential for variations. Lows: single choice of decals though its a good one. No beaching dolly. One faux paux in naming a build step. Injector pin marks in an unfortunate location.Verdict: Most impressive kit. This kit brings the builder a chance to really have a bit of fun in its assembly and a unique subject when completed.
About Stephen T. Lawson (JackFlash) FROM: COLORADO, UNITED STATES
I was building Off topic jet age kits at the age of 7. I remember building my first WWI kit way back in 1964-5 at the age of 8-9. Hundreds of 1/72 scale Revell and Airfix kits later my eyes started to change and I wanted to do more detail. With the advent of DML / Dragon and Eduard I sold off my ...
Wow Stephen - That's quite the kit! Have you done any dry fitting to see how well it's put together yet? Looking forward to see how it turns out! I really like the way the countries in the east are filling the void when it comes to kits!
This looks to be a nice kit in the box. Other than those ejecter pin holes and nubs on the interior!
One of these may find its way to me someday......
RAGIII


Comments