There has been so much written about the 109 series of aircraft I highly doubt I could write anything that isnt already known, or hasnt been written about before so I will dispense with the history lesson and talk about the model. I have built some of UMs offerings of military vehicles, but this is a first for me in regards to an aircraft kit.
the kit
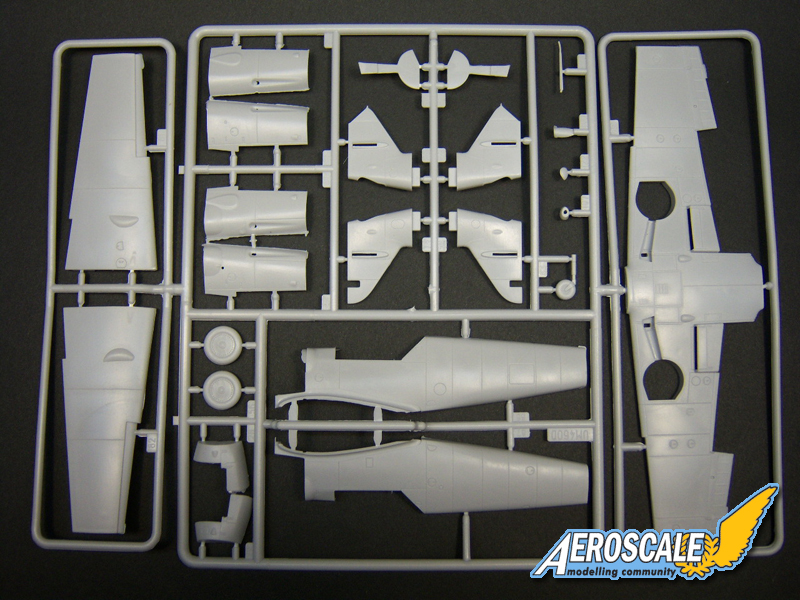
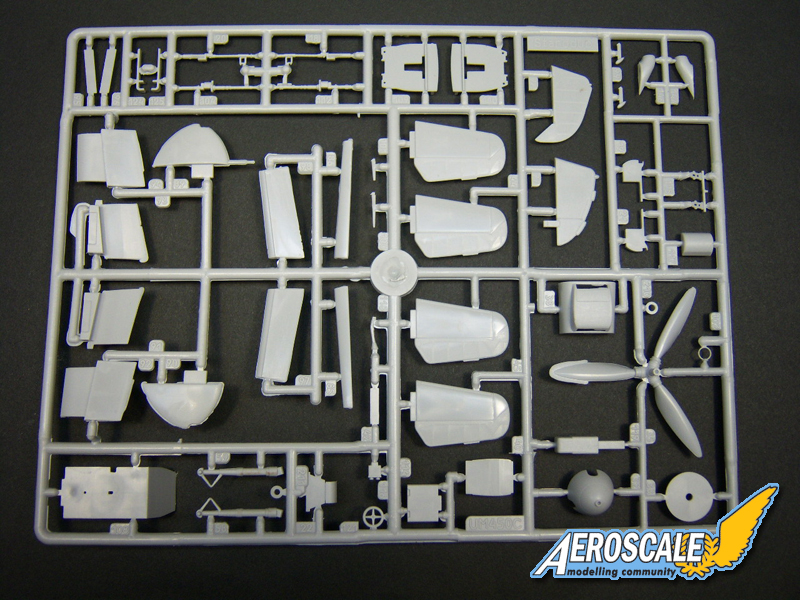
On first glance the kit looks a little rough, but no more than others I have laid eyes on. There are traces of flash on about 90% of the sprues, but it is not extreme and should clean up easily enough with a few passes of a sanding stick, or the back edge of a model knife. While most kits begin assembly with the cockpit or office as it is sometimes called, this one begins with the healthily detailed engine, with the cockpit following at step seven. The entire build takes place over 46... yes, forty six steps. Unused parts are shaded out on the instruction sheet. There is a brief history of the place written in English, German, and Ukrainian.
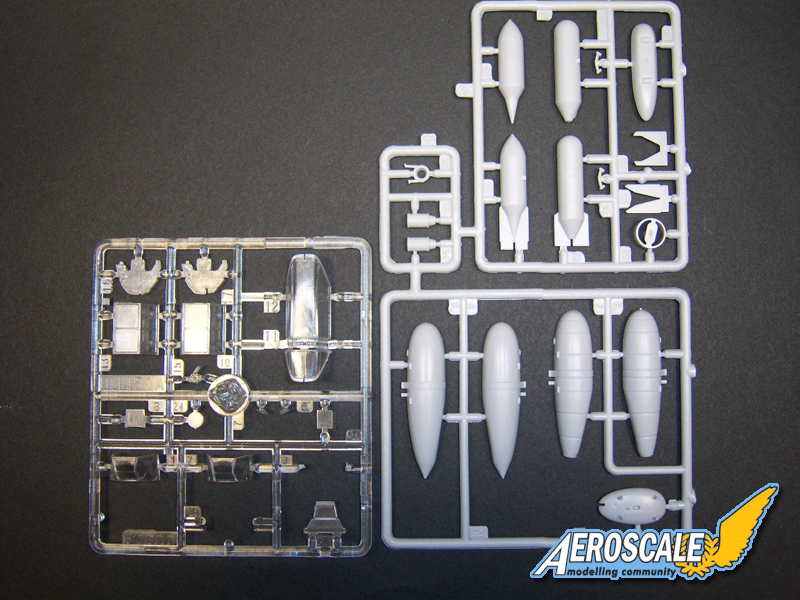
Parts are molded in a light gray styrene on eleven sprues that feels fairly soft (I was able to scratch it with my finger nail) Panel lines are recessed and are consistent over the entire model. Wheel well detail is molded into the bottom of upper wing pieces. A portion of the cockpit side-wall detail is molded into the fuselage halves and the result is a couple of small sink holes on the side of the fuselage exterior, but should also fill easily enough.
Separate slats and flaps are provided as well as two different tails and their corresponding horizontal stabilizers. The tail attaches at a natural panel line so there should be no seam to dress. A nice touch. I believe the choices allow for an early and late variant, but I cant be 100% sure on this. There are separate engine cowlings that can be posed closed or opened to show off the highly detailed engine.
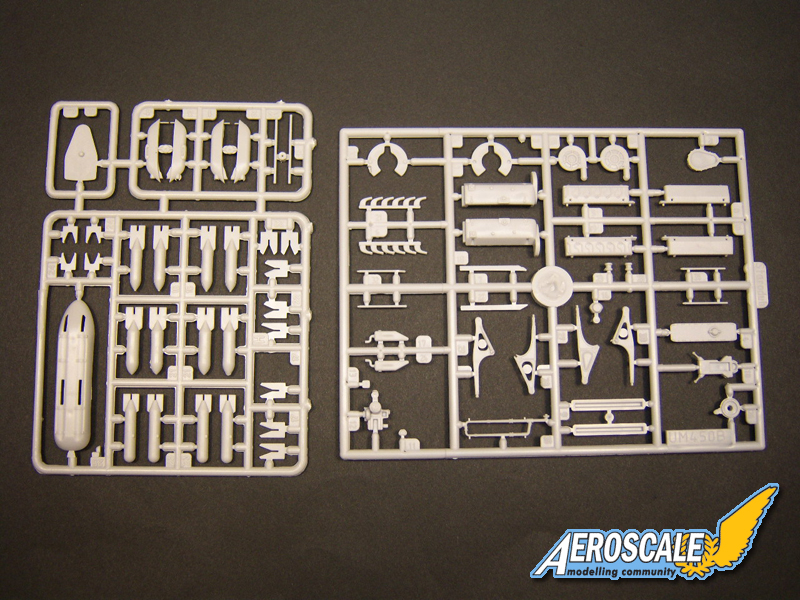
There is a wide selection of ordinance to hang under this plane. You are offered a choice of using a single SD250 semi armor piercing bomb, a single AB250 sub munitions dispenser, a multiple SC50 general purpose bomb dispenser with four bombs mounted, or the same multiple dispenser with four AB50 bombs. Decals are provided for each of the bombs mentioned. You are also given the option to use either of the two different centerline fuel tanks instead. But wait, theres more. You can also install the under-wing cannons if you are so inclined. Bottom line is that the builder has a few options available to them.
Sounds promising so far eh? Well, there are some hiccups to deal with. The wingtips are separate pieces which I cant understand why when just about everybody else these days are molding them as an integral part of the wing. The multi-piece nose assembly looks to be problematic as there is a lot going on here, and to get the fit right will require an extra set of hands or two. The biggest disappointment for me was the canopy and other clear parts. They are fogged/frosted (take your pick) and will require some work to bring it them up to standard. However, replacement ones can be found at Squadron. I also wish there was a little more info in the instructions on the tail choices, and weapons load out. Just a personal nit-pick. I had to search the net to find the info on the bombs
Decals & painting
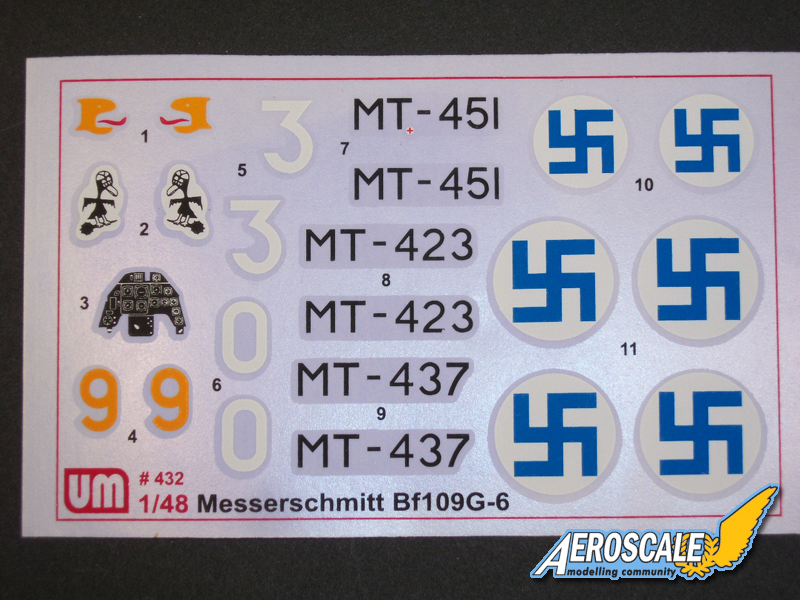
The decals look nice but feature a pretty fair amount of decal film around the edges which sends me an alarm when I see this. However, they are opaque and well registered. There are only two marking options provided:
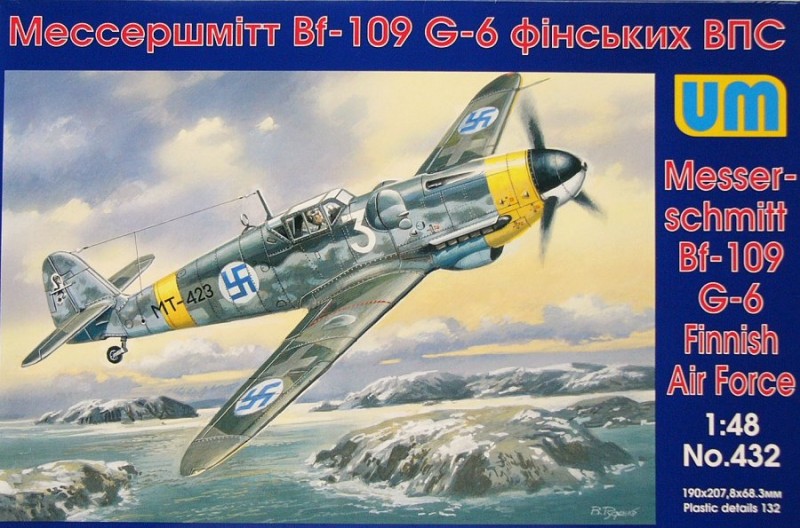
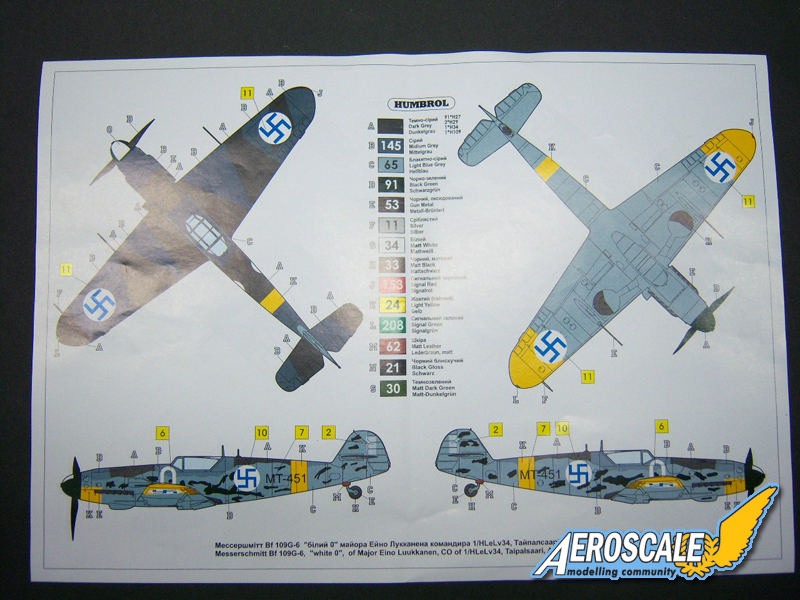
White 0 of Major Eino Luukkanen, CO of 1/HLeLv34, Taipalsaari, August 44
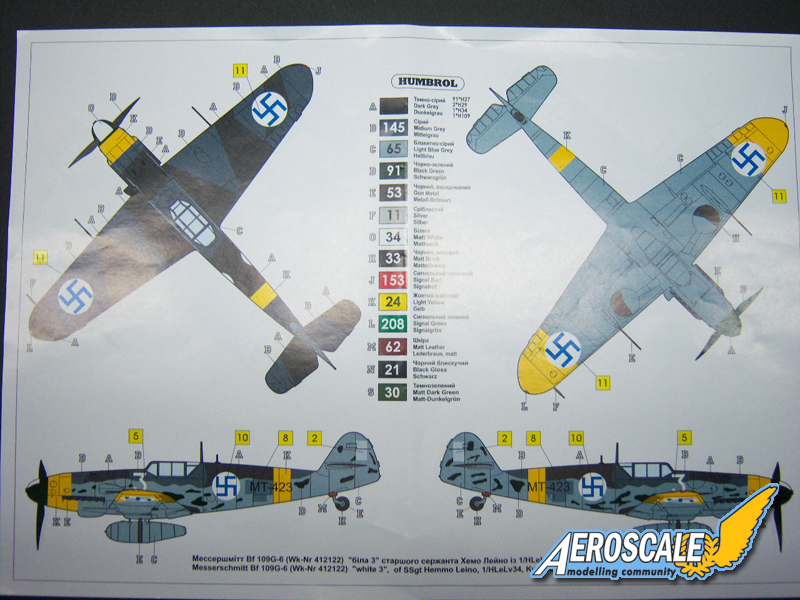
White 3 of SSgt Hemmo Leino, 1/HLeLv34, Kymi, June 44
Paint call outs are for Humbrol colors and are featured on a color sheet.
Conclusion
Overall this isnt a bad looking kit. It features a fair amount of flash, a highly detailed engine, a lot of parts, decent looking decals, a plethora of weapons to choose from, a color painting guide, and easy to follow instructions. But that being said, there are a couple of minor glitches such as the clear parts, and lack of info on the tail choices but if one can handle/address these, they could be rewarded with a decent looking representation of this fine fighter.
Please remember, when contacting retailers or manufacturers, to mention that you saw their products highlighted here - on AEROSCALE.
SUMMARY
Highs: Highly detailed engine. Finely recessed panel lines. Lots of weapons options. Choice of tails and horizontal stabs.Lows: Separate wing tips. Clear pieces fogged/frosty looking. Fair amount of flashVerdict: Not a bad looking kit. Will take some skills to clean up, but should build into a fair representation of this famous fighter
Our Thanks to Scale-Model-Kits.com! This item was provided by them for the purpose of having it reviewed on this KitMaker Network site. If you would like your kit, book, or product reviewed, please contact us.
Nice review.
Although I don't have all the references I'd like at hand, I can still answer to some of the questions raised in the text based on what I do have.
You mentioned there are markings for the bombs in the kit, I presume there is a similar (or the same) decal sheet also having stencils, as on the earlier German boxing of the kit? I'm under the impression that the planes in Finnish service rather quickly received Finnish language stenciling, so one might want to check their references.
I wonder why there is only decal options mentioned in the instructions, as the decal sheet also includes markings for MT-437. The lynx's head and yellow number nine should go the tail, like this. (< that's my somewhat recently finished 1:72 kit of the same particular aircraft)
Continuing with the decals, the national markings look fine, but should have the backgrounds painted with the so called "DN color" (~RLM 65) by the timeframe given in the instructions. (the order for the dimming was given January 1944)
I'm not sure whether there was a distinct "early" or "late" type of the G6, but yes, some of the later production aircraft received the wooden, taller wooden tail & rudder (the same as later 109 variants, like G10 and K4), hence their inclusion in the kit.
The painting and marking guide has the planes' tail configuration correct, so choose your parts according to that. Also, choose your canopy following the markings guide. (note that MT-451 shows the correct canopy in the sideview drawings, the Erla type)
The wing cannon pods were originally fitted to MT-451, as correctly shown in the markings guide. (The pods were removed from many planes during the war to increase maneuverability. IIRC, they were removed from MT-451 too at some in the summer of 1944)
Every G6 came with the 300 litre fuel tank mounts, but they were usually removed from aircraft not doing missions requiring longer flying times (like night fighting for example).
Some Finnish G6s were also fitted with the bomb racks, but unfortunately I don't have references about them at the moment.
I hope this helps.
Edit: let's try again, my whole post didn't show for some reason.
Yes, it worked now.
Eetu, perhaps this one should have gone to you. Thanks for the assist on the tail info. I went thru my meager references, but couldn't glean that much info on the tail hence my disclaimer. The kit looks like it will build into a nice model provided all that engine detail fits etc. Hopefully I can find out first hand here shortly. My "Honey Do" list is getting shorter as the days go by. Thanks again for your input. "Q"
Thanks for the review, i've seen these around and wondered what they're like- wasn't sure if they were some ancient re-box of another product or something totally new. And they are priced quite well...and the only real competion in the scale is still the Hasegawa kit and the old Revell/Monogram .
My first thought on the seperate wing tips was maybe it's a half hearted attempt at allowing for earlier versions (with square wing tips added). But of course it can't be...they had totally different flaps as well, so the lower wing could not be used just by adding square tips! So it does seem totally pointless.
If i saw these sprues without seeing the box first, i'd say i was looking at a Roden kit...
Andrew
This one seems like a nice alternative to expensive aftemarket parts if you want to build a 109 showing the engine. I'll snatch one as soon as I can.
One possible reason for molding the wingtips separately might be tool size. I'm not too familiar with UM, but I get the feeling they've been concentrating on 1:72 before. What's better if you want to go to 1:48 than a 109?
Tony
Interesting review. UM has released quite a lot of these Bf 109 versions. I am considering to acquire one of these to see for myself. I have a couple of extra cockpits, so it should not be a problem. The engine and weapons lay our is a plus.


Comments