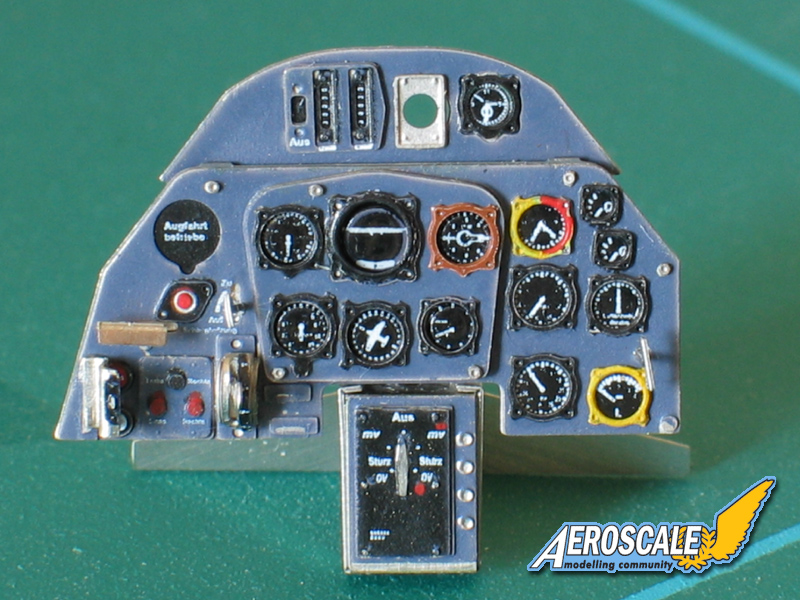
One of the chief centres of attention with the big Hasegawa/Revell Bf 109K is bound to be the cockpit - and specifically the instrument panel. The part supplied in the kit is very nicely moulded, matching the layout of the original well, and will certainly repay careful painting to bring it to life. However, 1/32 scale is an open invitation for, shall we call it, "extreme detail" and Eduard have definitely taken things to the next level with the release of a superbly detailed pre-painted etched panel, which can also serve as a display-model in its own right.
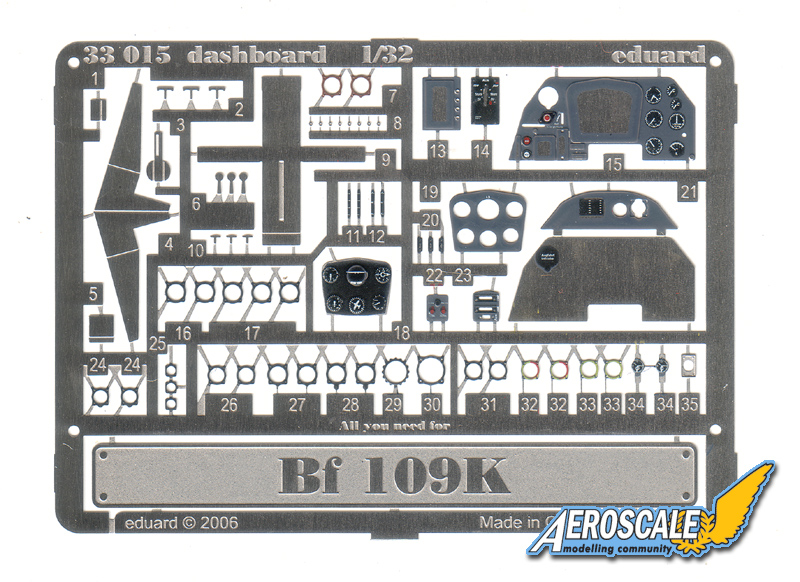
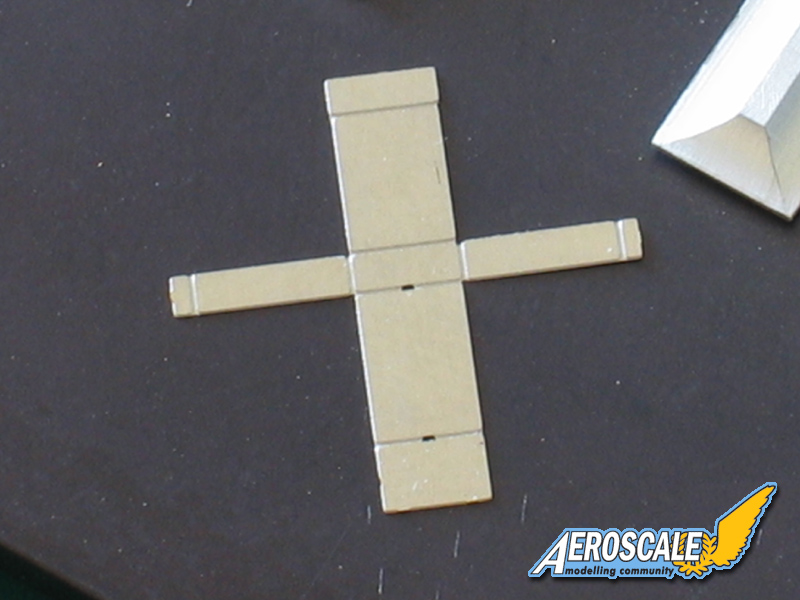
Set #33015 arrives sealed in a standard Eduard cellophane envelope with a single fret of steel parts backed by a piece of white card and a set of instructions. The fret contains 66 parts, including a nameplate and stand. 60 parts for a finished panel approximately the size of your thumbnail!? That sounds pretty daunting, but the number actually includes a few spares in case of accidents, so things aren't quite as complex as they appear at first. Nevertheless, every bezel, switch and even screw-head is a separate part - and a couple of tiny sub-assemblies must be built-up of multiple pieces to achieve the correct 3-D look.
The kit is accompanied by a clearly illustrated set of instructions which break the assembly down into manageable chunks. So long as you take your time and work steadily, the construction isn't actually complex - the difficulty comes with the extremely small size of some of the parts. I found working with a magnifier absolutely essential and I used varnish (as against cyano-acrylate) for a lot of the assembly, since this allows some repositioning. Working with a small brush, I tacked each bezel lightly in place with a small amount of varnish before fixing it in place with a larger drop applied within the bezel which also served to "glaze" it. I only used gel-type cyano on a couple of occasions (to fix the stand and some tiny brackets that have minimal contact-areas).
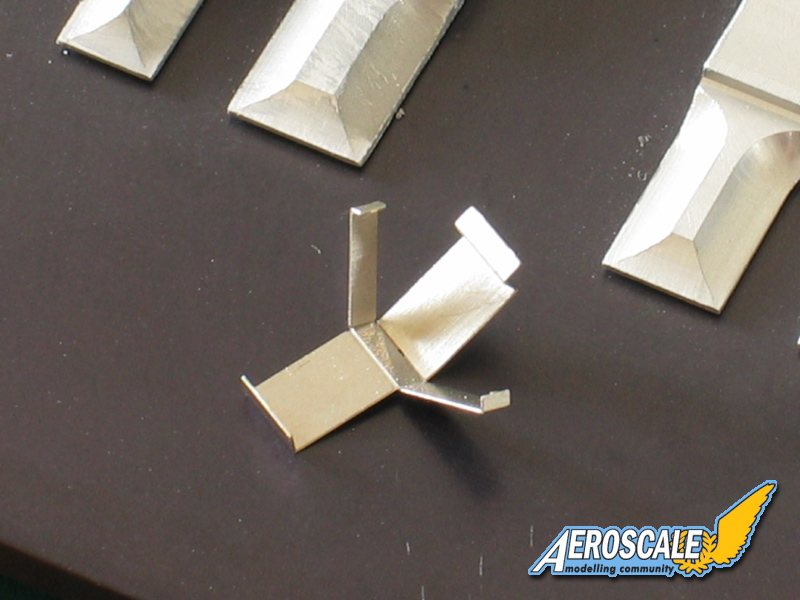
In terms of accuracy, the layout of Eduard's panel matches photos of the original almost exactly - the only giveaways are the two small tabs visible where the main panel piece is folded concertina-fashion. In retrospect, these could easily be removed to give a better appearance.
Eduard's pre-painting is excellent as usual. The detail on the instrument faces is quite phenomenal and there's even some text that's far too small to read with the naked eye (mine at least!). However, I wasn't convinced by the yellow used for some of the bezels - it looks too green, probably as a result of the thin paint applied directly over bare metal - so I repainted them with Humbrol enamel.
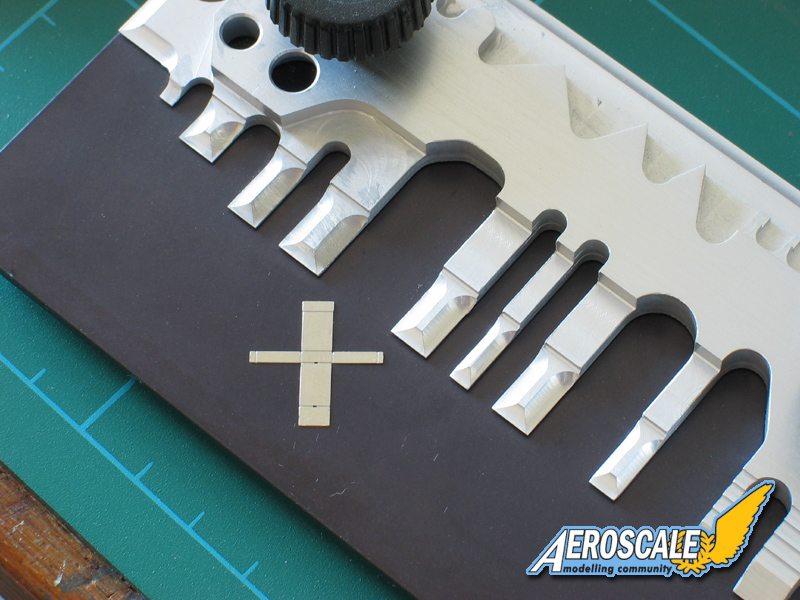
I followed the instructions sequence and didn't hit any snags; building the panel represented an evening's work. Along with the aforementioned magnifier, I used a folding tool, plus a super-fine Vallorbe file. These are available from
Eternal Tools and I can't recommend them too highly for removing small burrs etc. The cut is so fine they almost polish parts. They are a relatively expensive investment but, like all the best tools, should last a lifetime's modelling work.
The finished panel is very delicate even on its display stand and I'd be tempted to give it a light over-spray with matt varnish to further fix everything in place, before "re-glazing" the instruments with gloss varnish. Eduard's assembly sequence is very much aimed at building the panel as a display-model; if I was building it into the Hasegawa/Revell kit, I'd definitely recommend test-fitting and adjusting the basic panel without any bezels, because it'll be impossible to make changes later without causing a lot of damage.
Conclusion
I thoroughly enjoyed building the panel. It required some concentrated work, but was very satisfying to see taking shape. Taking an evening to build it seemed just about right and it made a nice break from normal modelling tasks. It won't appeal to everyone - beginners will certainly struggle and if you're clumsy or impatient this is the kind of job that could seem sent to torment you - but modellers experienced working with small etched parts should have few problems. It'll make an eye-popping addition to the Bf 109K cockpit or a stand-alone ornament. Recommended.


Comments