History
In summer 1944, the decision was made to derive a night fighter version - the Ar 234 B-2/N - from the already existing jet-powered bomber Ar 234 B-2. The intention of this solution under the code word "Nachtigall" ("Nightingale") was to convert 30 aircraft into night fighter versions in November and December 1944. After removal of all equipment related to release of bombs, a Siemens Fug 218 "Neptun" radar with antennae fixed at the nose was installed, along with the FuG 120 "Bernhardiner", a Fug 350 "Naxos", a Fug 16ZY with flagpole antenna under the nose and a FuBI 2 instrument landing system. The semi-recessed space at the bottom part of the fuselage which had before been designed to carry one large bomb was fitted with a modified "Magirus" bomb and two forward-fixed MG 151/20 cannons. Delays in production made that the idea of fitting the nose with a two-seater cabin was dropped in favour of a backward-facing work station for the radar operator, fitted into the very small space behind the second fuel tank which had previously been scheduled to house a camera for the reconnaissance version.
By 10 December 1944, the first completed night fighter aircraft took off to its first flight which lasted 25 minutes. By 12 December, an experimental night fighter unit was set up: Sonderkommando "Bisping" was to test the first converted Ar 234 B-2/N. Hauptmann Josef Bisping and his radar operator Hauptmann Albert Vogl had achieved a couple of unsuccessful flights when they crashed to the ground while taking off in 13 February 1945. The evaluation process was continued by Hauptmann Bonow and he came to the conclusion that the pursuit of fast piston-engined fighters and high-speed bombers on high altitudes (such as the Mosquito) was not going to prove effective because the full view canopy caused reflection phenomena which dazzled the pilots. Furthemore, they would have been put in danger if during battle, debris of enemy aircraft would have hit their aircraft. Also, the antennae set on the nose reduced the maximum speed and the comparatively low endurance was another problem.
Introduction
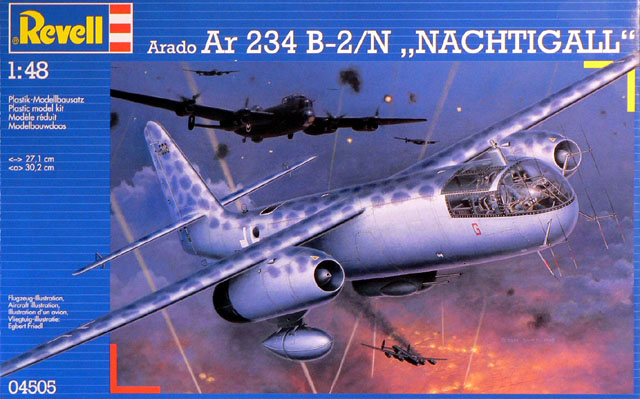
First let me say that this Revell kit is a reboxing of Hasegawa's Ar B234 B-2/N kit released a couple of years ago (kit number JT085). It was the third version in a serie of new Ar 234 kits in 1/48 scale by the two cooperating manufacturers. The first one was the B-2 "Blitz Bomber" version (Hasegawa JT083) and the second one the C-3 four engined version (Revell 04501). This "new" revell kit is exactely the same as Hasegawa's "Nachtigall", except for the packaging, instructions and decal sheet of course.
The Kit
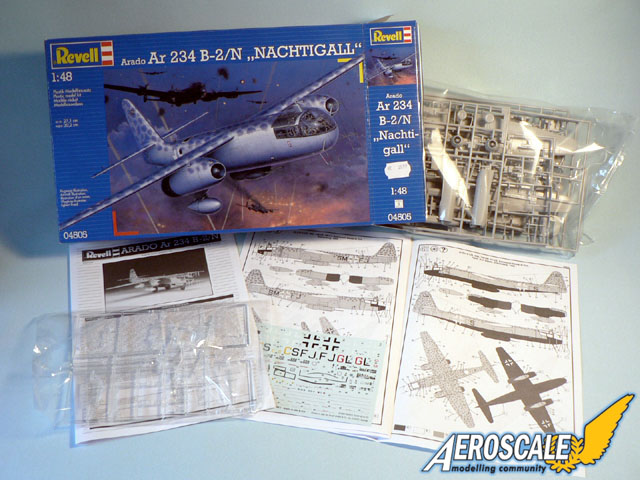
When I purchased the Revell Ar 234 C-3 kit two years ago, I remember having been surprised by the huge size of the box. I thought "wow! The Arado must be a big plane!" Well, the box was huge but almost 50% of the available space was not used in it! In fact an Ar 234 model is not that big and this time Revell were more reasonable and the "new" kit is packed within a more appropriate medium sized box. In it you will find two plastic bags for the injected plastic parts, one instruction booklet and one decal sheet.
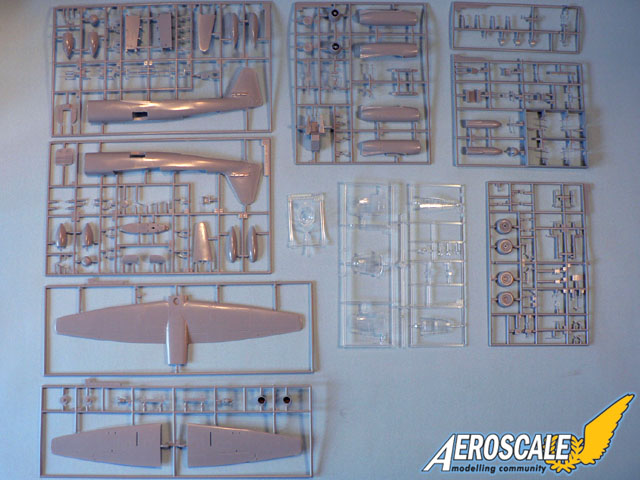
In total, the kit is composed of 8 sprues of light grey parts and 2 sprues of transparent plastic parts. The latter are placed in a separate bag to prevent damage and scratching. The overall quality, as you would have expected from Revell/Hasegawa, is top class with delicate surface finish and crisp detail. I found no sink marks, no flash and no damaged parts in my sample.
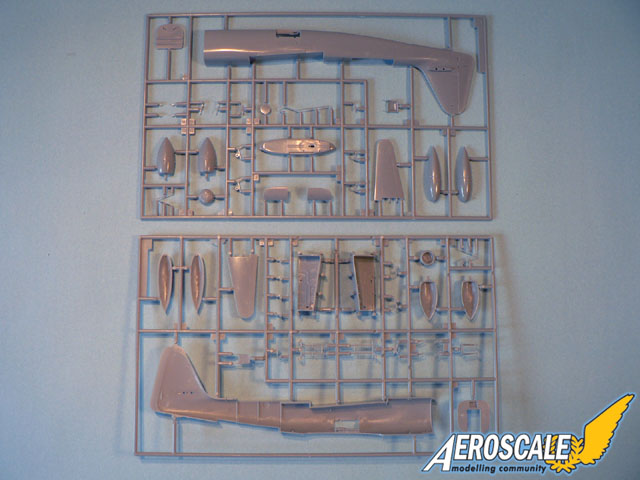
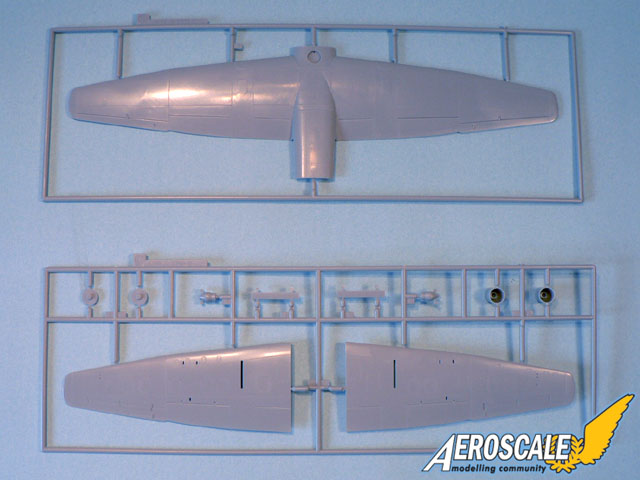
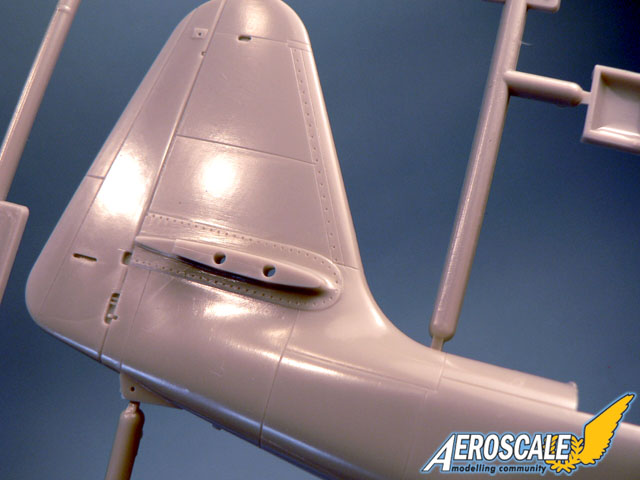
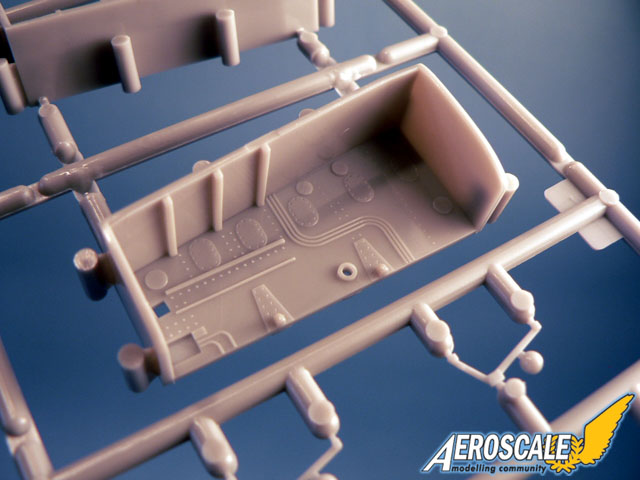
Sprues A and B hold the fuselage halves, the thin horizontale tailplanes, two bulkheads, the landing gear bays, the semi recessed belly rack, the RATO rockets, the external fuel tanks and other smaller detail parts. Two round windows will have to be opened on each fuselage side for the radar operator's work station. This should not be a problem as the plastic has been prepared for this and is very thin in that area.
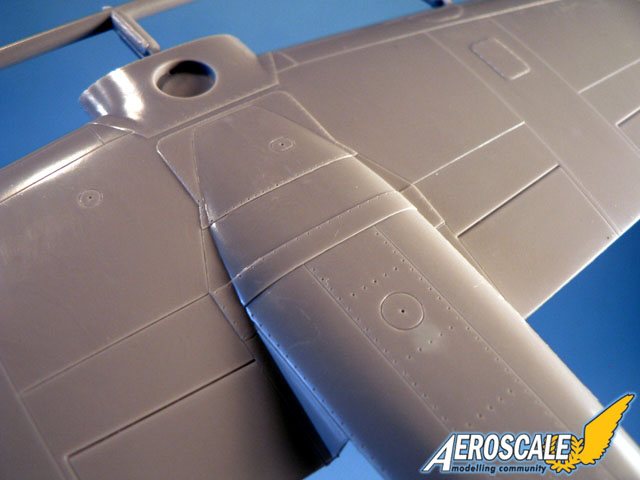
Spues C and D are basically for the wing assembly. The are composed of one upper part and two under parts. The panel lines are finely engraved and there are also subtle relief details on the top of the wing, were it meets the fuselage. The ailerons and flaps are nicely renderd but have not been molded separately though.
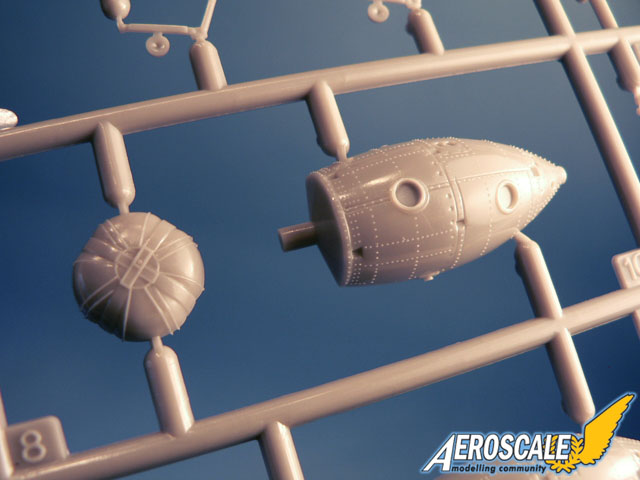
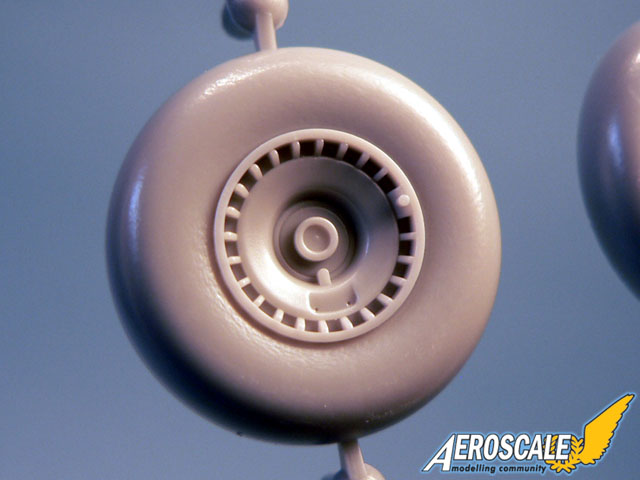
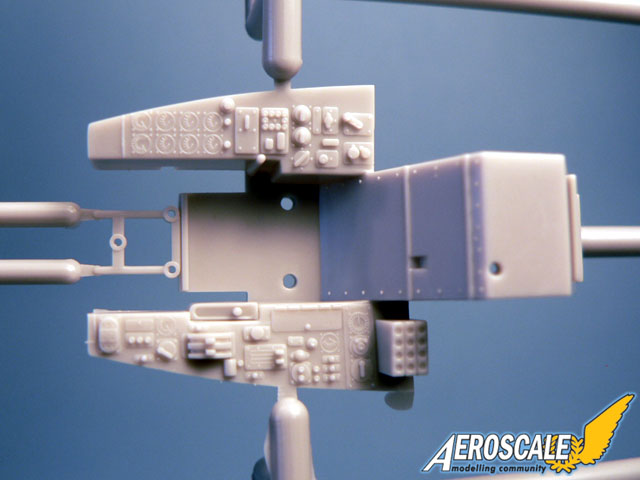
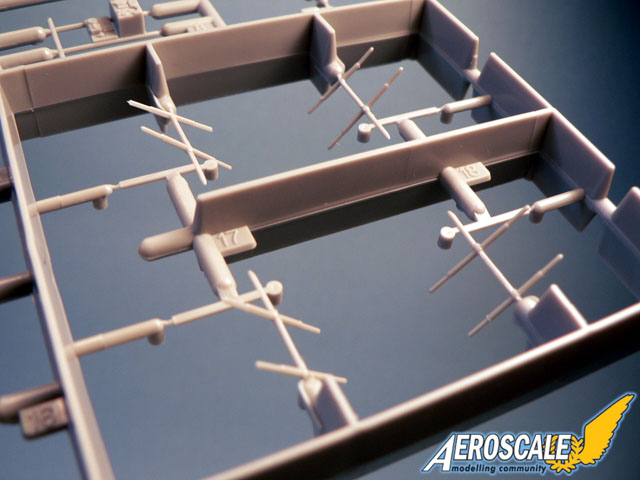
Sprues E, F, G and J are the smallest, but feature the most parts. Tree E is composed of parts for the pilot's cockpit (floor with nicely done side consoles), the forward landing gear (don't forget to add 20 gr of weight to your model!) and the engine nacelles. Talking about the nacelles, I must say Revell's box is a little misleading. It is written on the side that the kit features "Detailed engine gondolas". I thought I would get two complete Jumo engines but in fact they only meant the exterior. I'm happy to note that these parts are detailed... like everything else in the kit! thanks a lot, I didn't expected that! Spue F has three different periscope parts, so make sure you use the right one (F7), the other two are for the spare box. Sprue G is composed of parts typical for the night fighter version. It has the parts to do the radar operator's station (floor, side consoles and instruments), the ventral "Magirus" 2xMG 151/20 gondola and the antennas. The latter are protected by big plastic "walls" to protect them from damage as they appear to be very fragile. In my sample it worked quite well as nothing broke. The laste grey plastic sprue (J) is made of parts for the pilot's cockpit (instruments) and the landing gear.
The transparent parts (sprue M, N and Q) are very nice and clear. Part M1 is a fuselage insert with a big window for the radar operator station. The way it was designed will make painting easier but to the detriment of assembly. This is also the case for the forward four parts glazing assembly (N1, N2, N3 and Q1) which are molded with parts of the fuselage. The nose cap is new as it features four holes to accomodate the "Neptun" antennas. Unfortunately, the annoying seam right in the middle of the clear part which was noticable in the initial release of the kit, is still present and will have to be eliminated with delicate sanding and polishing.
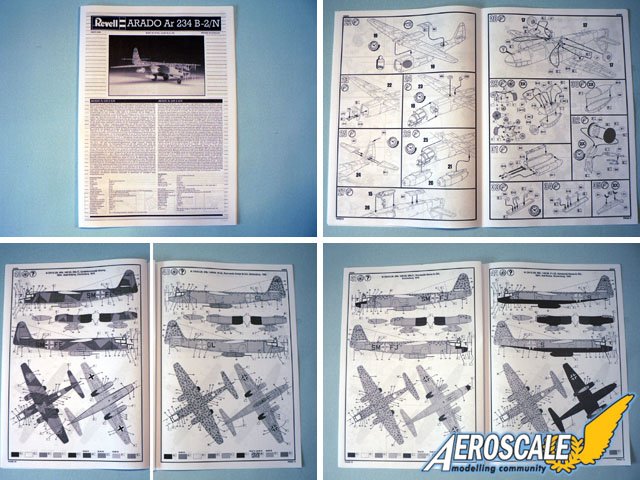
The instructions are composed of four A-3 sized paper sheets folded so to make a 16 page booklet. Page 1 has some historical facts about this special version of the Arado as well as some Specifications related to the aircraft. Page 2 and 3 features some basic construction tips in 21 languages (!?) and some explanations on the symbols used. Page 4 is entirely dedicated to the colors that must be used for the kit. Assembly guide start with page 5 and continues until page 10. There are 39 steps in total so I don't think one can miss something. A parts layout is also present on page 5. finally, there are four pages (11 to 14) dedicated to painting and decalling at the end of the booklet which will help you to choose between four different aircraft:
1 - Ar 234 B-2/N, WNr. 140608, T9 GL, Kommando Bonow, Oranienburg, 1945.
2 - Ar 234 B-2/N, WNr. 140150, SM FJ, Kommando Bonow, Oranienburg, 1945.
3 - Ar 234 B-2/N, WNr. 140146, F1 CS, Kommando Bonow, Hptm. Kurt Bonow, Oranienburg, 1945.
4 - Ar 234 B-2/N, WNr. 140145, SM FE, Kommando Bisping, Hptm Josef Bisping, Oranienburg, 1945.
All the aircraft wear a RLM 75/76 upper camouflage with spots apart from the last one which wears a RLM 81/82 splinter pattern. All have RLM 76 undersurfaces except for the third option which was painted black. Hptm Josef Bisping's aircraft is also particular in that the lower front glazing wasn't painted over while it was the case on the other planes, probably to reduce the reflection phenomena mentionned above. It is to note that this kit offers four options while the initial kit only had two. The German manufacturer also includes full stencil markings while none are present on the Hasegawa decal sheet. So if you have the choice, pick the Revell kit!
The decals are nicely done with, as mentioned above, a complete stencil set and instrument dials for the various consoles. However, I doubt that the latter decals will conform to the heavy relief detail of the plastic parts. At least, they can be used as color templates for the painting of the instruments. The typical black joint lines for the plexiglas glazing are also provided but unless they are printed in reverse they will be useless as the joints were located in the inside of the cockpit, not the outside. And interesting picture about this can be found at
Flightsim.com. No swastika decals are present in the kit as usual with Revell Germany.
Conclusion
This is a very fine kit of an interesting aircraft and while it was not on my "to buy" list I couldn't resist the temptation when I saw it on the shelve. At a price of 2099 it is a bargain when compared to the Hasegawa kit, at least here in Europe. Once completed, the Ar 234 b-2/N will make a nice transition between the models of Luftwaffe planes that were use in combat and What if? projects, as it represents something in between. Highly recommended!
Please remember, when contacting retailers or manufacturers, to mention that you saw their products highlighted here - on
AeroScale.


Comments