Literally hundreds of books have been written about R.J. Mitchells masterpiece, and it stirs the soul as no other aircraft can. As Jeremy Clarkson says in one of his recent books, Possibly, just possibly, the Spitfire is the greatest machine ever made
Whats in the Box?
There are 27 parts on 2 sprues of light grey plastic,2 clear plastic parts on 1 small sprue. A decal sheet, and an instruction booklet.
Assembly
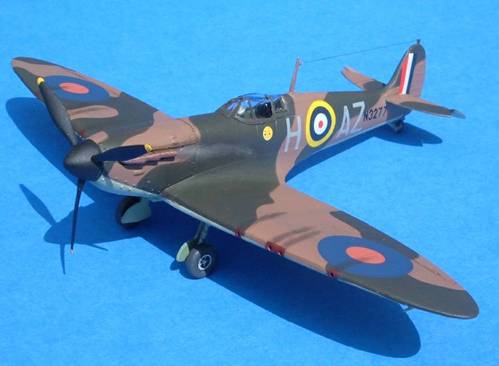
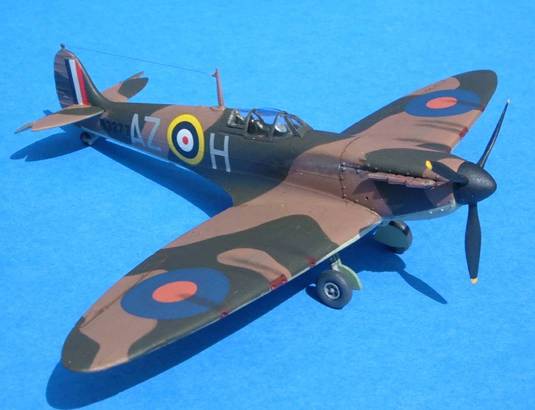
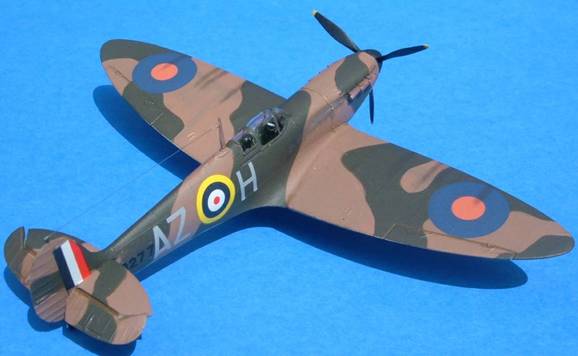
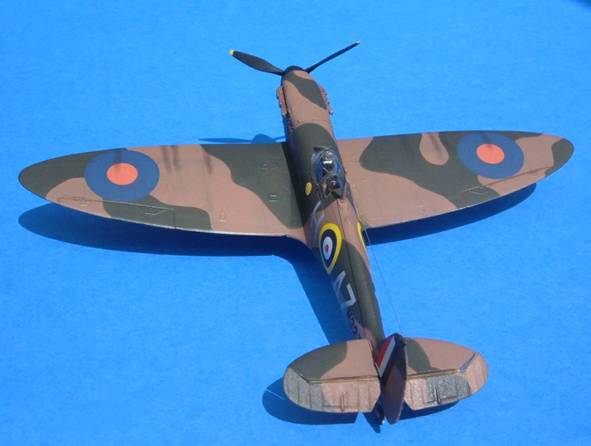
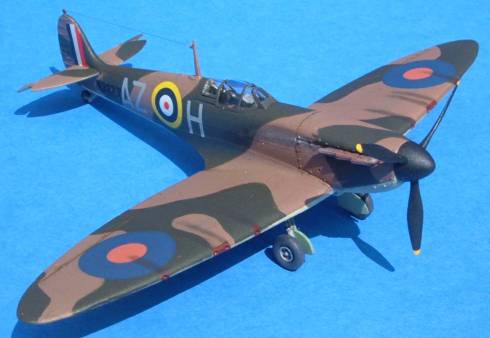
As usual assembly begins with the cockpit. Detail is sparse compared to more modern mouldings from other manufacturers. What you get is a nicely moulded seat and a gunsight, which I left off until just before fitting the canopy to avoid damage. Its possible to fit the cockpit after the fuselage halves have been joined together which I would recommend. The fuselage halves go together quite well, but I found they fitted even better after removal of the locater pins. The wings are in three sections. A full underside and the two top sections. The first time I built this kit I had to do quite a bit of filling and sanding around the wing roots and also ended up with a ridge around this area. To counter that, this time I stretched the gap under the cockpit slightly with a piece of sprue, and also removed the ridge on each side of the fuselage wing joints. This took care of the wing root issue quite easily and also cut down on the amount of filling required. Again, learning from earlier builds, and utilising techniques learned from Armorama, I used the filler/nail varnish remover method which takes away the need for sanding and consequent loss of detail. Its also a very quick way of filling small gaps. The last time I built the Airfix Spit it took me the best part of a day to sand the wing roots down, this time the whole area was finished in a couple of hours. The undercarriage legs are moulded into the wheel covers which is a shame but you have to bear in mind that this is an Airfix Series 1 kit and not one of the excellently detailed and moulded Tamigawa offerings. I decided to try something new on this Spit by dropping the elevators. Parked Spitfires were invariably seen with the elevators down due to the joystick being pushed forward to enable an easier exit for the pilot. I stuck dymotape along the mould line to guide the knife and prevent it slipping and gradually cut the elevators away. After cleaning the parts up I glued a piece of 1mm plastic rod along the edge to represent the hinge.
Painting
Everything was primed with Halfords White Plastic Primer, and then preshaded in black acrylic. The underside was sprayed with Tamiya XF21 Sky, and the main camouflage is Tamiya XF52 Dark Earth and XF61 Dark Green. Masking was done using the BluTac Sausage Technique. All the smaller parts were brush painted with various Humbrol and Xtracolour enamels. The canopy was masked with Parafilm and then sprayed dark green before being fitted. The whole model then received a couple of coats of Klear/Future and was left to cure for a day before decalling.
Decalling
The decals supplied depict markings for 234 Sqn Spit based at RAF Middle Wallop, August 1940. The fuselage roundels are badly out of register and the rudder markings have a white border which requires trimming if your going to use them. I would suggest using either aftermarket decals or decals from another kit. As I wanted this build to be as much of a direct comparison to my first build, I elected to keep the squadron markings supplied and replaced the tail fin markings and fuselage roundels with decals from the spares box. Once decaling was complete another couple of coats of Klear were applied to seal everything in and the model was left for a day or so before weathering and final assembly.
Finishing Touches
The prepainted undercarriage and the smaller parts, which had been left off to avoid damage, were fitted, and the model was washed with a mixture of oil and water colour washes. When everything had been left for a further day to completely dry I misted on a coat of Humbrol Matt Varnish from a rattle can and added the ariel wire from fine fishing line. Cordite and exhaust stains were done with pastel chalk dust.
And Finally.
Despite its age,( this moulding dates back to the late eighties), the Airfix Spitfire is generally regarded as one of the best kits on the market accuracy wise in 1:72 scale. If youre a rivet counter you're not going to like the lack of interior detail and the raised panel lines, but then an AM detail set and a rescribe will not be too daunting. For modellers like myself who arent too bothered by these shortcomings, its a beautiful little kit and apart from having to work at the wing roots a bit it goes together very well and looks the business. This is an ideal kit for a youngster or a novice/returning modeller. Its less than a fiver and so easy to pick up that theres no need to dread making a mess of it and wasting money. For the more accomplished builder it makes a nice back to basics build, and when finished certainly holds it's own with all other Spitfires available in this scale. The only thing that lets this kit down is the decals, so consider buying a set or raid the spares box like I did. Modelling for me is all about having fun and creating something to display and admire when finished, and what could be more fun than building yourself a Spitfire?
SUMMARY
Way back in 1955,the Spitfire was the first aircraft kit released by Airfix. The company had been the first in the UK to use an injection plastic moulding machine and in 1947 were the biggest manufacturer of hair combs in the UK. For modellers of the time the Airfix Spitfire was probably the first aircraft they built. Over 50 years later not much has changed. Last year I returned to modelling after over 20 years of inactivity, and I built the Airfix Spit. 8 months later and Ive decided to revisit my, first labour of love, and the boyhood joy of building an Airfix Spitfire is still as strong as it ever was.
About Nigel Julian (lampie) FROM: ENGLAND - EAST MIDLANDS, UNITED KINGDOM
Restarted modelling in late 2005 after a break of over 20 years.Built a lot of armour as a teenager but now concentrating on WW2 aircraft.
Some skills are coming straight back to me and Im learning new ones everytime I log on to this site it seems.


Comments