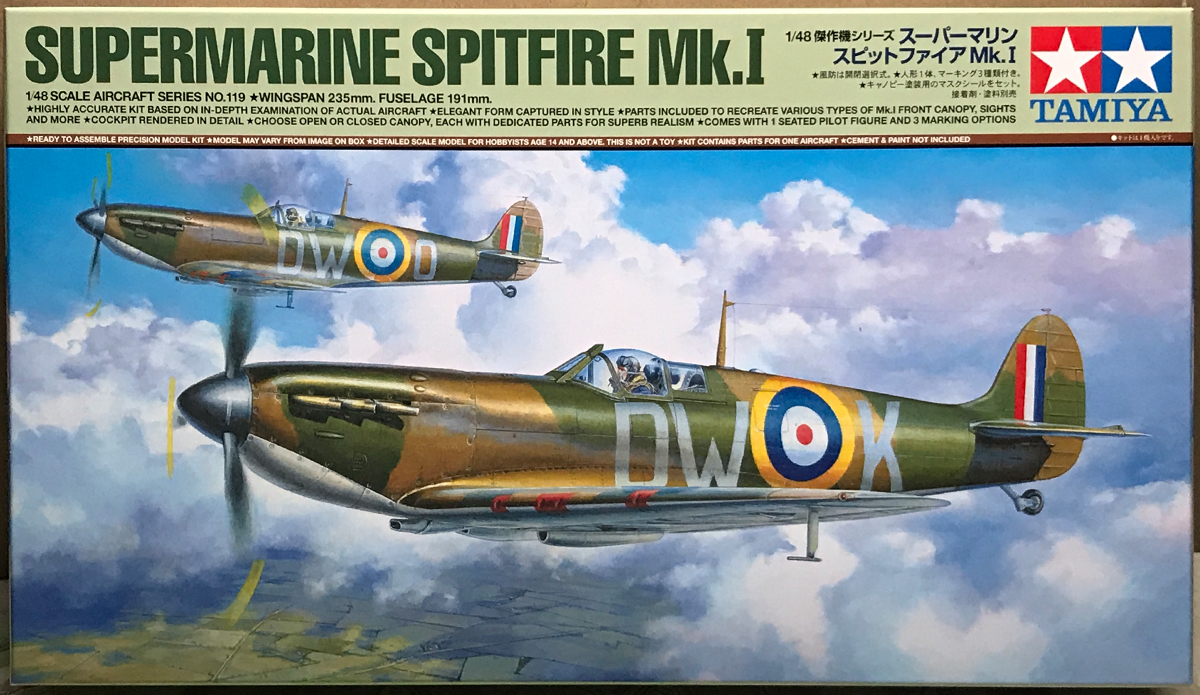
Im going to spare you any short and woefully incomplete history of the famous Supermarine Spitfire. Suffice to say, it is without question one of the most popular aircraft ever produced. Even your grandma loves the Spit. Build her one for her birthday.
However, it is important to mention why this kit has garnered so much press and attention; this is a brand new 2018 tooling of Tamiyas 1/48 Mk.I Spitfire. The last time a new tooling of the Mk.I was produced was 1993 when I had a ponytail, played in bands five nights a week, and slept till noon everyday. That was a long time ago, but I bet that kit has held up better than my hairline. That kit birthed several releases of the Mk.V over the next fourteen years. So before I start getting all weepy lets take a look at Tamiyas new and improved 2018 Spitfire Mk.I.
In the Box
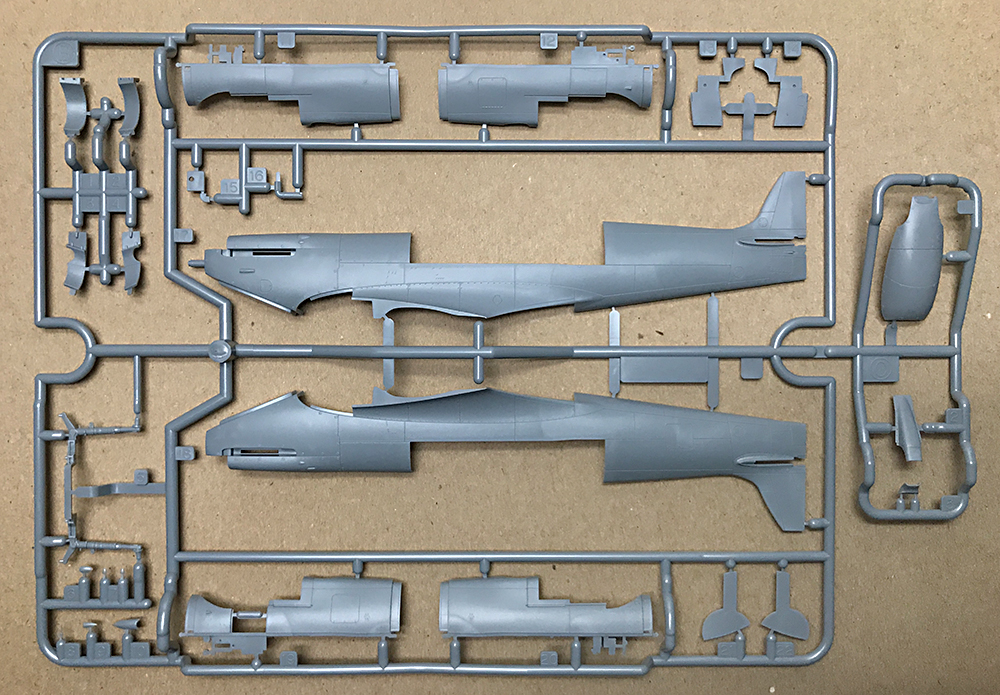
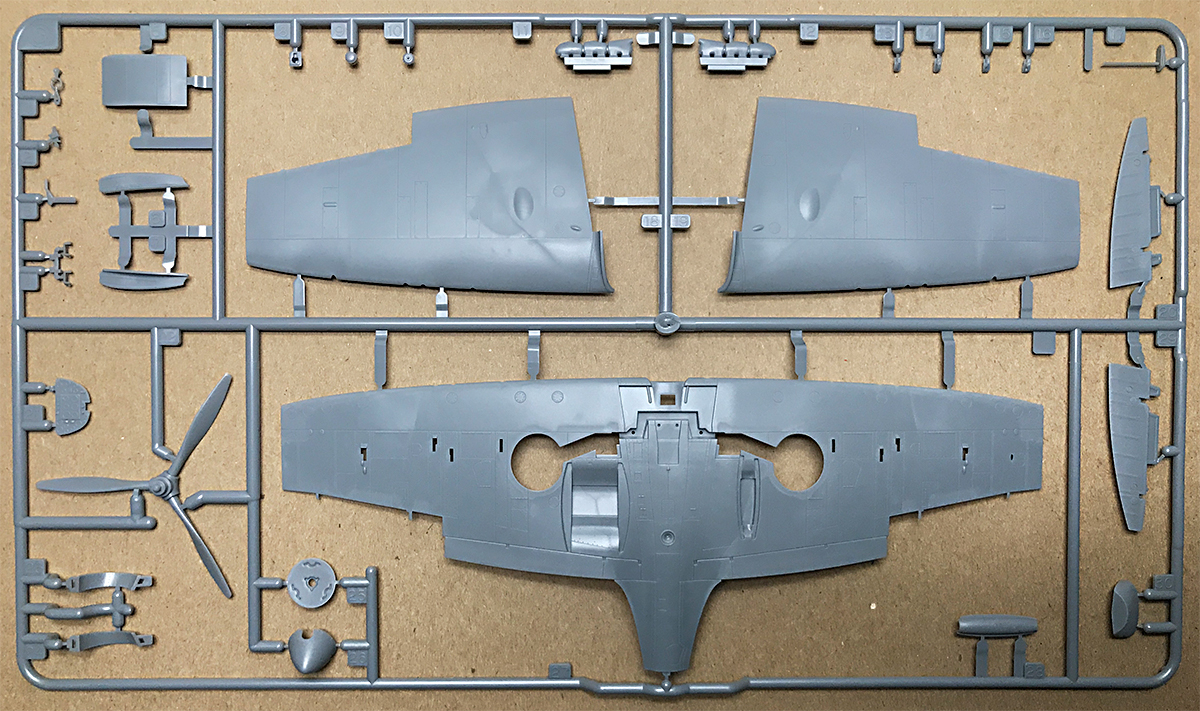
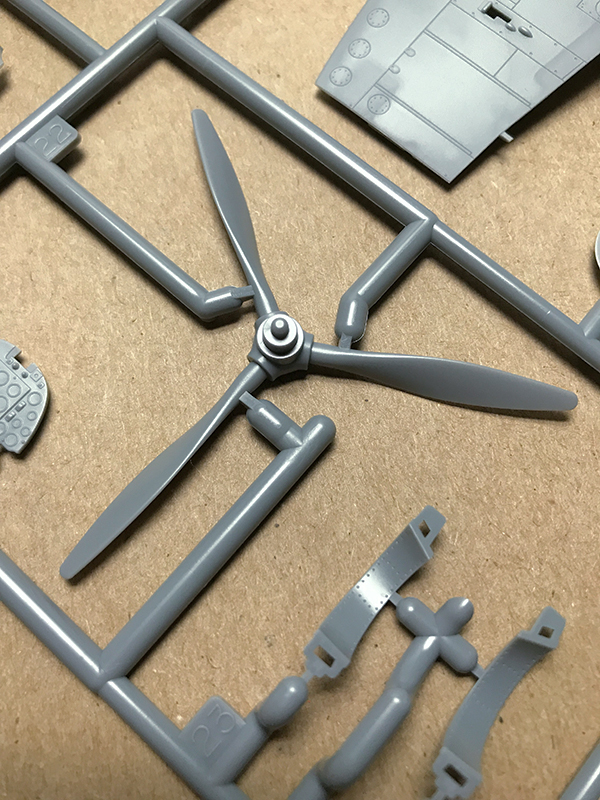
3 sprues in dark gray styrene
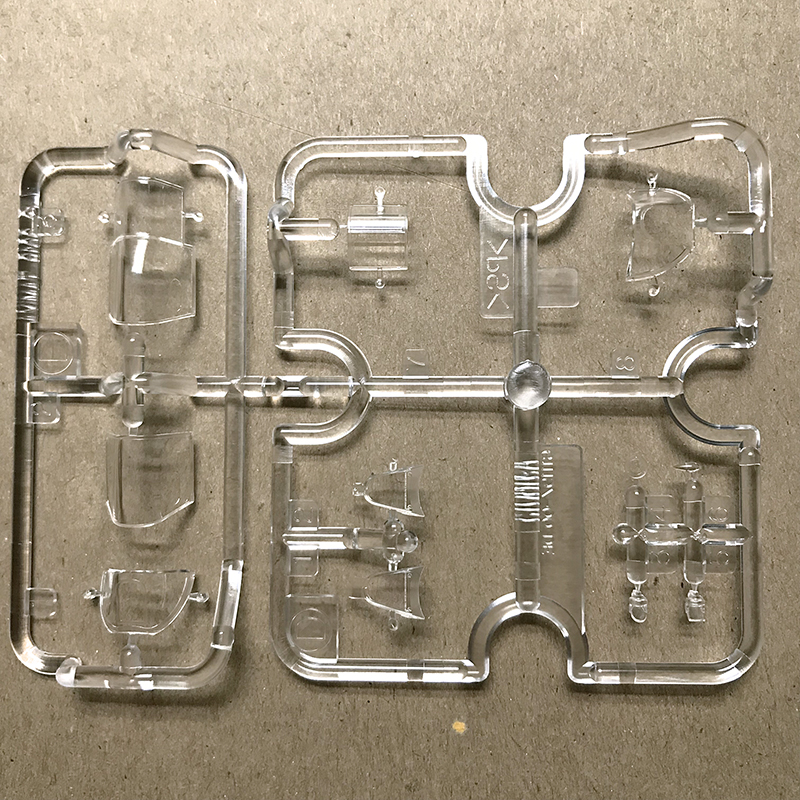
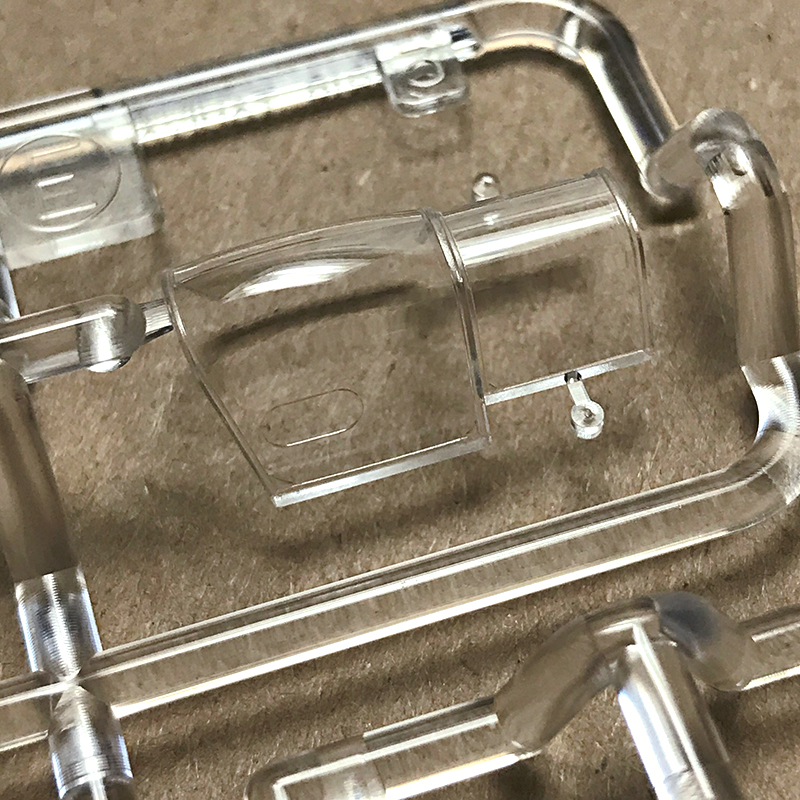
1 clear sprue
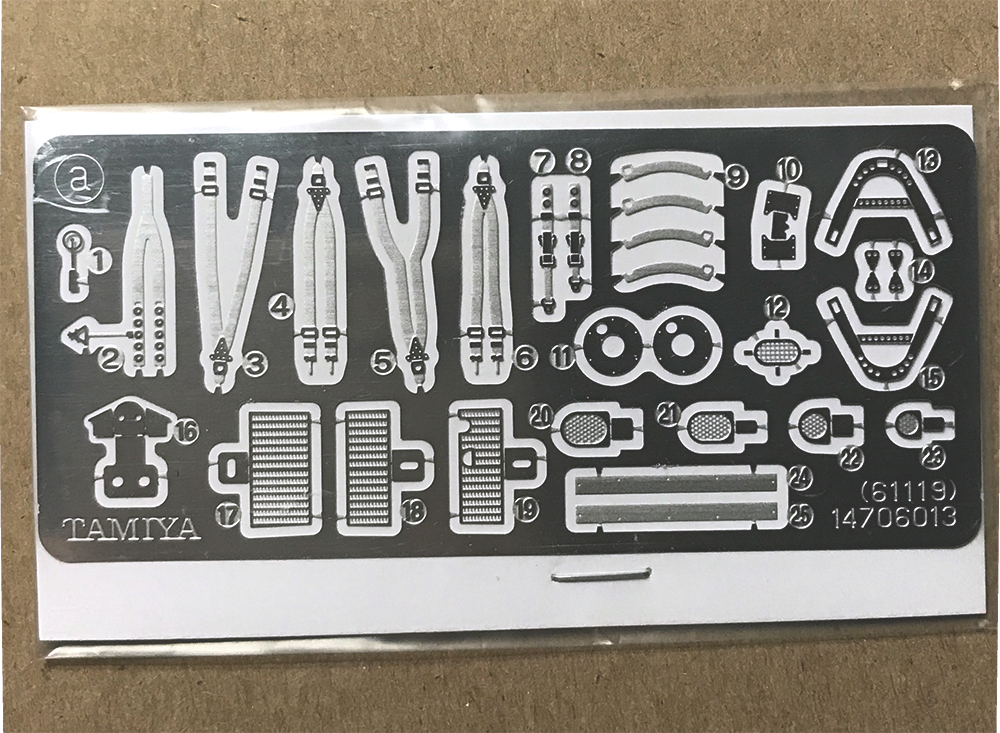
1 photo-etch fret
12 page instruction manual
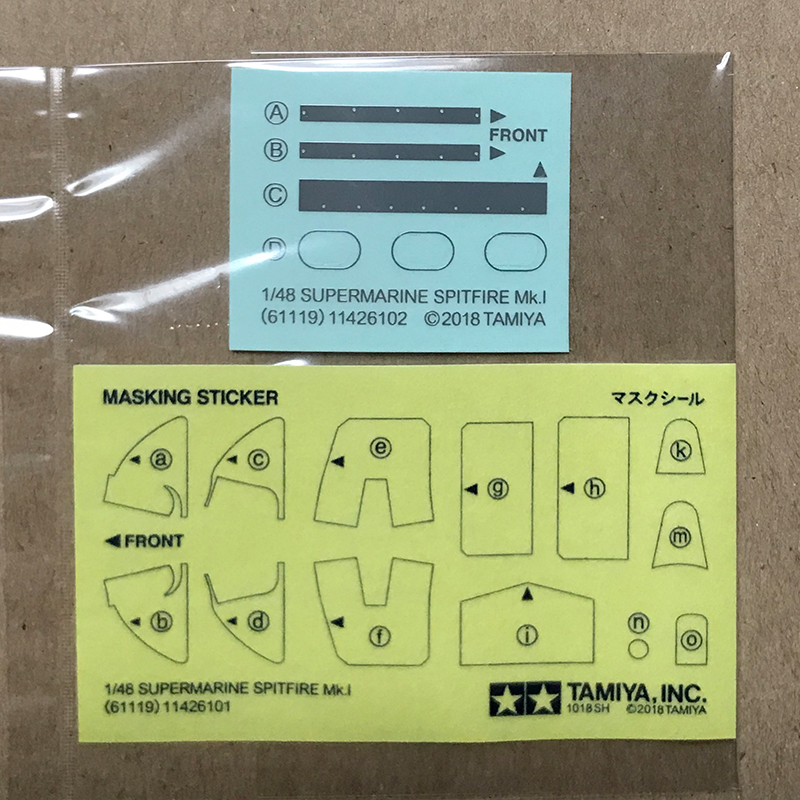
Masks, decals and textured stickers
Background info in four languages
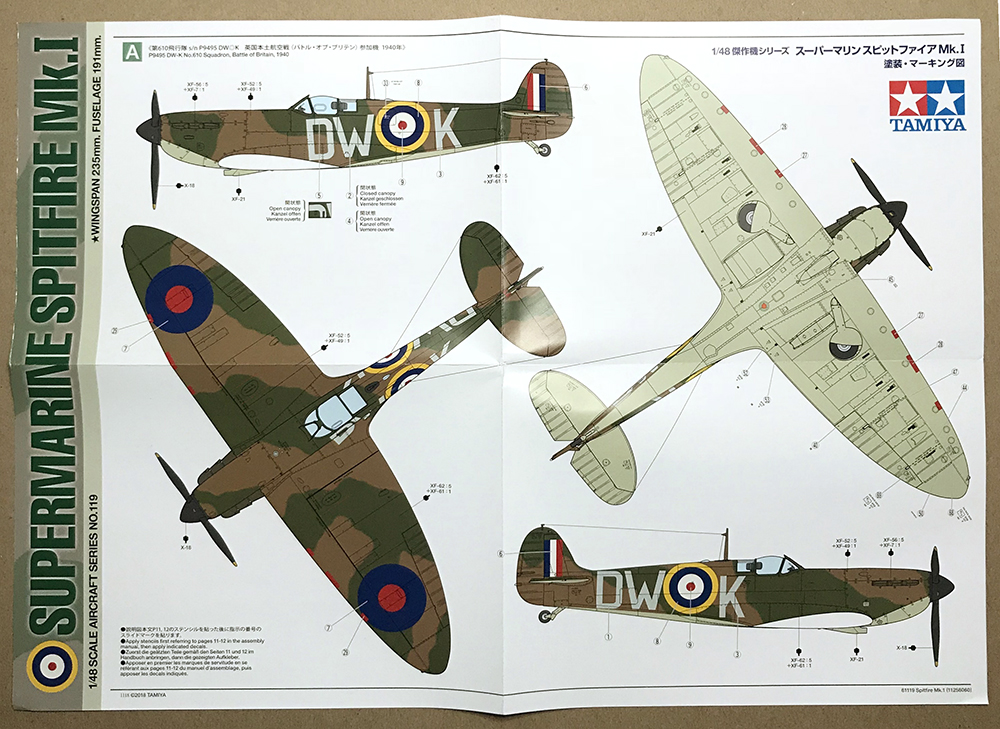
Full color marking and decal guide
2 polycaps
Review
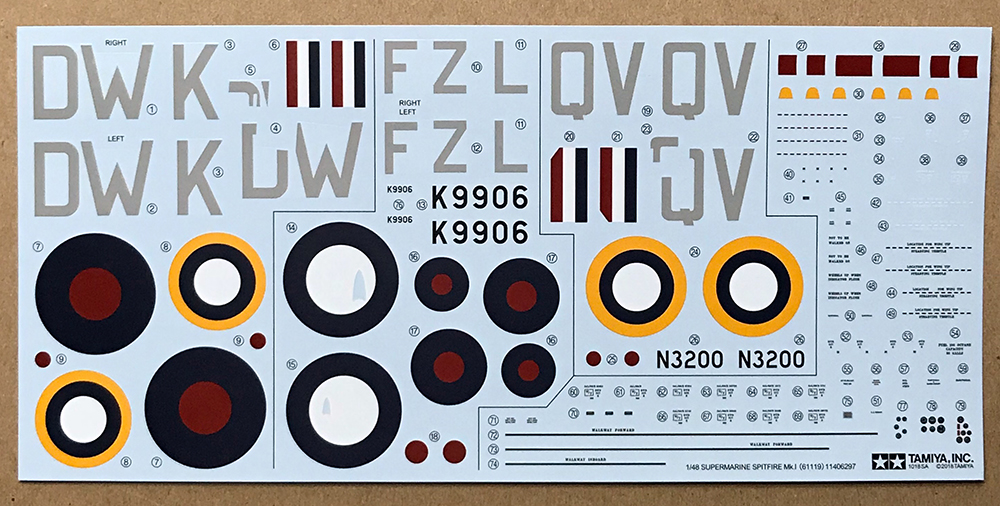
This kit lets you build one of three versions. There is a 1939 pre-war plane from the No. 65 Squadron. And there are two from 1940; No. 610 Squadron from the Battle of Britain and No. 19 Squadron. The No. 19 Squadron plane, with the black and white lower wings, is Spitfire N3200 which was shot down during the Dunkirk evacuation. It was fully restored (and mostly rebuilt) in 2014 and lives at Duxford airfield in England. It is fully operational and hence there are oodles of photos available for reference. Both wartime versions share almost exactly the same build steps, but the pre-war version has some different parts or parts that need to be modified.
The twelve page instruction booklet is in black and white. There are color callouts for Tamiya paints only; a variety of Tamiya XF, X, AS, and TS paints.
A full-color painting guide is also included. Side one shows the A camouflage pattern of the No. 610 Squadron from the Battle of Britain 1940 in 1:1. You can photocopy this side and use it to cut out masks for the camo. The second side shows the other two variants; 1939 No. 65 Squadron, and 1940 N3200 No. 19 Squadron. The drawings on the second side are smaller. You would have to enlarge them 128% to make 1:1 masks, but dont bother. But the No. 19 Squadron shares the same A pattern as on side one. And the No. 65 Squadron Simply is simply the reverse for the B pattern camo.
A mask sheet is included for the canopy, but per Tamiyas standard practice, the lines are printed but not pre-scored. You will have to cut them by hand.
The decal sheet is in very good register and includes a lot of stencils and gauges for the cockpit dash. Strangely, all of the three and four-color roundels have the small red centers separate from the main decal. I thought that maybe this made the printing easier, or was separated for color fidelity reasons, but the tail markings have their red band printed right on top of the white background. So that theory doesnt play out. I cant think of a single good reason for this. If you can, leave a comment on this reviews thread. Whatever the reason, you will have to worry about perfectly centering the red center on top of the main decal.
The carrier film is matte, not glossy. And Tamiya lives up their reputation for thick decals; you can feel them as you run your fingers across the sheet. For my test build (to follow) Ive decided to only use whats included in the box, and the Tamiya paint mixes. Well see how the decals go down.
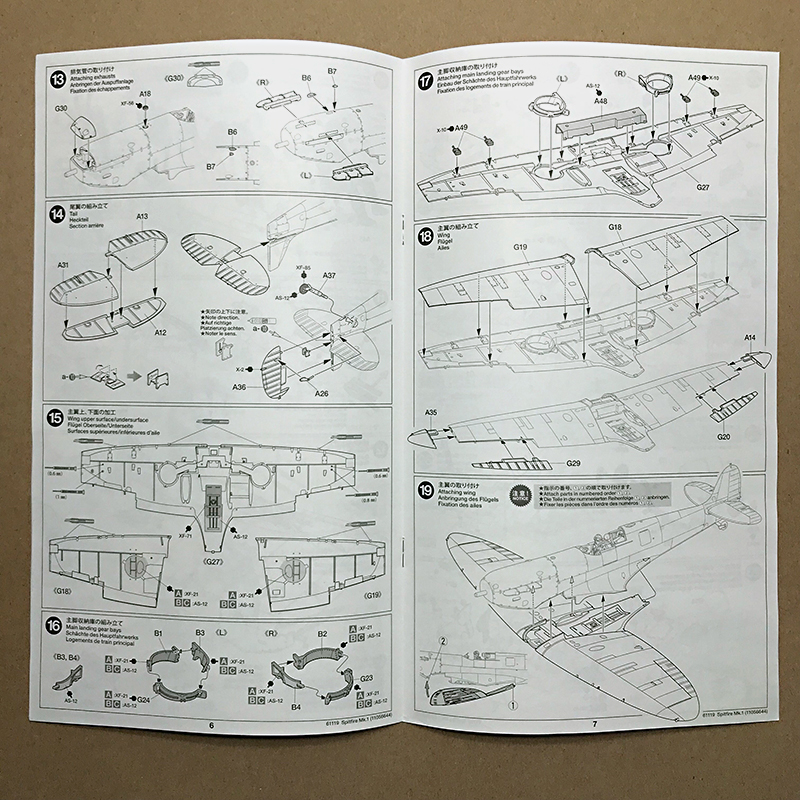
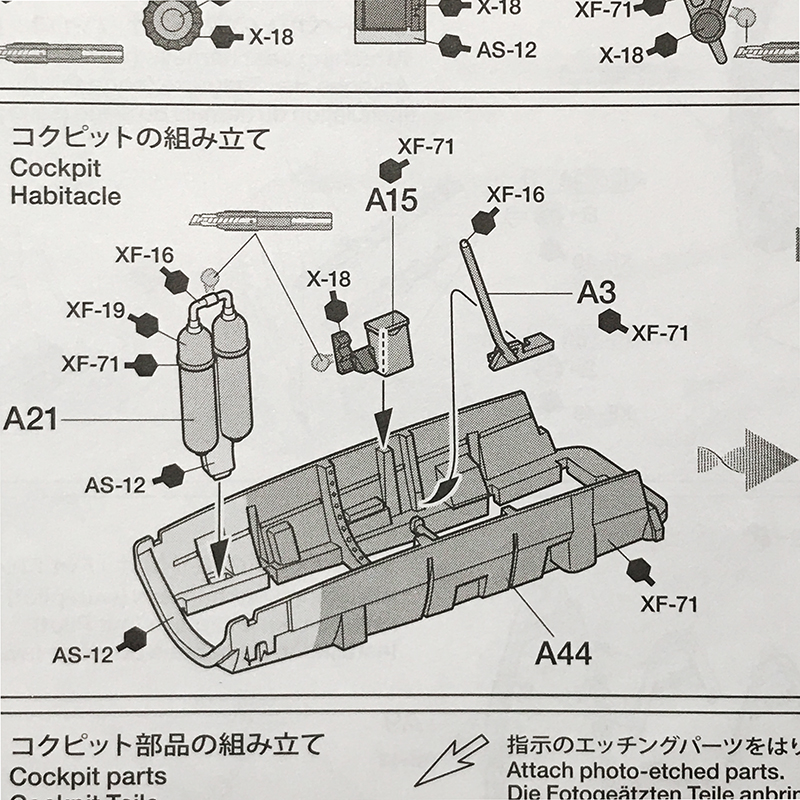
The instructions are very clear and have very detailed painting diagrams of small parts (especially in the cockpit). They also show where small parts need to be altered depending on which variant you have decided to build. It will be easy to miss something. Take it slow and be thorough.
This is a good time to discuss the radio aerials. Here the instructions falls short, giving mixed signals and no clear direction. I will go into greater detail about the variations in my build review feature. In short, the color poster and the final illustration in the instructions all include the IFF wires, which run from the roundels on the side fuselage back to the tips of the horizontal stabilizers. Yet none of these planes would have had the IFF equipment installed.
If you want to build Version B from 1939 there is only one option; the round mast with the aerial running from the top of the mast to the top of the tail. Version A (P9495) and Version C (N3200) were both built in April 1940. N3200 was downed in June during Operation Dynamo, and P9495 was damaged and removed from service in August 1940. Both planes were gone before IFF equipment was ever issued, so neither would have had those wires. The restored N3200 has the tapered mast and the aerial wire that runs up from the fuselage to the top of the mast, then back to the top of the tail. P9495 would most likely use this same aerial configuration.
Tamiyas reputation for minding the details even extends to the packing. The kit arrived in perfect condition. Each sprue, the PE fret, and the decal sheet are packed in separate sealed plastic sleeves to prevent them from getting scratched during shipping. The PE fret is backed with cardboard to prevent warping.
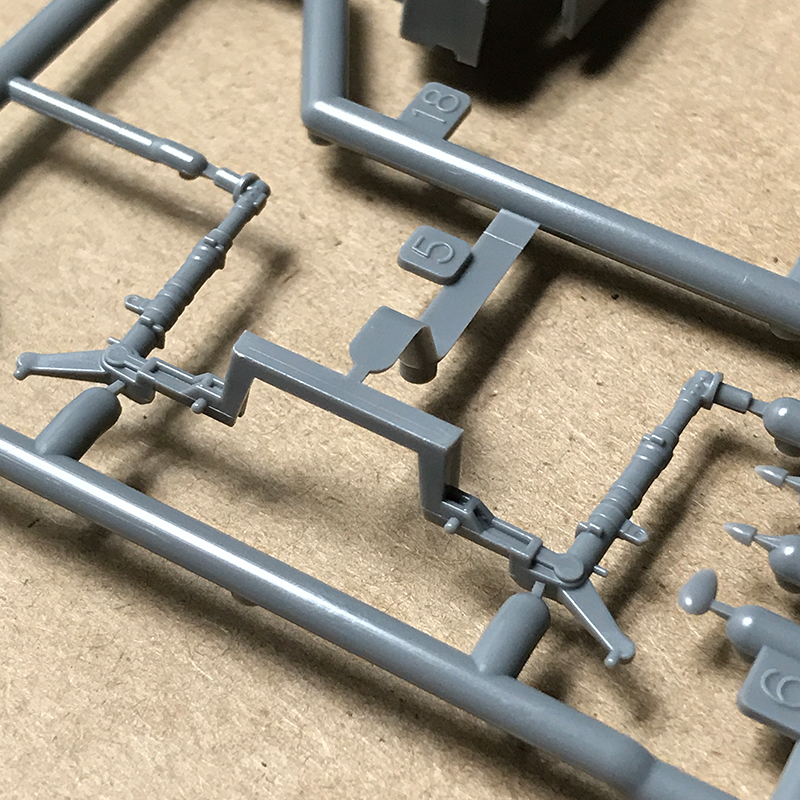
The photo-etch steel sprue includes two sets of seatbelts, one for use with the pilot, and without. Other PE parts are the pedal straps, gunsights, cockpit details and radiator and oil cooler screens. The clear sprue includes both open and closed canopy options, as well as two armored windscreens.
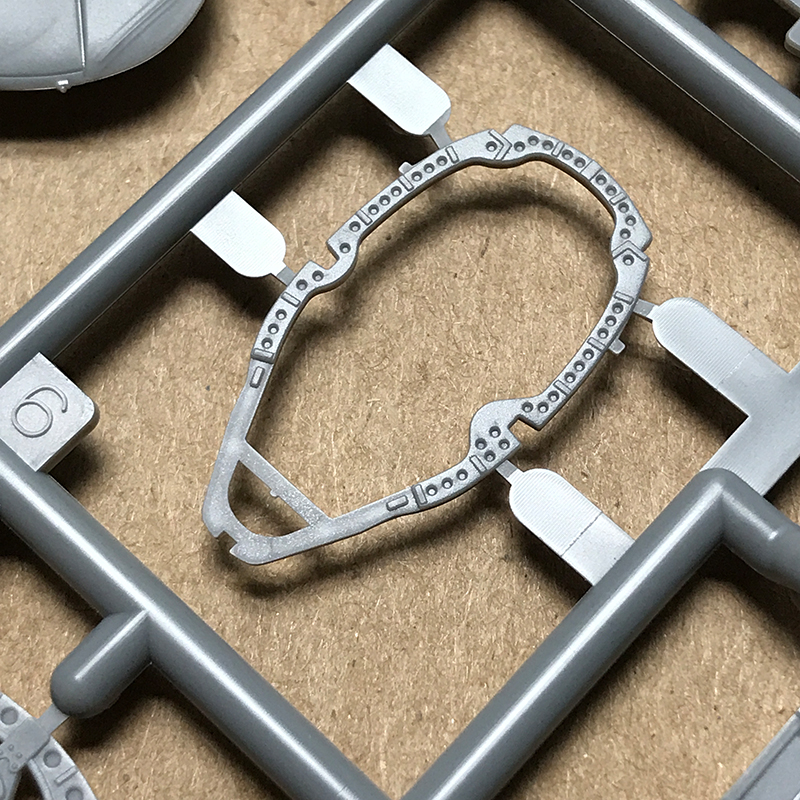
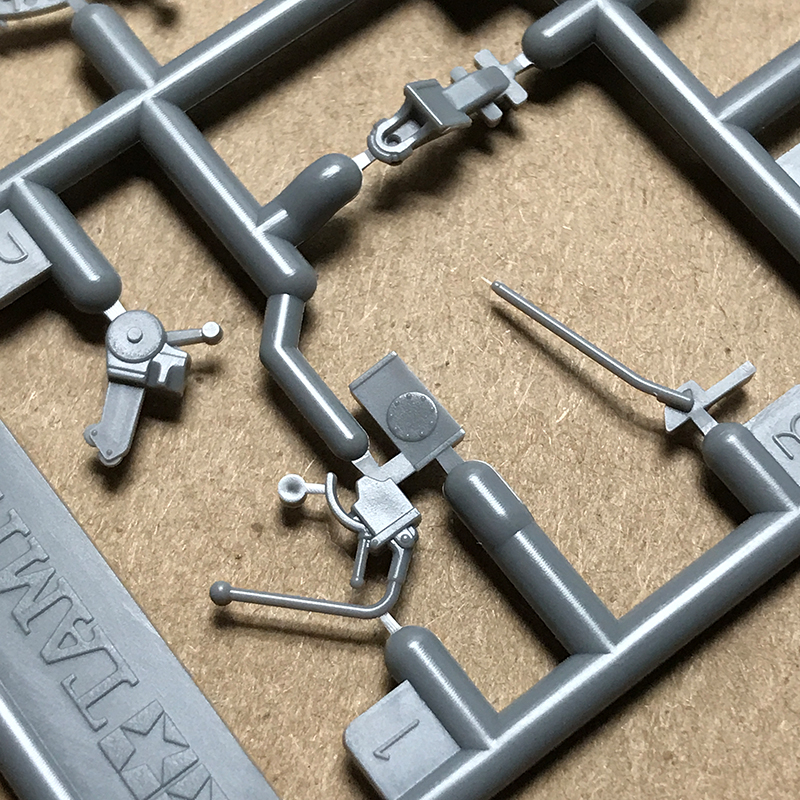
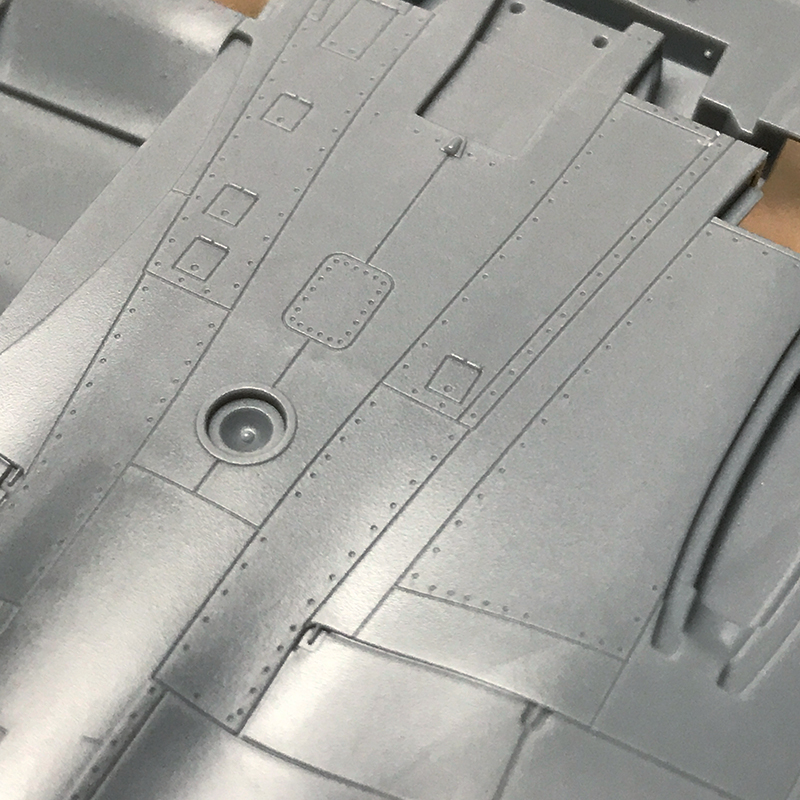
All of the gray styrene parts have a slightly rough texture. I was really surprised by this. Its not bad, mind you, but rougher than I was expecting from Tamiya and worth noting. The raised details are beautiful and crisp, such as the Dzus fasteners around the nose area. The panel lines are recessed and are very fine. Ejection pin marks are nonexistent. They have made sure that the ejector pins are on the sprue runners, not on the kit parts. The interior of the rear fuselage and wings have ribbed supports molded in, to guard against warping.
Tamiya has also taken pains so that in many places the sprue gates attach on the mating surfaces of parts, rather than on the visible external surfaces. The intent is to give the builder less cleanup on visible areas, which could end up obscuring details. Cleaning up flat mating surfaces should go much quicker, although you must be mindful that you preserve good mating seams.
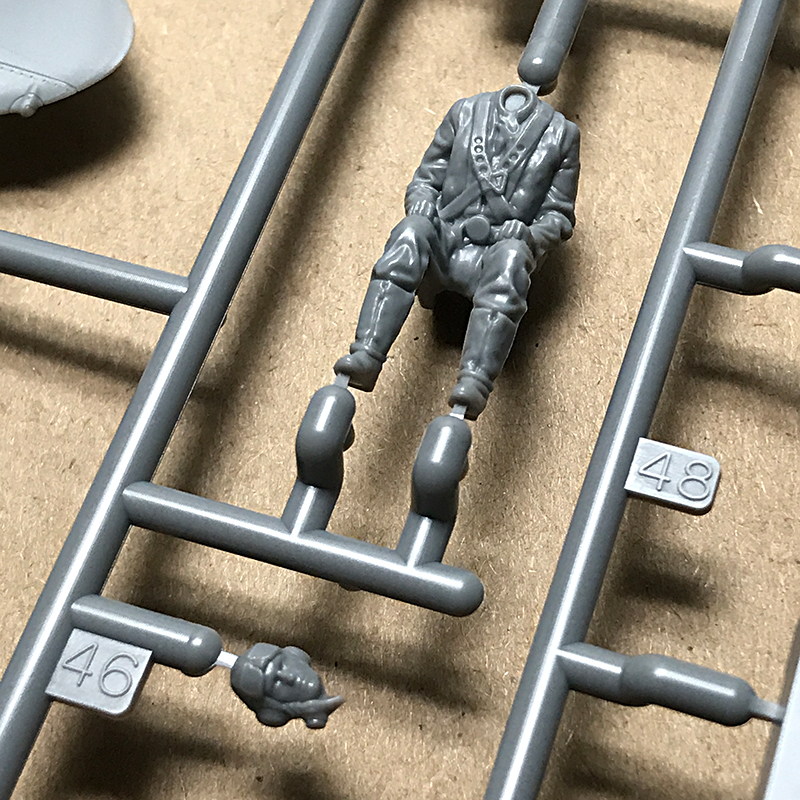
Three of the eight pages of instruction concern themselves with the cockpit alone. There is a wealth of detail here. By my count there is somewhere in the neighborhood of 42 parts depending on if you use the pilot and the seatbelts.
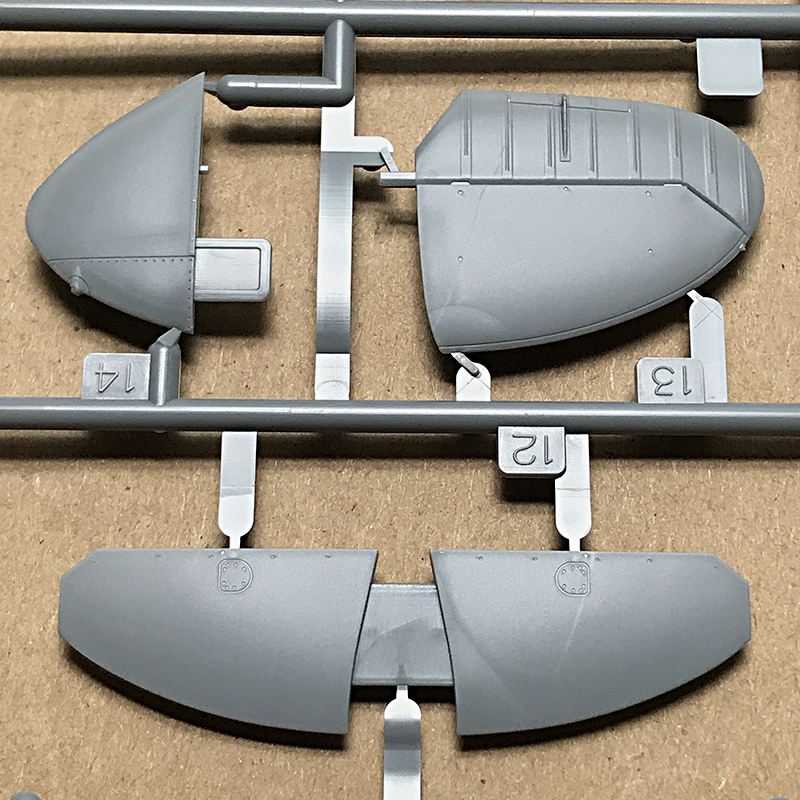
The mid-side of each fuselage half is a separate insert, which is different depending on whether you want to build the cockpit open or closed. There are also two doors included for the open cockpit option; one with a crowbar inside the door and one without. Ive seen some buzz online that there are two ways to build an Mk.I Spitfire; without a crowbar on the door or the WRONG WAY. They cite that the crowbar wasnt added until later variants emerged. Fair nuff. However, I dont think that the inclusion of a door with a crowbar is a mistake, but rather is a clue that later Spitfires are coming based on this same tooling. Other clues are separate air intakes, chin panel, wing tips, nose tip, and various tiny body bulges that must be glued in place.
Unfortunately though, if you choose to build the cockpit closed then you only have one choice. Crowbar. A crowbar is molded onto the left cockpit wall. You can take pains to remove it, but my bet is youll never see it especially if you add the pilot. Im sure this was an economic decision so that they can use the same fuselage inserts for Mk.Vs down the line.
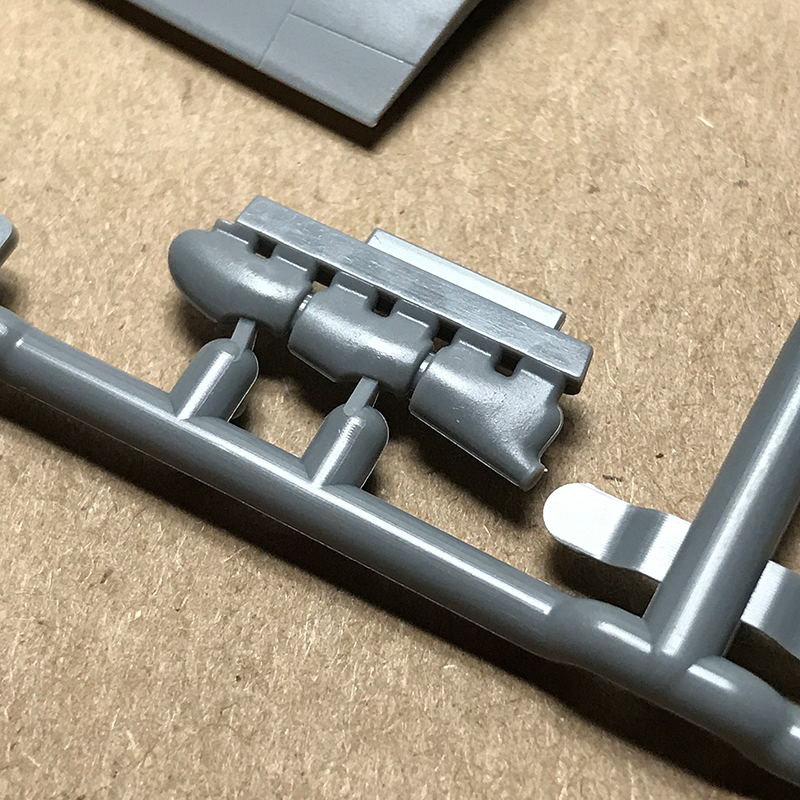
Some may be disappointed that there is no open engine option, but the three-port exhausts are beautifully molded and include weld seams. The tips of the two forward ports are glued in separately where the sprue gates attach, ensuring easy cleanup while maintaining the welds. Nice.
Finally, a brilliant decision was made to mold both landing struts as one piece attached to a crossmember that cements into the lower wing, which is then covered by wing panels. This ensures strength, stability, and proper landing gear attitude. Why isnt every single kit made this way? Sadly though the tires are not molded to reflect the aircrafts weight, and the tailwheel assembly is soft on detail.
All in all though, this kit sure lives up to the hype it has received. This In-Box Review will be followed by a full build feature on Aeroscale.
Thanks to Tamiya for supplying this kit for review, and to KitMaker Network for trusting me with it.
SUMMARY
Highs: Tamiyas famous dedication to clever engineering, detailed painting instructions, canopy masks included, markings for three planes.Lows: Two-part roundel decals, unweighted tires, slightly rough plastic, vague aerial directions, un-cut masks.Verdict: A fast and joyous build with a reasonable parts count, beautiful details, and three versions to choose from. A perfect kit if you fancy an easy build so that you can start painting and weathering.
Our Thanks to Tamiya USA! This item was provided by them for the purpose of having it reviewed on this KitMaker Network site. If you would like your kit, book, or product reviewed, please contact us.
About Wiggus (WIggus) FROM: PENNSYLVANIA, UNITED STATES
Like a thousand others here, I've returned to the sport after a 20 year hiatus, primarily building planes. The first kit I ever built with my dad was MPC's 1/16 Petty Charger with the clear body. I'd love to have that kit again. I am thrilled to see how the hobby has grown, and the generosity of its...
My theory to explain the decal sheet: The center dot of the roundel exaggerates registration error: the white ring becomes broader on one side at the expense of the other, and the eye compares the two. However, the same registration error wouldn't be noticeable for the tail flash - it would just mean the white stripe is a tiny bit too wide or narrow, or the red stripe is too high or low by that amount. So it's a good decision by Tamiya.
I like your theory, Ed. It has to be a printing consideration, and you're right that bad registration would be easy to notice in the bullseye.
I work for a commercial offset printer and that degree of registration error would be hard to achieve. BUT, we are not printing on decal stock. I'm sure that is a whole 'nother set of rules and parameters. They may even be run on a flexographic press?
Thanks.
Hi Bill, and Everyone else!
Though 1/32-scale is the growing trend right now, there are still a vast number of guys such as myself, who are 1/4-scalers. The 1/72-scalers' numbers are even greater than the 1/4-scalers'. REVELL made a 1/32 Mk.I/Mk.II way back in the mid 1960s, but we can hardly expect this venerable kit to keep pace with the beautiful 1/32 aircraft kits we are seeing today. My expectations are that TAMIYA will soon follow suit with a 1/32 Mk.I, AND an all-new Mk.V, in order to keep you 32-scalers happy!
This new TAMIYA 1/48 Spitfire Mk.I is JUST what the doctor ordered, even though the "NEW" AIRFIX kit of same is no slouch. I've looked BOTH kits over virtually part for part. I say "virtually" because TAMIYA has come up with several novel features which are completely different from the norm. These are, to name a few, the separate halves for the Inner/Outer Cockpit area of the Fuselage, the single-piece Upper Engine Cowling, and the Landing Gear Strut Assembly. My opinion is that this particular Mk.I is THE BEST Spitfire Mk.I that money can buy. The beautiful Cockpit assemblies negate something along the lines of EDUARD's BRASSIN' or BIG SIN multi-media Cockpits for the people who don't want to bother with the "extra work", but I would be more than willing to see if EDUARD will indeed go that far. EDUARD has already released several BRASSIN' "updates" for this kit, of which I will likely buy very soon...
I cannot speak for the 1/48 EDUARD Spitfires, because they don't make a Mk.I... Yet... Give 'em time... I will not compare EDUARD's Mk.Vs, Mk.VIIIs, Mk.IXs, etc to TAMIYA's Mk.I, just because they were/are so different. This would be akin to comparing a P-51 or a P-51A to a late war P-51D...
As to the TAMIYA 1/48 Mk.I's parts, the two different Cockpit Doors alone, hint that there is a new Mk.V in the works. It WOULD make perfect sense for TAMIYA to do so. I've checked the other on-line modeling sites, and the reactions to this new Mk.I have been VERY positive...
The "NEW" AIRFIX 1/48 P-51D is currently THE bench-mark '51 kit. I have to wonder if Mr.T will counter with an all-new tooling Mustang of his own- The TAMIYA 1/32 P-51D is a SUPER kit, so why not a re-tooled '51 in 1/48..? Will they re-tool their three already EXCELLENT P-47 kits..? Or their three Corsairs..? Their Bf.109s and Fw.190s could VERY EASILY stand to be re-tooled...
I LIKE this new TAMIYA Spitfire Mk.I, and I have plans for three of them already...
Id like to add my two cents worth here. Firstly, I want to state Id be the first in line to buy a new Tamiya Mk1 Kit if and when it comes out. But, before we discount the 1969 release of Revells venerable 1/32 kit, we need to take a close look at it. It was accurate in shape and outline, had fabric covered flying surfaces with rib detail, and more importantly it had finely ENGRAVED and accurately detailed panel lines. It lacked an accurately detailed cockpit, engine, and landing gear, But, IMHO, it surpassed the current Revell, Hobby Boss, PCM, and other Spifires out there in regards to the outer skin, the exception being Tamiyas Mk9 of course. So dont discount this old kit until you take a look at the engraving. Couple the old Revell issue with the guts of the existing newer kits, and you can get a pretty nice looking Mk1 going.
VR, Russ
Id like to add my two cents worth here. Firstly, I want to state Id be the first in line to buy a new Tamiya Mk1 Kit if and when it comes out. But, before we discount the 1969 release of Revells venerable 1/32 kit, we need to take a close look at it. It was accurate in shape and outline, had fabric covered flying surfaces with rib detail, and more importantly it had finely ENGRAVED and accurately detailed panel lines. It lacked an accurately detailed cockpit, engine, and landing gear, But, IMHO, it surpassed the current Revell, Hobby Boss, PCM, and other Spifires out there in regards to the outer skin, the exception being Tamiyas Mk9 of course. So dont discount this old kit until you take a look at the engraving. Couple the old Revell issue with the guts of the existing newer kits, and you can get a pretty nice looking Mk1 going.
VR, Russ[/quote]
VR Russ, did I "discount" this "Venerable old kit"? NO. I DID call it "VENERABLE", did I not?"
From Webster's Dictionary: "venerable: 1. worthy of respect or reverence", et al...
I did not DENIGRATE the old REVELL Spitfire Mk.I kit in ANY WAY. I DID say that TODAY's 1/32 kits are "BEAUTIFUL", meaning that they take advantage of today's CAD and SLIDE-MOLDING technologies, which are today's benchmark. I'm SURE that if TAMIYA should deign to produce an all-new 1/32 scale Spitfire Mk.I, that it would be superior to the old REVELL kit, if only by virtue of the aforementioned "today's CAD and SLIDE-MOLDING technologies"... People become "prickly" over my commentary because they don't take the time to actually READ what I'm saying...
If anything, by calling the old REVELL 1/32 Mk.I Spitfire "venerable", I should think that I had already paid this old kit one of the highest compliments due to it...
You've read too much into my comment. I wasn't trying to be "prickly" and I wasn't directing my comment at anyone. I was just saying for modelers in general not to "discount" the older kit just because it's "old", because it still has a lot to offer, and many younger modelers (younger than I am) don't realize the Revell 1/32 Spitfire, Tony, Frank, and Jack were some of the first kits to have beautifully engraved and accurate panel lines-- real mold maker works of art. The Japanese aircraft molds have been lost, making the kits collectors items, but the Spit can still be found-- usually dirt cheap because it's been "replaced" by more "modern" offerings. In fact, I believe the old kit is a work of art compared to Revell's latest 1/32 Spitfire MkII, which is covered in sunken rivet divots and wide panel lines despite "CAD" and "slide molding (although I am combining the nice interior of the new kit with the nice exterior of the old kit in my model). Just because an item is "new" does not mean it's "good", and just because an item is "old" does not mean it's "bad", and there are still old kits with plenty to offer (kinda like people I guess!). This was my point. We've kinda hijacked this thread, so we should probably get back on topic--and I'm glad to see Tamiya offering new items in any scale or genre-- you can usually count on them to do good work in either 1/48 or 1/32 scale. 😊
VR, Russ
Hi, Russ!
Re: "Prickly"- Not YOU specifically, Russ- A LOT of other modelers over on ARMORAMA seem to take what I say the wrong way, nearly every time I open my mouth. ESPECIALLY when I bring up WWII US/Allied Tanks, the Men, their Equipments and Uniforms and the attention to their various details. In the "Aircraft Community", not so much. Actually, I think that the "Aircraft Community" seems to have a much less belligerent "atmosphere", no pun intended. I dunno, maybe I'm just getting a little bit "punchy" with all of the negative vibes over there, ESPECIALLY from the "Panzer-Clique"...
TAMIYA makes a top-notch product. Usually... They've had a few "Not-So-Goodniks", too. Their 1/48 Lancaster kits come to mind- Those Engine Nacelles-to-Wing Root problems with fit are pretty awful...
VR, Dennis
BTW, have a Nice Easter!


Comments