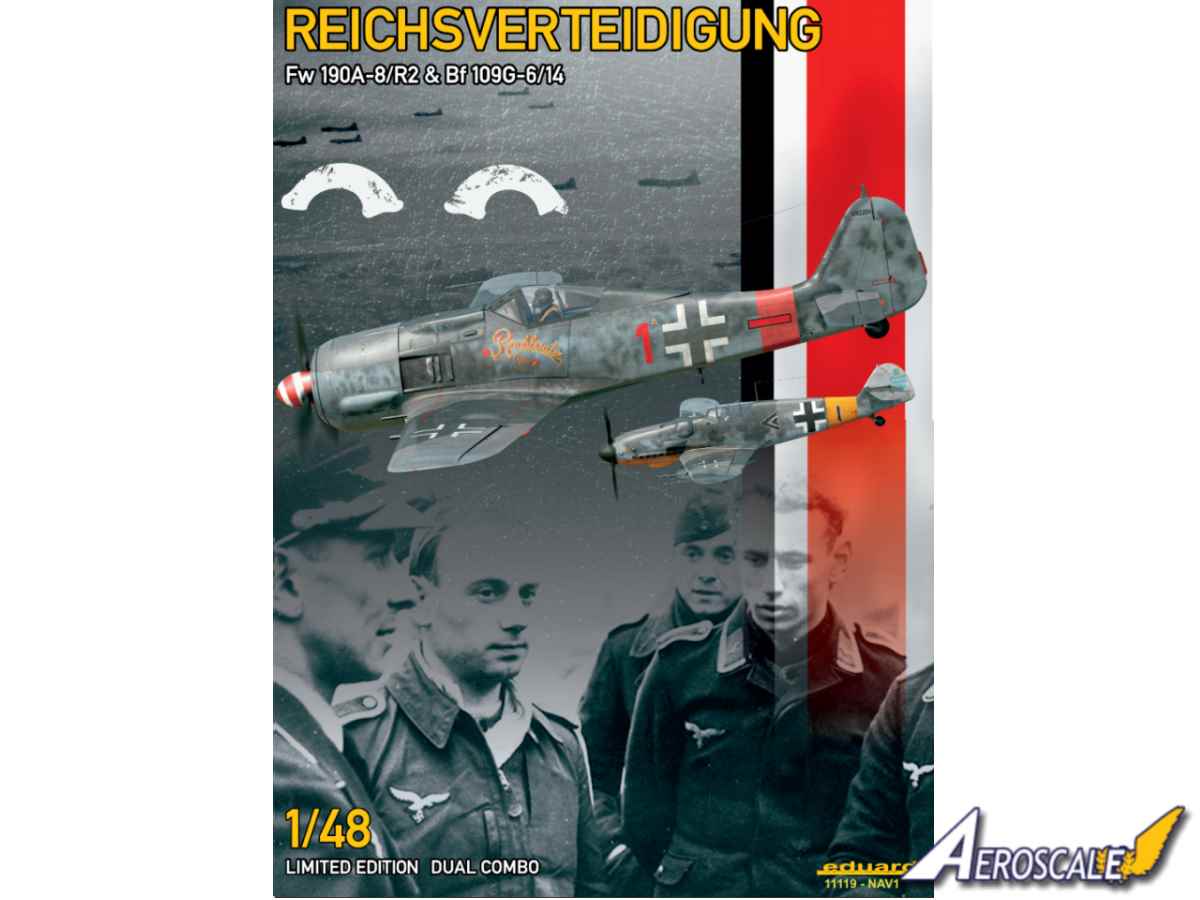
During the latter period of WWII Germany was facing a desperate fight defending the Homeland from Allied Bombers and long ranging fighter escorts. The heavily armoured Fw 190A-8/R2 Sturmbock were designated as bomber destroyers and their armament consisting of two 30 mm MK 108 cannon could bring down a bomber with a few hits. Unfortunately the defensive armour affected the performance of the Sturmbock and required the Bf 109 Gs to escort them.
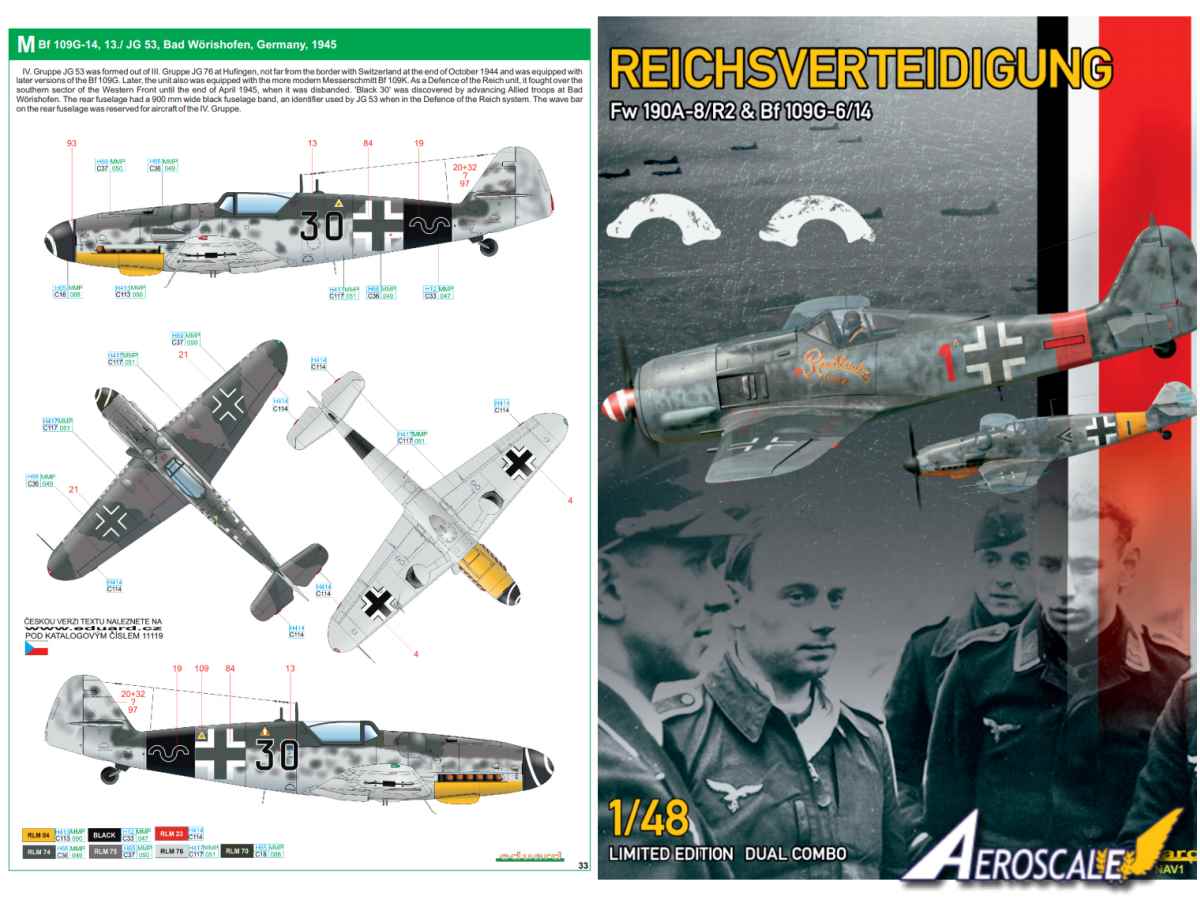
The rather large box contains the duo combination of a Fw 190A-8/R2 & Bf 109G-6/14 in 1/48 scale. The two are specific to the role as defenders of the Third Reich from November 1943 up to the end of WWII. Included is a 36 page instruction manual and a small poster titled the lone Adler by Piotr Forkasiewicz featuring the Fw 190A-8/R2 Sturmbock flown by Lt. Alfred Lausch of 8 [Sturm]/Jagdgeshwader 4 after an attack on the 95th Bomb Group over the Czech/German border on 11th September 1944. This is one of the marking options [B] provided in the kit. All the contents except the instructions are in self-sealing plastic bags.
Fw 190 A-8/R2
This is the latest tooling of the Fw 190, not the complex release Eduard first released. Overall the recessed panel lines and rivet detail is very subtle. Also the fuselage has a lot fewer parts than the previous releases. Contents include:
●5 x injected grey plastic sprues.
●1 x injected clear plastic sprue
●1 x pre-coloured photo etched fret.
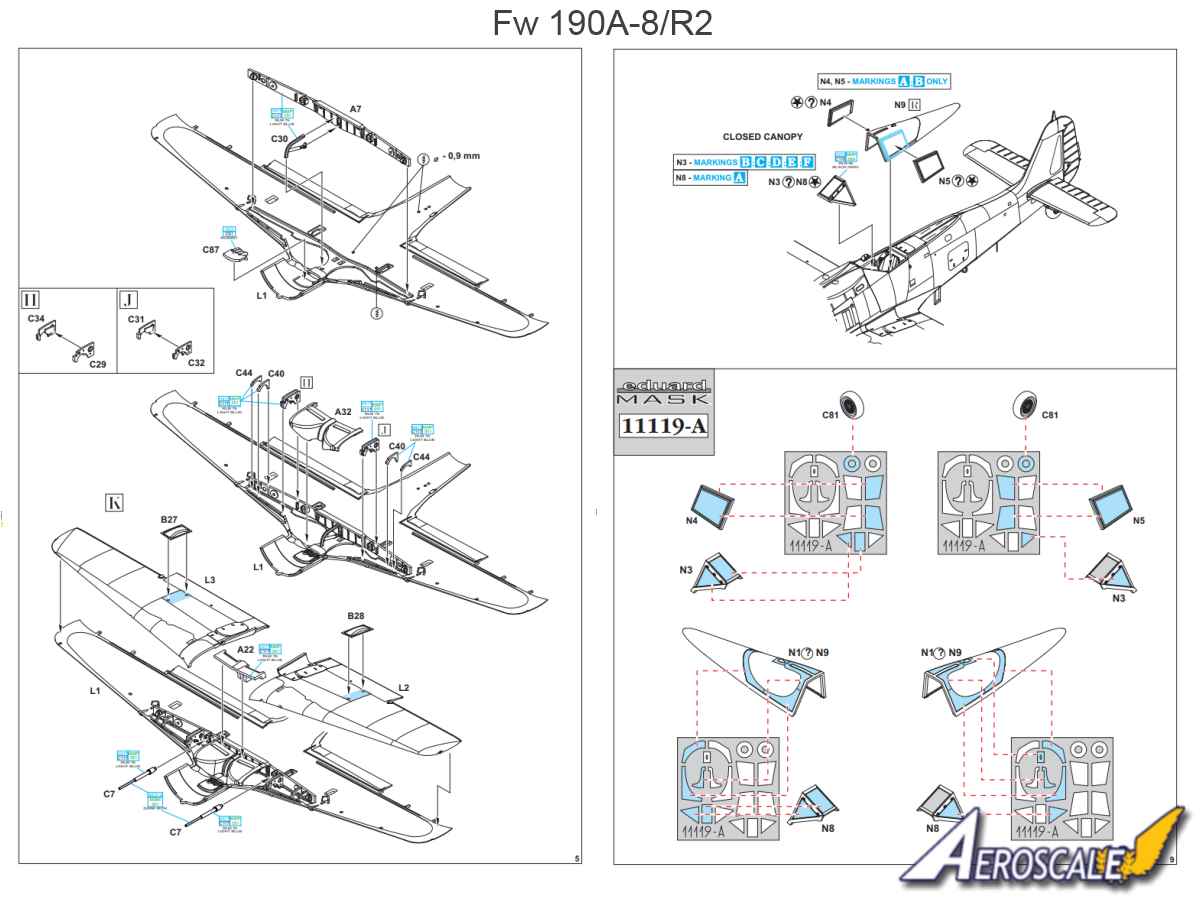
●1 x set of paint masks for canopy and wheels.
●2 x decal sheets [the sheet includes the markings for the Bf 109G]
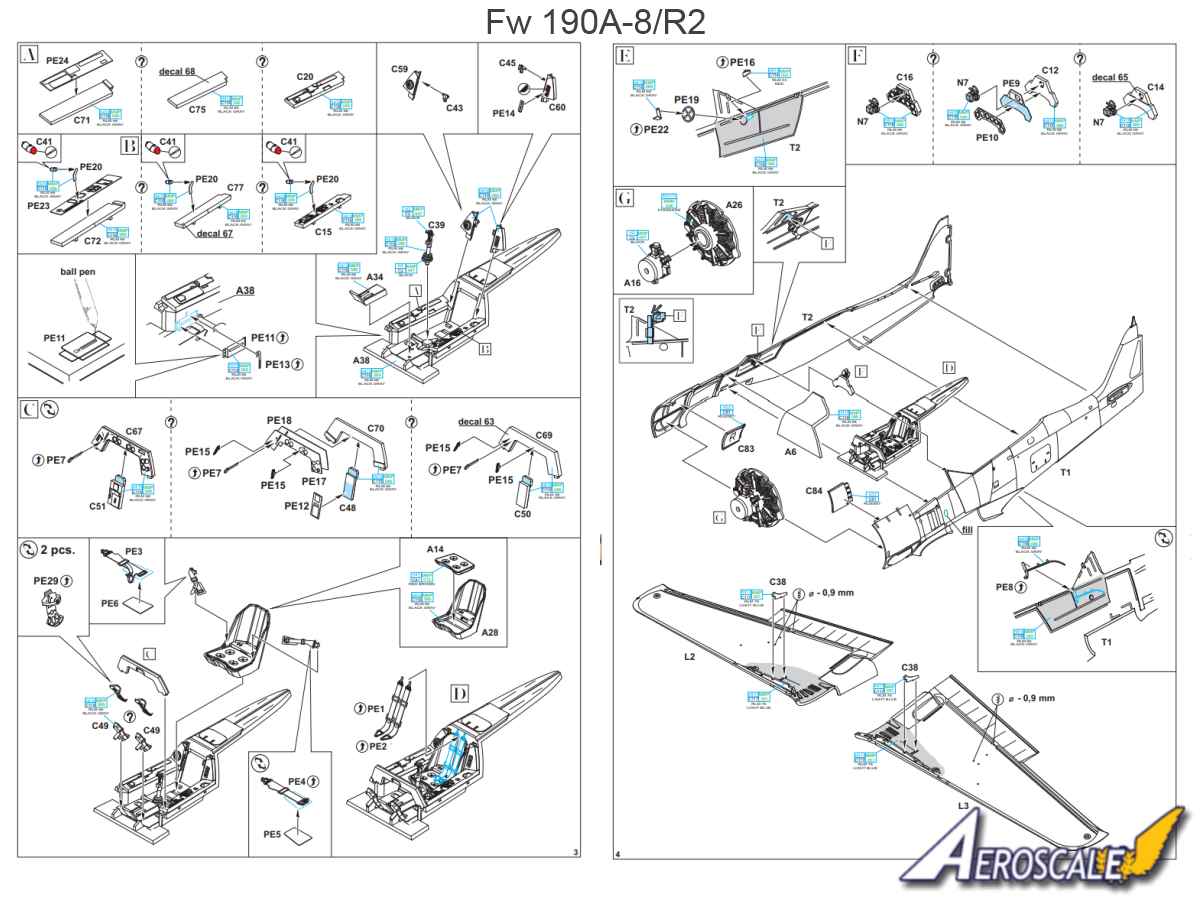
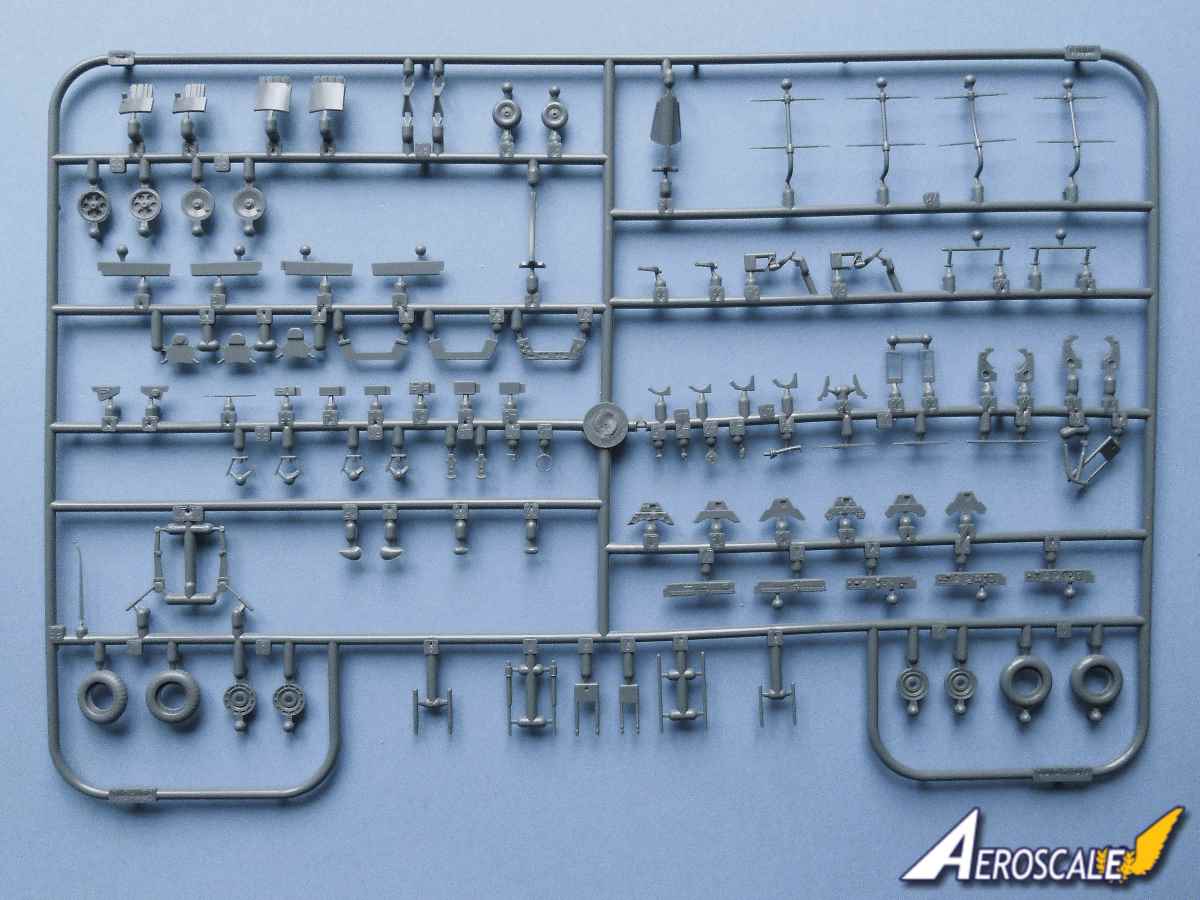
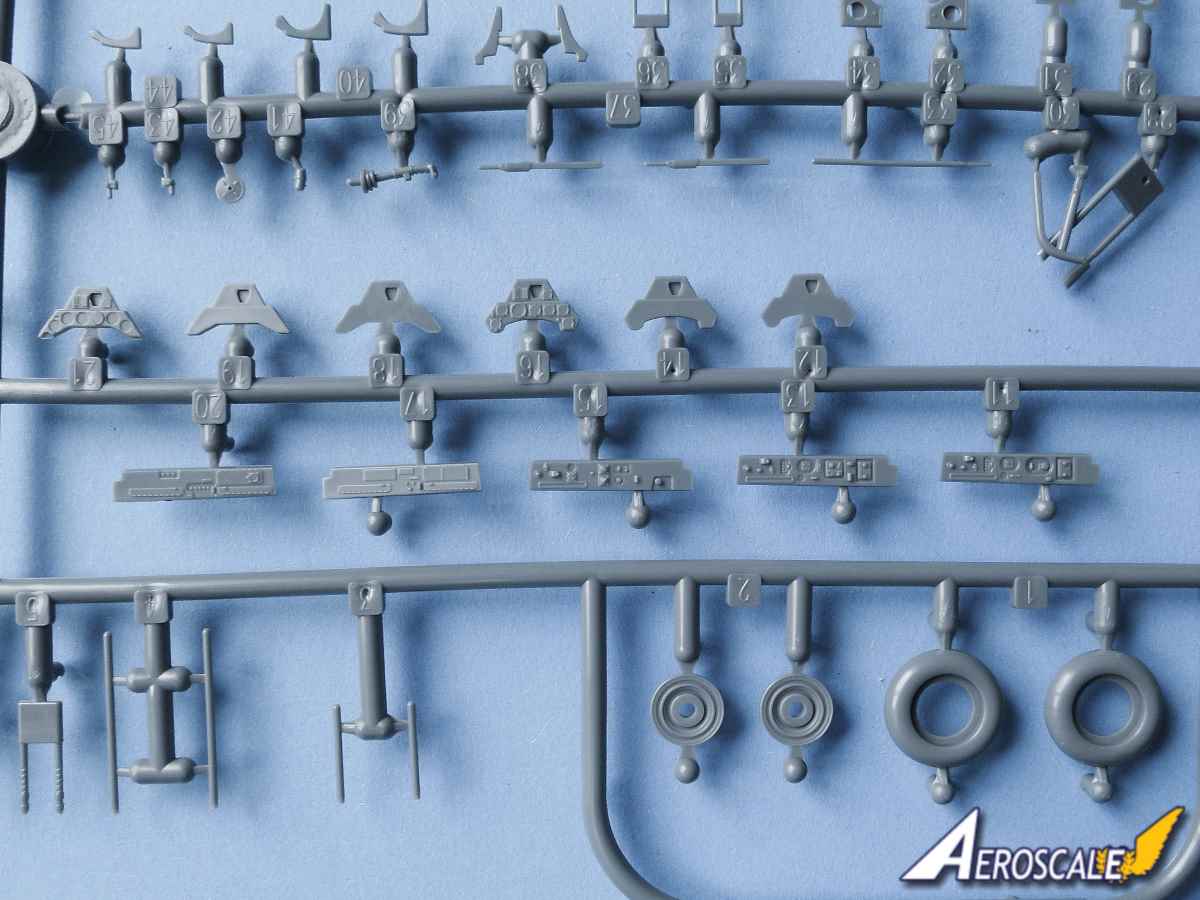
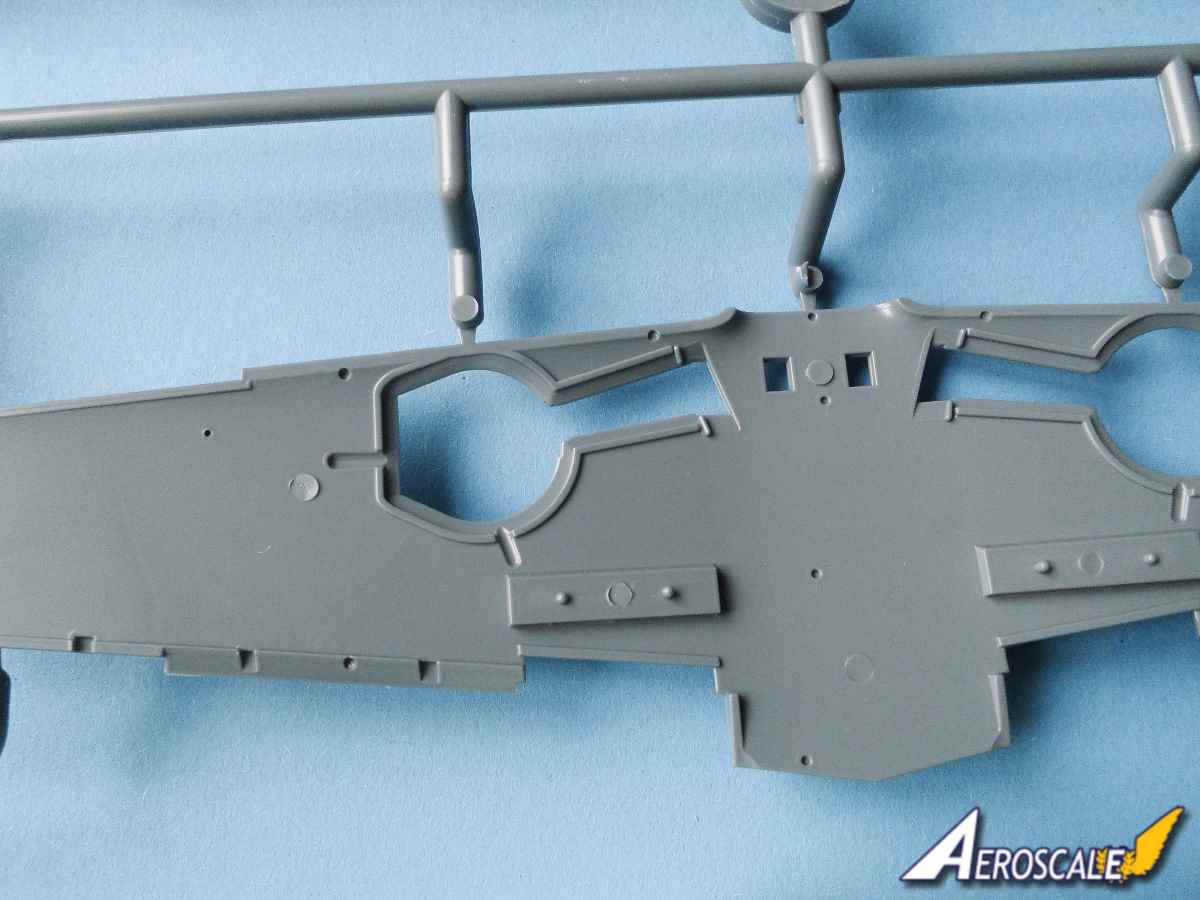
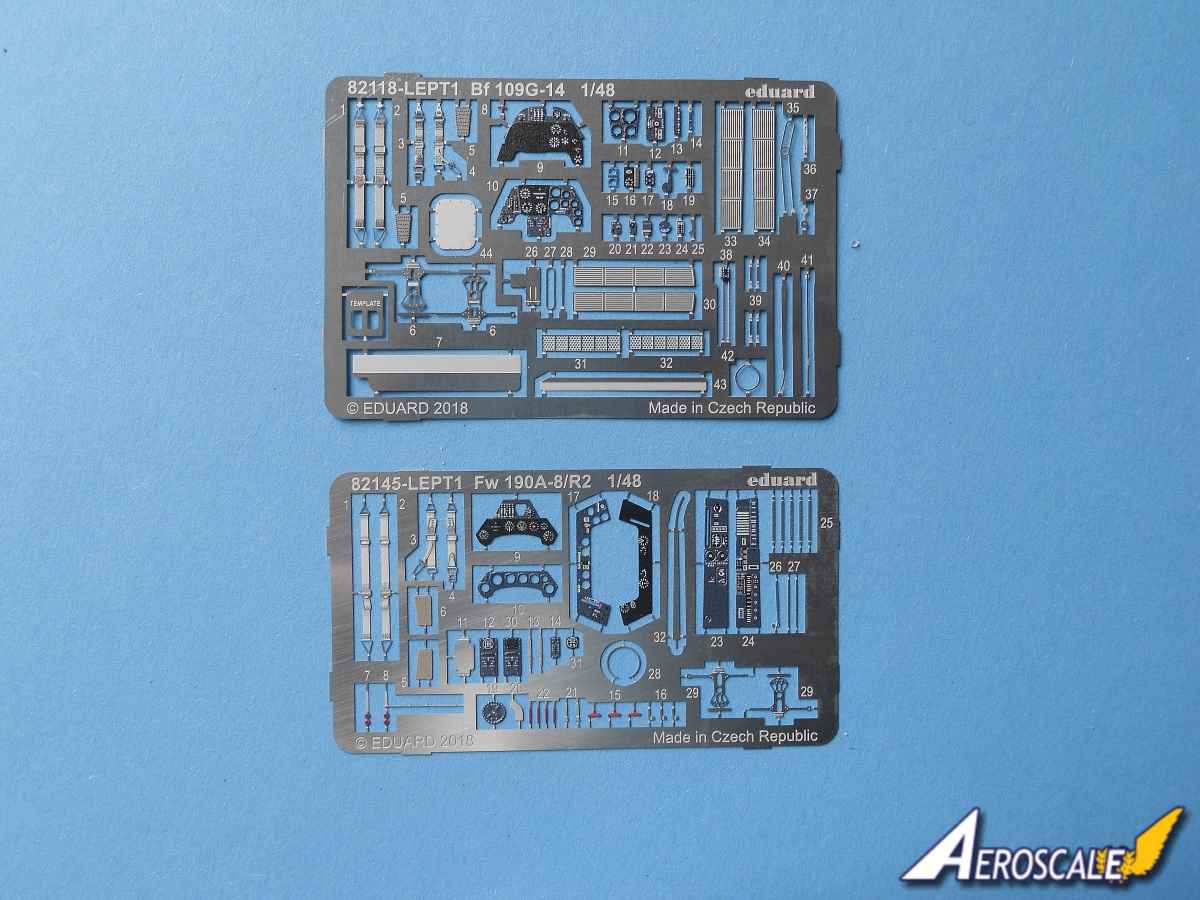
As is the norm for Eduard higher end releases there are three ways of creating the cockpit detail: using the pre-coloured photo etched parts, decals or painting. The quality of the painted photo etched parts is very good. Parts not only include instrument panel and side consoles there is also a seat harness, rudder pedals with straps, trim wheel and various handles. The decal instruments are not nearly as good as the PE parts. The decals are laid on smooth plastic parts to make adhesion easier. There are also plastic parts with low relief detail for those that would much rather create the look of the cockpit with paint. The plastic parts of the cockpit are nicely moulded with fine detail. A tub makes up the majority of the cockpit, onto which is added the seat and instrument panel. There is what I thought was an irritatingly placed raised ejector mark on the inside of the right side of the cockpit wall, but no its the locating point for the trim wheel. Once complete the cockpit will sit nicely on the narrow shelf moulded on the inside of each half of the fuselage. The gun sight is made from clear plastic.
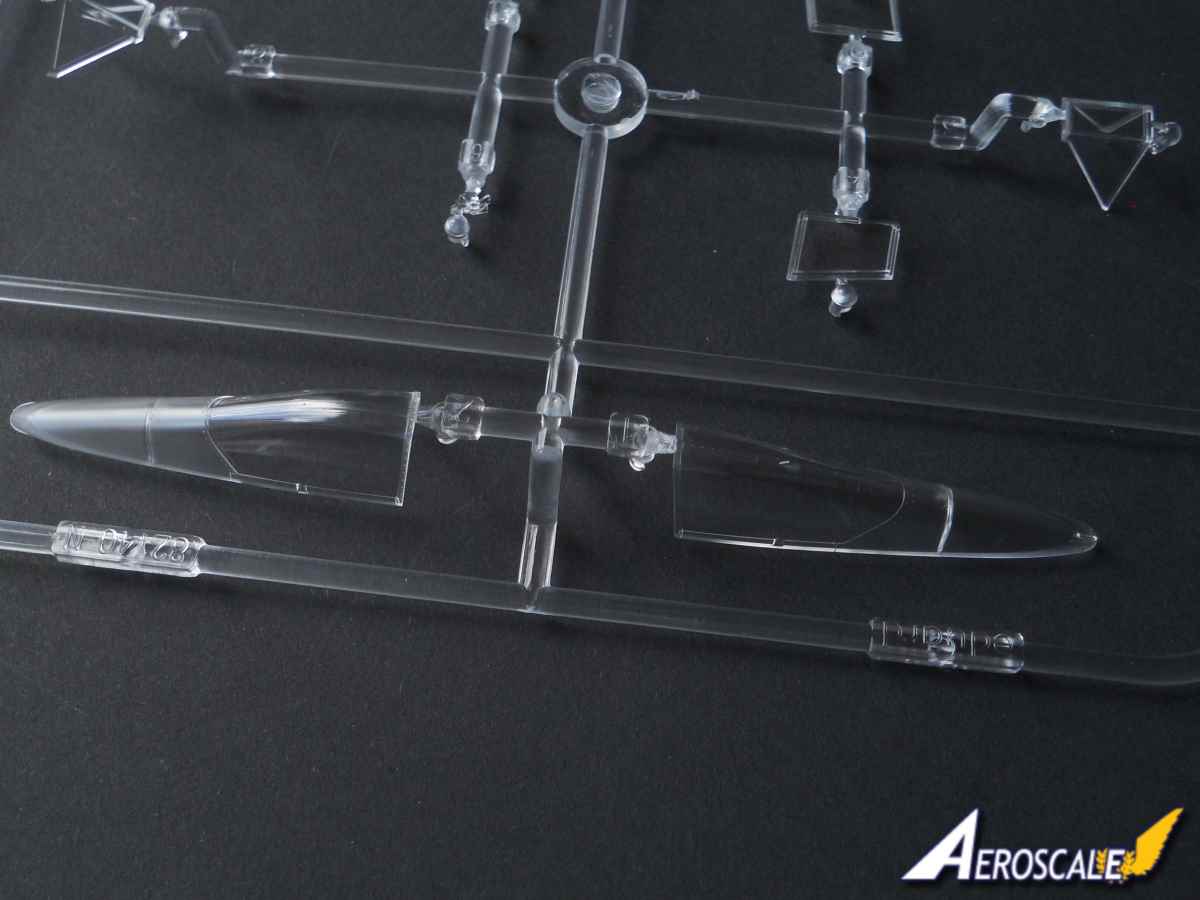
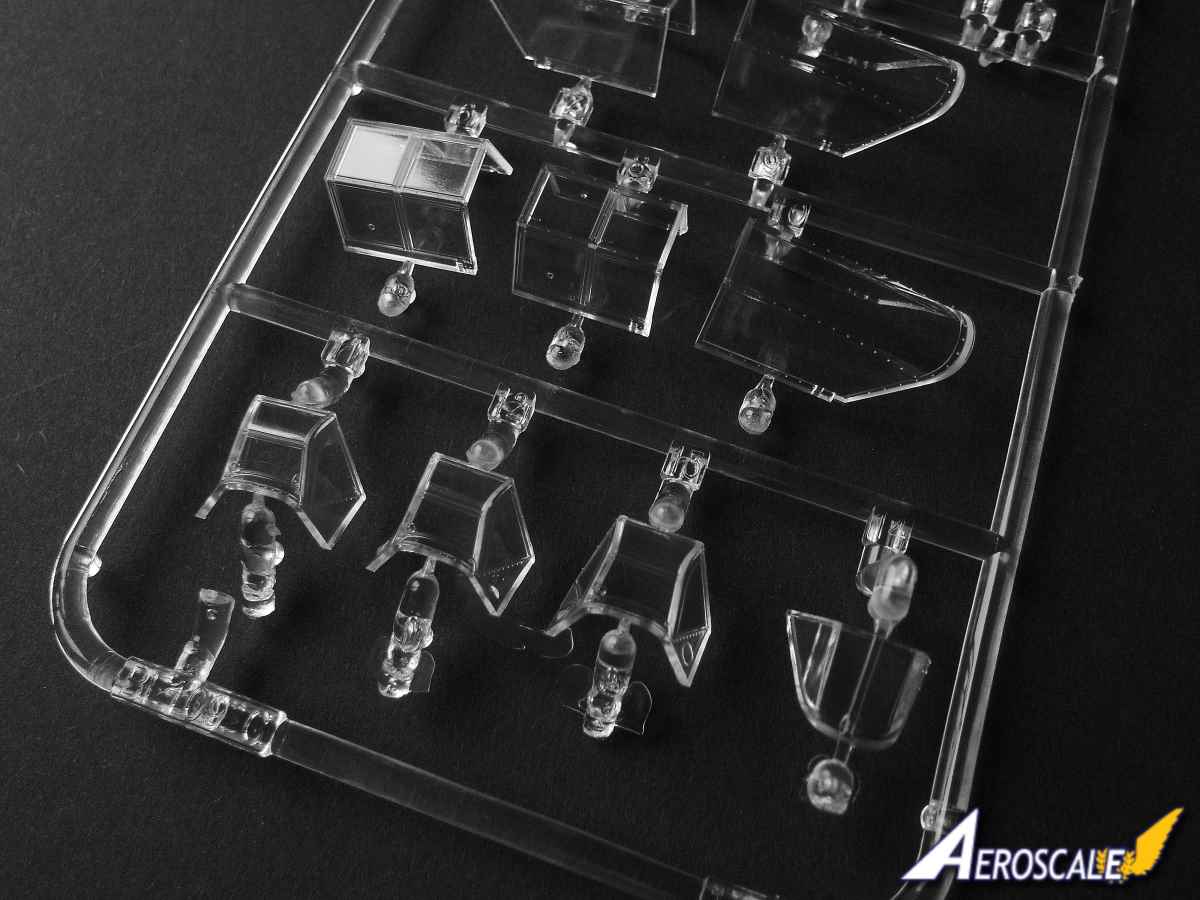
The canopy and windscreen are separate parts. They are very clear and thin. The unglazed area of the canopy has a slightly matt look to it. The canopy can be posed open or closed and there are two different canopies one for the open and another for the closed position. There are a couple of plastic items to fit to the inside of the canopy. Option A&B has additional armour for the sides of the canopy and these come as separate parts that need to be attached. Thankfully being a Limited Edition there are paints masks included. The canopy frame has some interesting curves which would be challenging if you were creating your own mask. So the pre-cut masks will be very helpful.
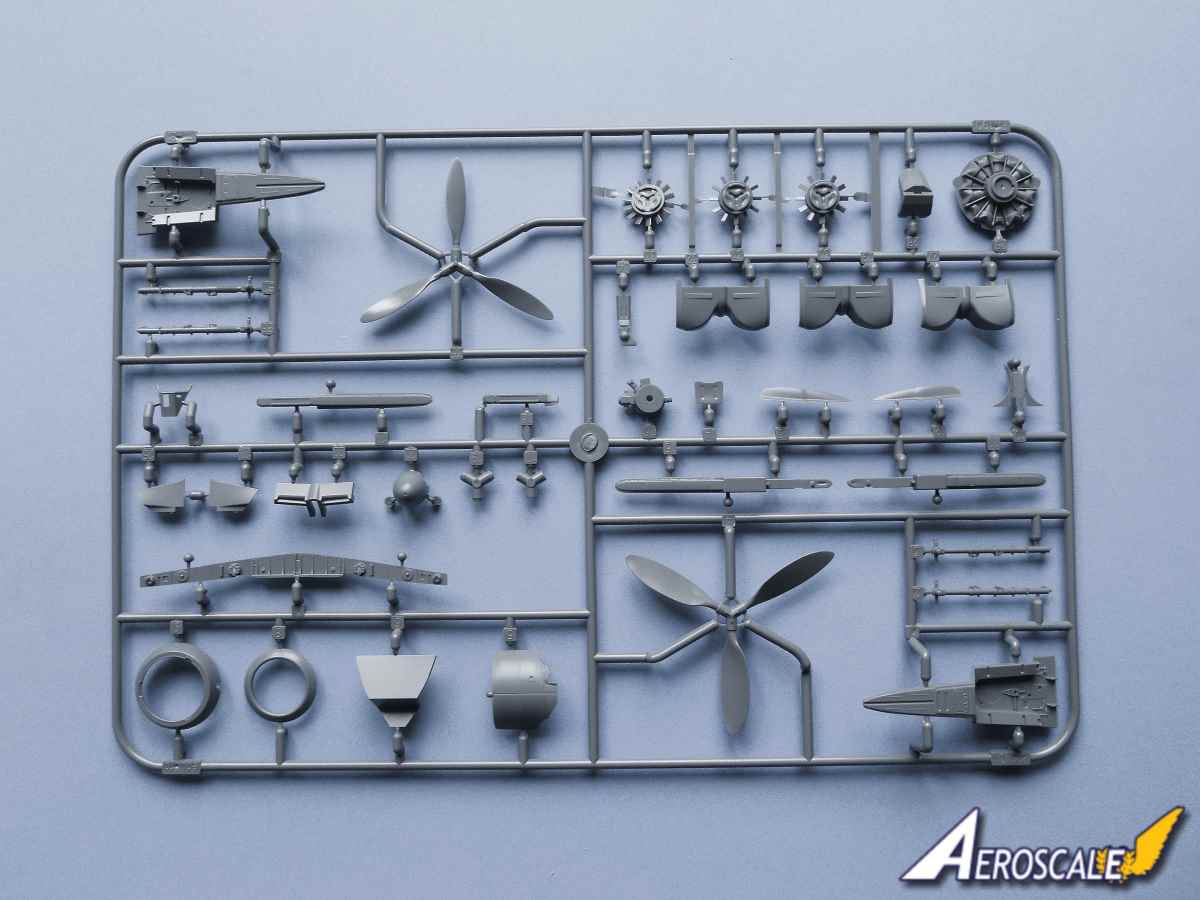
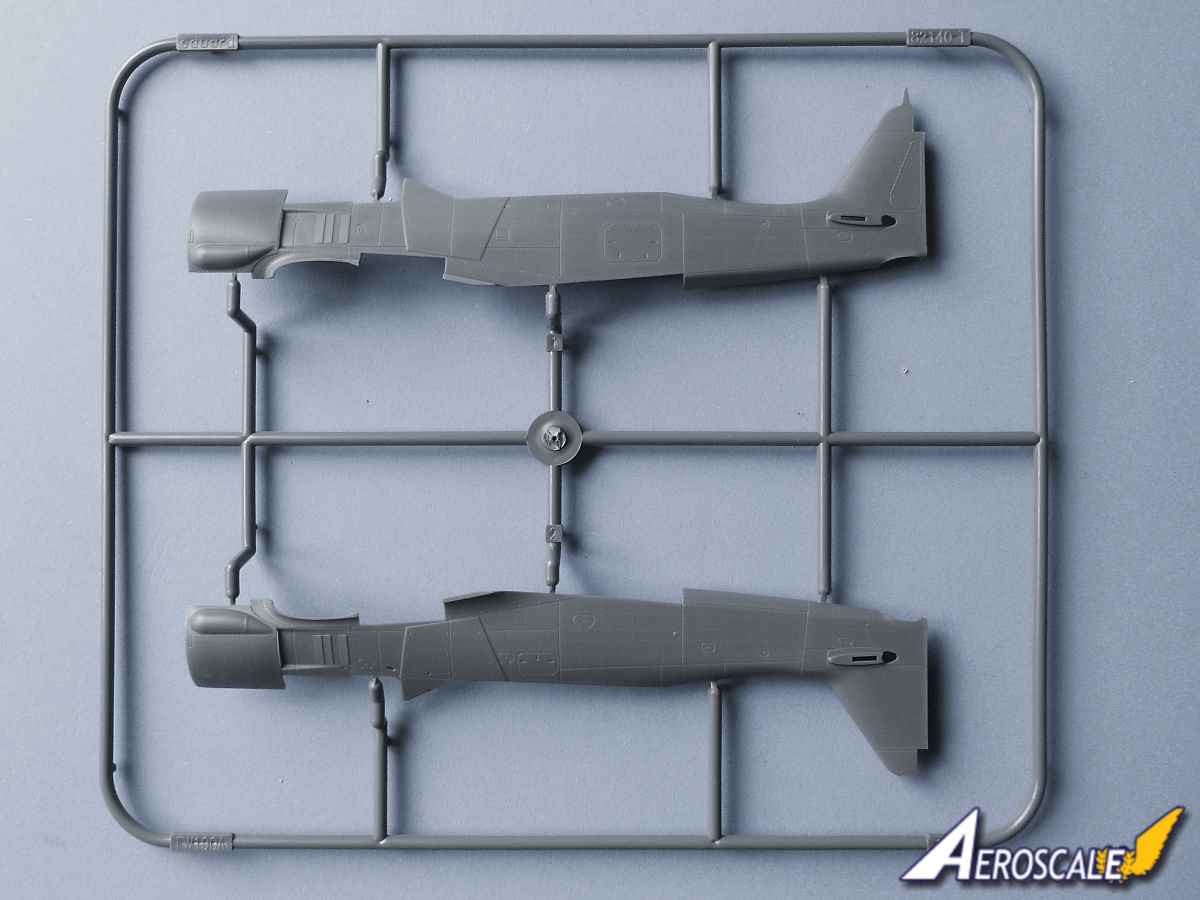
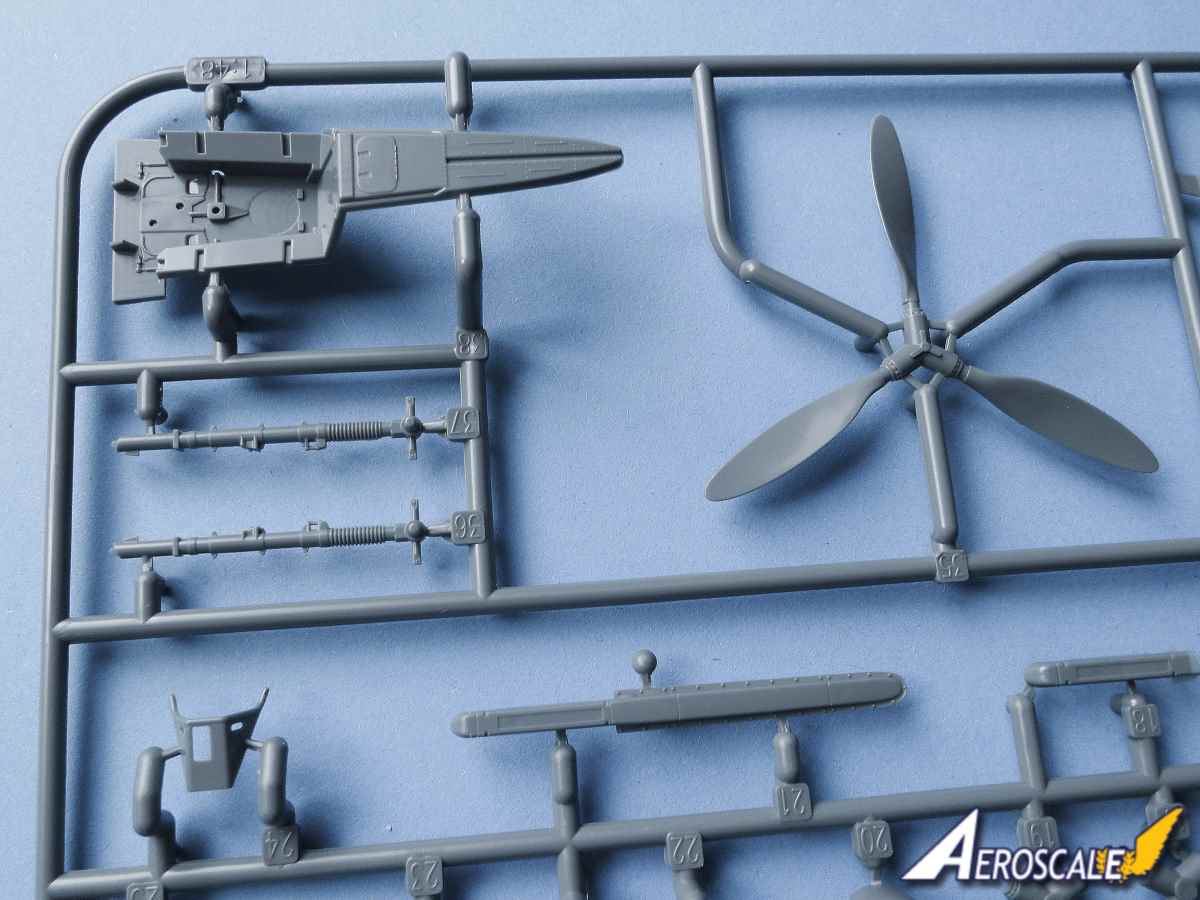
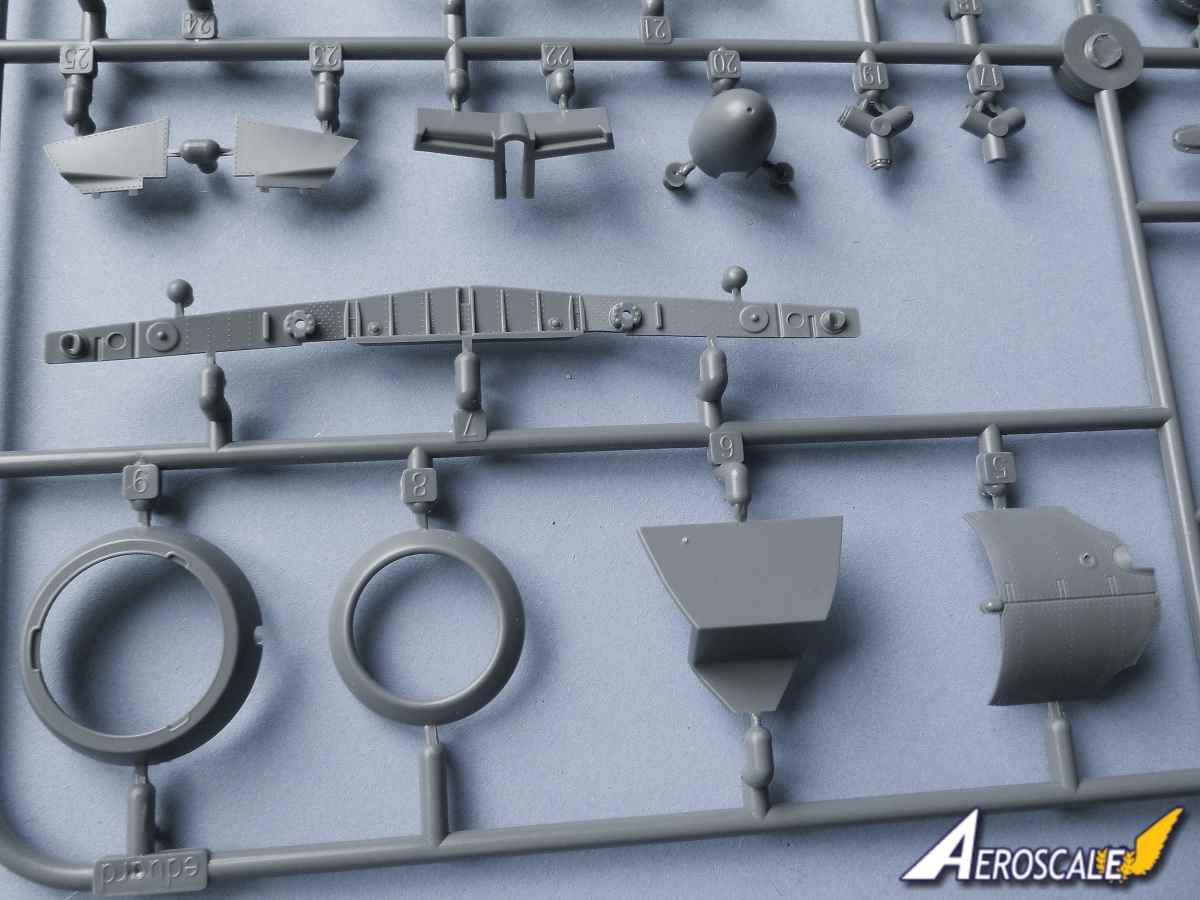
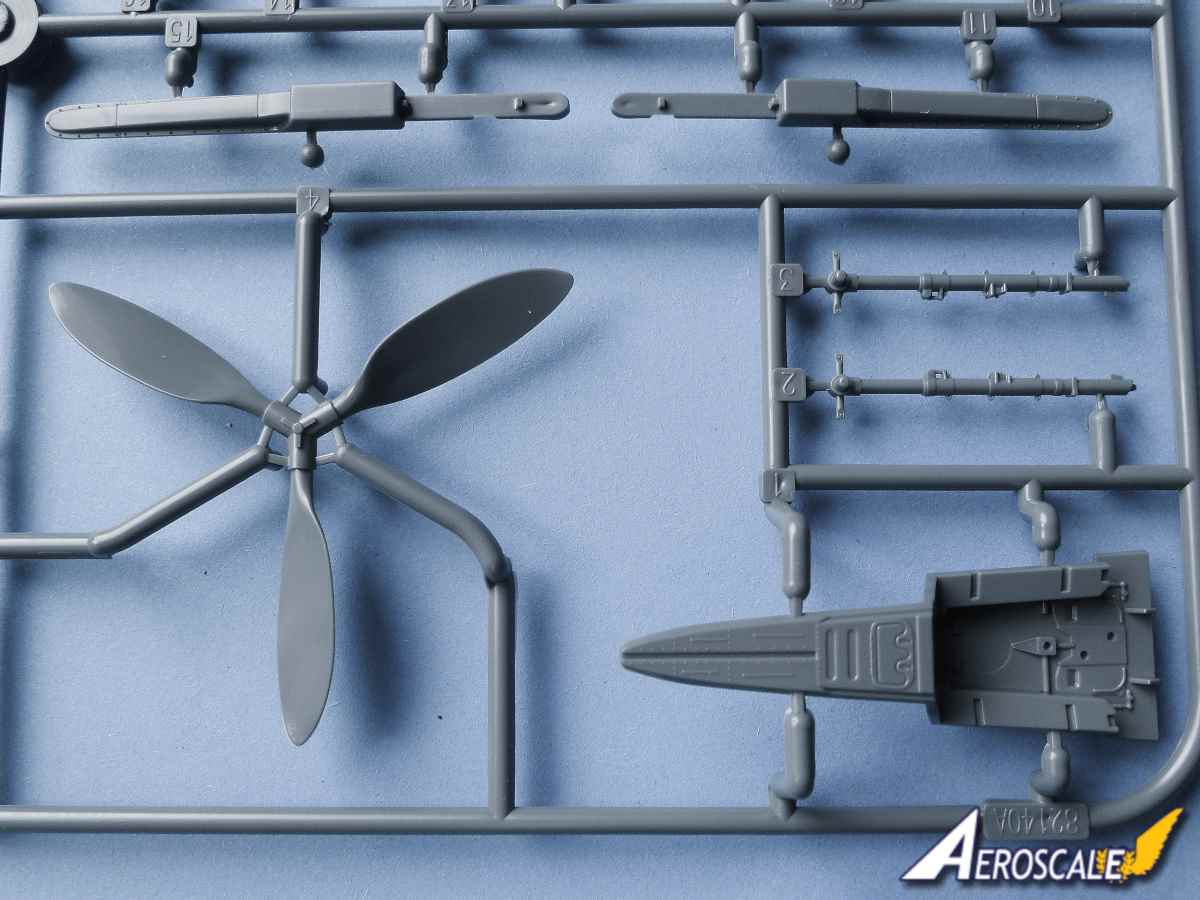
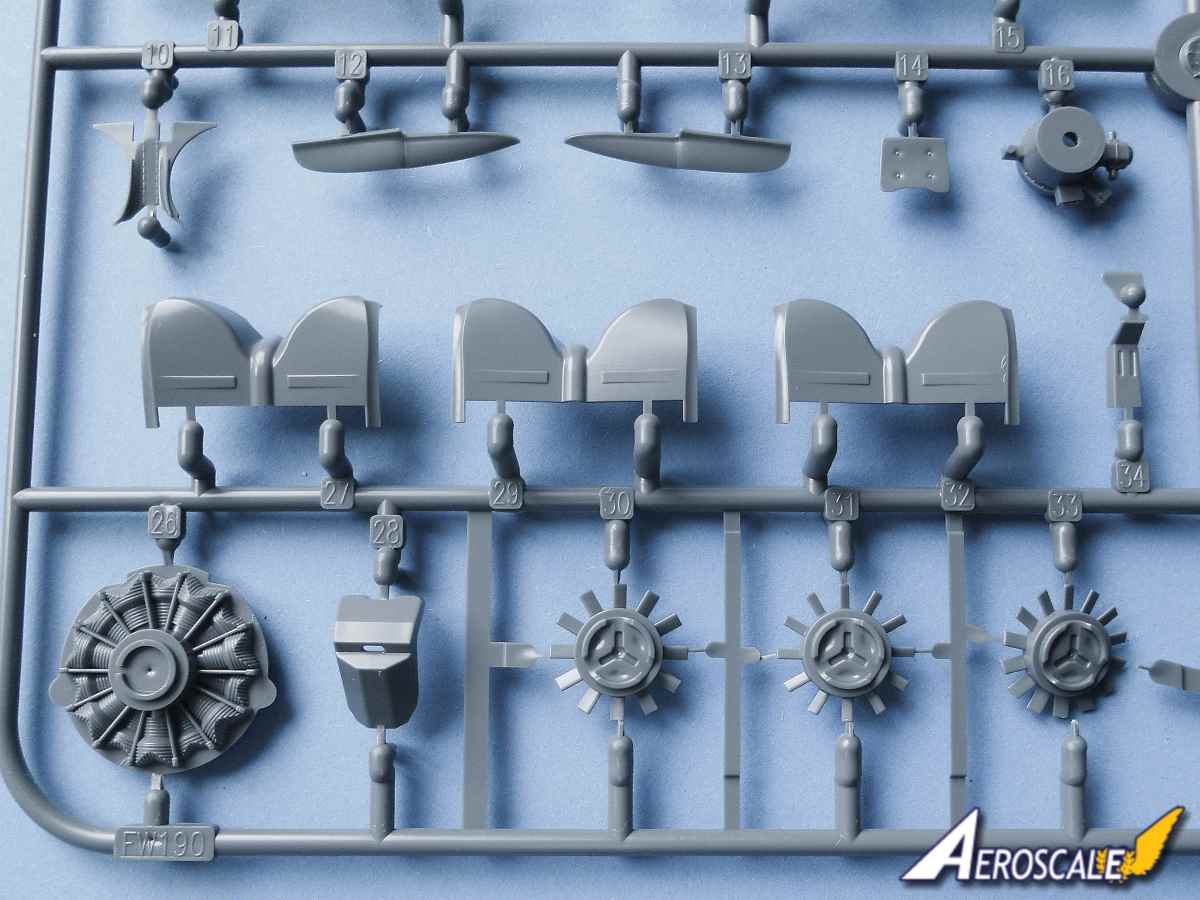
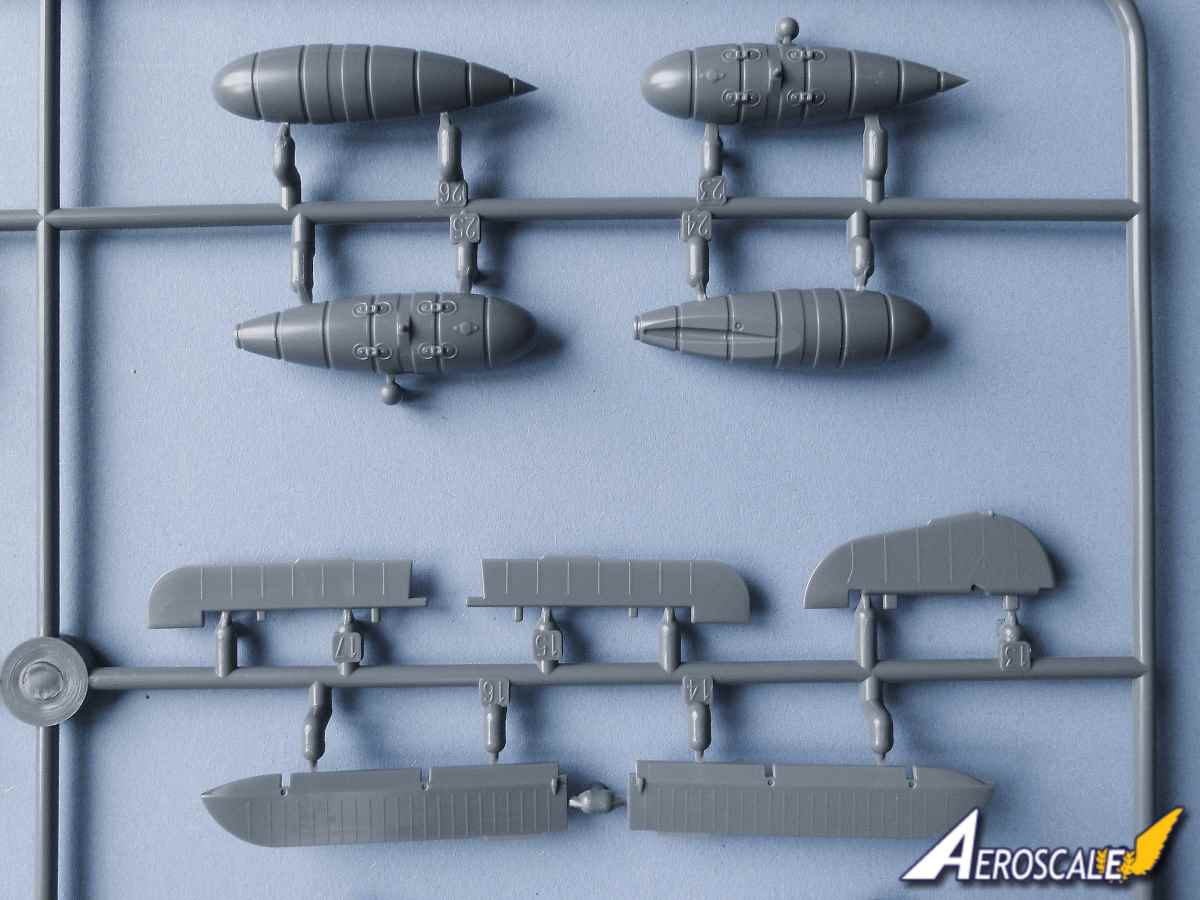
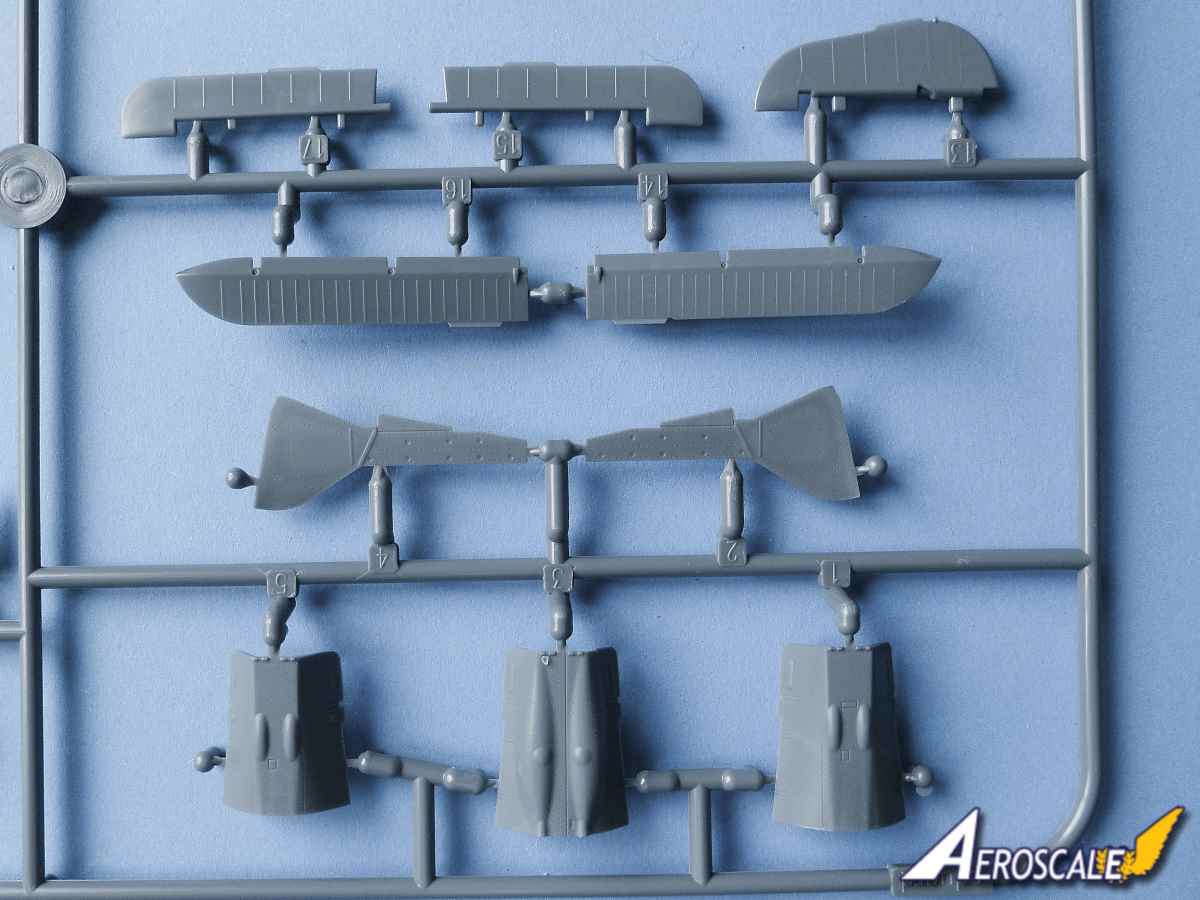
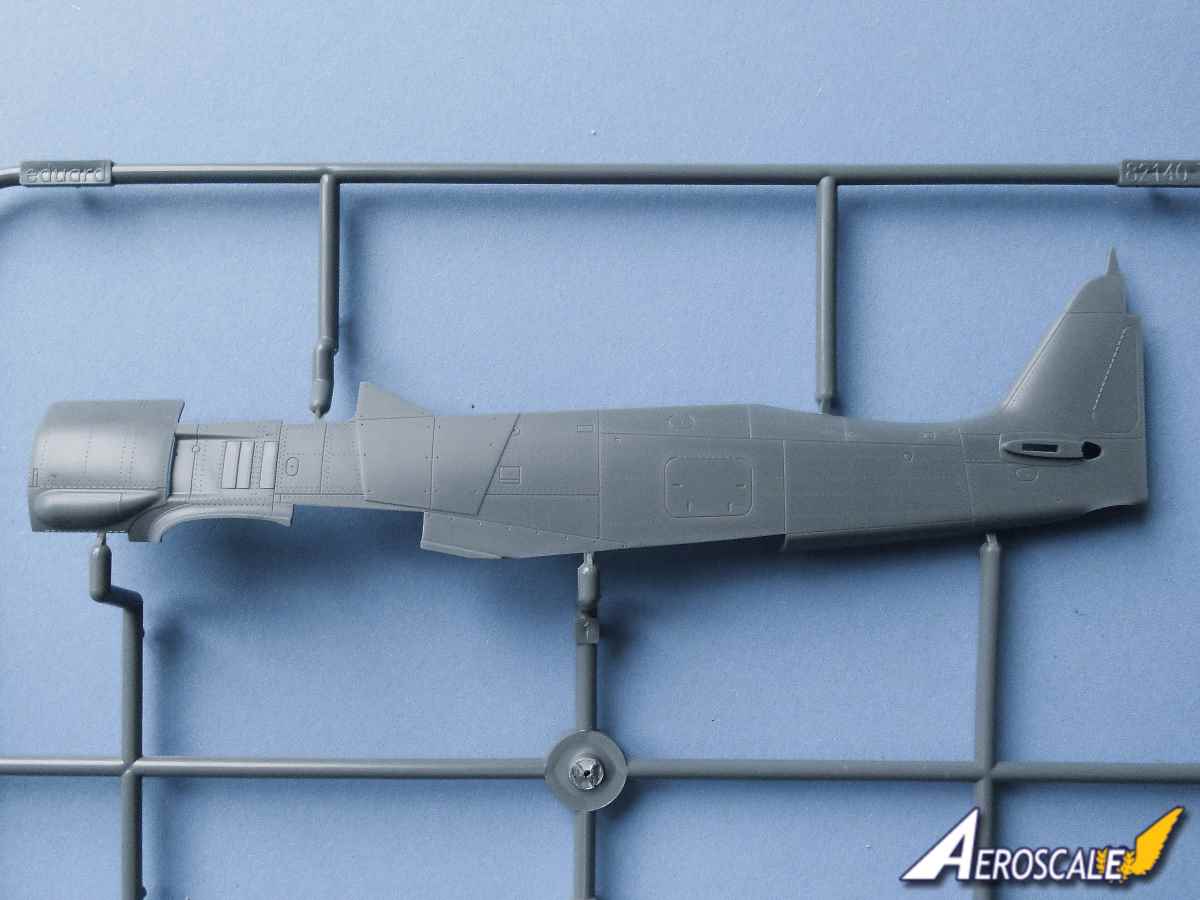
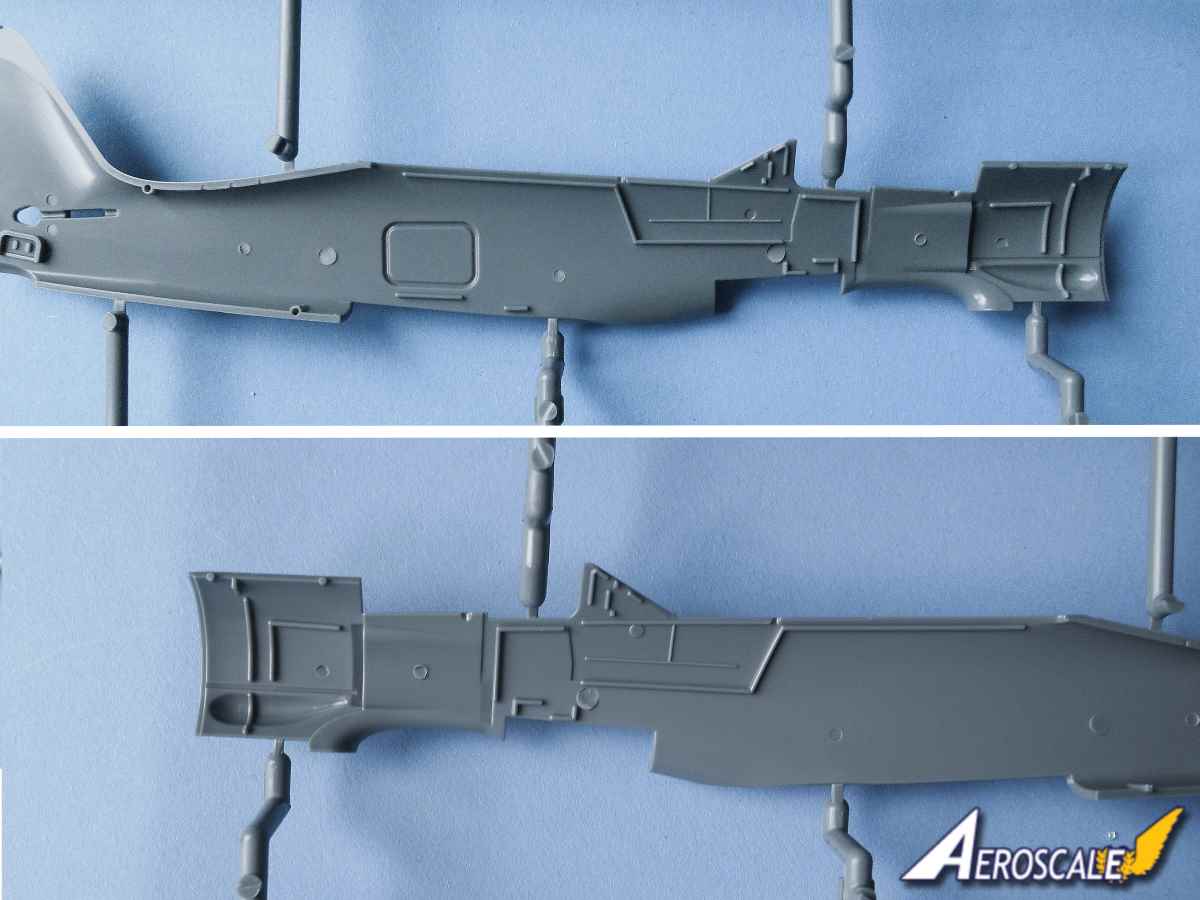
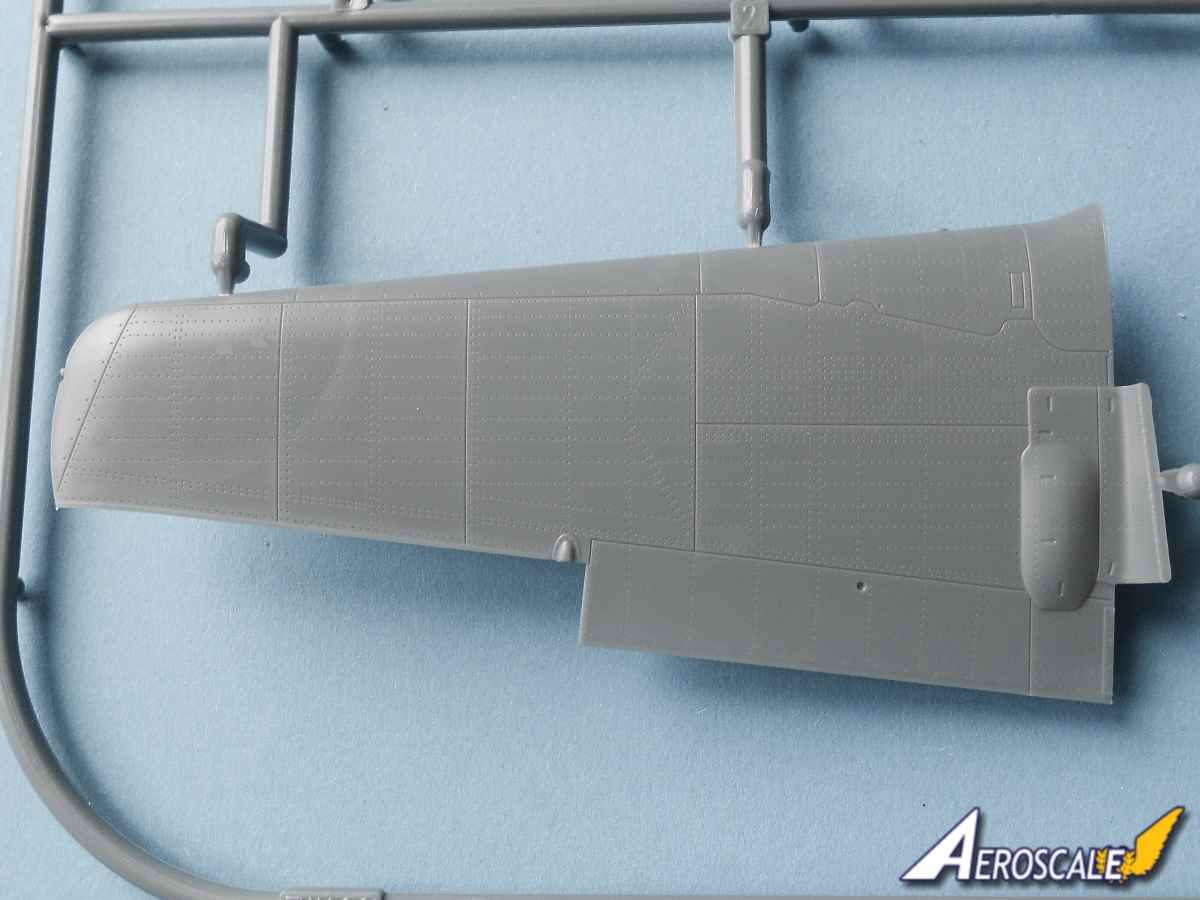
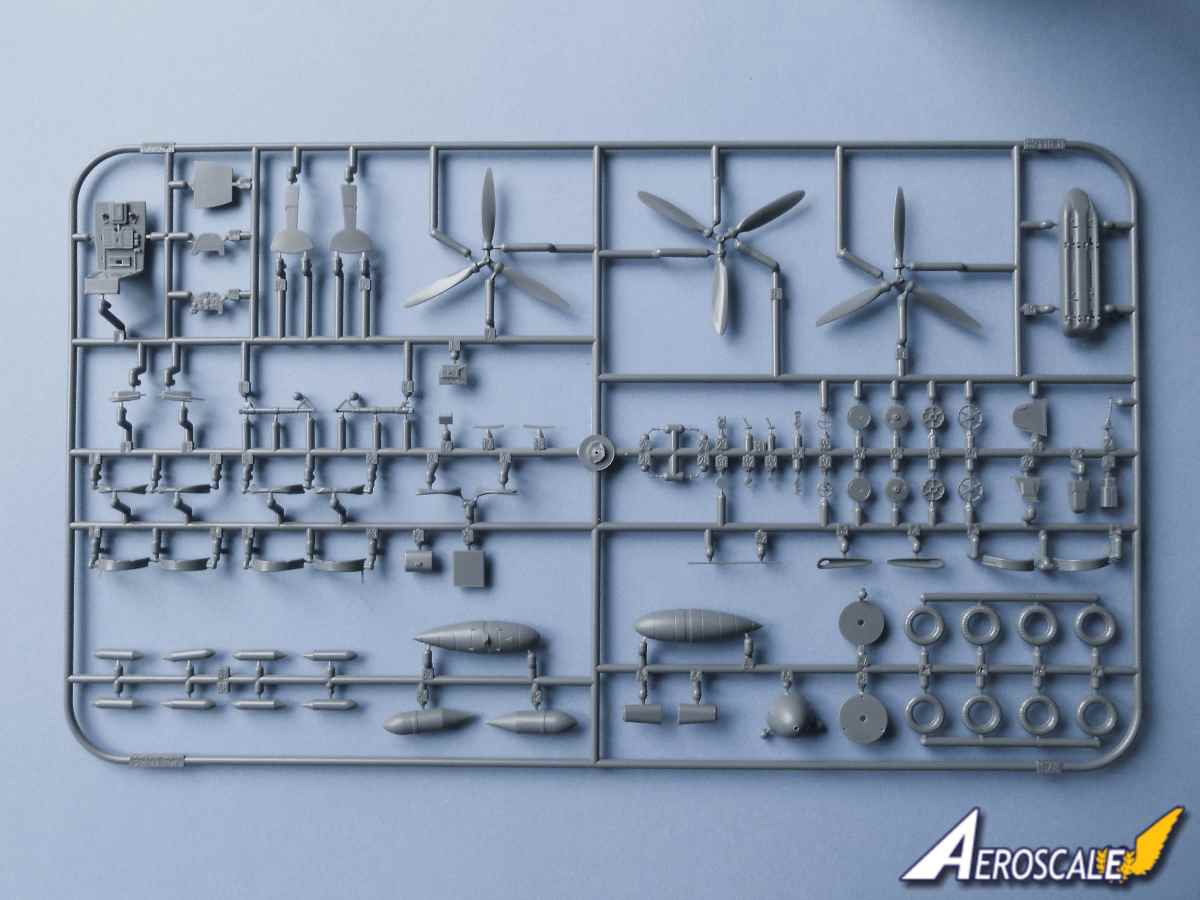
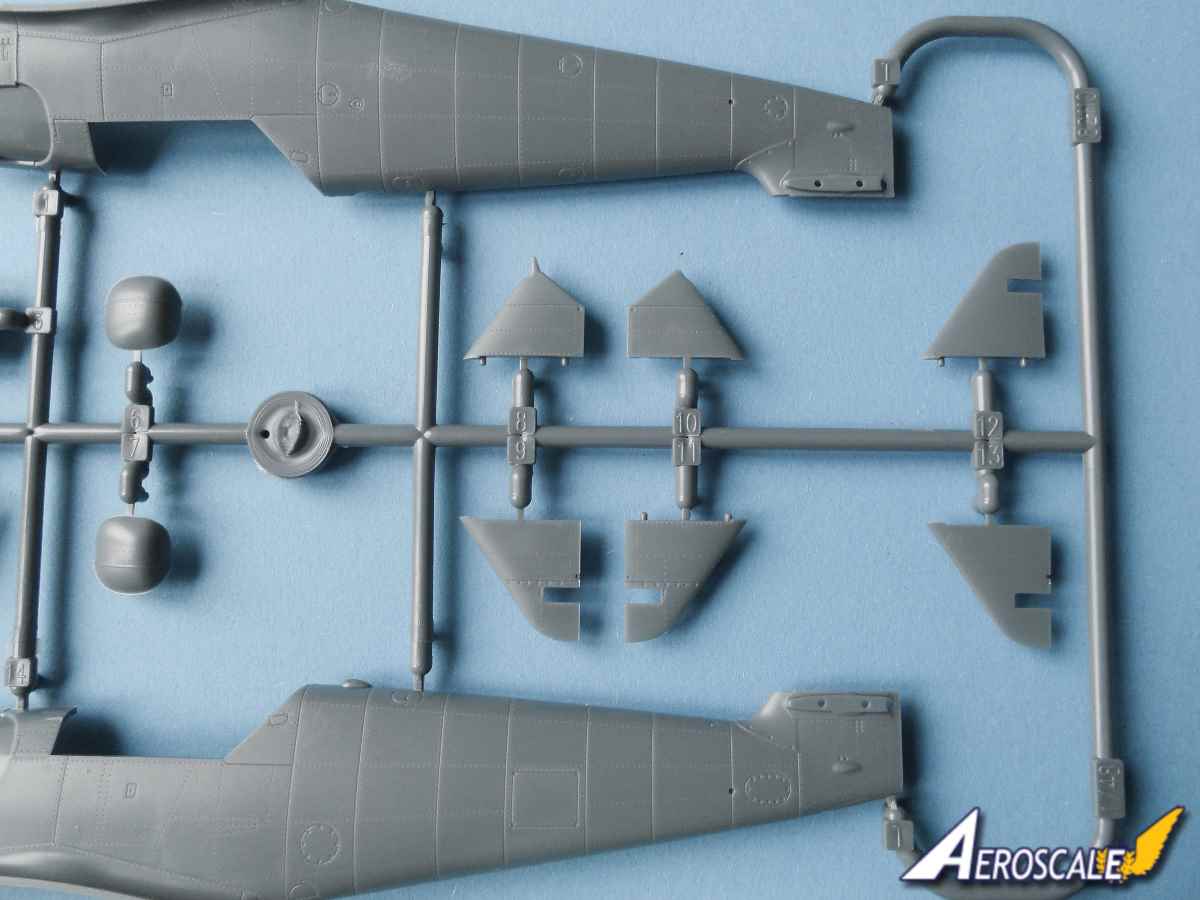
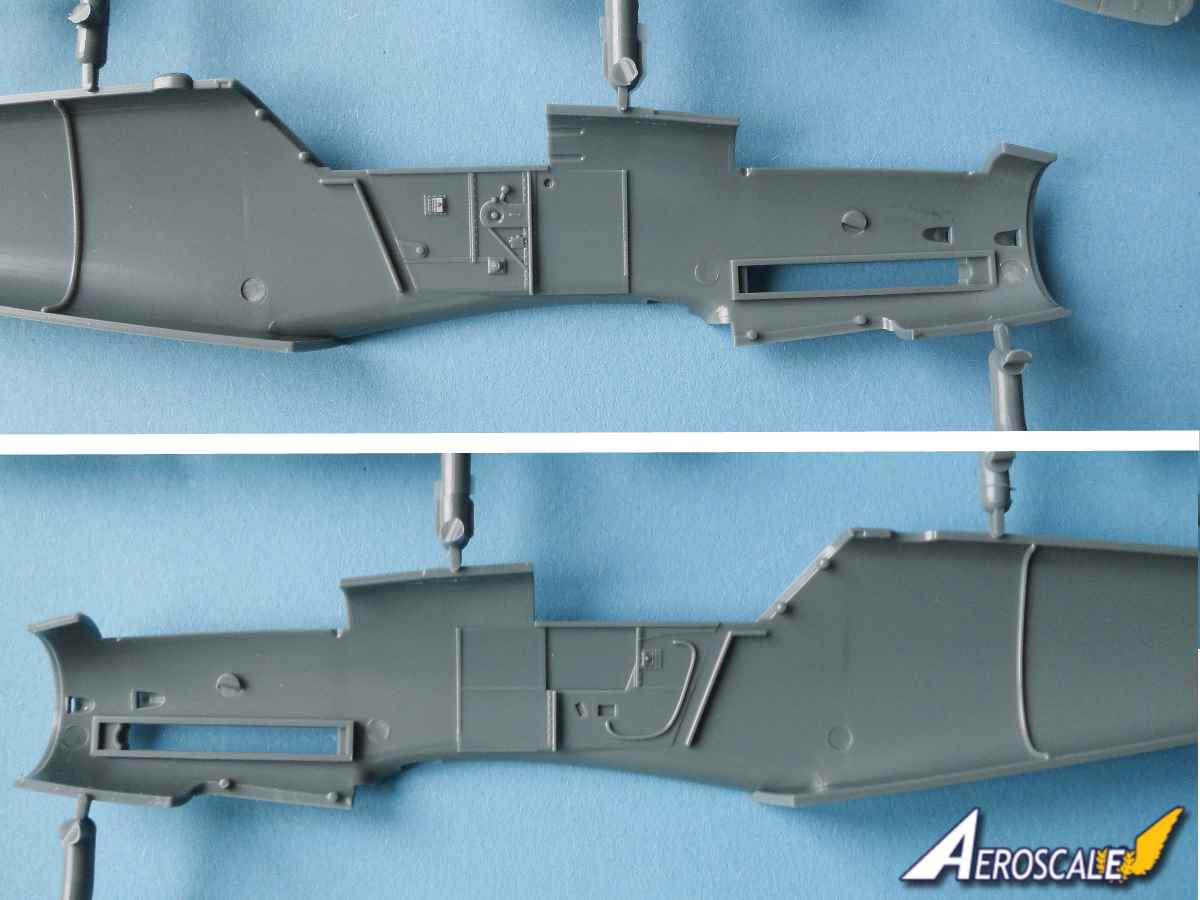
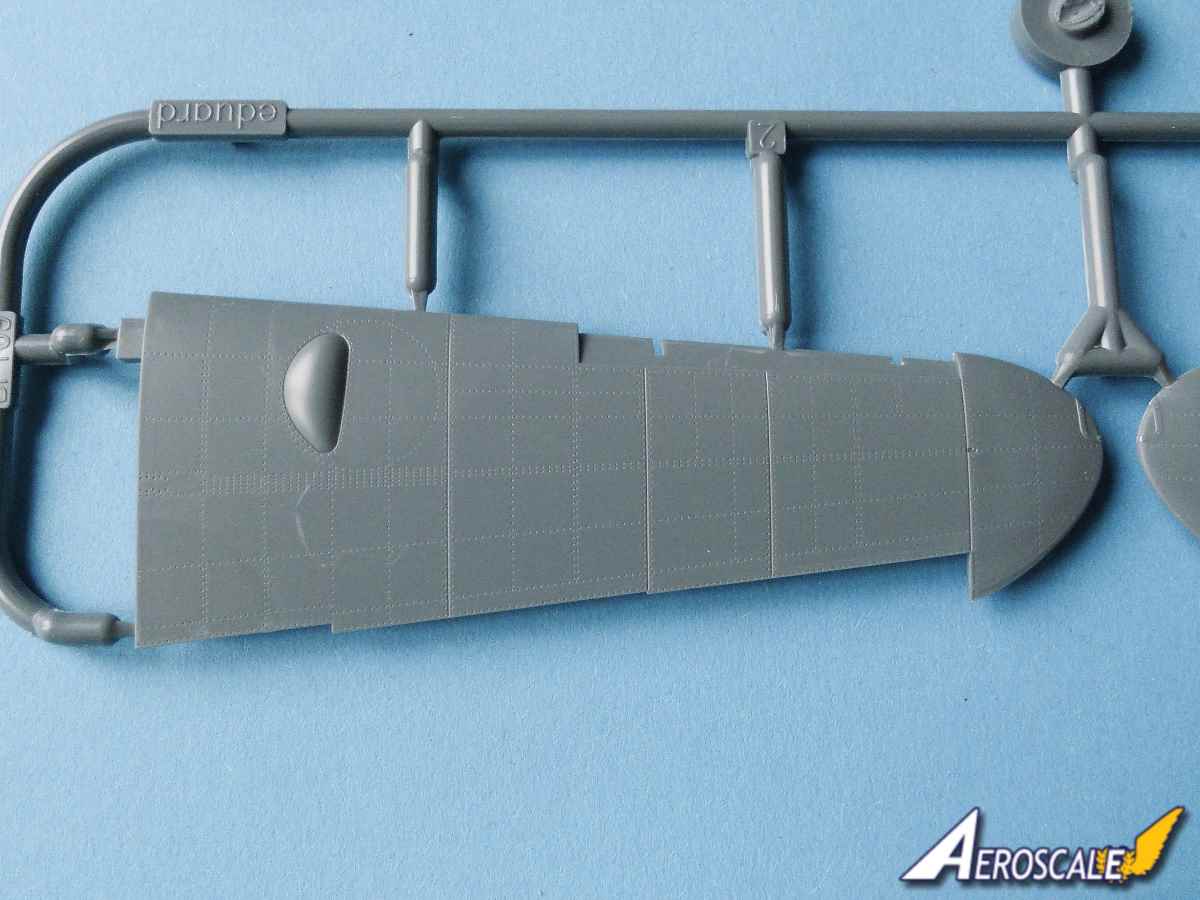
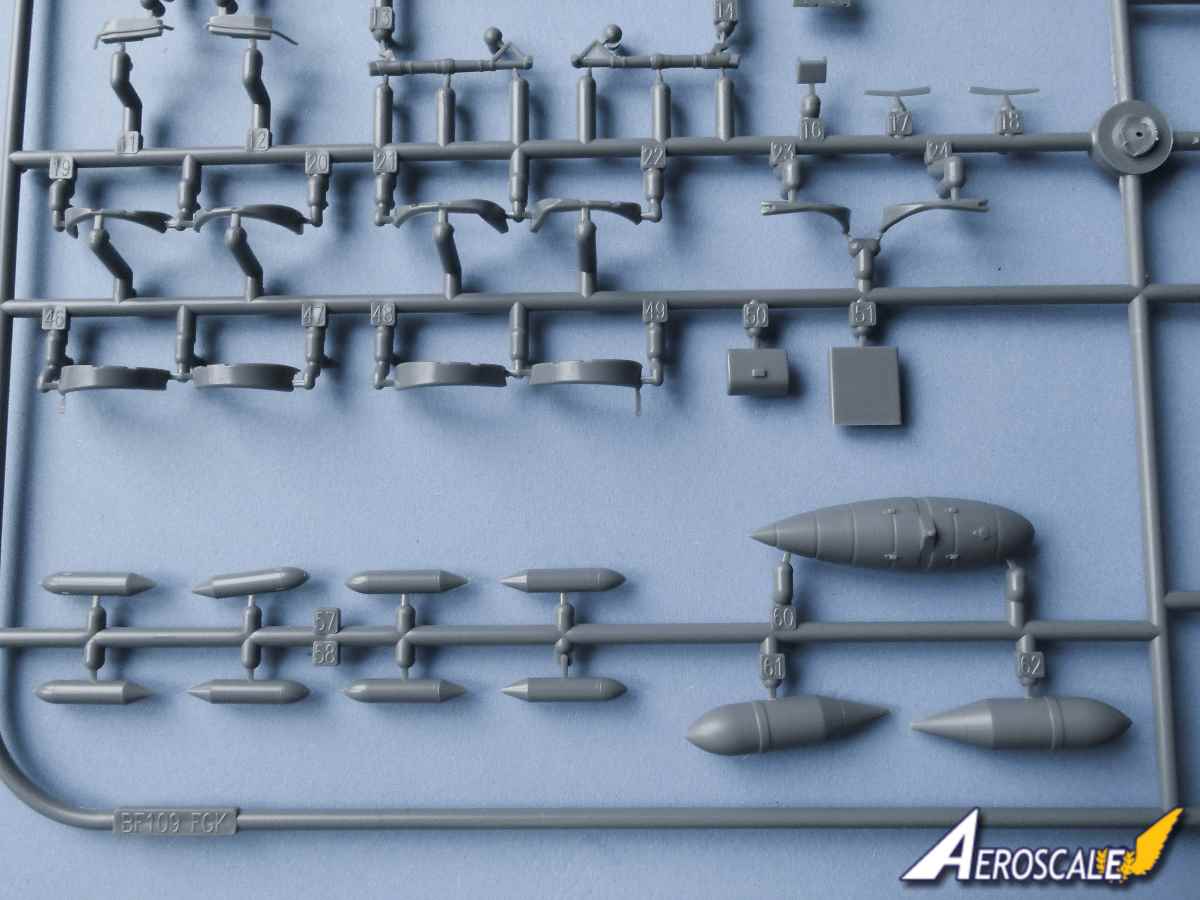
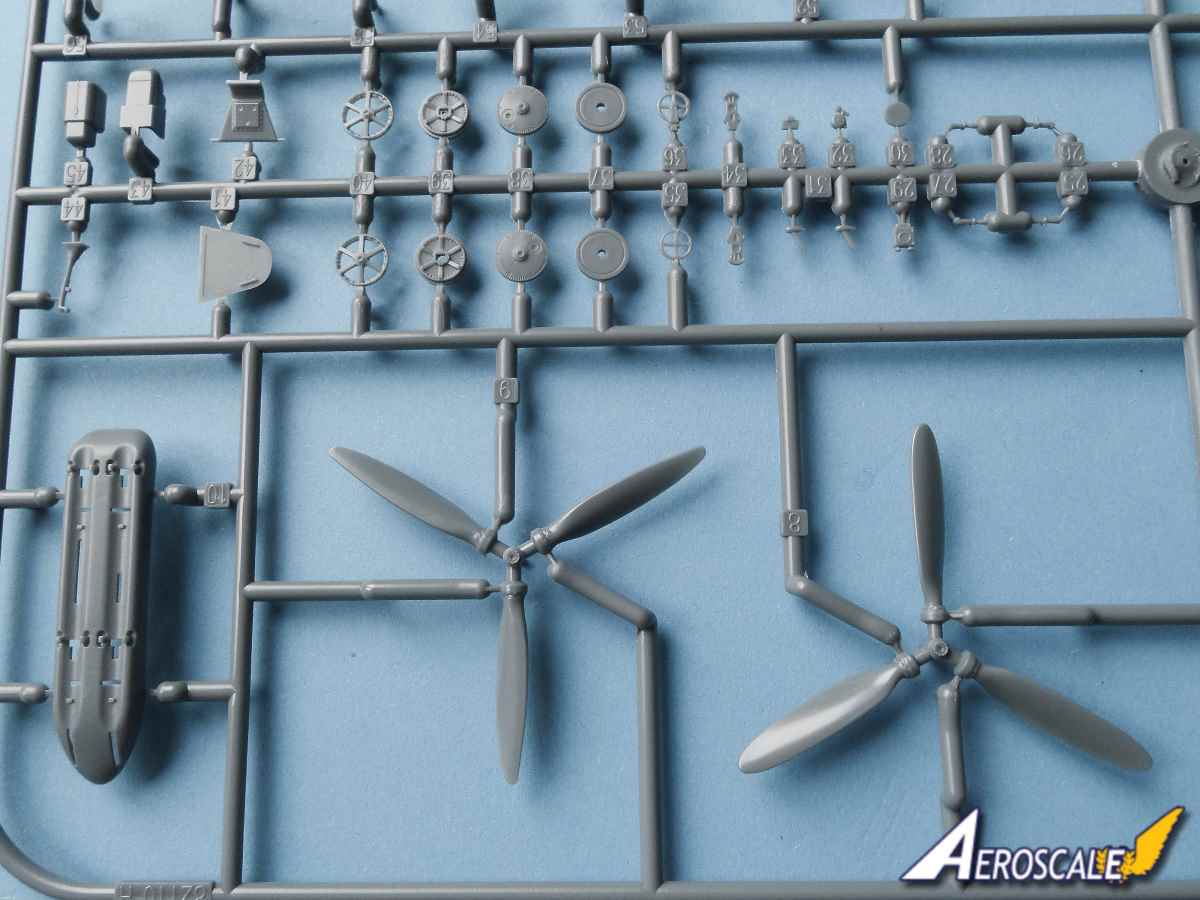
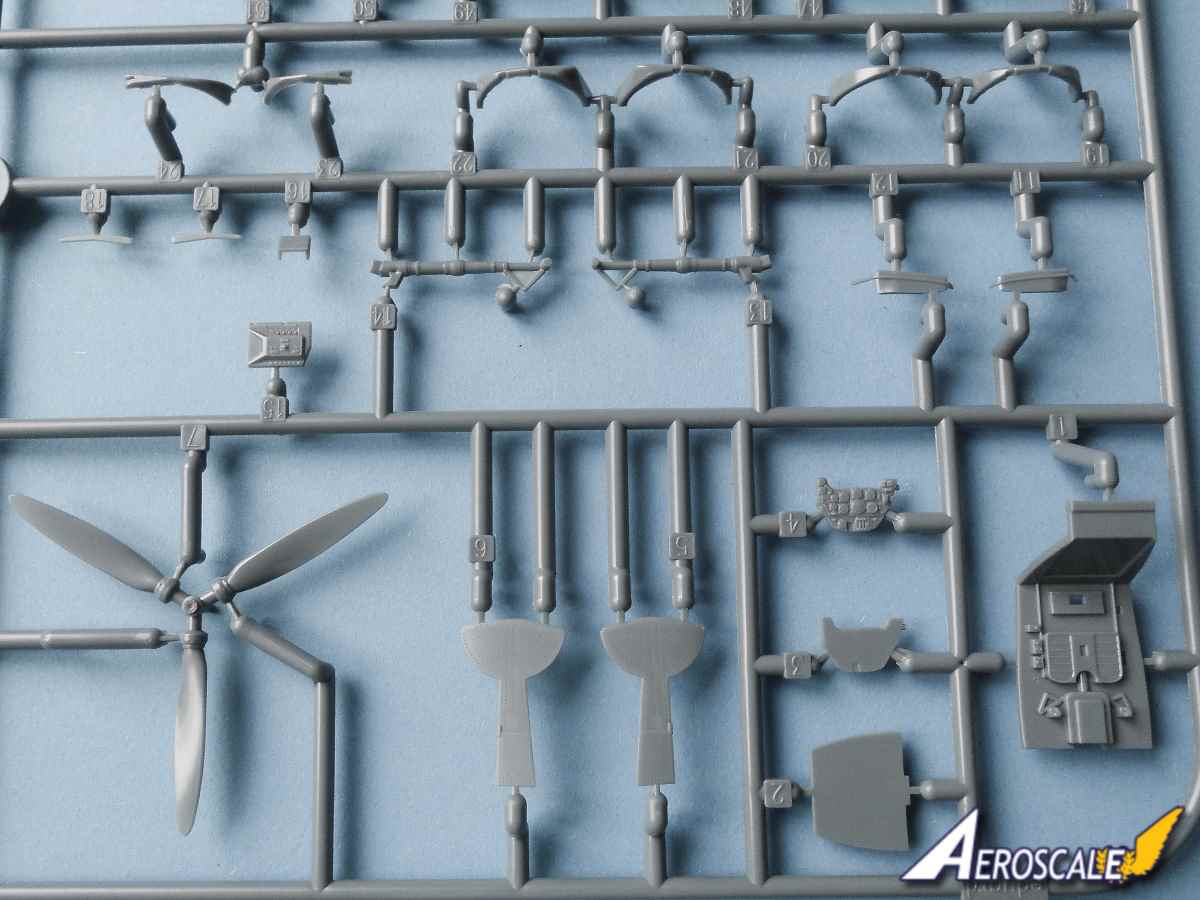
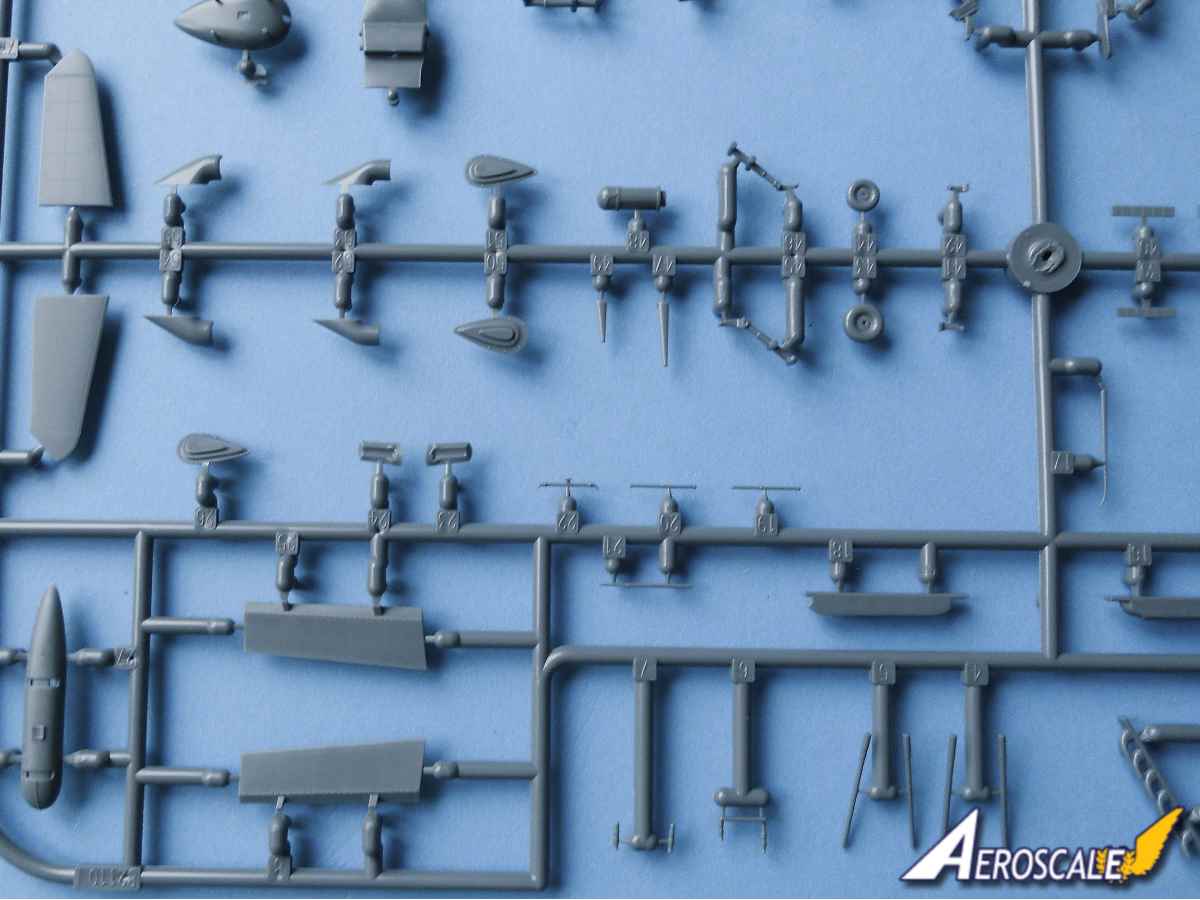
The fuselage has none of the complexity of the older butcher birds from Eduard. You only need to add to the fuselage a couple of rings at the nose and the cannon fairings in front of the windscreen as well as the one piece rudder. The radial engine looks decent enough, but only the front cylinders and a separate piece for the reduction gear are represented. Not much will be seen behind the cooling fan and tight fitting cowl. There are a couple of banks of exhaust pipes to install before the fuselage halves are joined. The prop is made up from two pieces with a curious small section of the prop arms that is separate. The prop itself looks good with sharp edges.
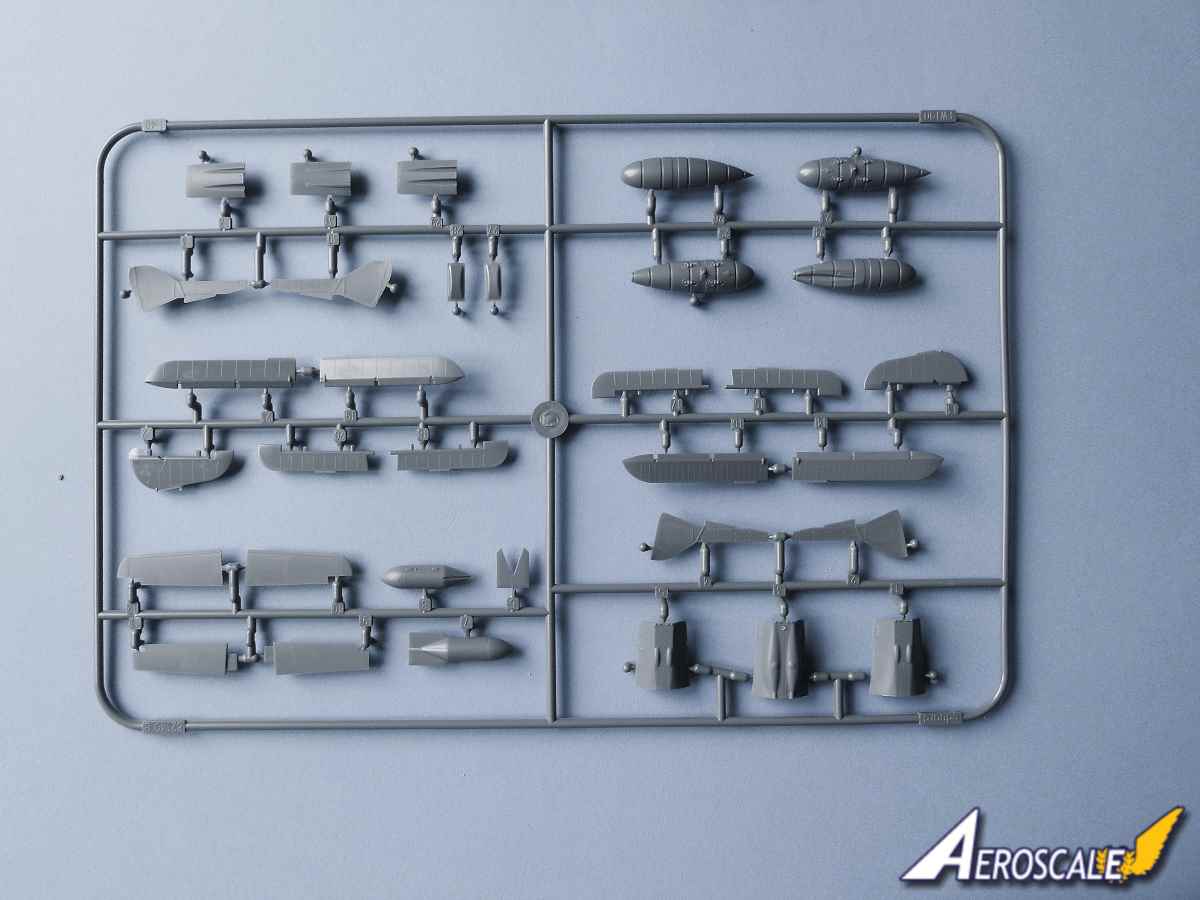
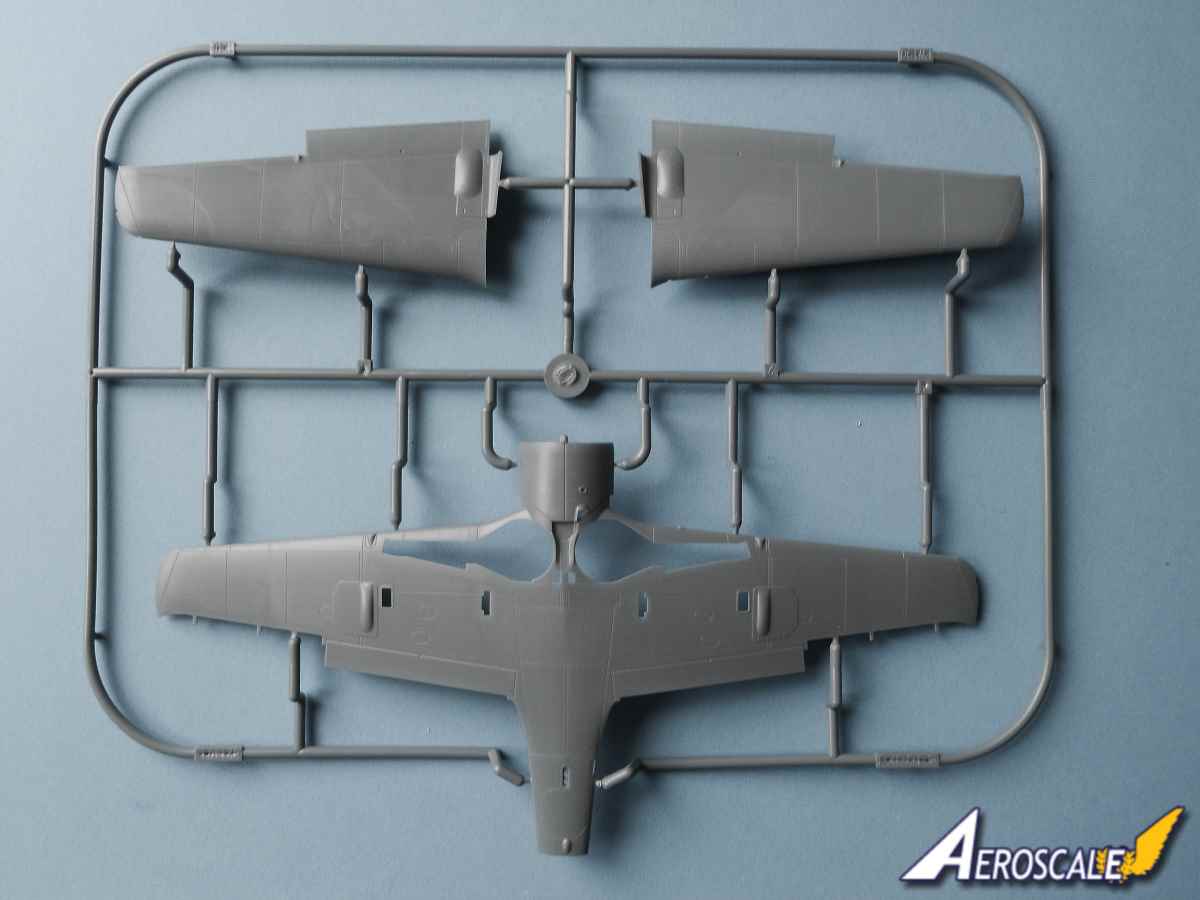
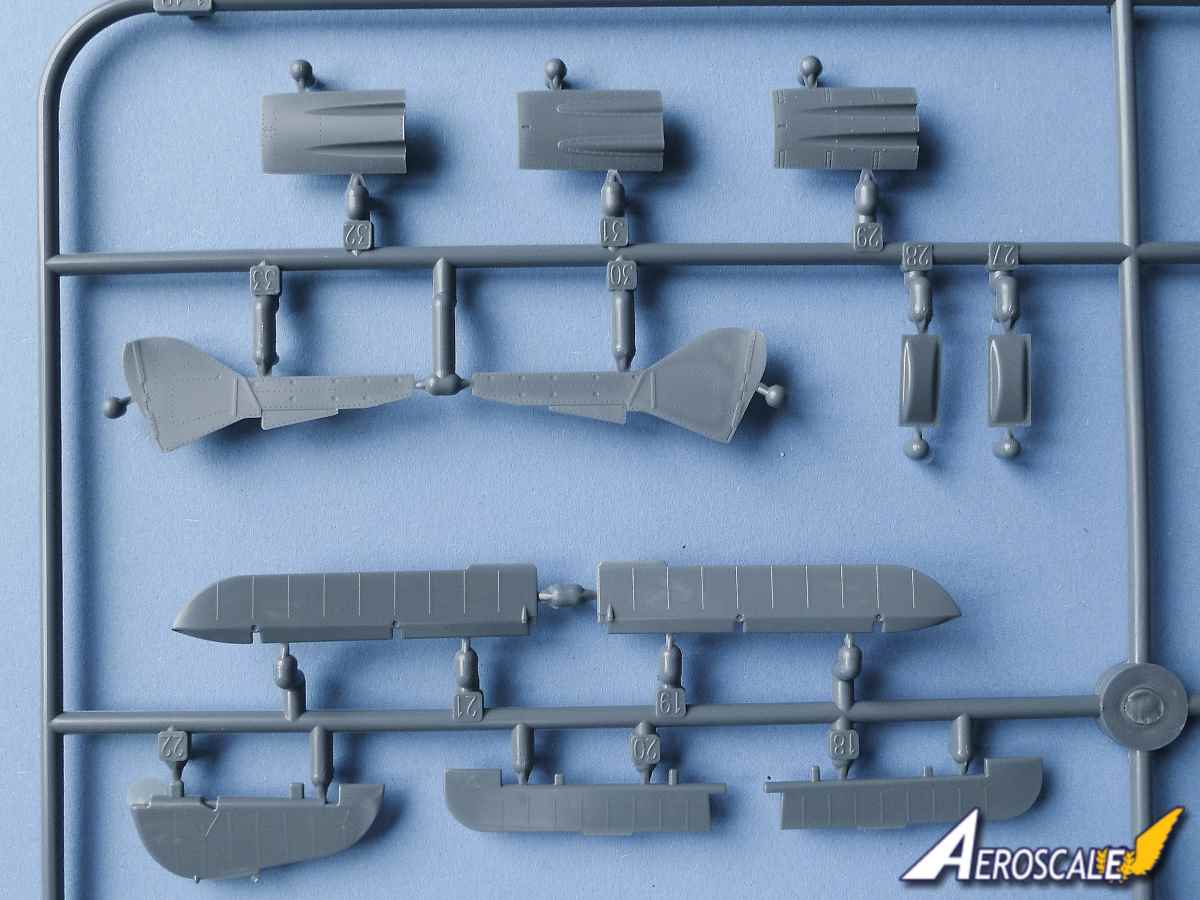
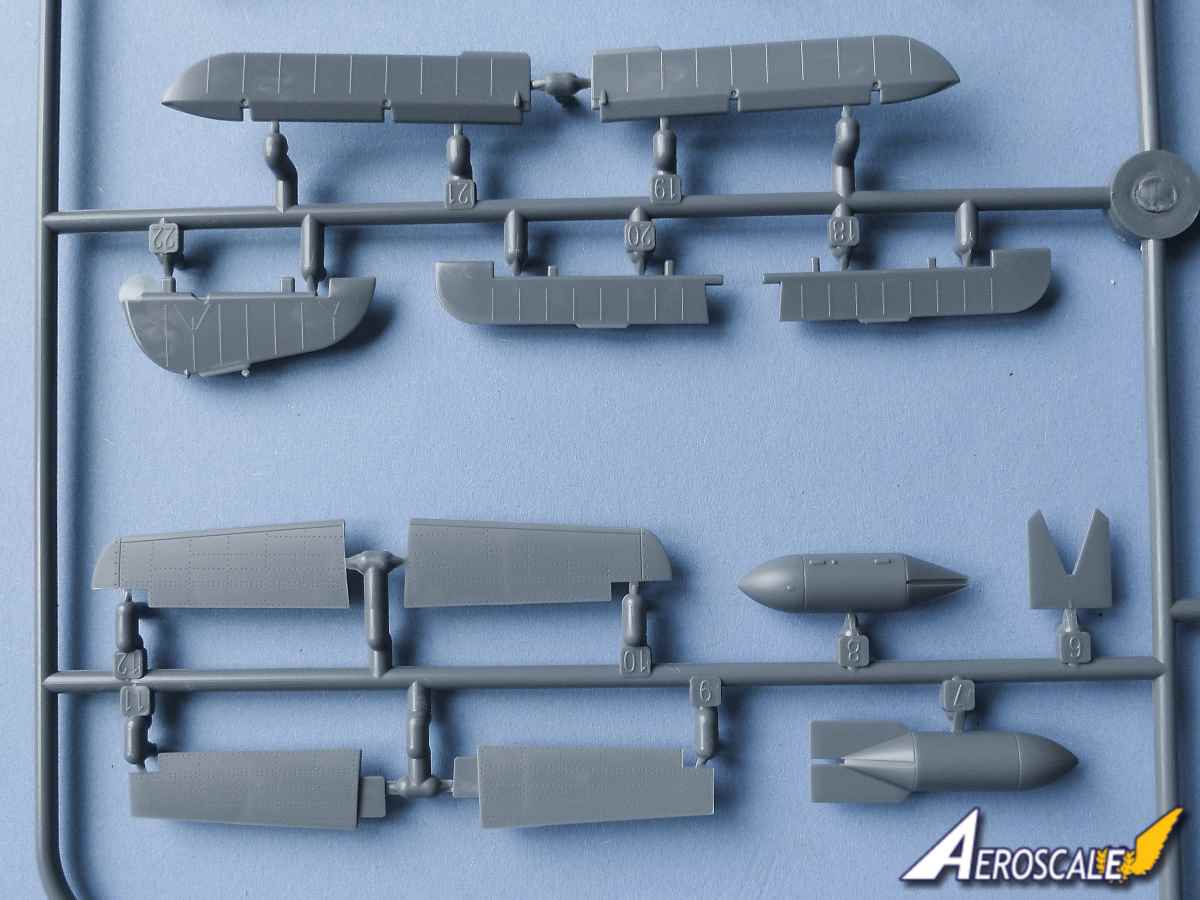
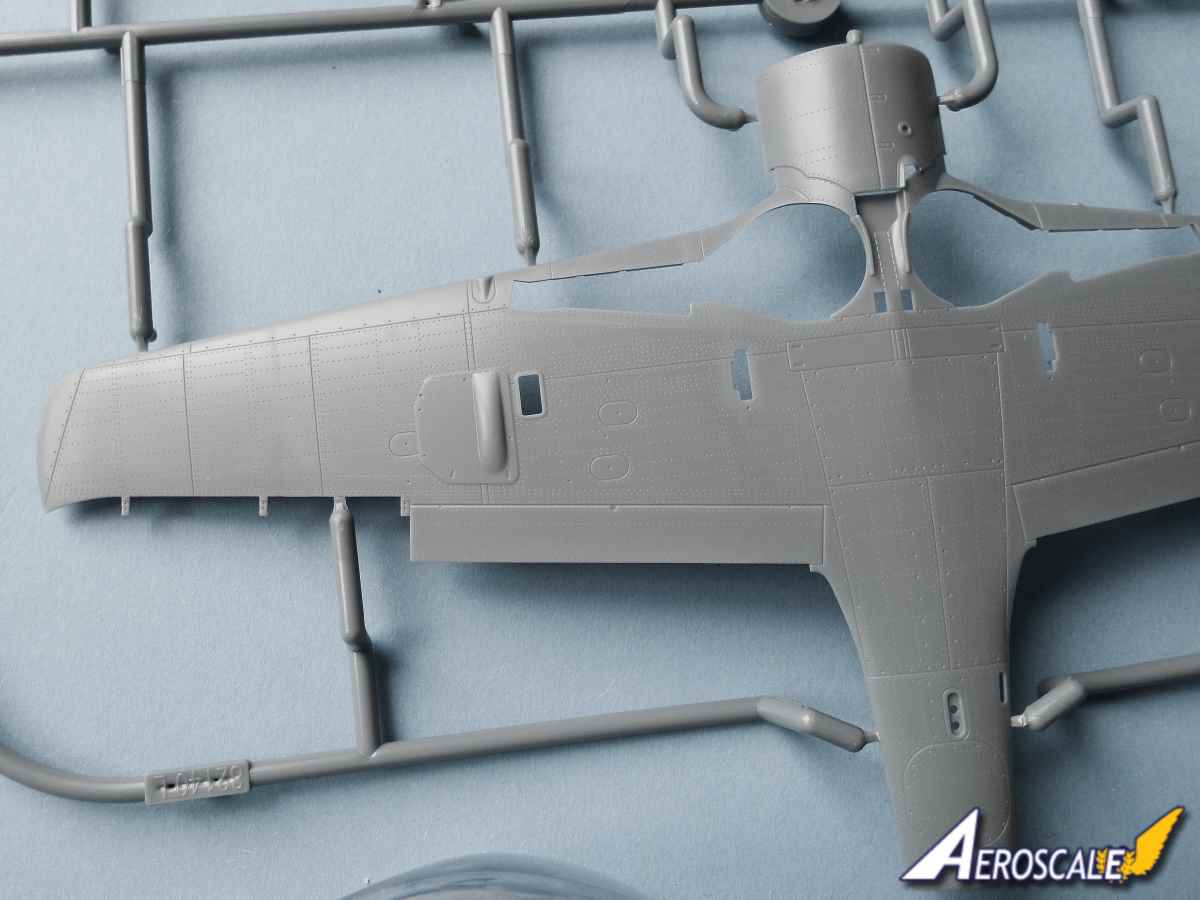
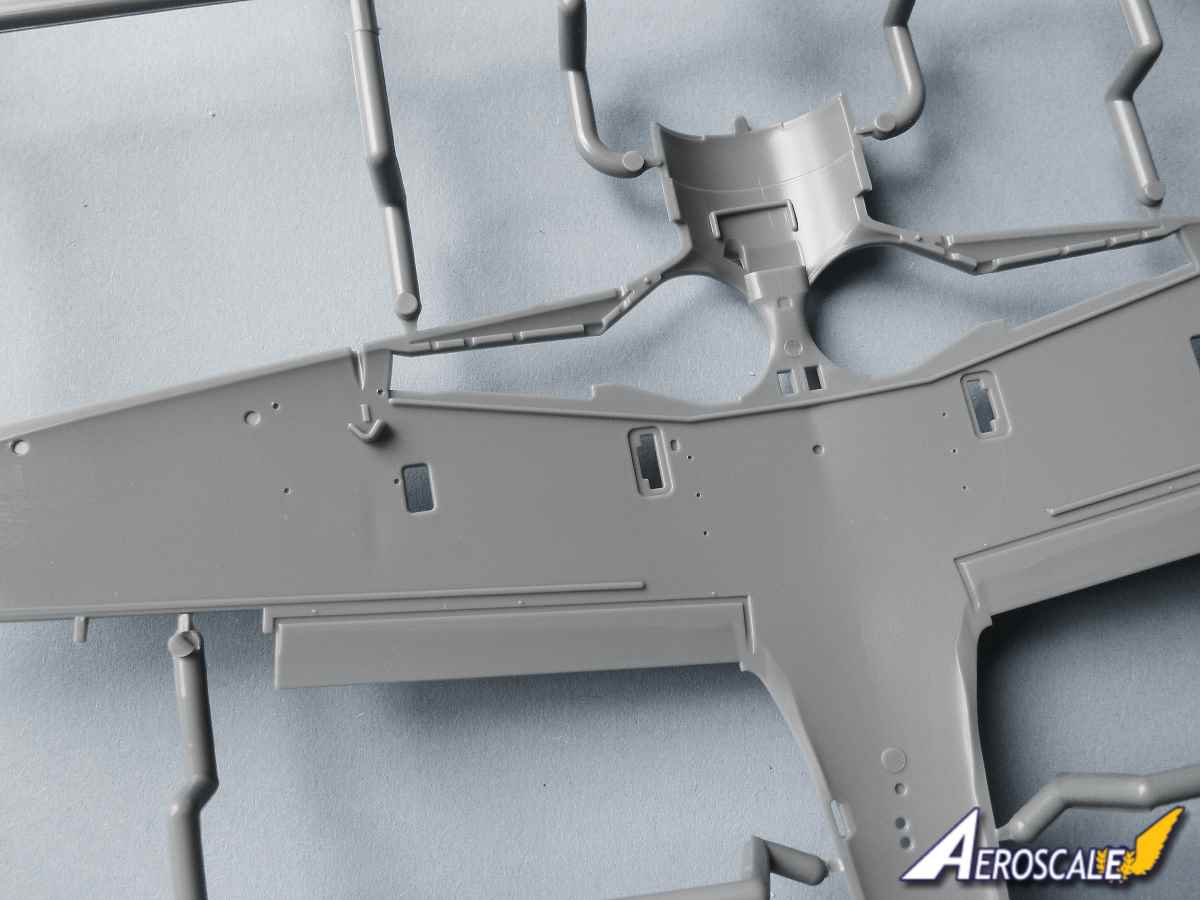
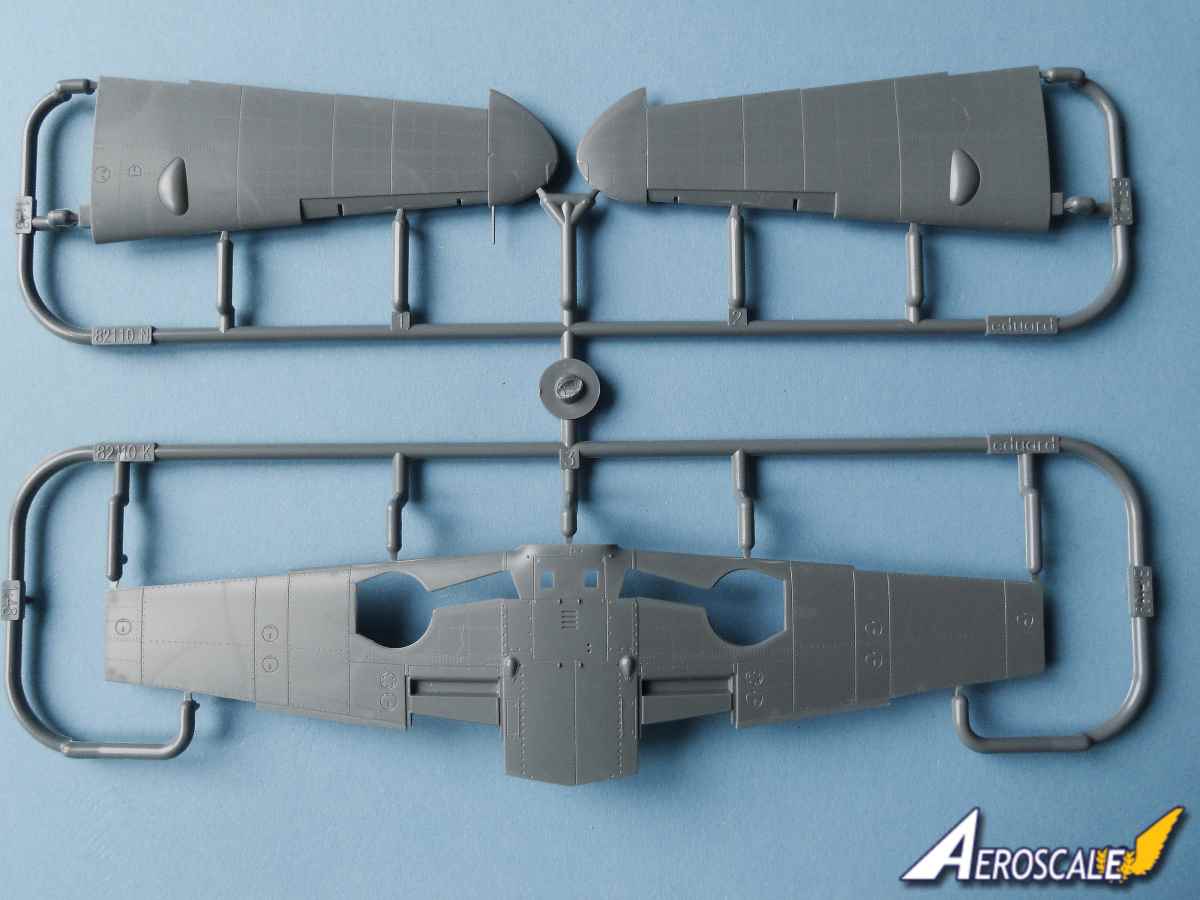
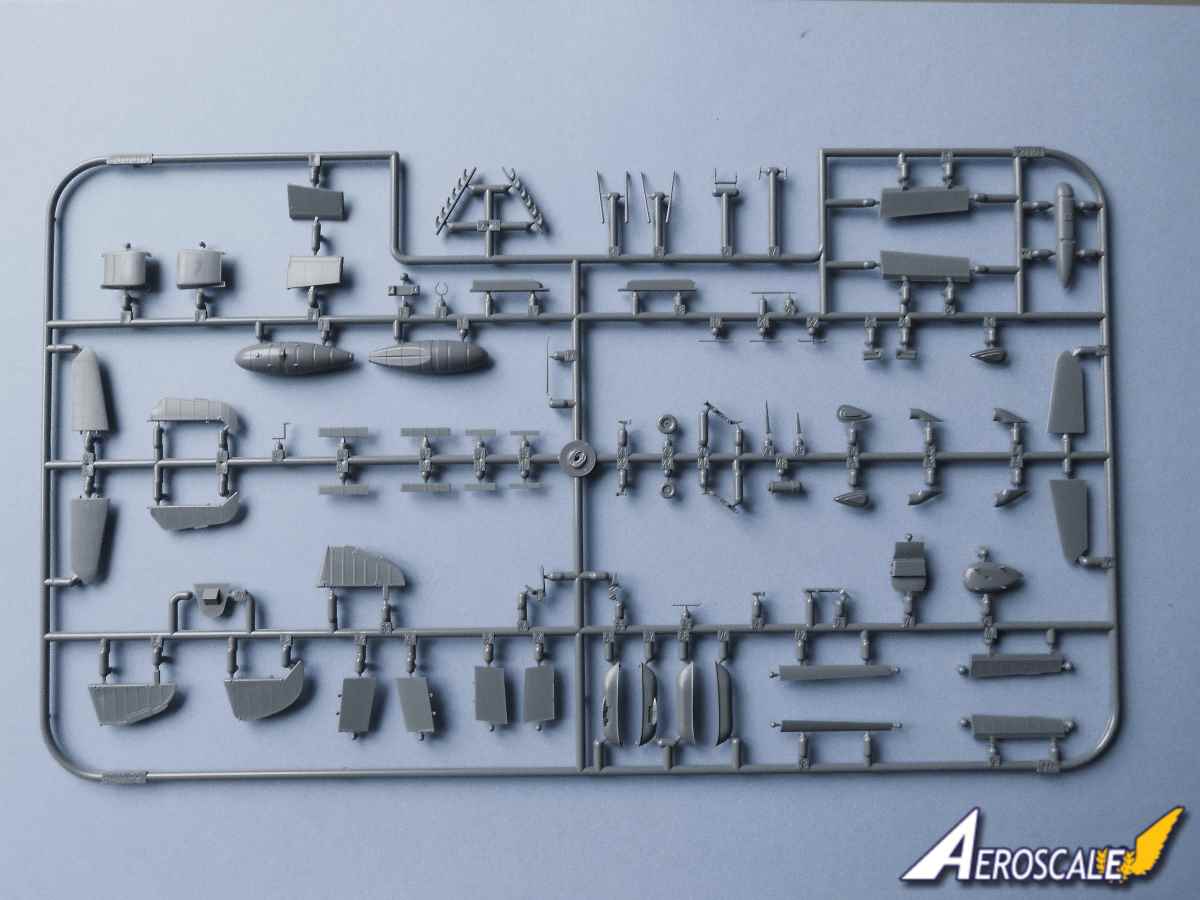
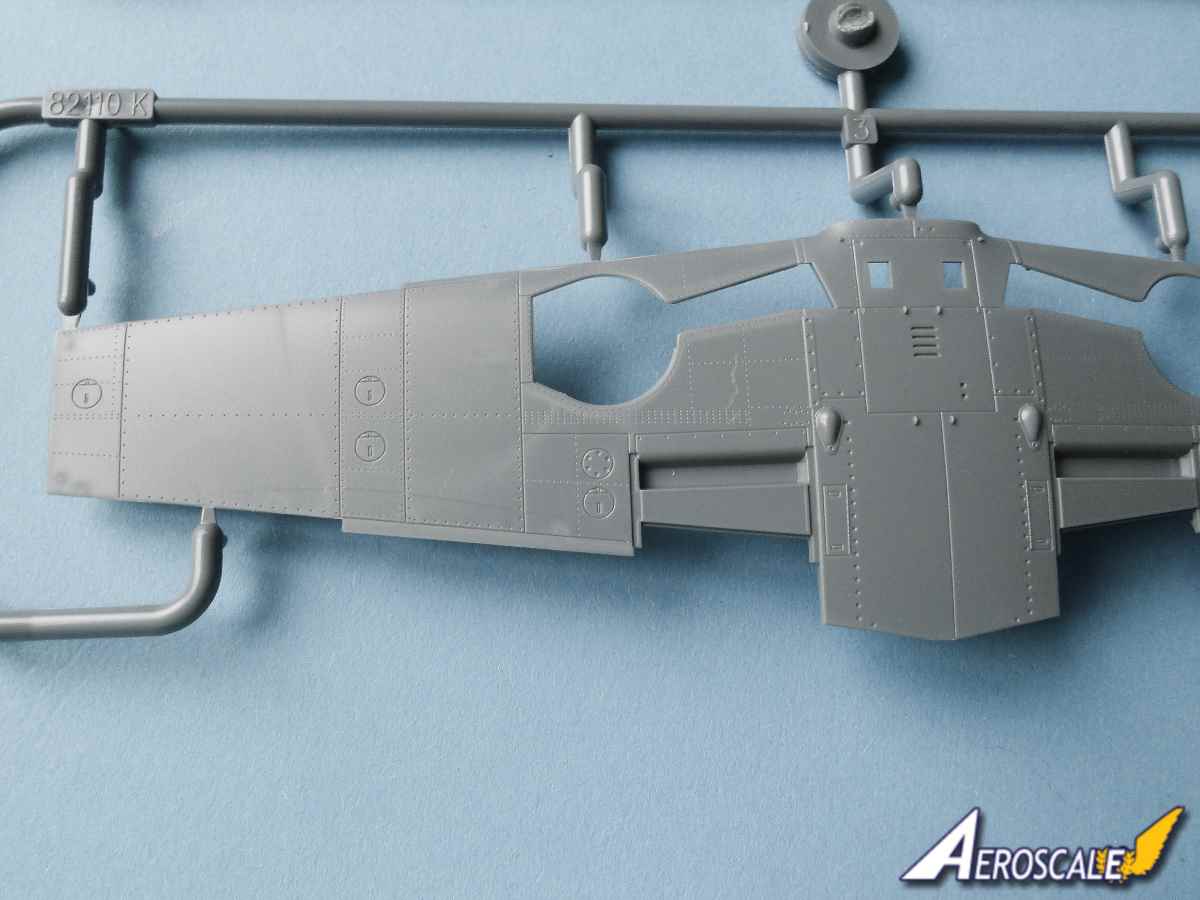
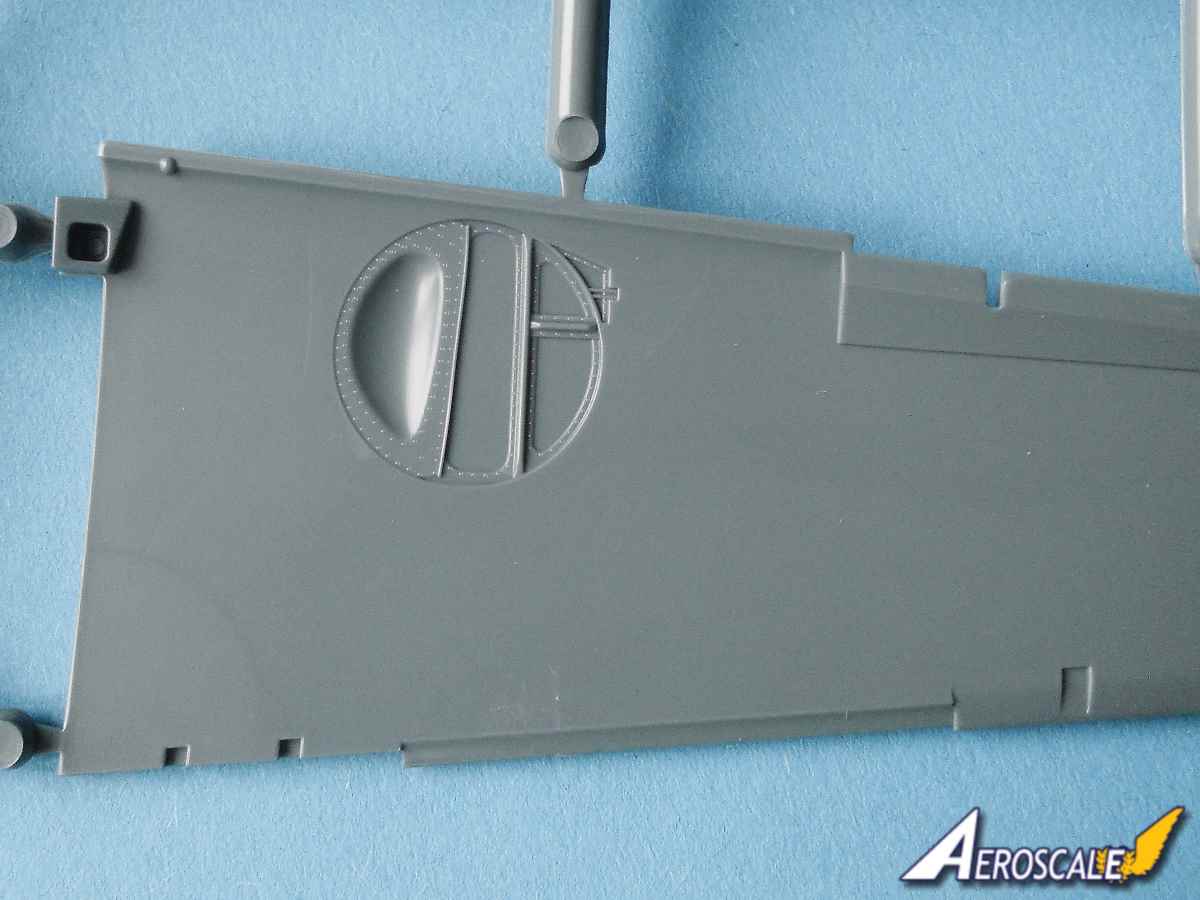
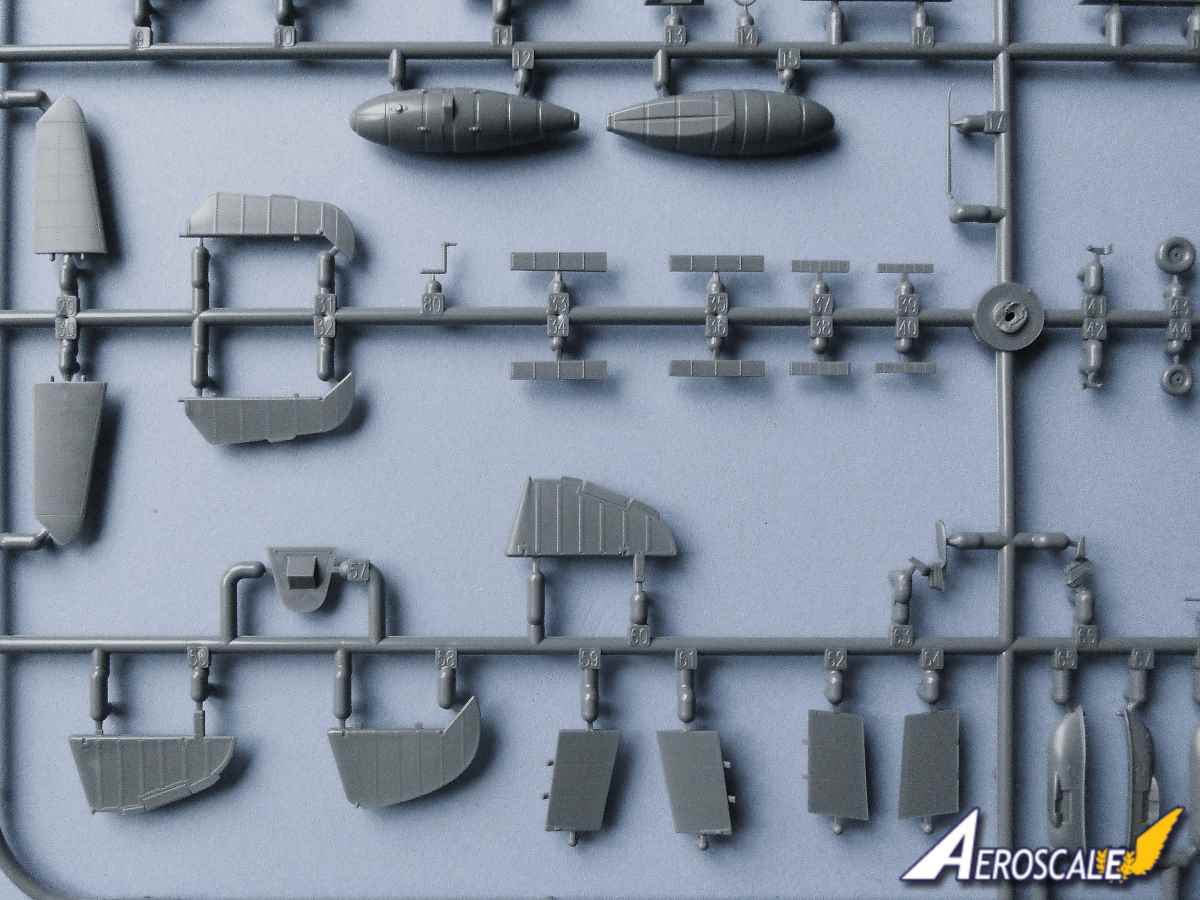
The wing is made up from three parts; the lower wing is one piece. There are a considerable number of parts that need to be attached around the wheel bay in the lower wing including a nicely detailed wing spar and parts that make up the roof to the wheel well. Again these parts are very well detailed. You will be rewarded with a very good looking wheel bay. There is also a third bank of exhaust pipes and wing root cannon barrels to fit as well. The one piece ailerons have a slight ribbed detail on them. Each of the horizontal tail planes is made up from two pieces with a one piece elevator.
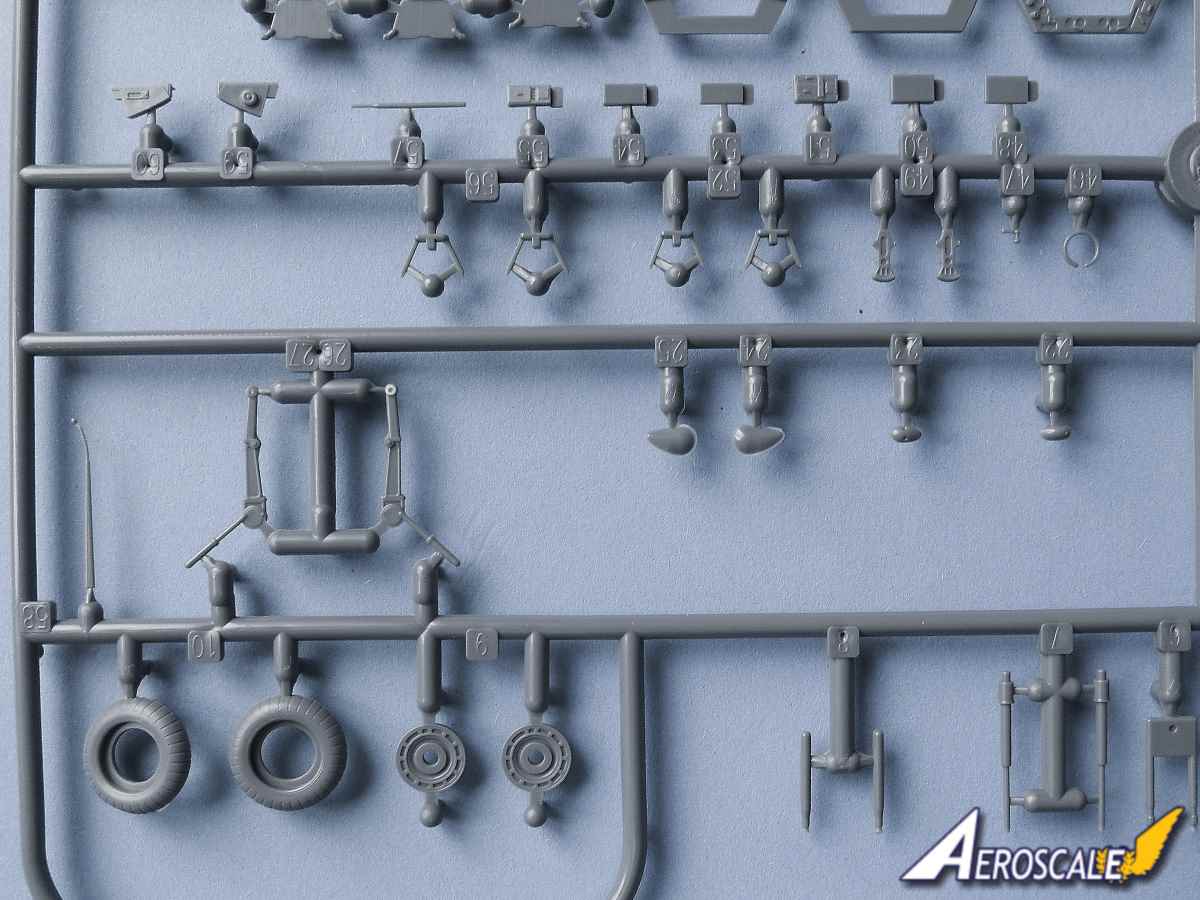
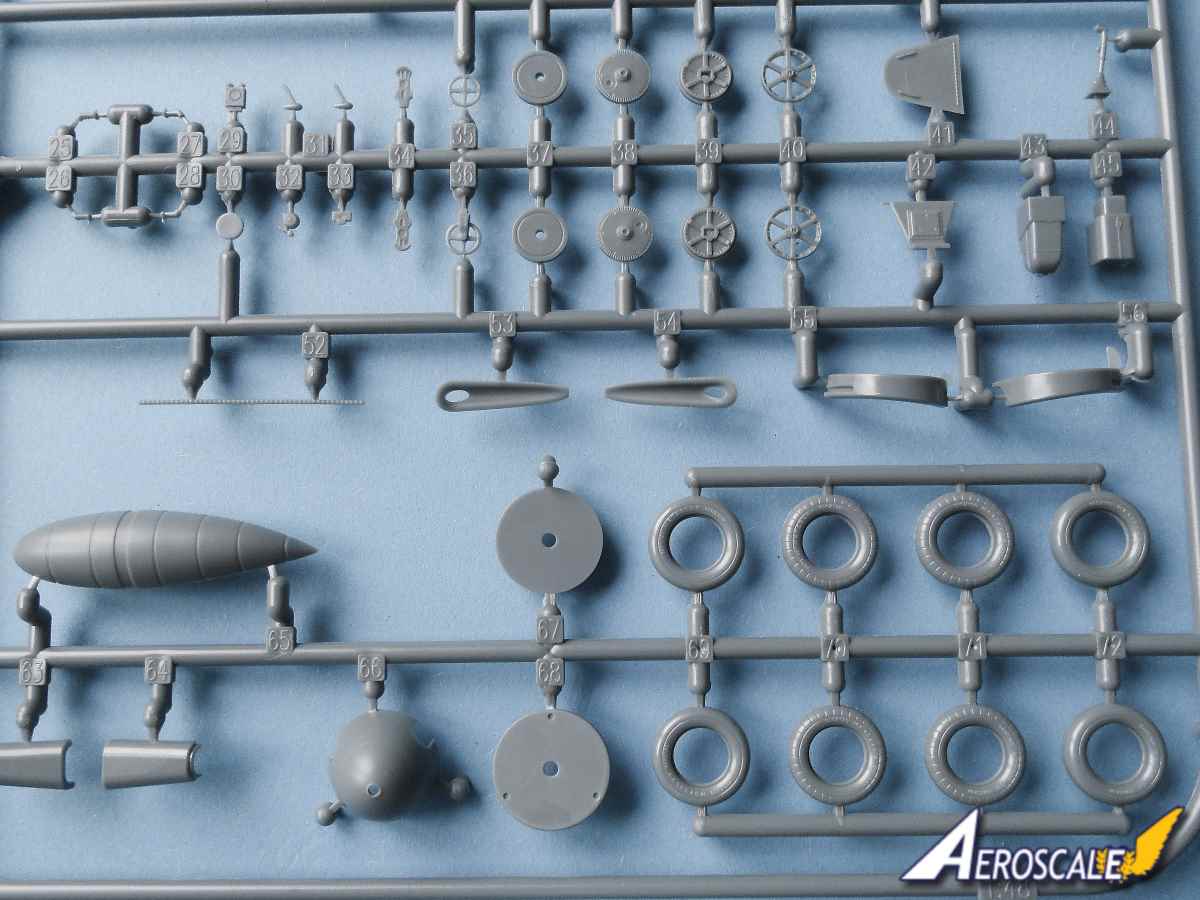
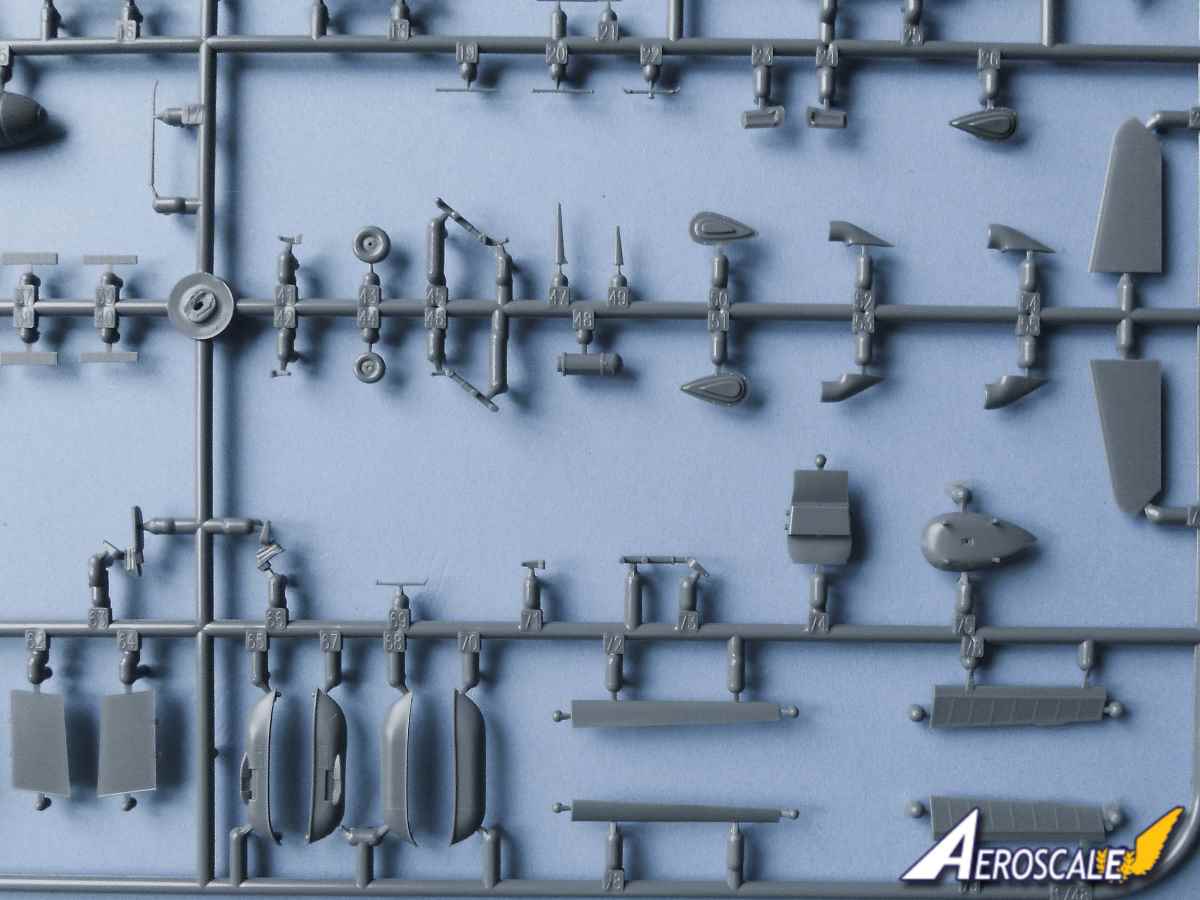
The undercarriage looks the part with detailed legs and separate torque links. The actuator arms for the main undercarriage are separate as well. These will be very useful for setting the angle of the legs. There is a useful diagram in the instruction illustrating the angle of the undercarriage. The wheels have separate detailed hubs so making painting much easier. There are two masks for the outer side of each hub. The tail wheel is made up from three pieces and has some good detail on it.
There are two types of under fuselage fuel tanks included. They are fitted to a four piece rack.
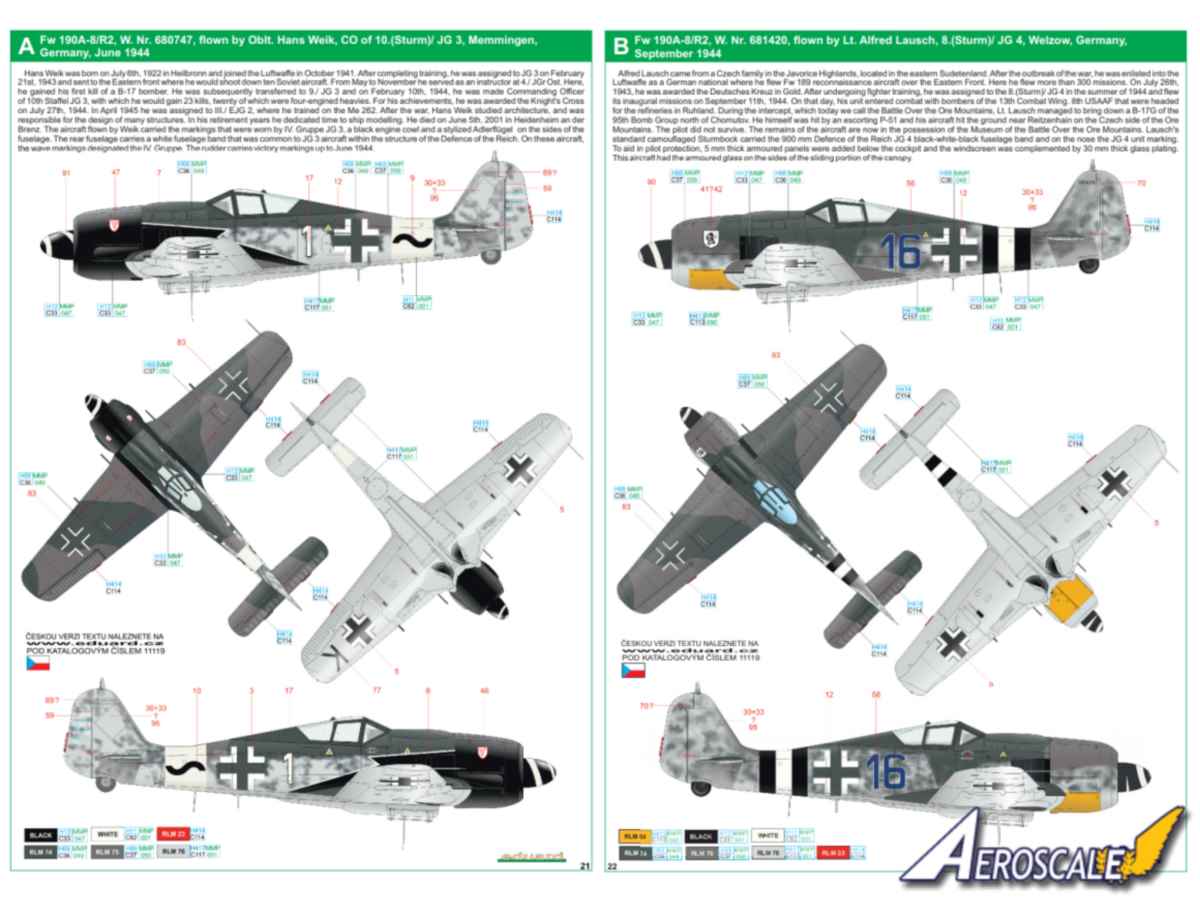
Fw 190 marking options
A. Fw 190A-8/R2, W. Nr. 680747, flown by Oblt. Hans Weik, CO of 10.(Sturm)/ JG 3, Memmingen,
Germany, June 1944 B. Fw 190A-8/R2, W. Nr. 681420, flown by Lt. Alfred Lausch, 8.(Sturm)/ JG 4, Welzow, Germany,
September 1944 C. Fw 190A-8/R2, W. Nr. 682958, flown by Uffz. Paul Lixfeld, 6.(Sturm)/ JG 300, Löbnitz, Germany,
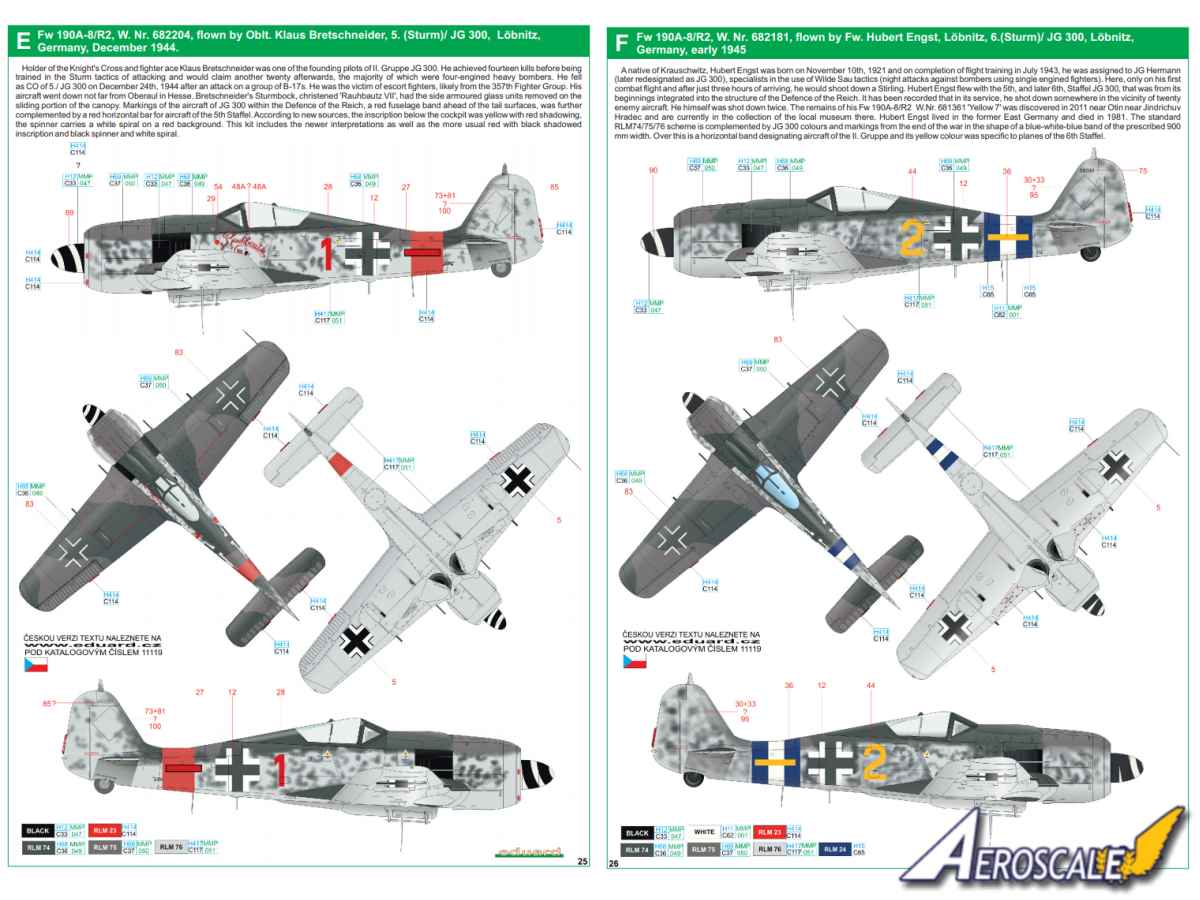
December 1944 D. Fw 190A-8/R2, flown by Uffz. Erich Keller, 5.(Sturm)/ JG 4, Babenhausen, Germany, December 1944 E. Fw 190A-8/R2, W. Nr. 682204, flown by Oblt. Klaus Bretschneider, 5. (Sturm)/ JG 300, Löbnitz,
Germany, December 1944. F. Fw 190A-8/R2, W. Nr. 682181, flown by Fw. Hubert Engst, Löbnitz, 6.(Sturm)/ JG 300, Löbnitz,
Germany, early 1945
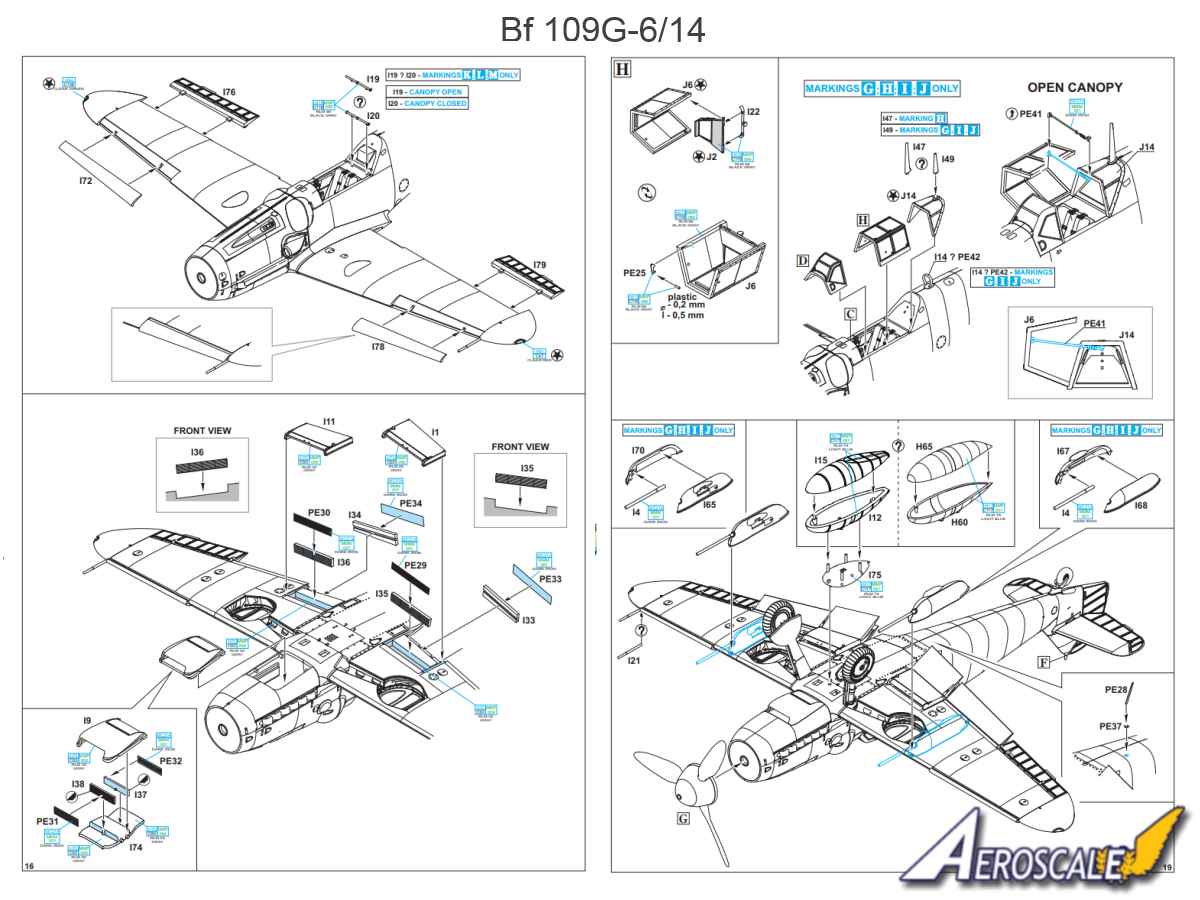
Bf 109 G
Contents include:
●4 x injected grey plastic sprues.
●1 x injected clear plastic sprue
●1 x pre-coloured photo etched fret.
●1 x set of paint masks for canopy and wheels.
●2 x decal sheets [the sheet includes the markings for the Fw 190]
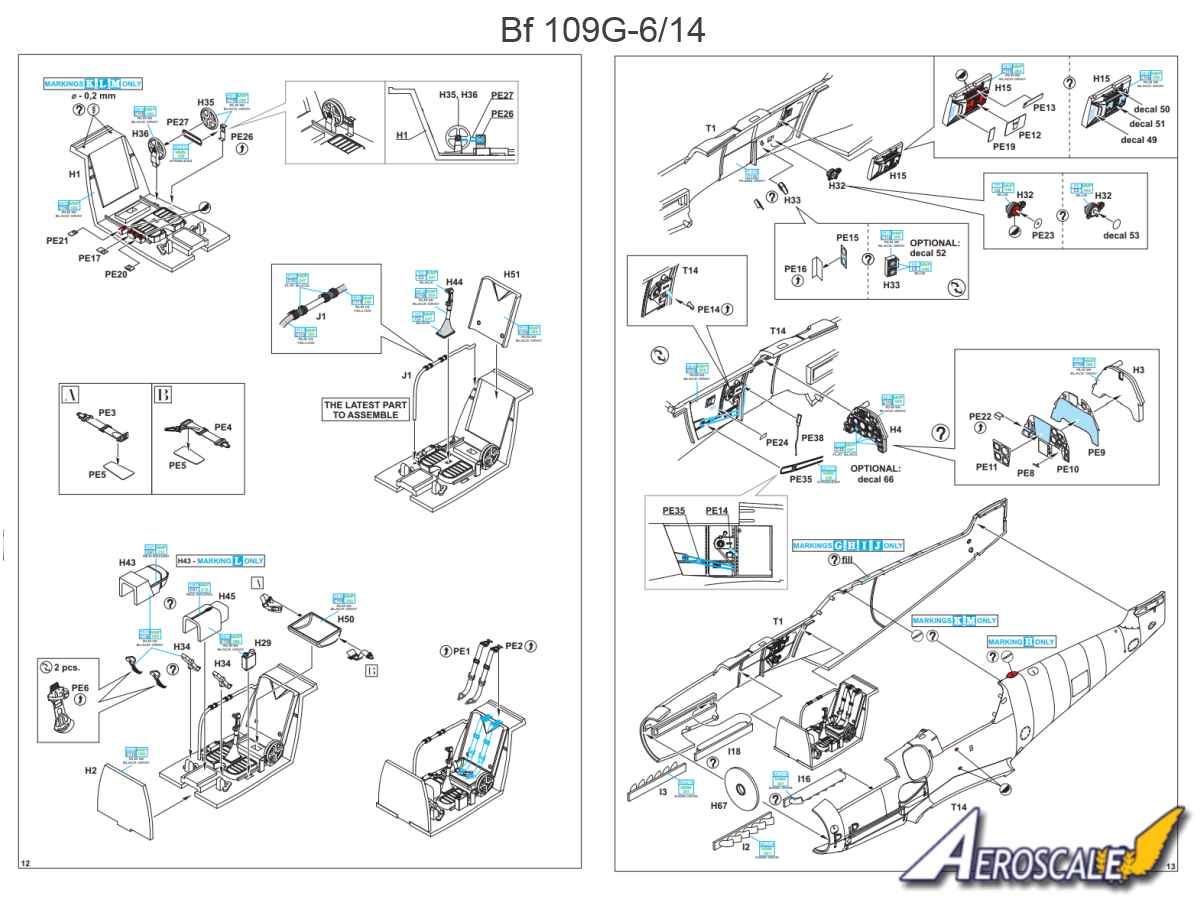
There is plenty of detail in the styrene to create an interesting cockpit. The detail on the instrument panel is very good as well as the detail on the side walls. The cockpit is built up from sixteen styrene parts including a clear part representing the fuel line. There are three options for realising the detail within the cockpit: using the supplied photo etched parts, using the styrene with the low relief detail or using the supplied decals. The clear parts look, well clear and well formed. The photo etched seat harness is always a welcome inclusion. There are two choices of canopy depending which mark of 109 you go for. Paint masks are included for the canopy and windscreen.
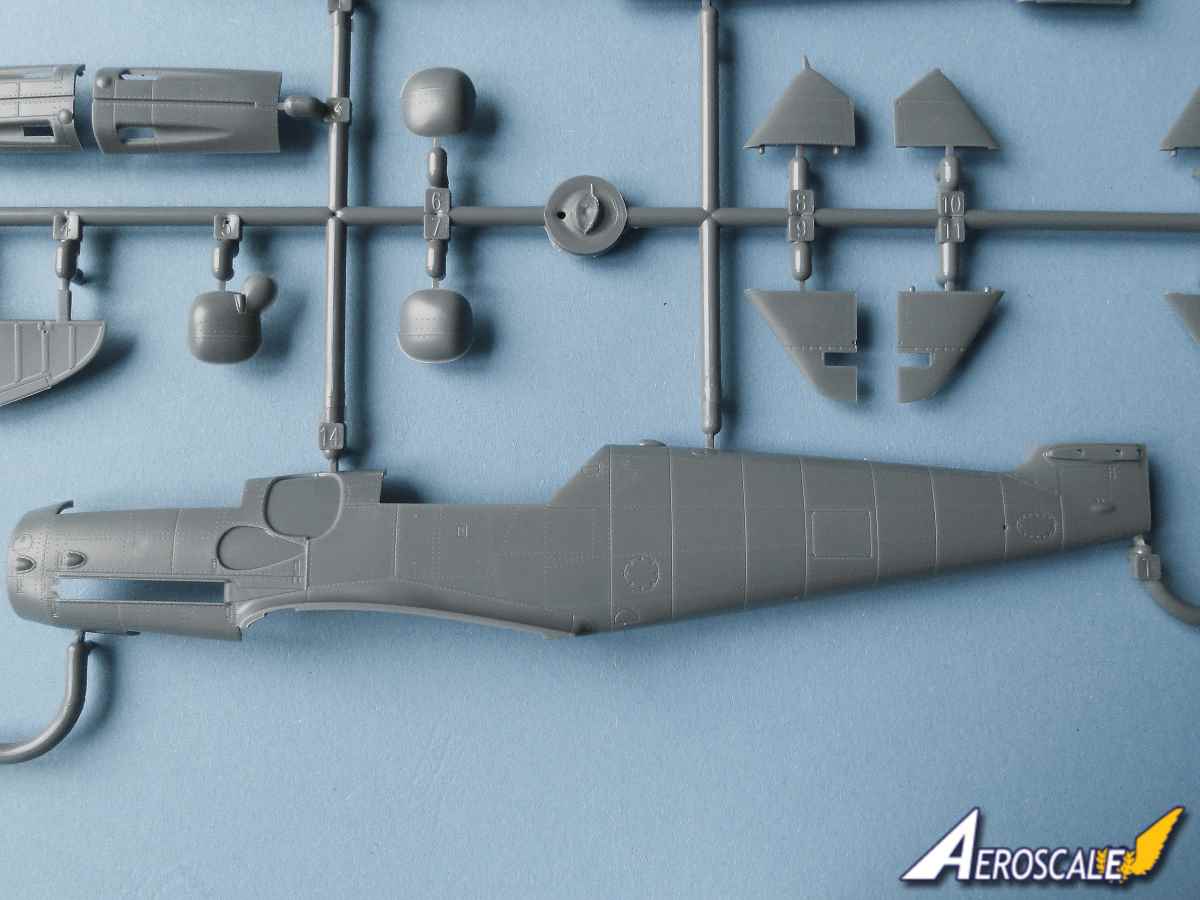
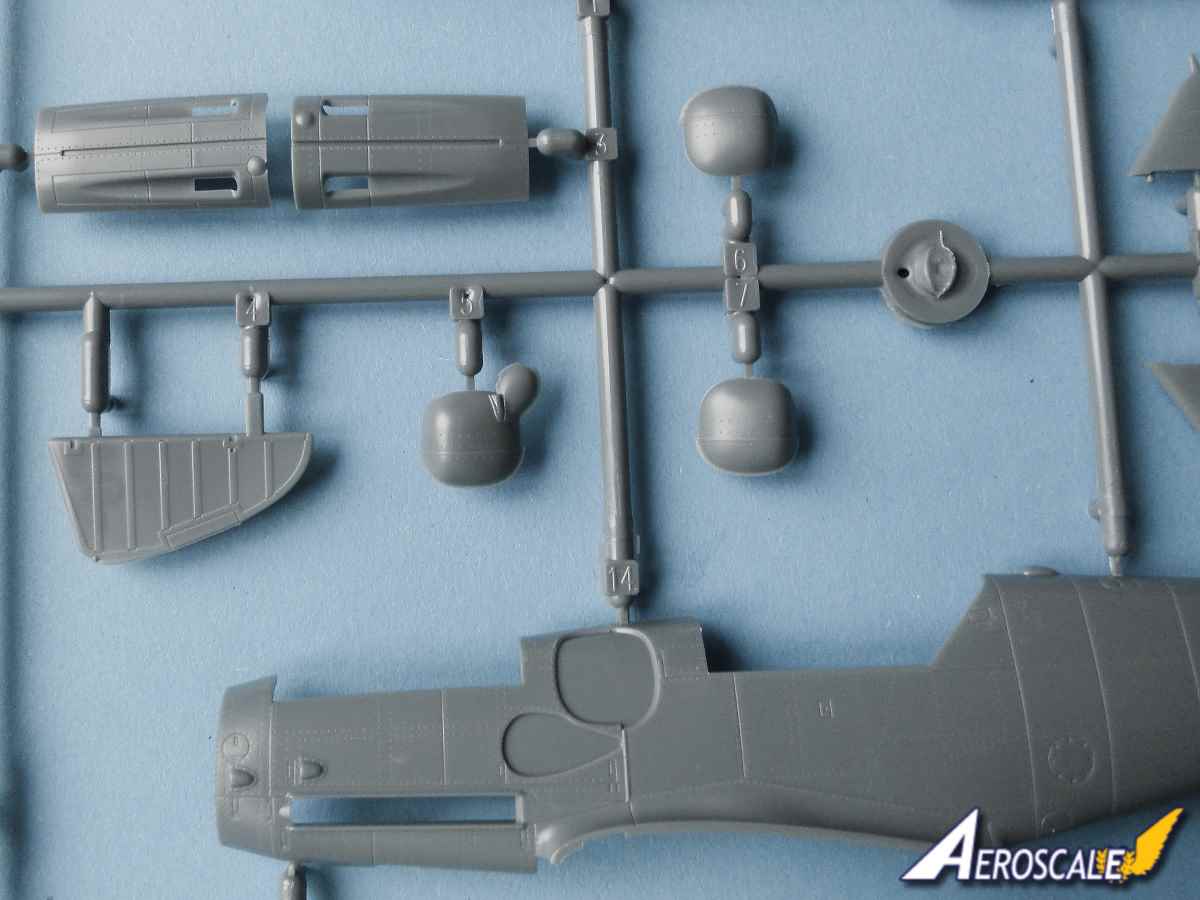
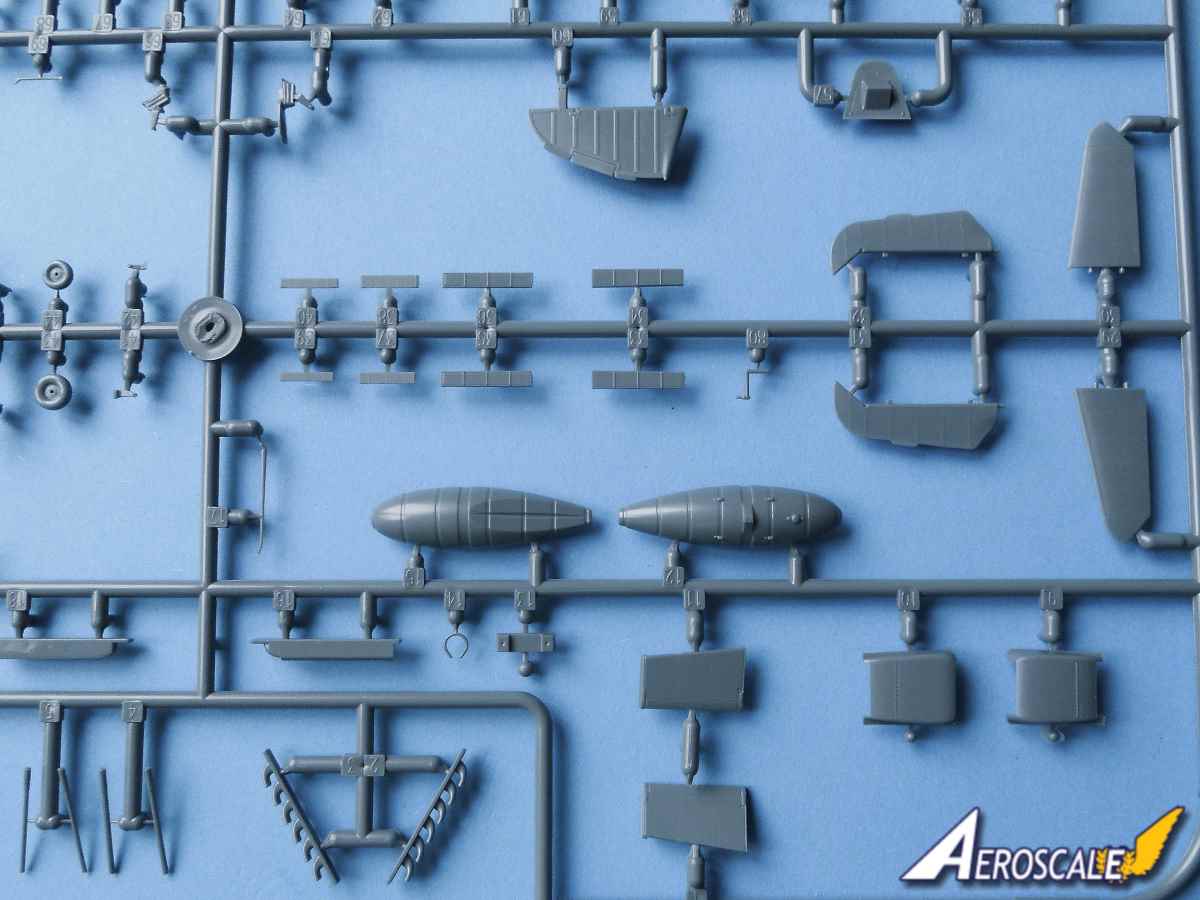
There is a choice of two sets of exhausts; they need to be fitted from inside the fuselage. There are the normal exhausts and exhausts with a glare guard for the pilot. The detail is excellent with the end of the pipes are partly recessed. The detail on the fuselage is excellent. The cover on top of the nose, blisters and the machine gun barrels are separate. The large air intake on the left side of the nose is made up from three parts. The radiator housing beneath the nose is separate. There are two choices of vertical tail surface and rudders. Its a little confusing in the instructions regarding the rudder. Not that it matters as the shape of the chosen vertical surface dictates the choice of rudder. A quick look at the painting guide helps clear up any uncertainty. The prop is made up from three parts: prop blades, spinner and back plate.
Moving on to the wings, the internal walls for each of the undercarriage bays need to be constructed from four parts. There is a hint of a fold or two representing the leather that made up part of the wall. The recess inside the wing provides a helpful guide on where to fit the parts. The lower wing is one piece and has the dihedral set. The detail on the wing surfaces like the fuselage is superb. The control surfaces and underwing radiators fairings are separate. The faces of the styrene radiators are nicely detailed, but of course there are the photo etched parts that can be used as well. The diagram illustrating the set of the flaps particularly on the radiators is very useful. I would have liked to have seen a guide on the angle of the tail planes in the instructions. Easy enough to reference if like me youre not an expert on the 109.
The main undercarriage is easy enough to create and the tail wheel is made up from three parts and is fitted once the fuselage halves are joined. There are four types of tyres for the main wheels, but only two are relevant for this boxing. The detail on the tyres is quite exquisite. Paint masks are included.
There are two different types of belly fuel tank to choose from. There is a rather impressive looking underwing cannon that can be fitted to marking options G, H, I and J.
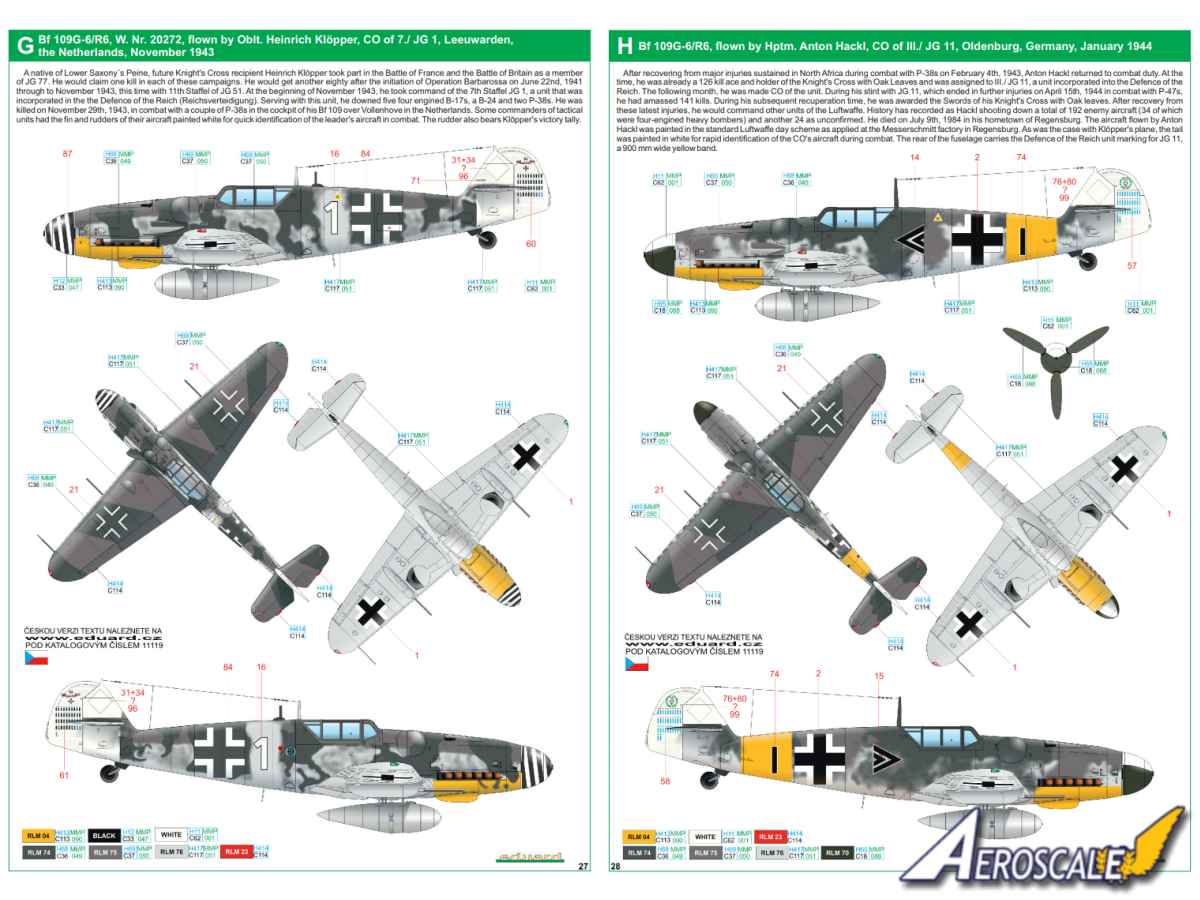
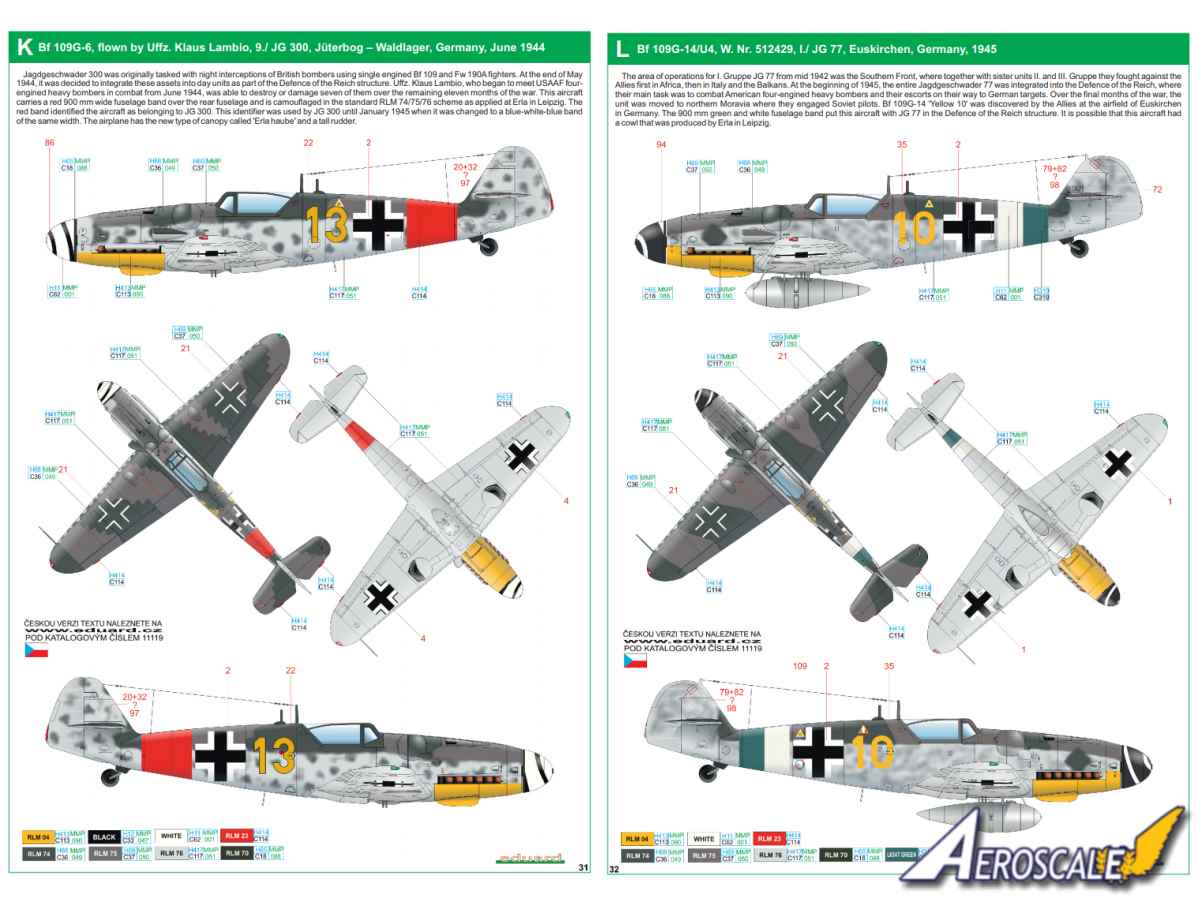
Bf 109 G marking options
G. Bf 109G-6/R6, W. Nr. 20272, flown by Oblt. Heinrich Klöpper, CO of 7./ JG 1, Leeuwarden,
the Netherlands, November 1943 H. Bf 109G-6/R6, flown by Hptm. Anton Hackl, CO of III./ JG 11, Oldenburg, Germany, January 1944 I. Bf 109G-6/R6, 2./ JG 27, Trenčín, Slovak Republic, early 1944 J. Bf 109G-6/R6, 9./ JG 54, Ludwigslust, Germany, January/ February 1944 K. Bf 109G-6, flown by Uffz. Klaus Lambio, 9./ JG 300, Jüterbog Waldlager, Germany, June 1944 L. Bf 109G-14/U4, W. Nr. 512429, I./ JG 77, Euskirchen, Germany, 1945 M. Bf 109G-14, 13./ JG 53, Bad Wörishofen, Germany, 1945
There are some really subtle variations of camouflage with these choices for the Bf 109. Eduard has done some great research selecting these.
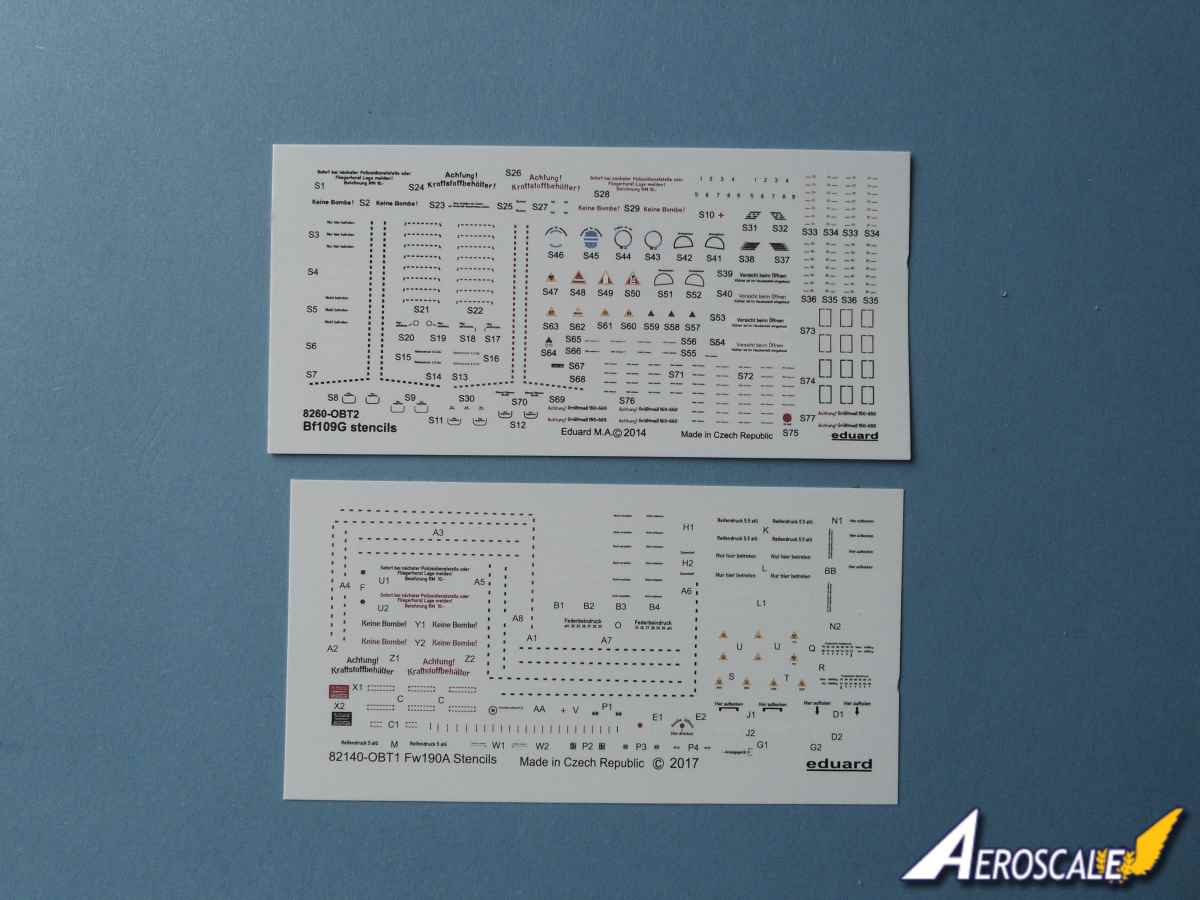
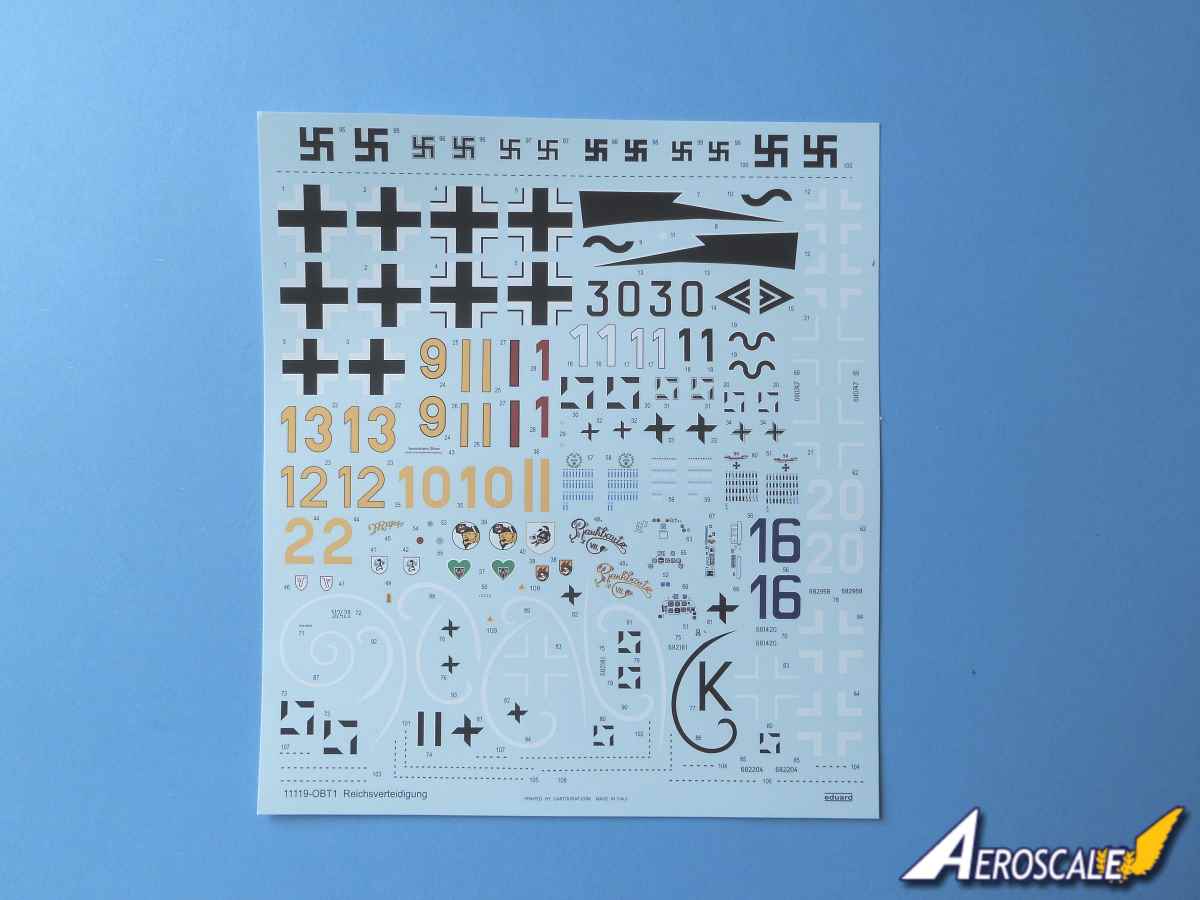
Decals
The decals are printed in house at Eduard. The colours are dense and the definition is very good. There is little carrier film to be seen. Oddly Eduard has included both full swastikas or you can build them up from two pieces. Not sure why the latter is necessary really. Thankfully the prop spinner stripe for both the Fw 190 and Bf 109G are included as decals.
Instructions
The 36 page instruction booklet covers all the bases regarding the build and finishing of the two aircraft. The construction diagrams are not overly busy, but you do need to look at each stage carefully if you want to get the most from the builds. The coloured marking section is a bonus along with the four views of each aircraft. There are separate illustrations covering the plethora of stencils
Conclusions
This is a good release from Eduard that brings together the two main single engine defenders of Germany towards the end of WWII. The price is pretty good compared to buying two separate kits. The quality of the kits are superb and currently represents some of the best mouldings you can find from any manufacturer.
SUMMARY
Highs: Superb looking kits, good marking choices. Cheaper than buying the ProfiPACK kits individually
Lows: Some slight sink marks
Verdict: I cant recommended this release enough, it just looks so good. Highly recommended
Our Thanks to Eduard! This item was provided by them for the purpose of having it reviewed on this KitMaker Network site. If you would like your kit, book, or product reviewed, please contact us.


Comments