Andy [Bethyn] asked if I fancied reviewing and putting this Eduard kit together. Being a bit pushed for time I followed Andys lead and just concentrated on putting the styrene together without filler or paint. Inbox reviews are fine, but nothing beats a construction review revealing if the sum of the parts really create a good representation of the real thing and also how easy the kit is to build. We might scoff at the shake and bake kits, but for the time pressed modeller they are a godsend. So will this kit from Eduard of the Bf 109G-14 be a good acquisition for the time pressed modeller?
Contents
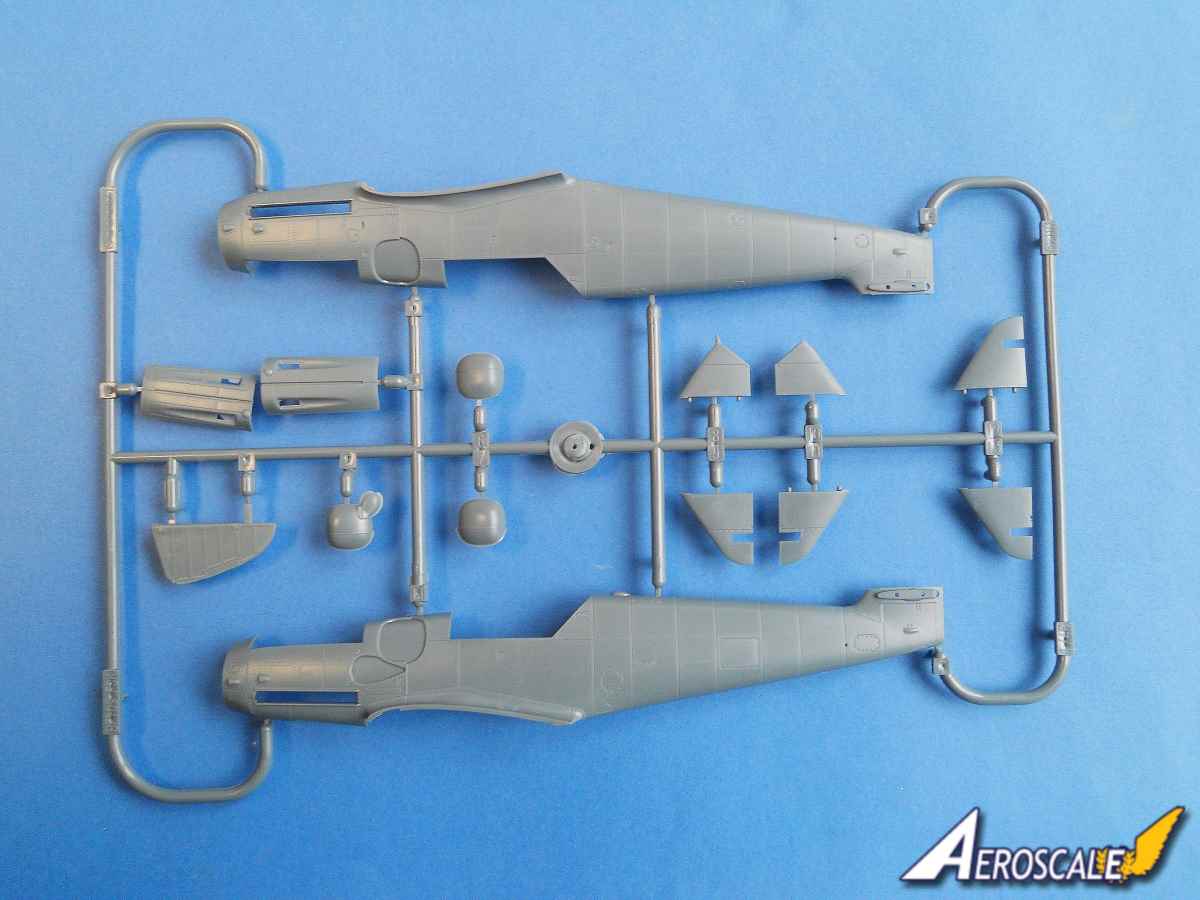
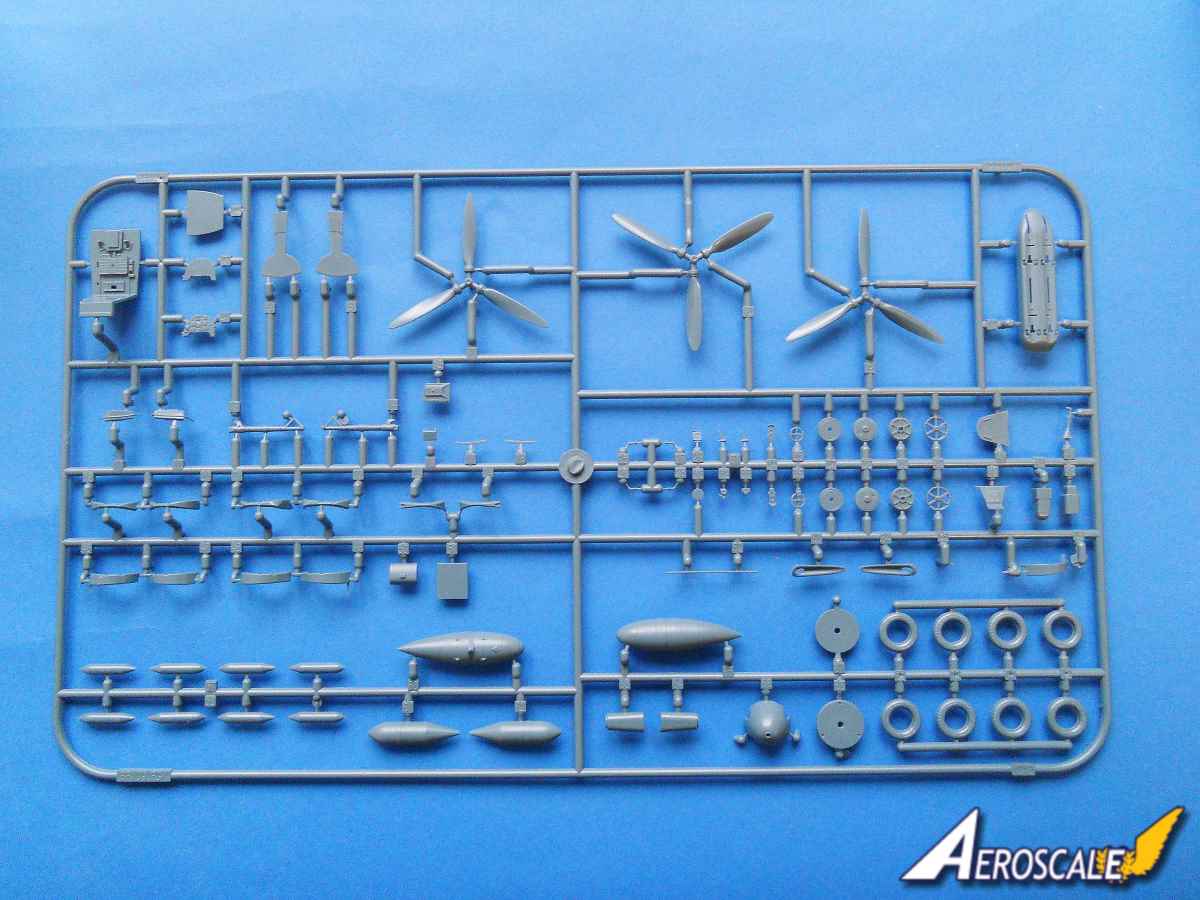
In the plain white box there are injected plastic sprues H, I, J, K, N & T and thats it. Remember the purpose of the overtrees is to provide the opportunity to create additional models cheaply using the remainder of the marking from your Brassin or Weekend kit or any other decal producer.
Construction
The Instructions for the construction of the Bf 109 G-14 can be down loaded from Eduards website. Just ignore the photo etched parts and concentrate on the styrene bits.
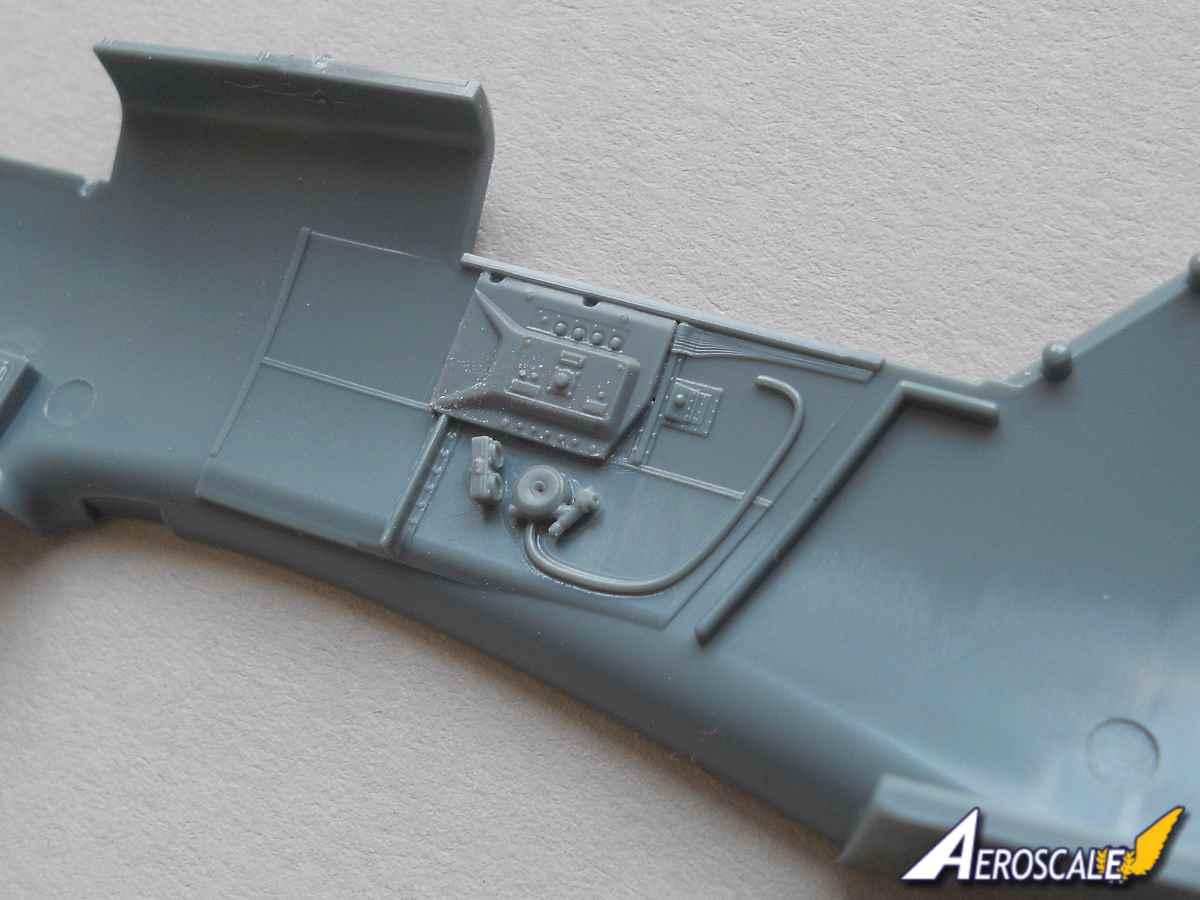
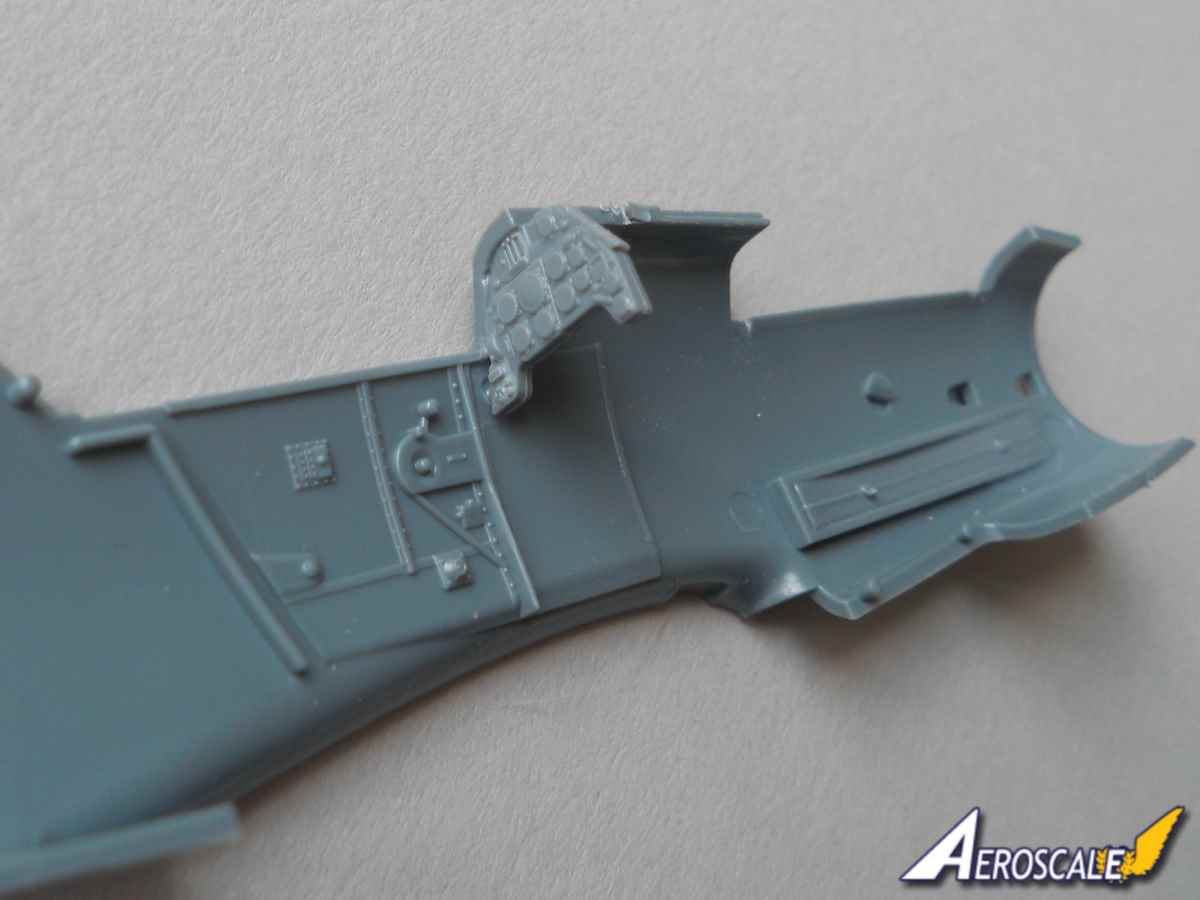
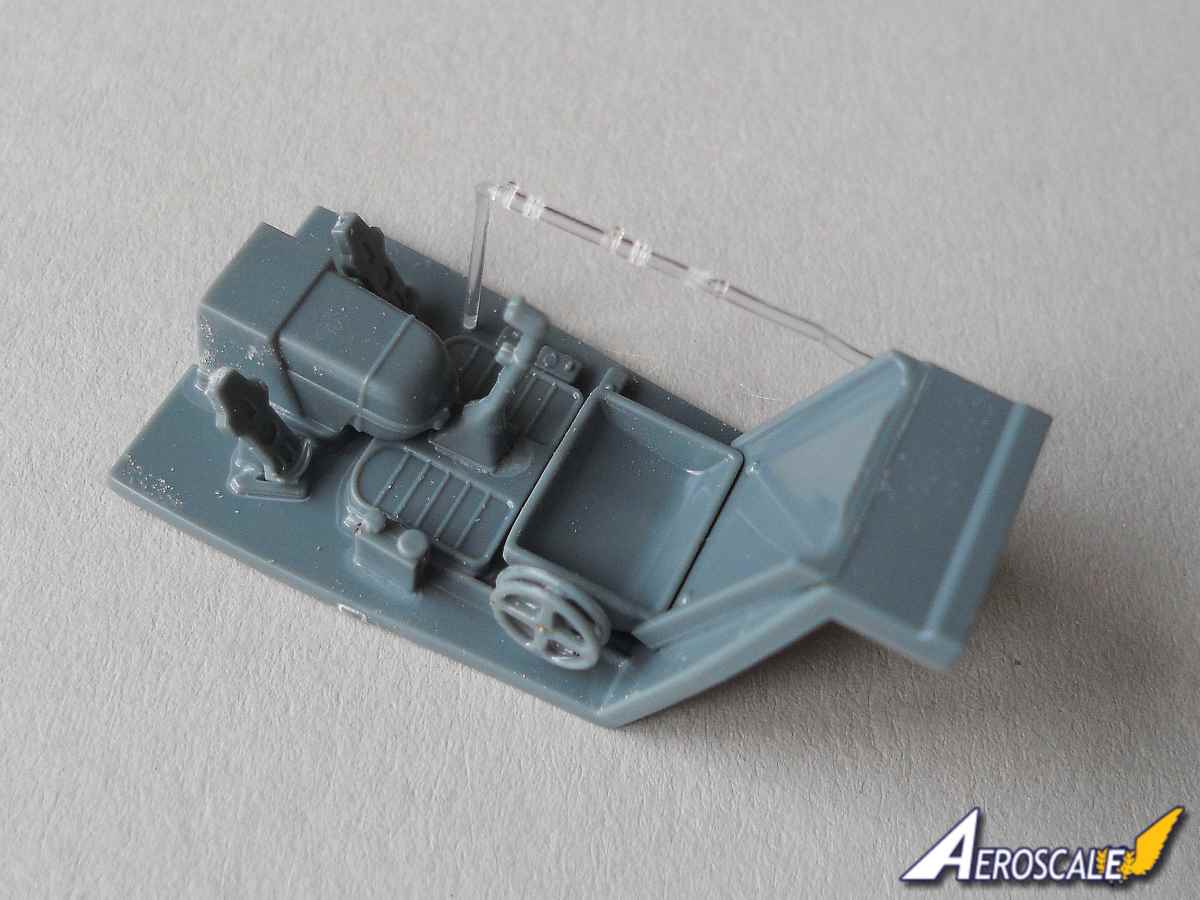
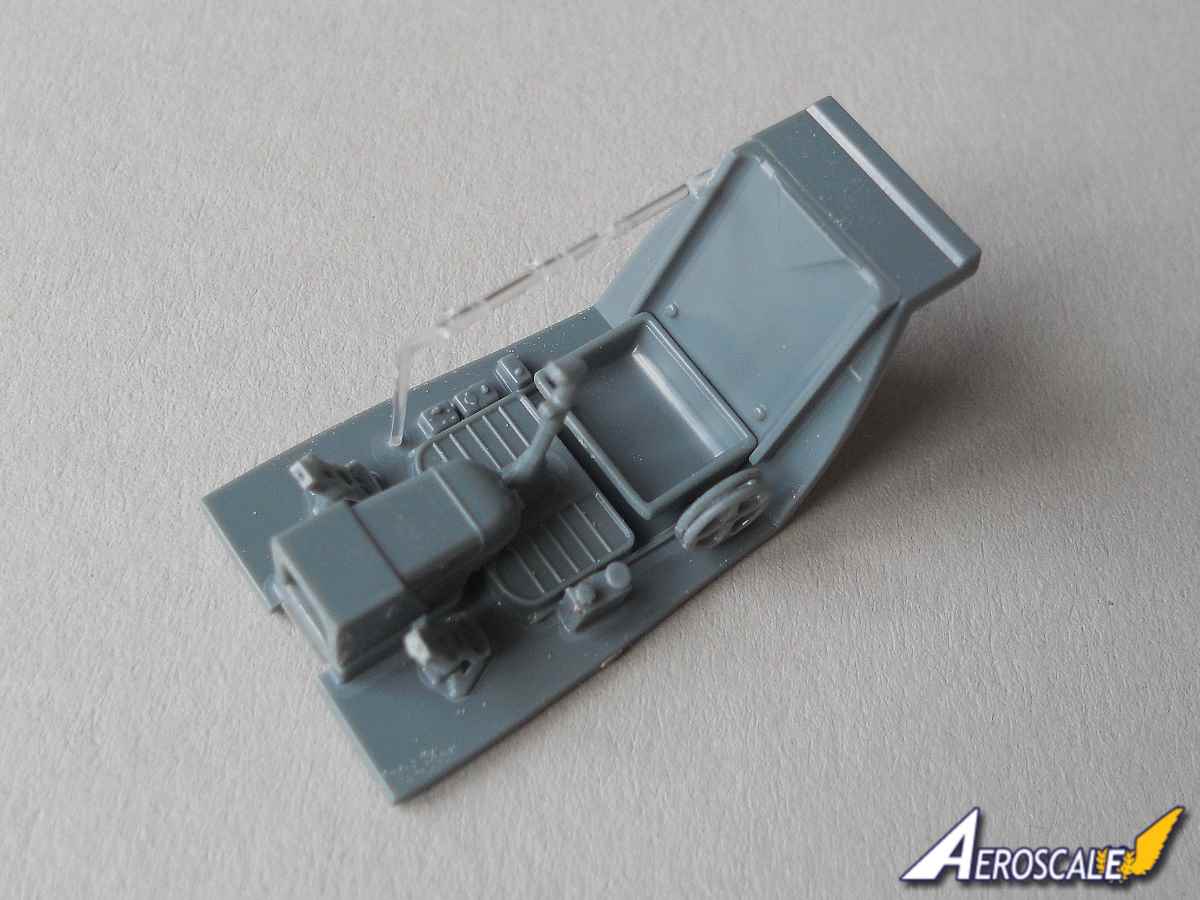
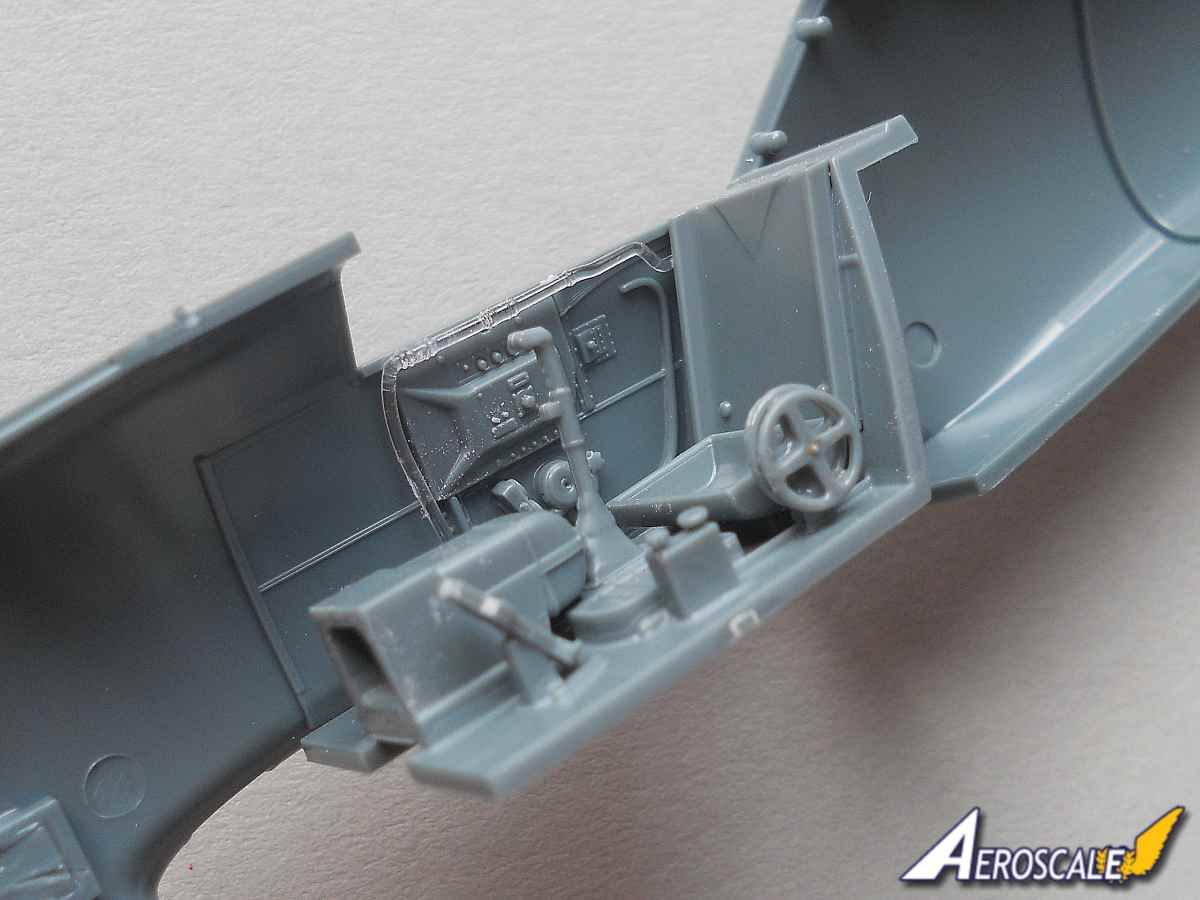
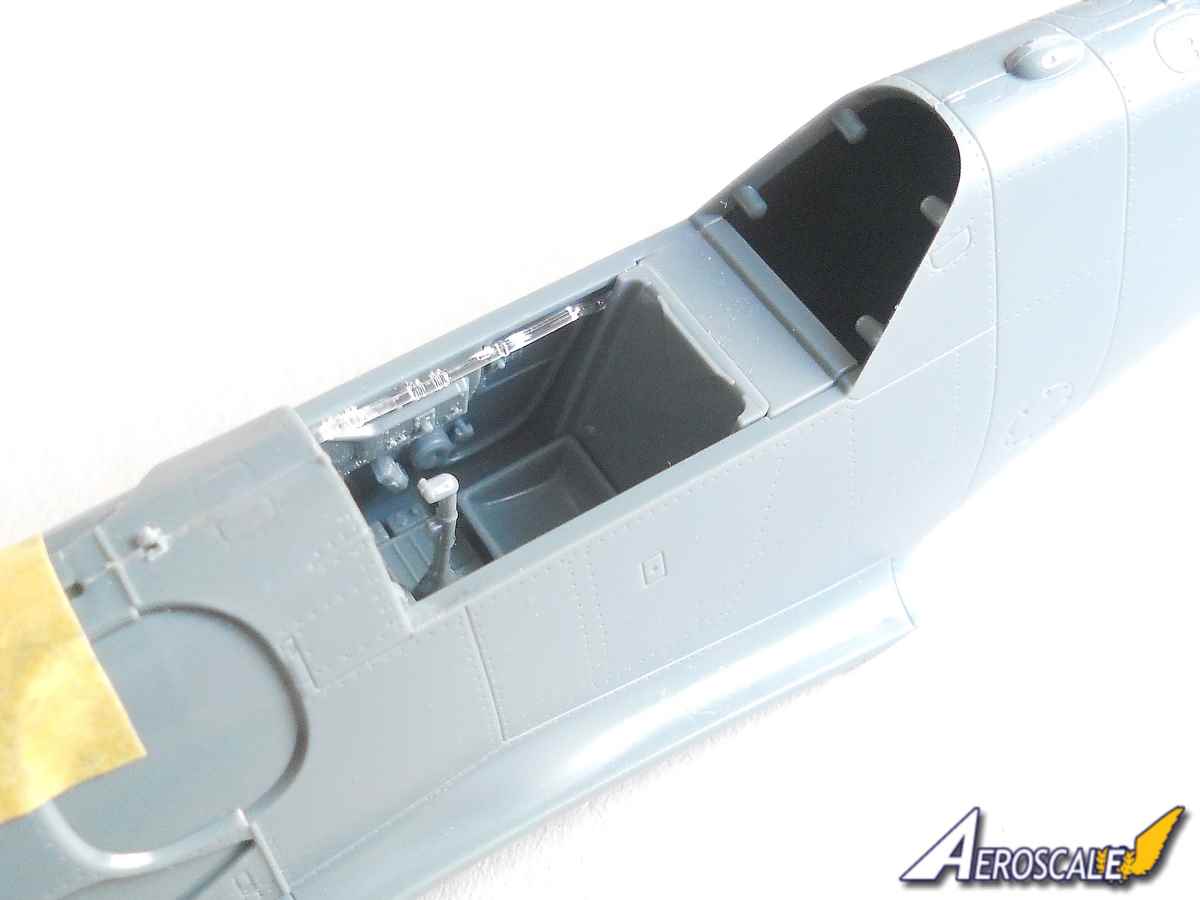
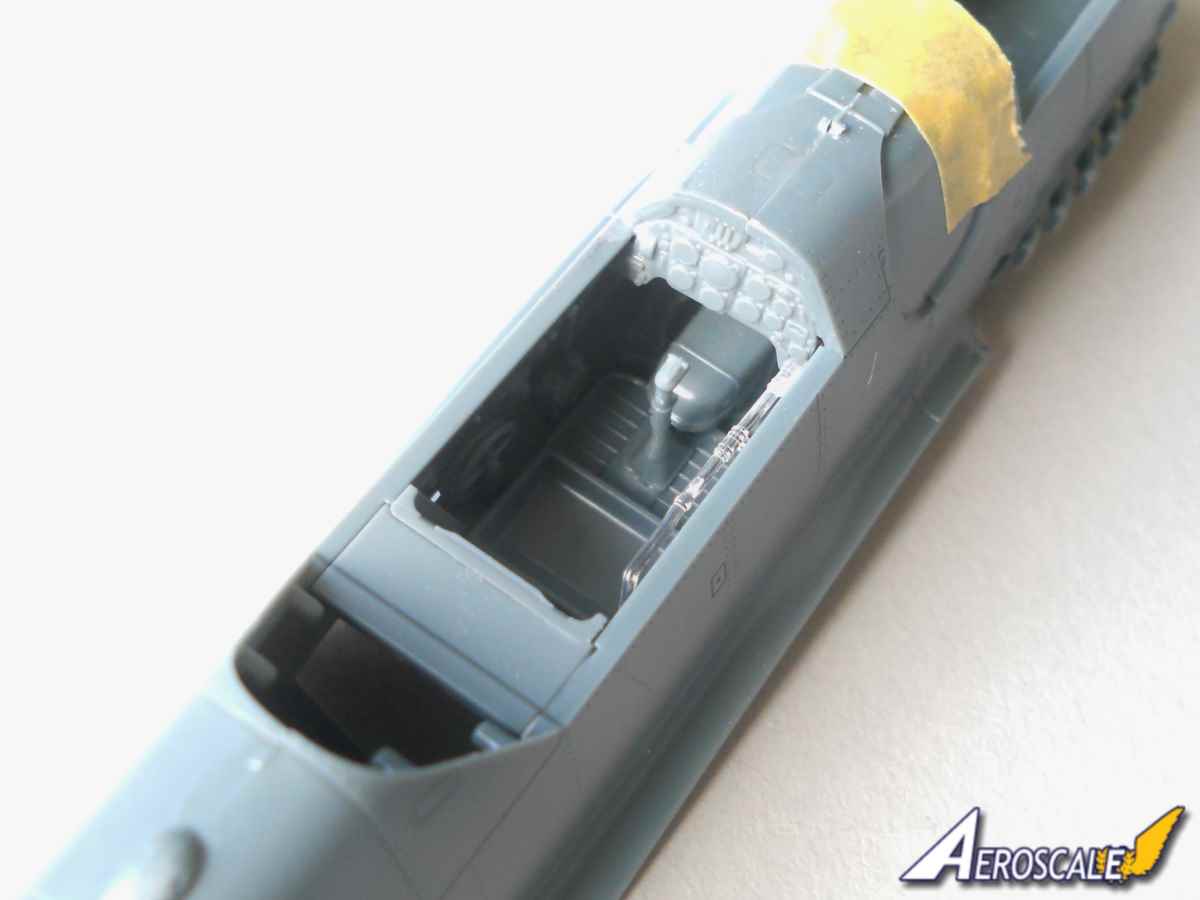
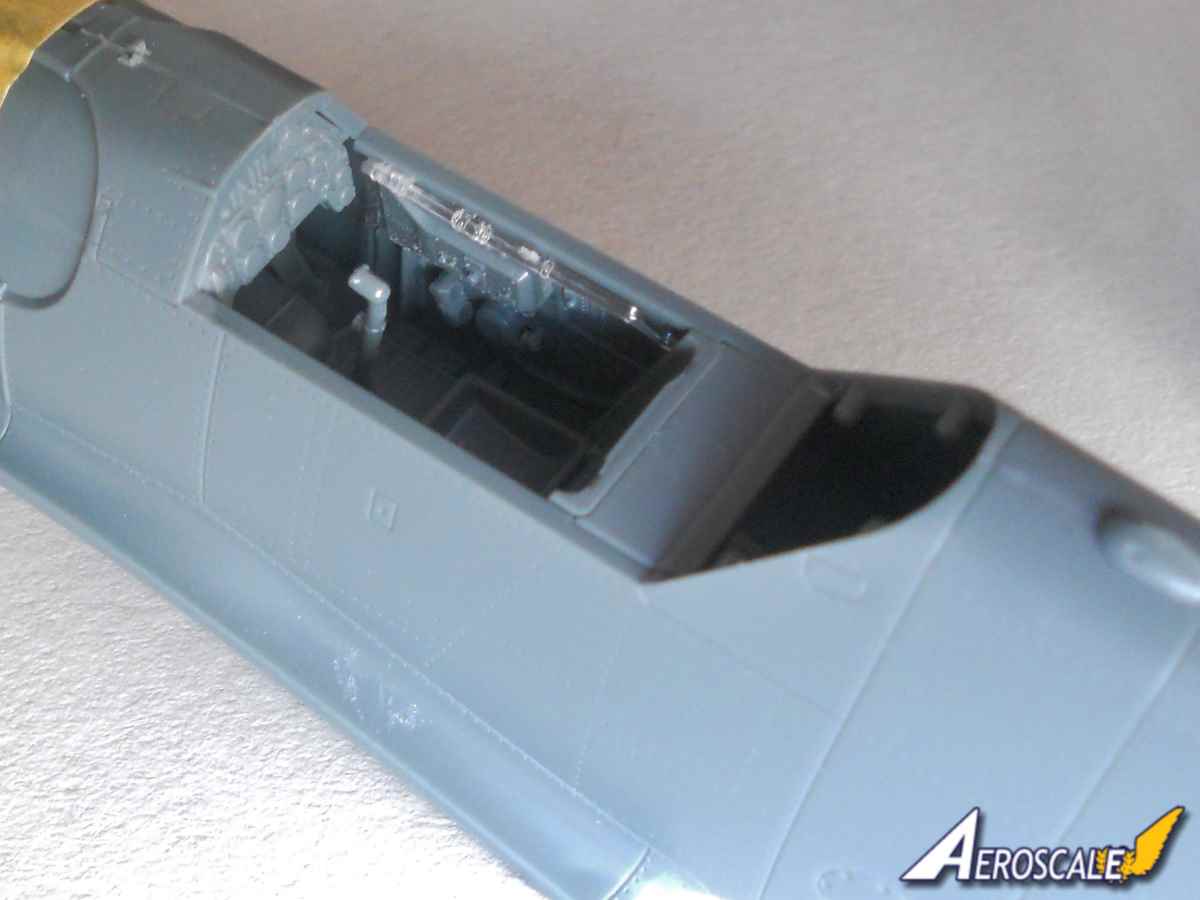
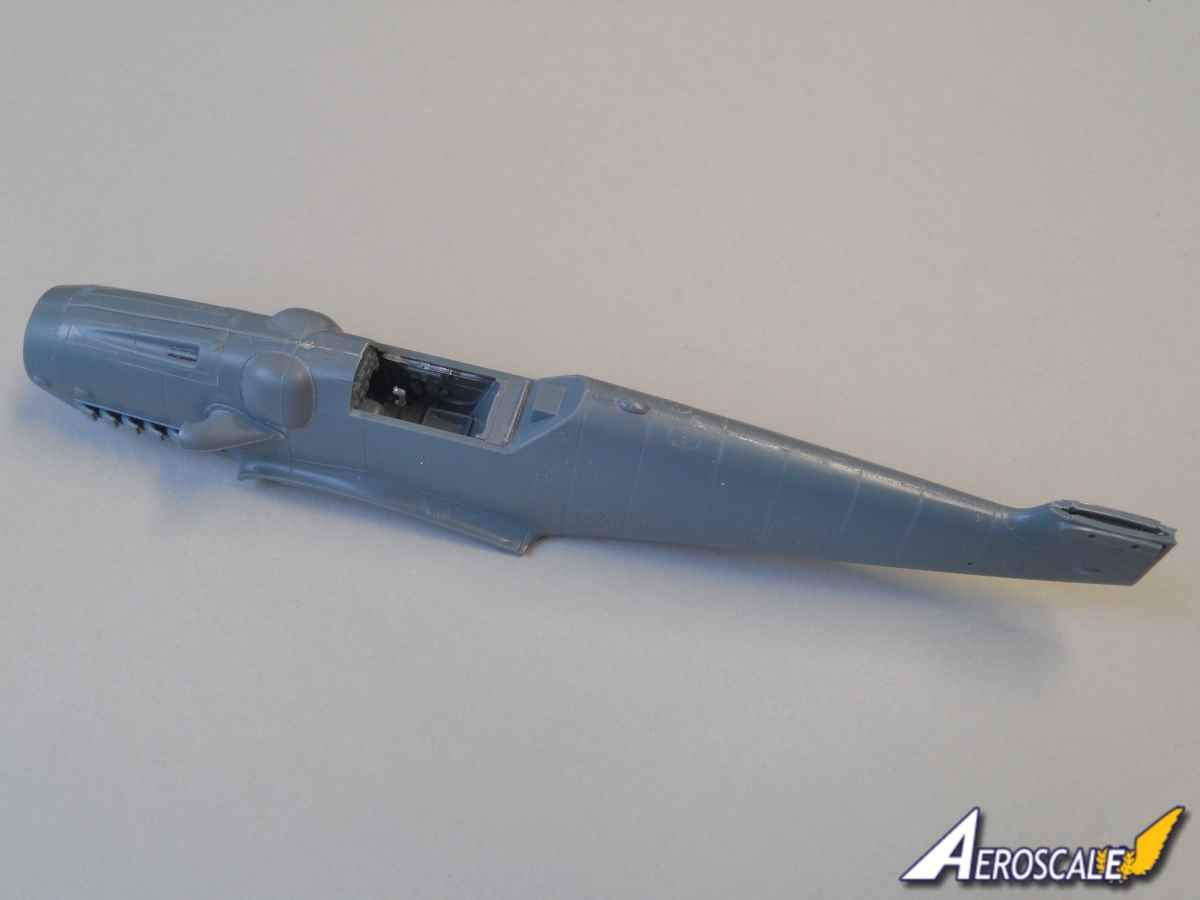
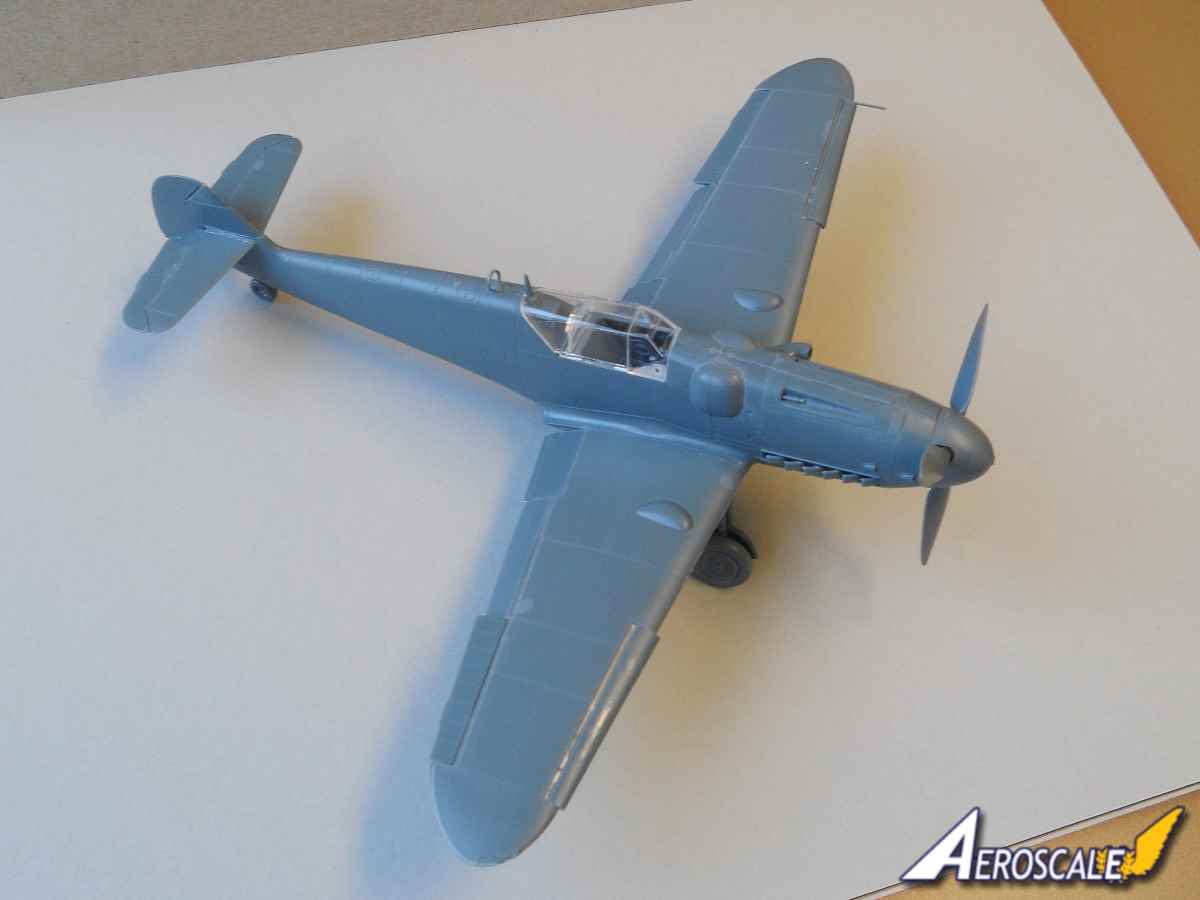
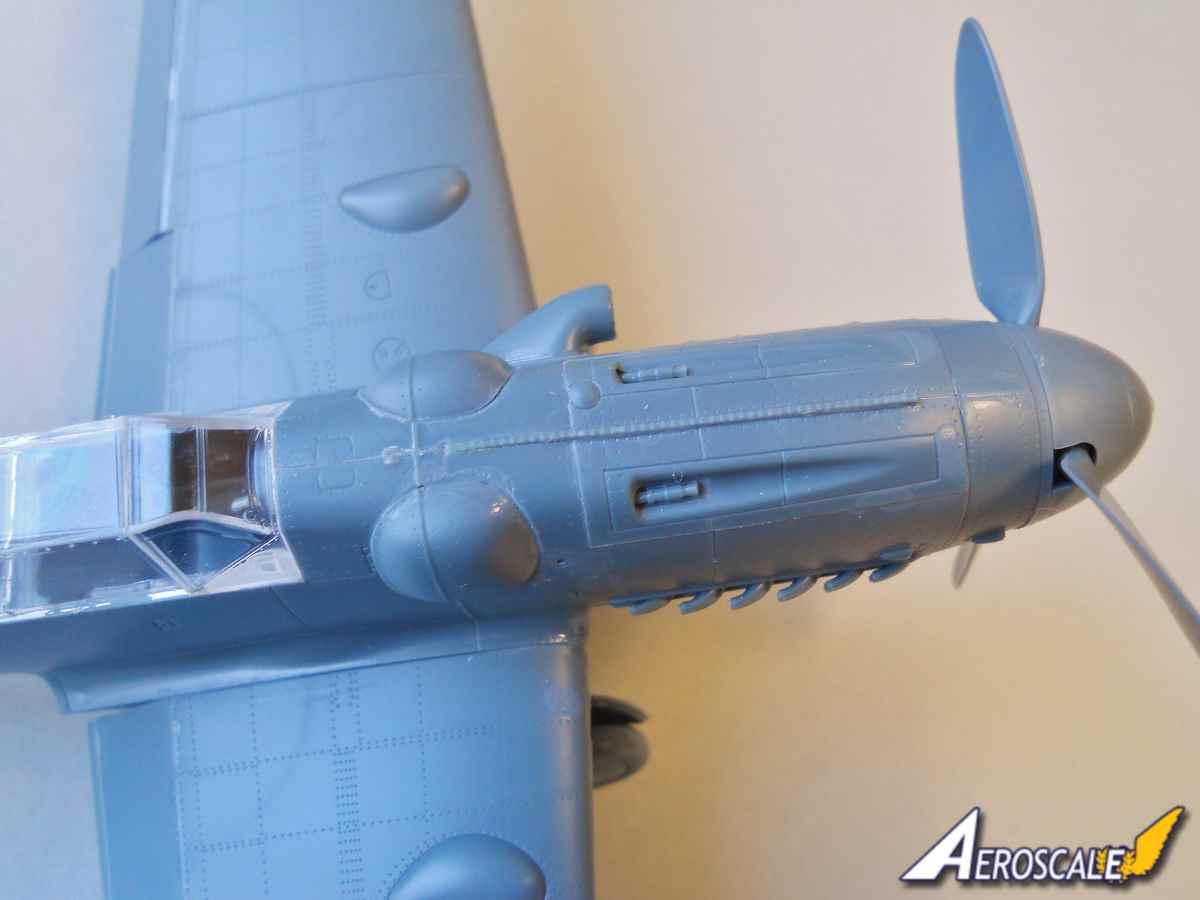
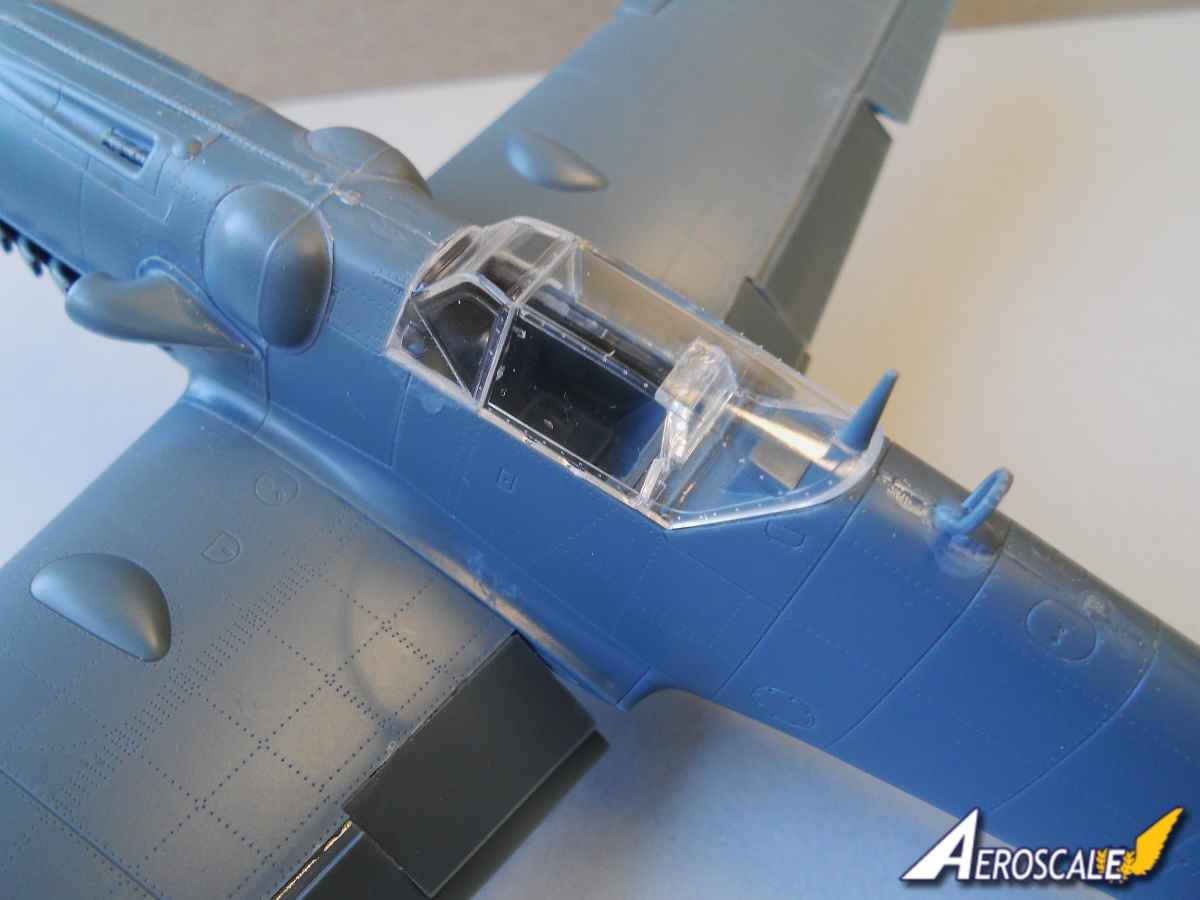
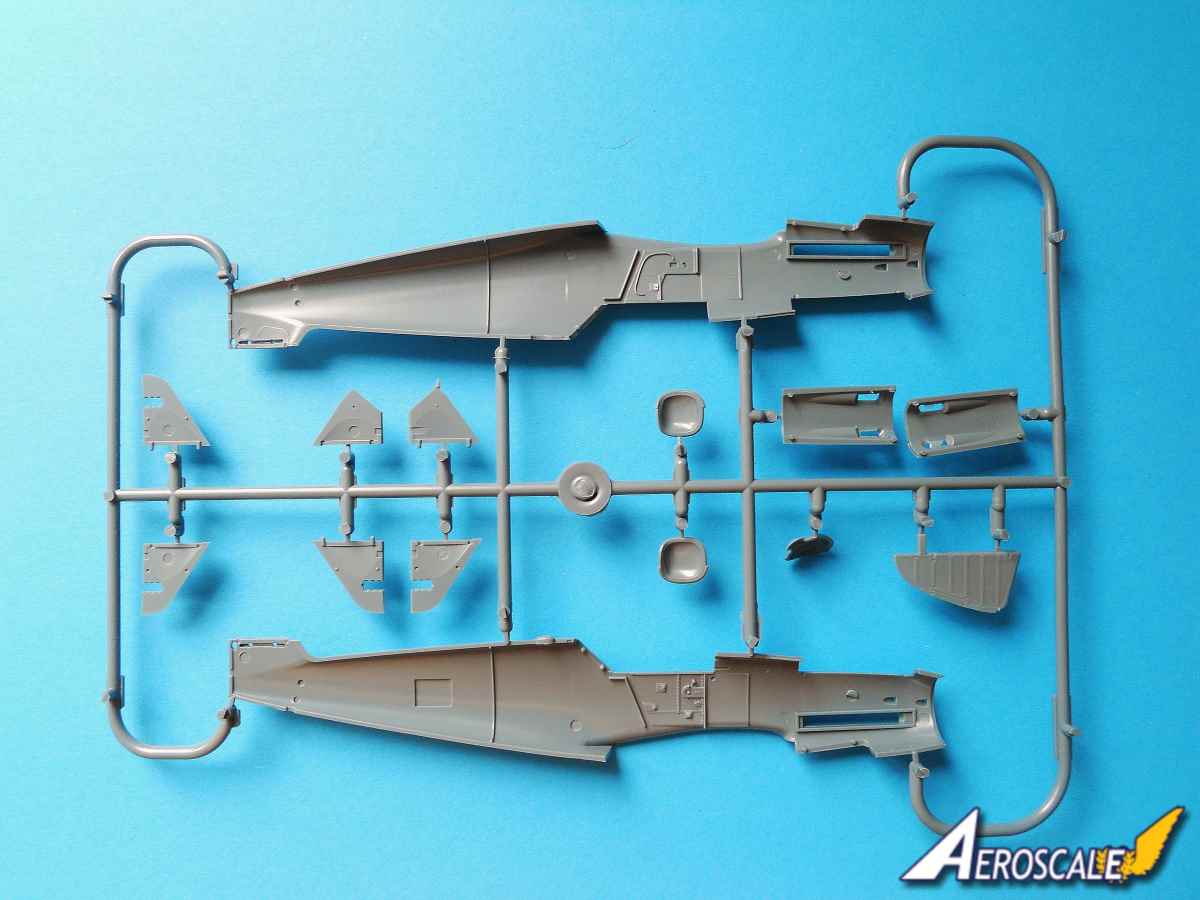
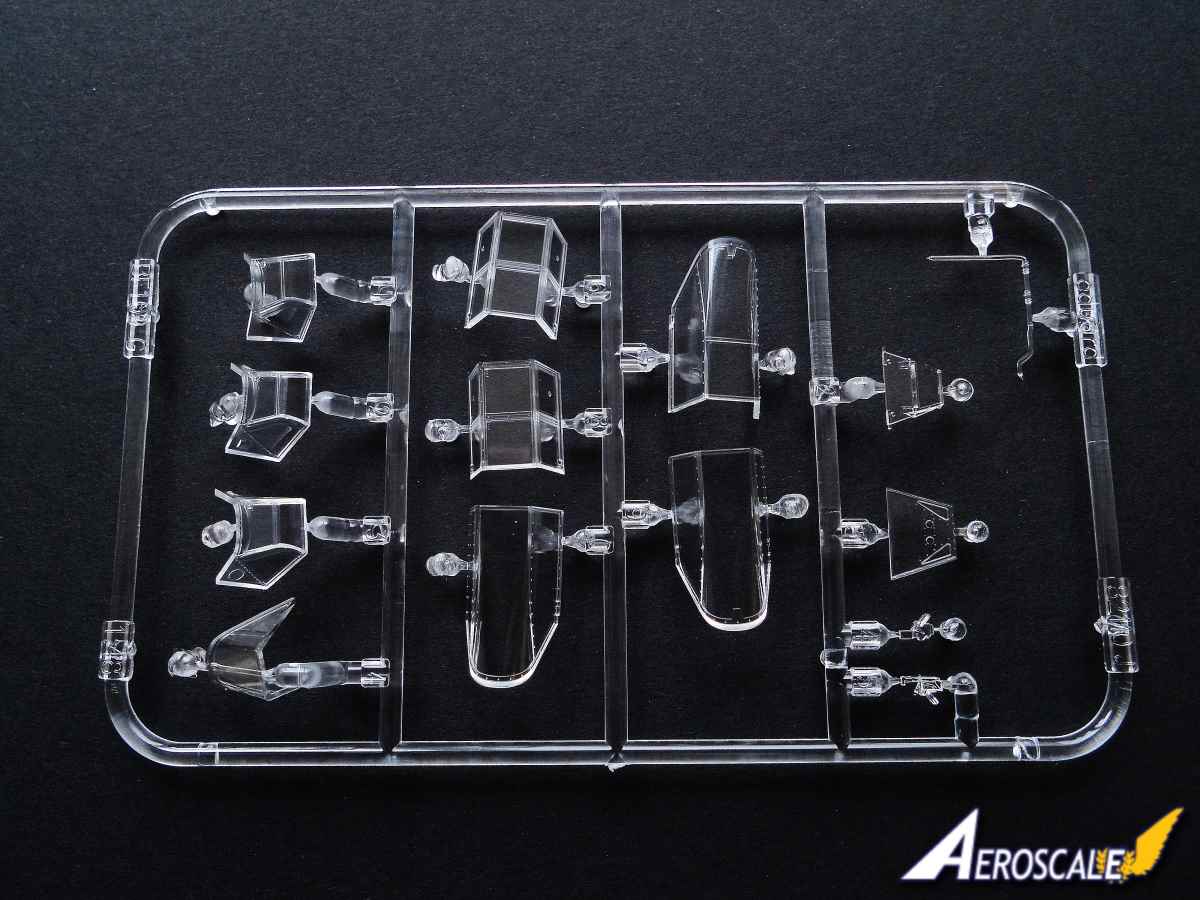
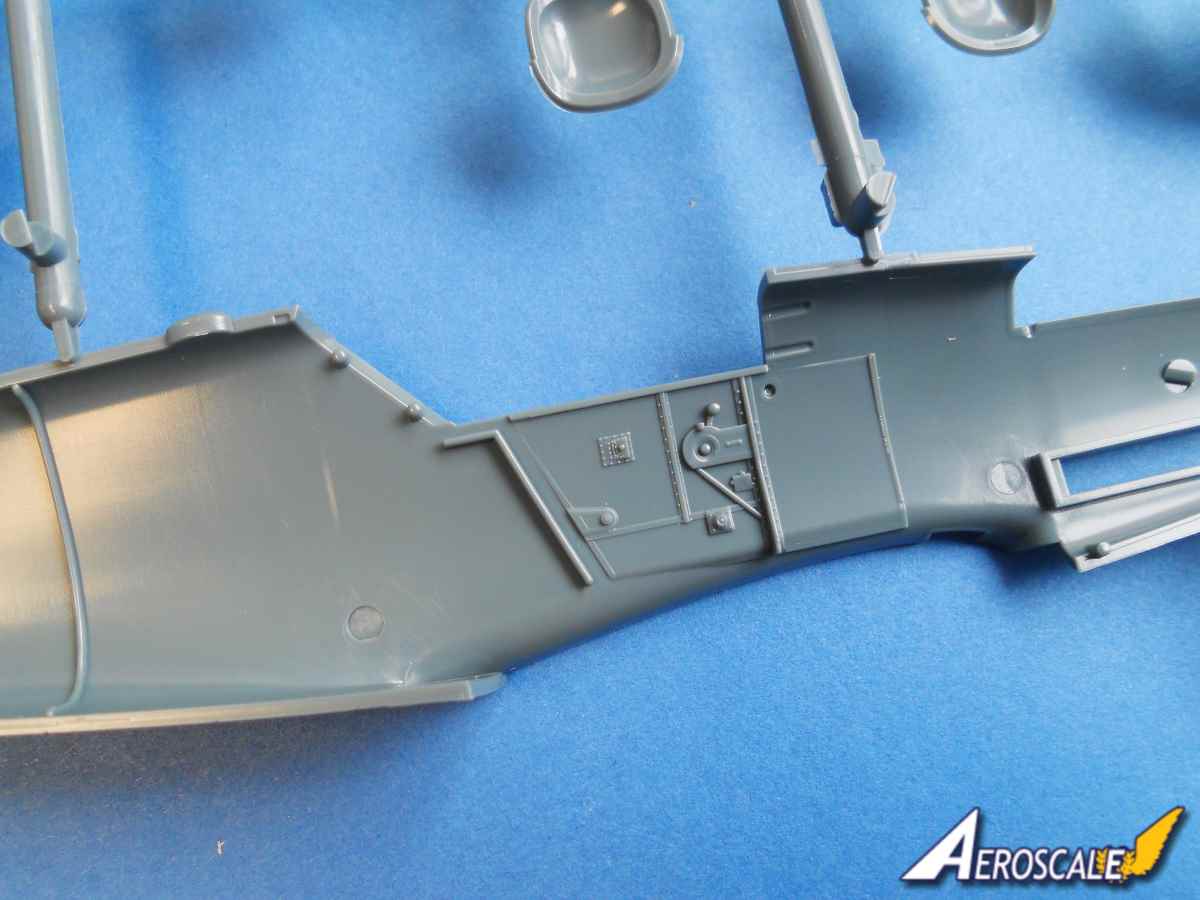
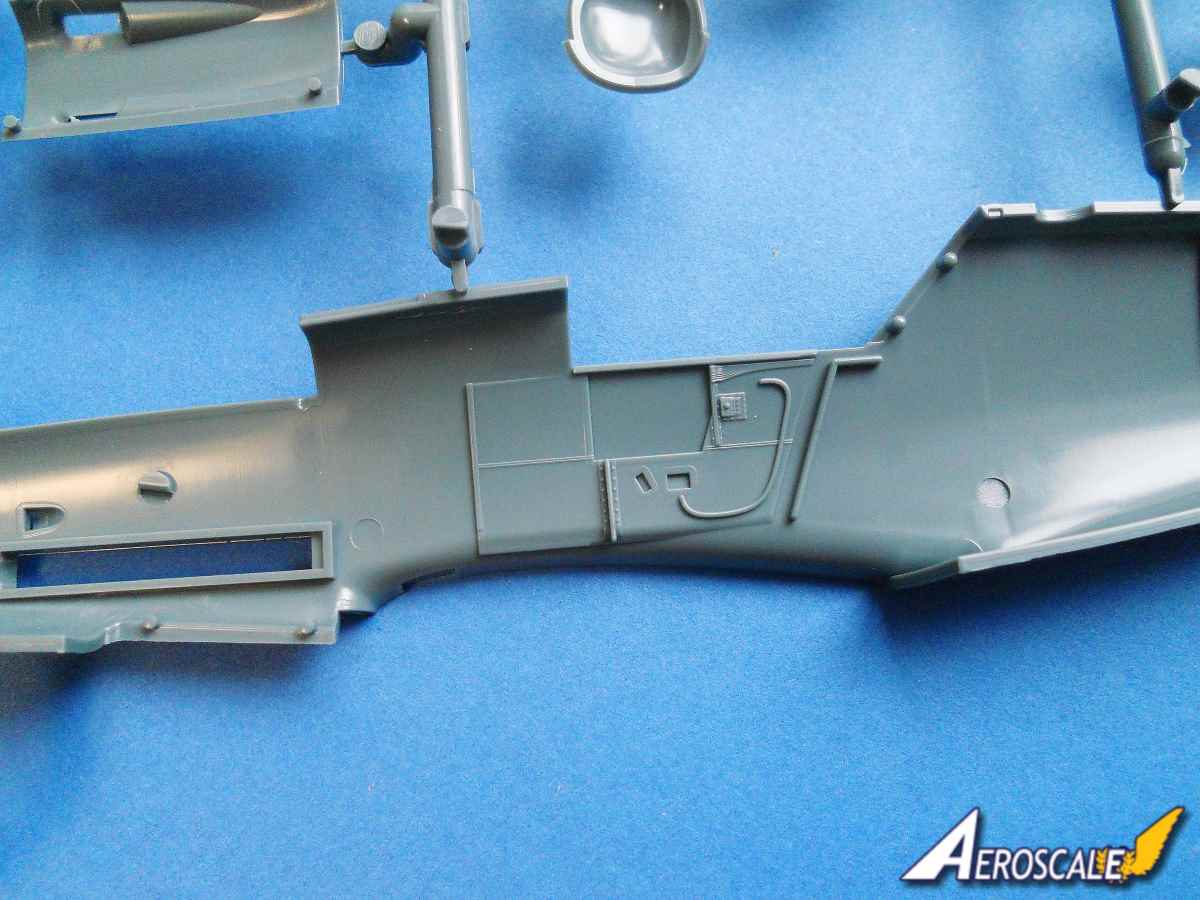
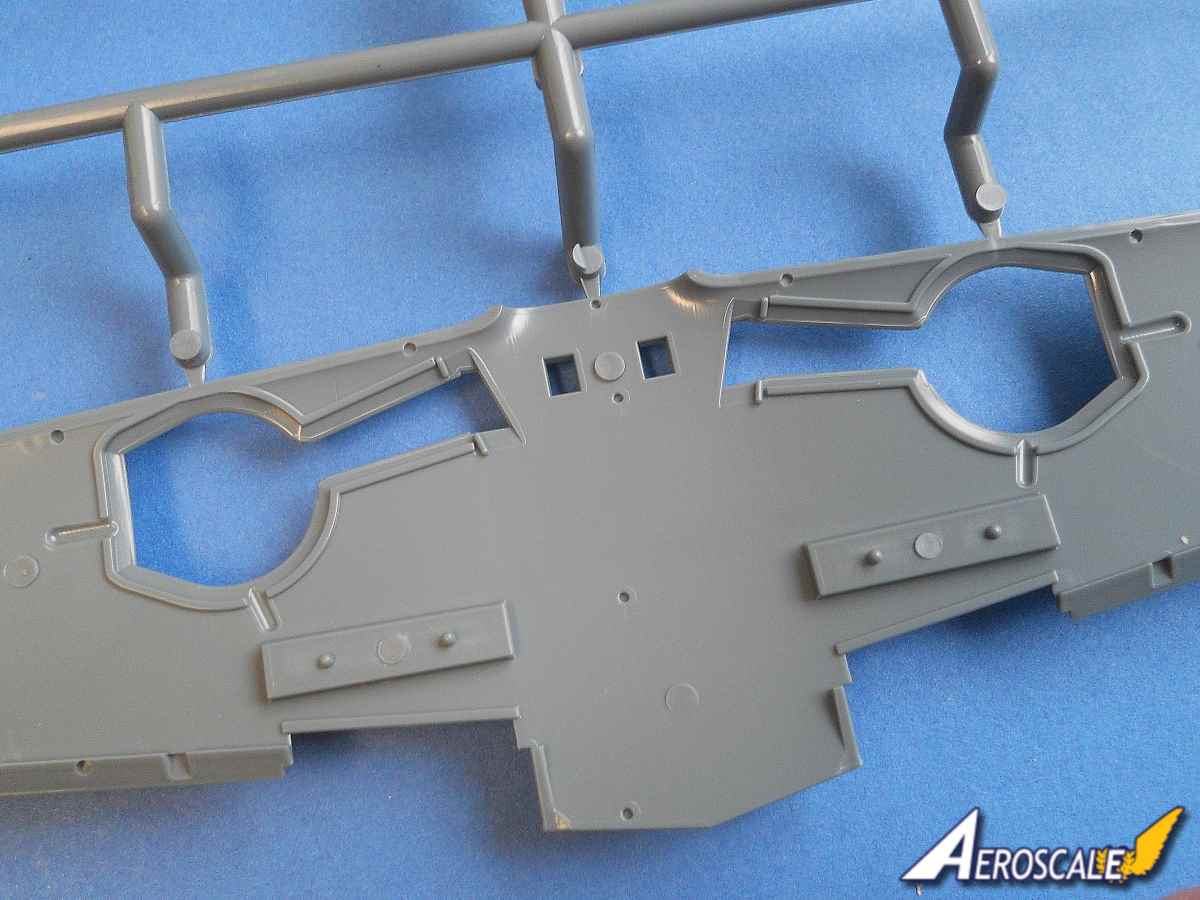
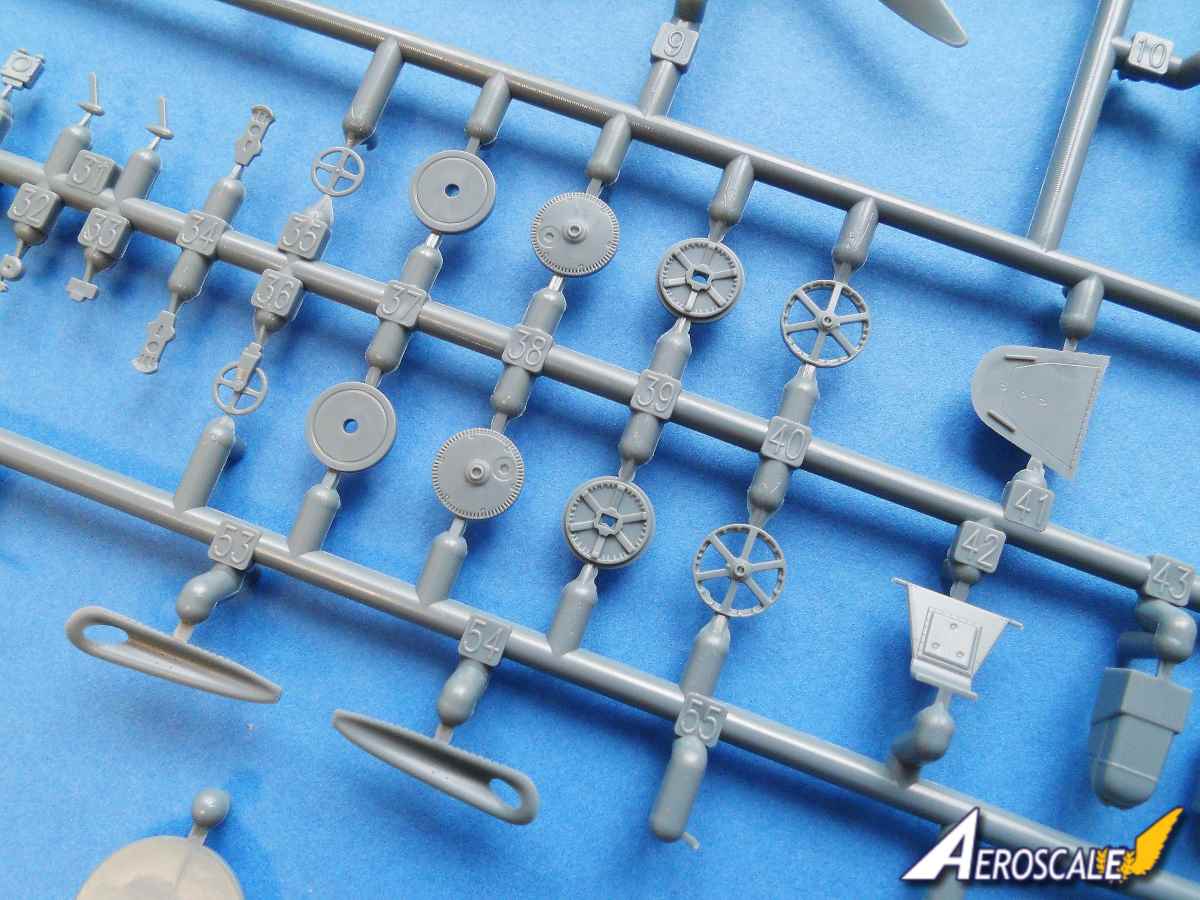
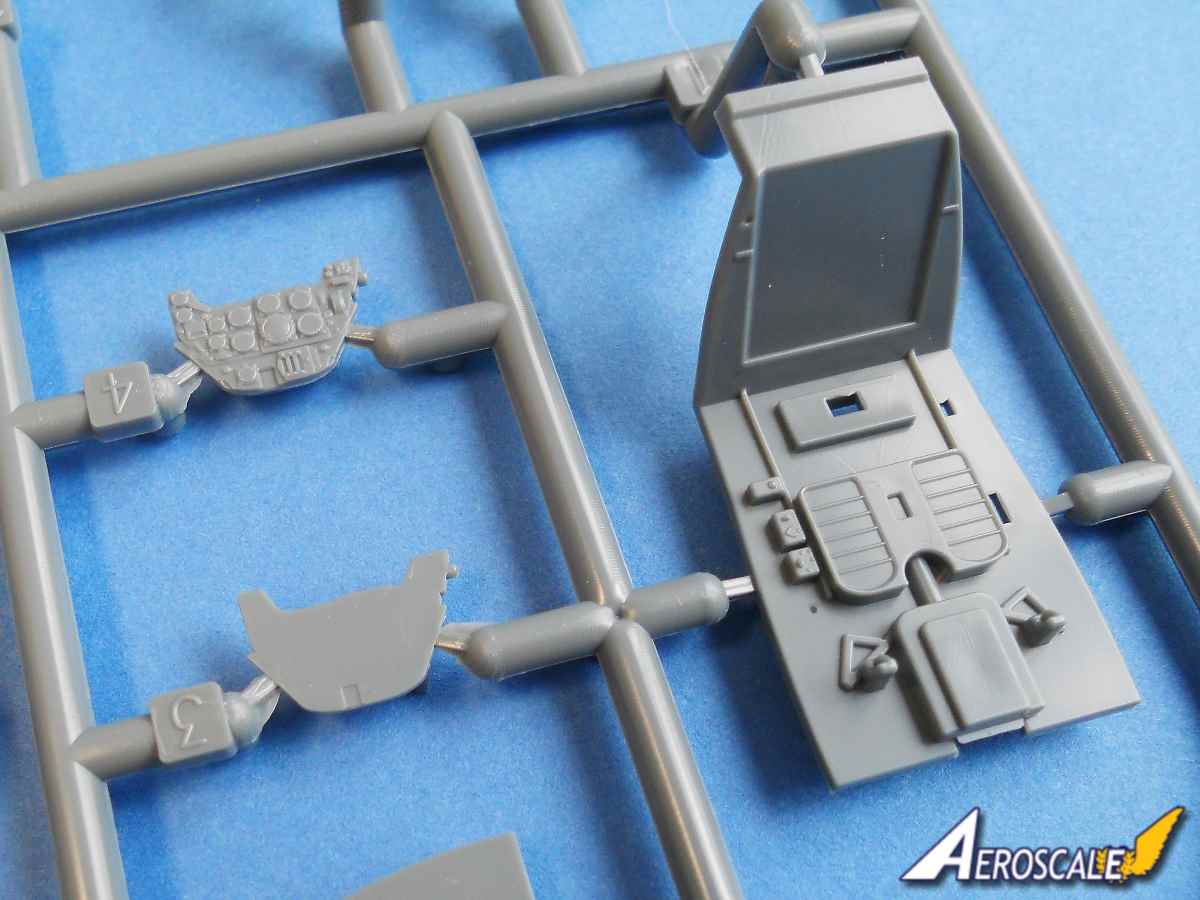
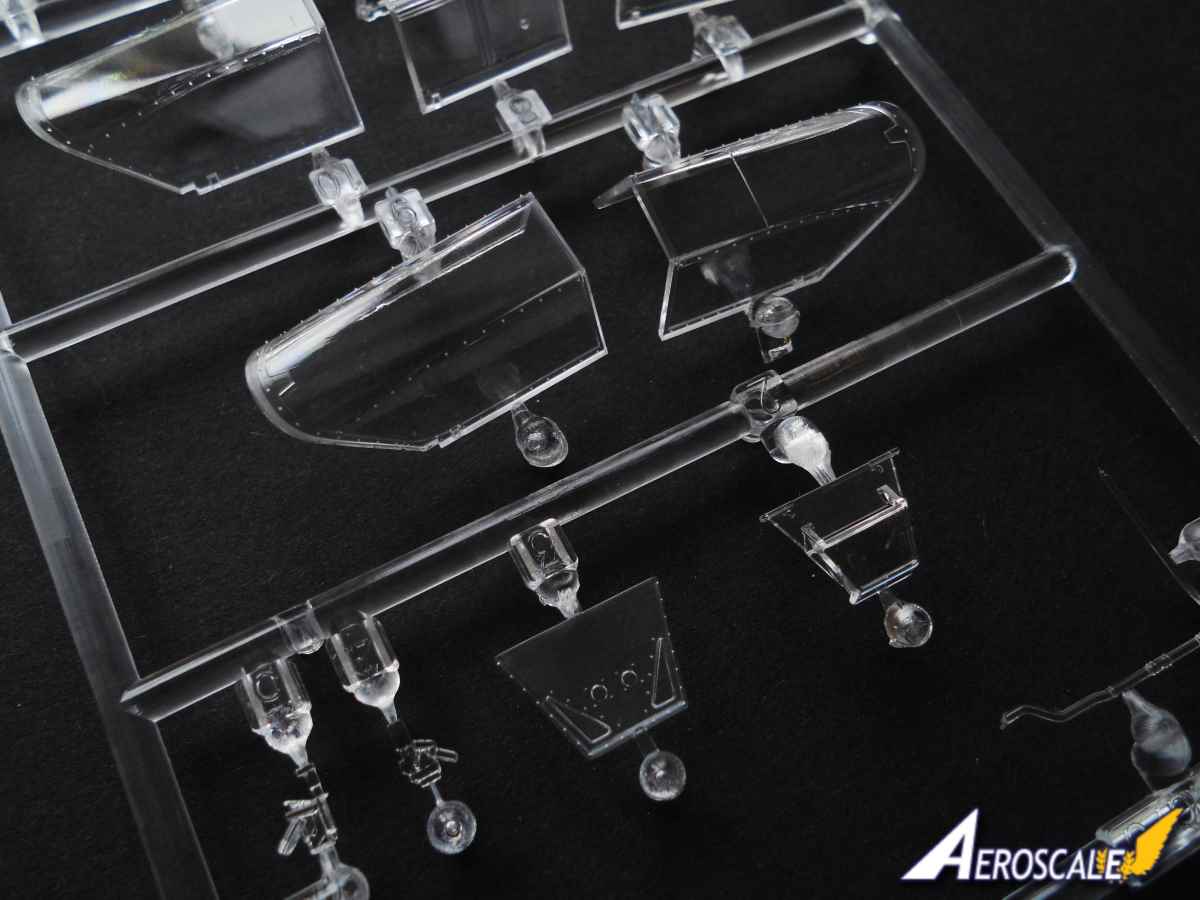
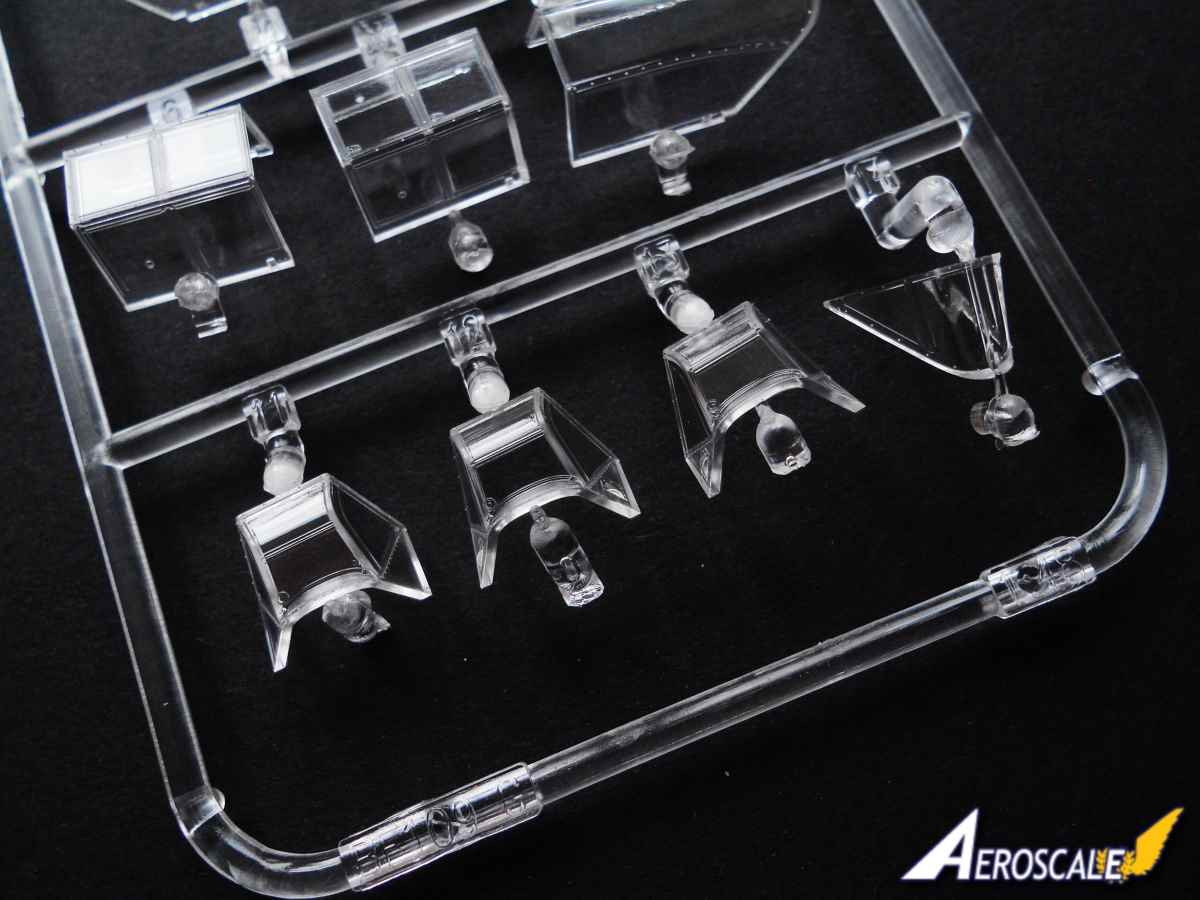
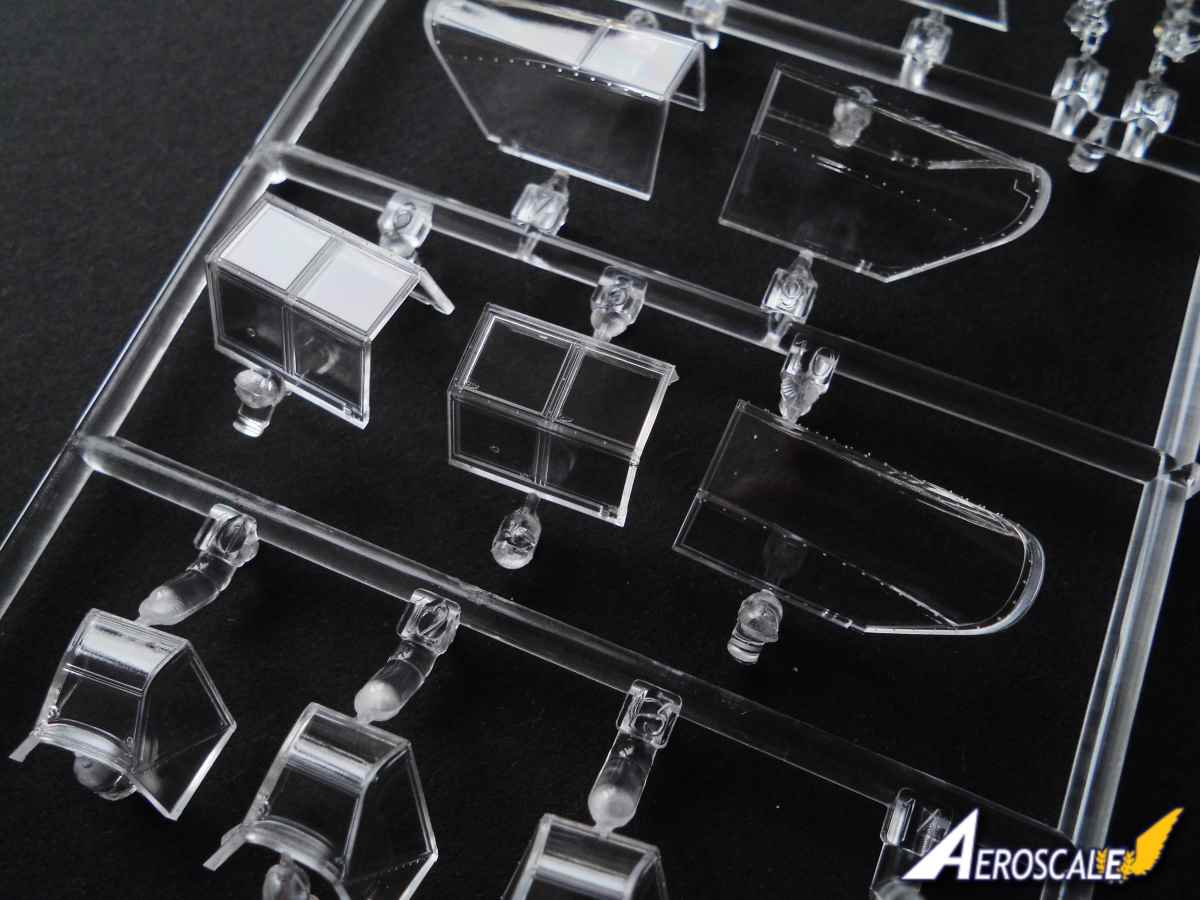
There is plenty of detail in the styrene to create an interesting cockpit. I found the fuel line in clear plastic a bit odd, but part of it is left unpainted, so a logical choice of material. The detail on the instrument panel is very good as well as the detail on the side walls. The cockpit is built up from sixteen styrene parts. The completed cockpit fits nicely within the fuselage.
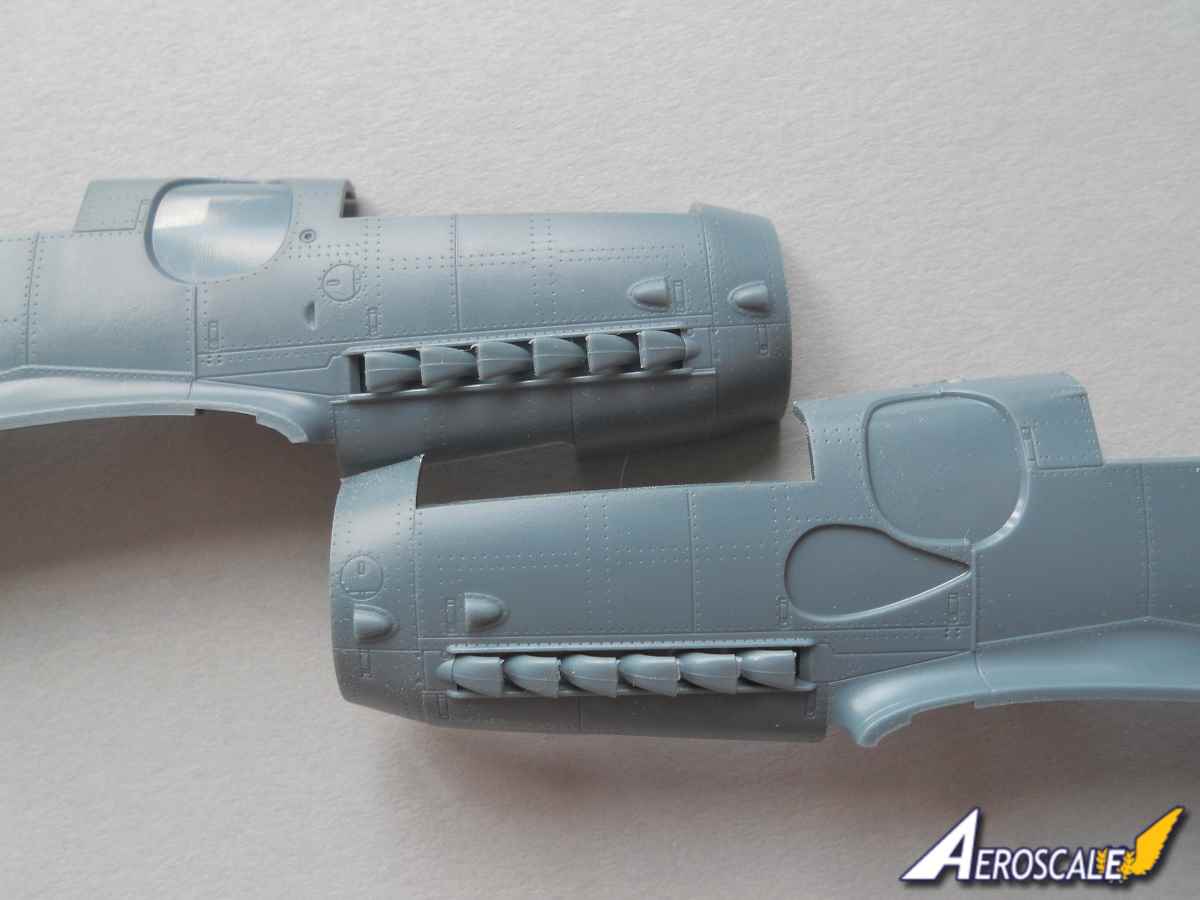
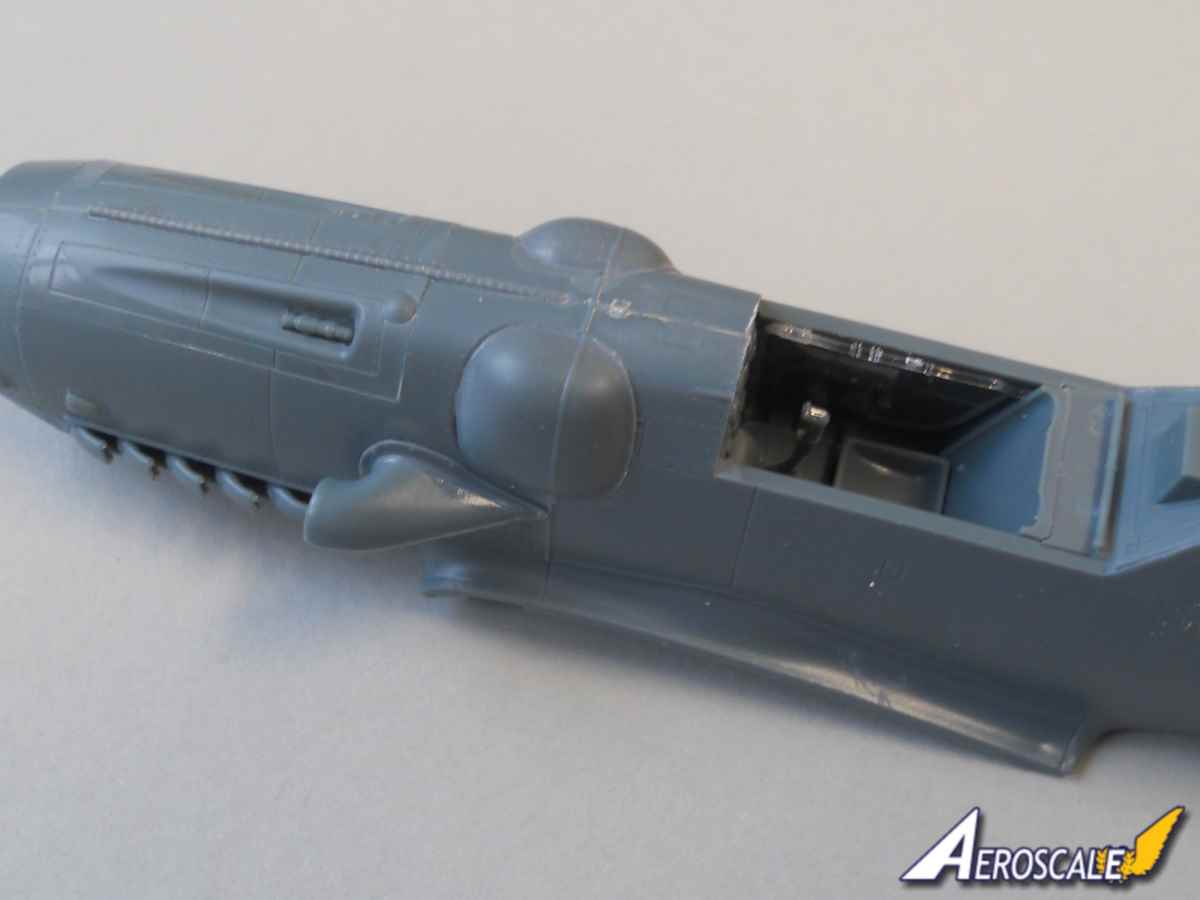
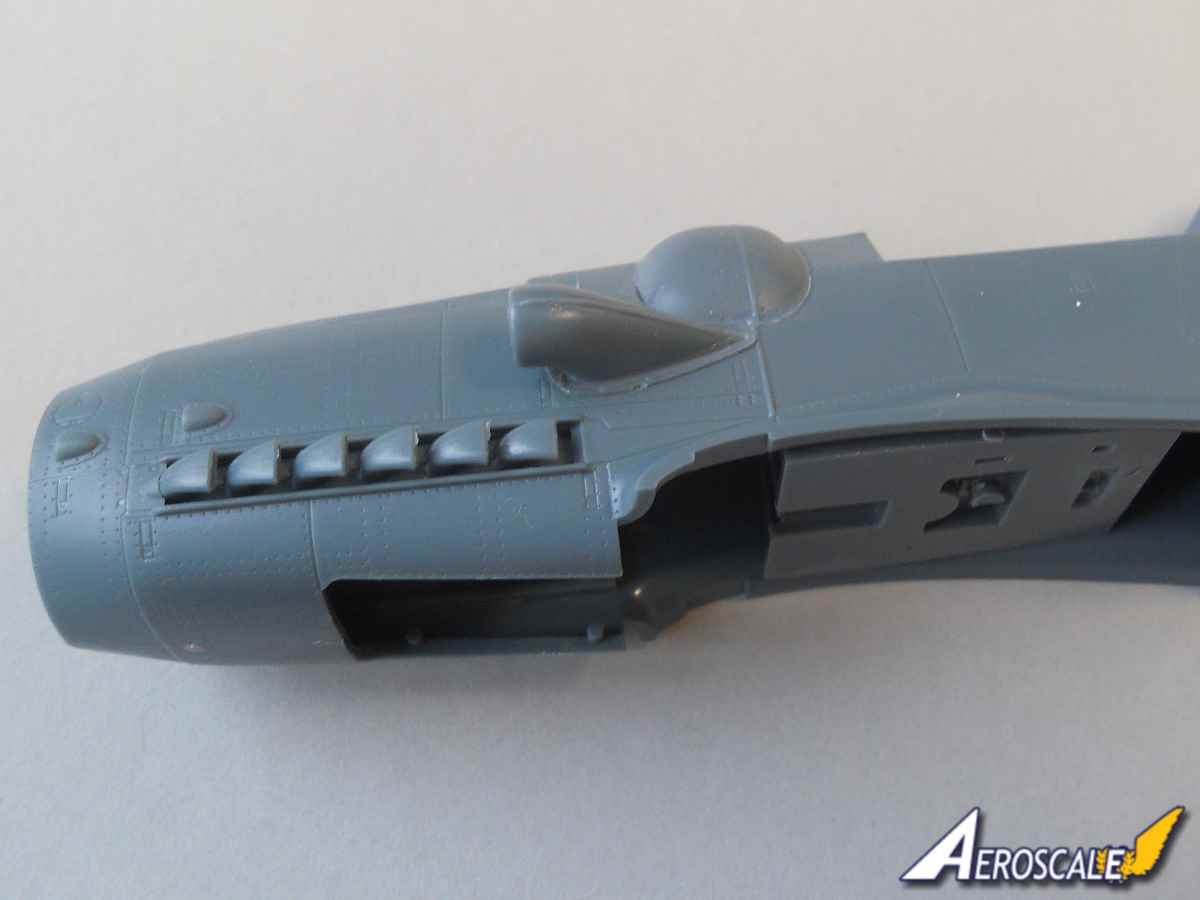
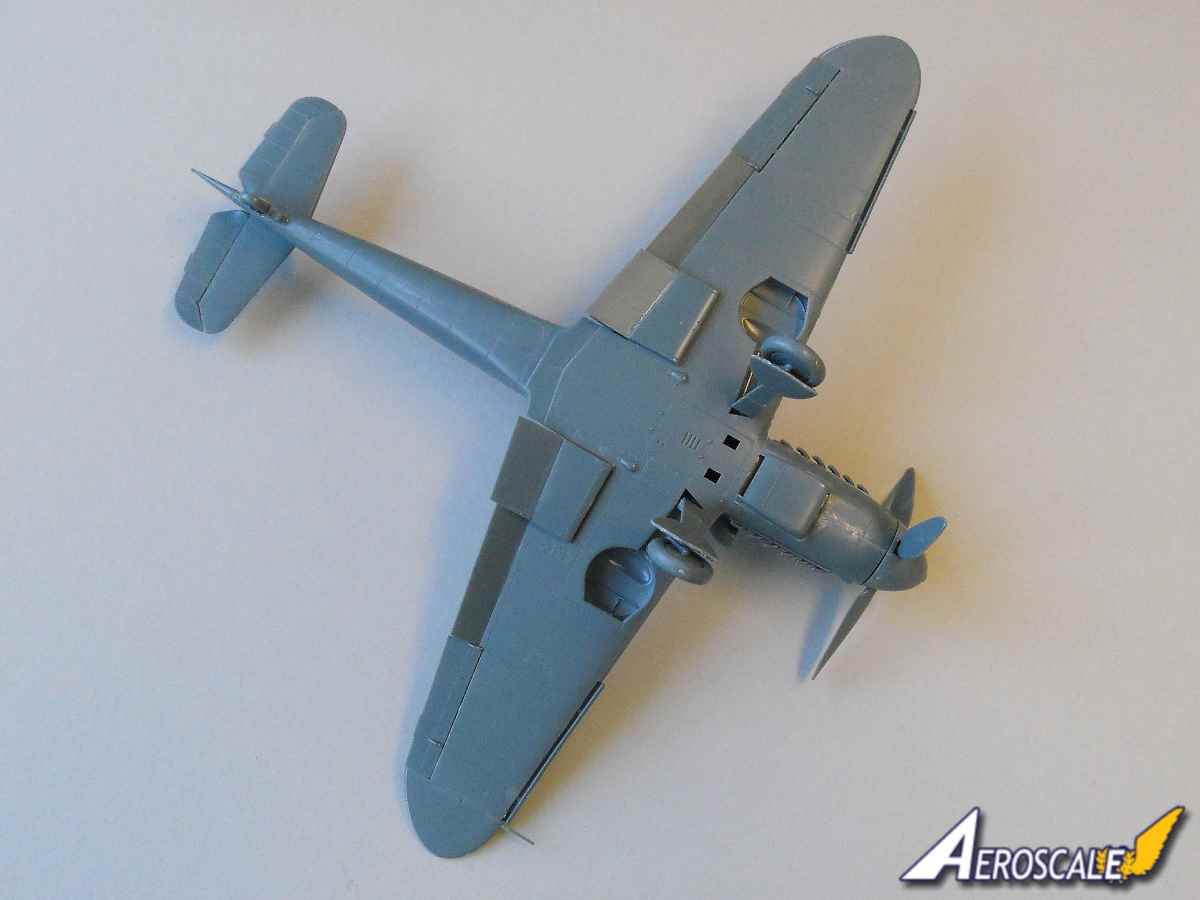
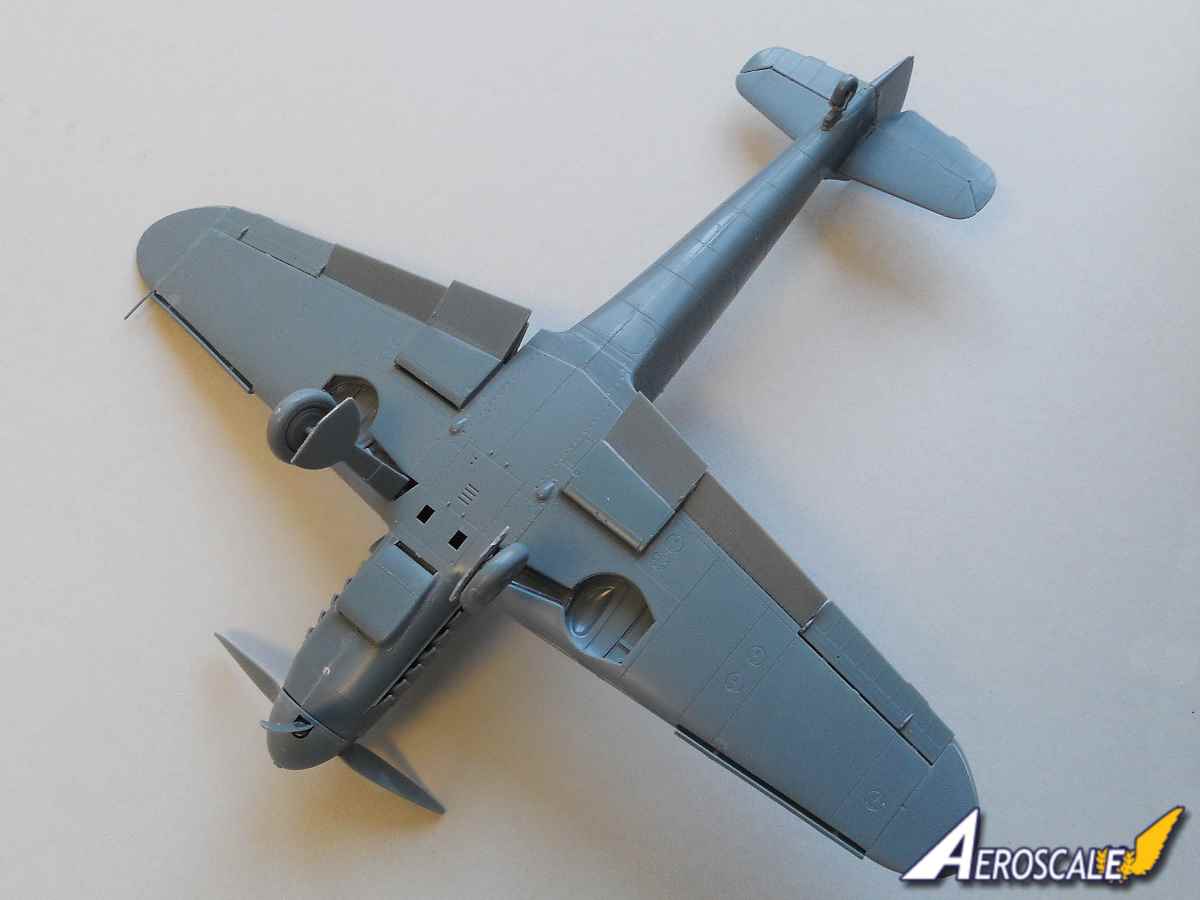
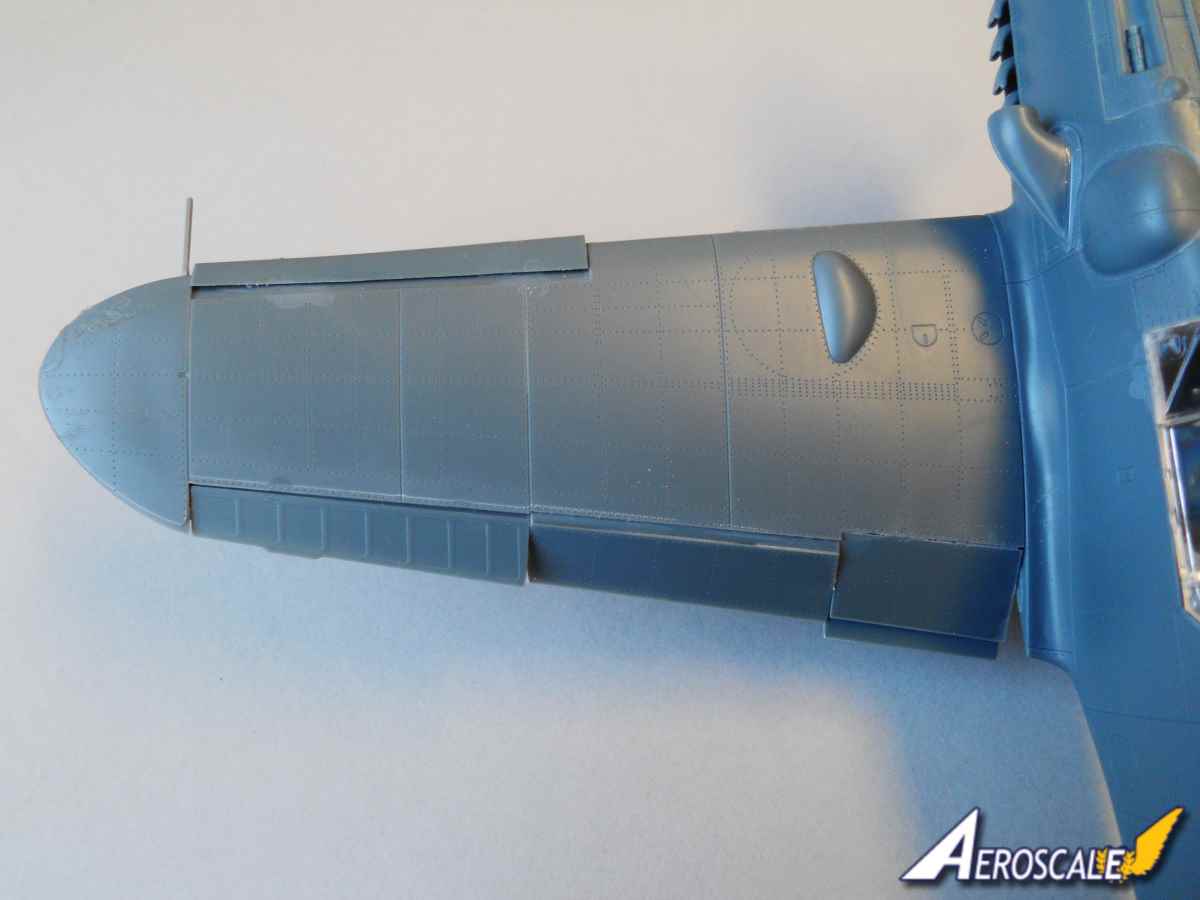
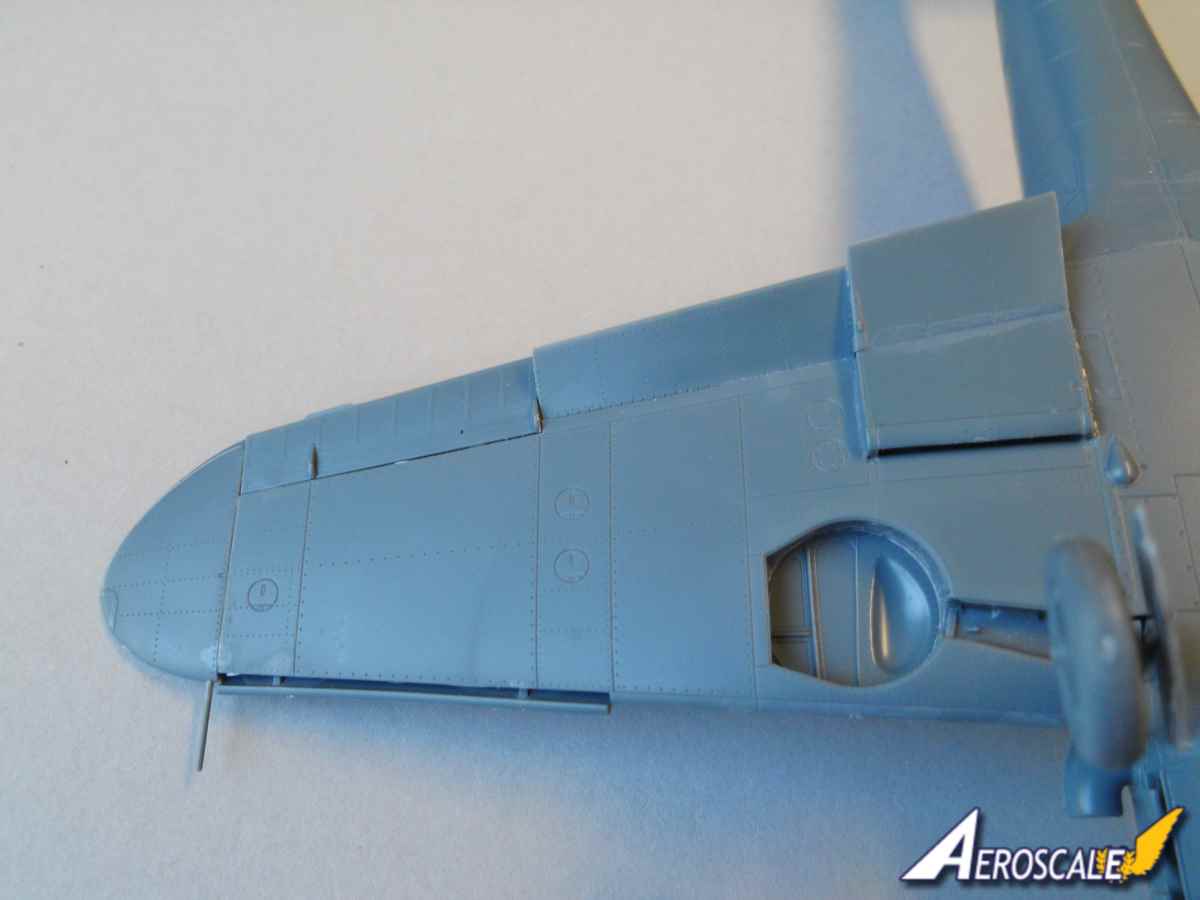
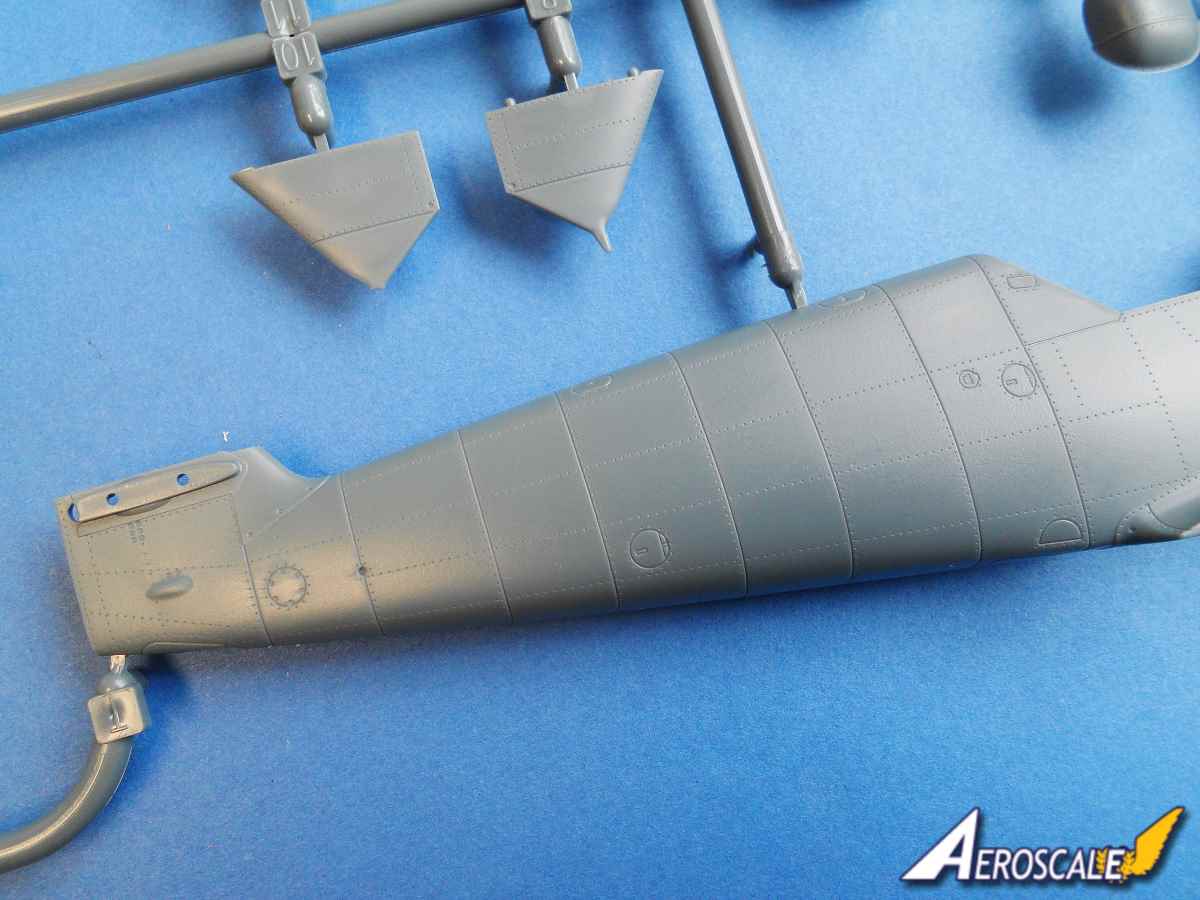
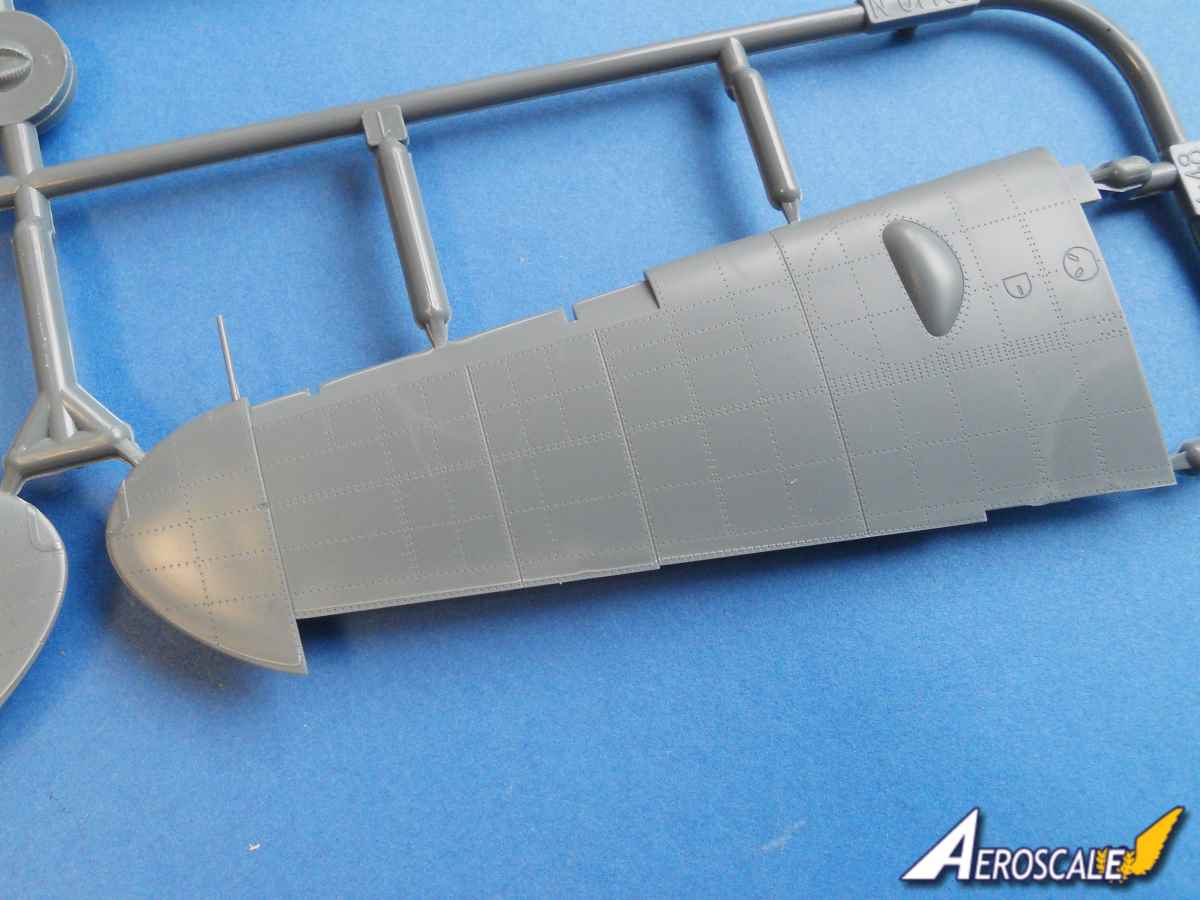
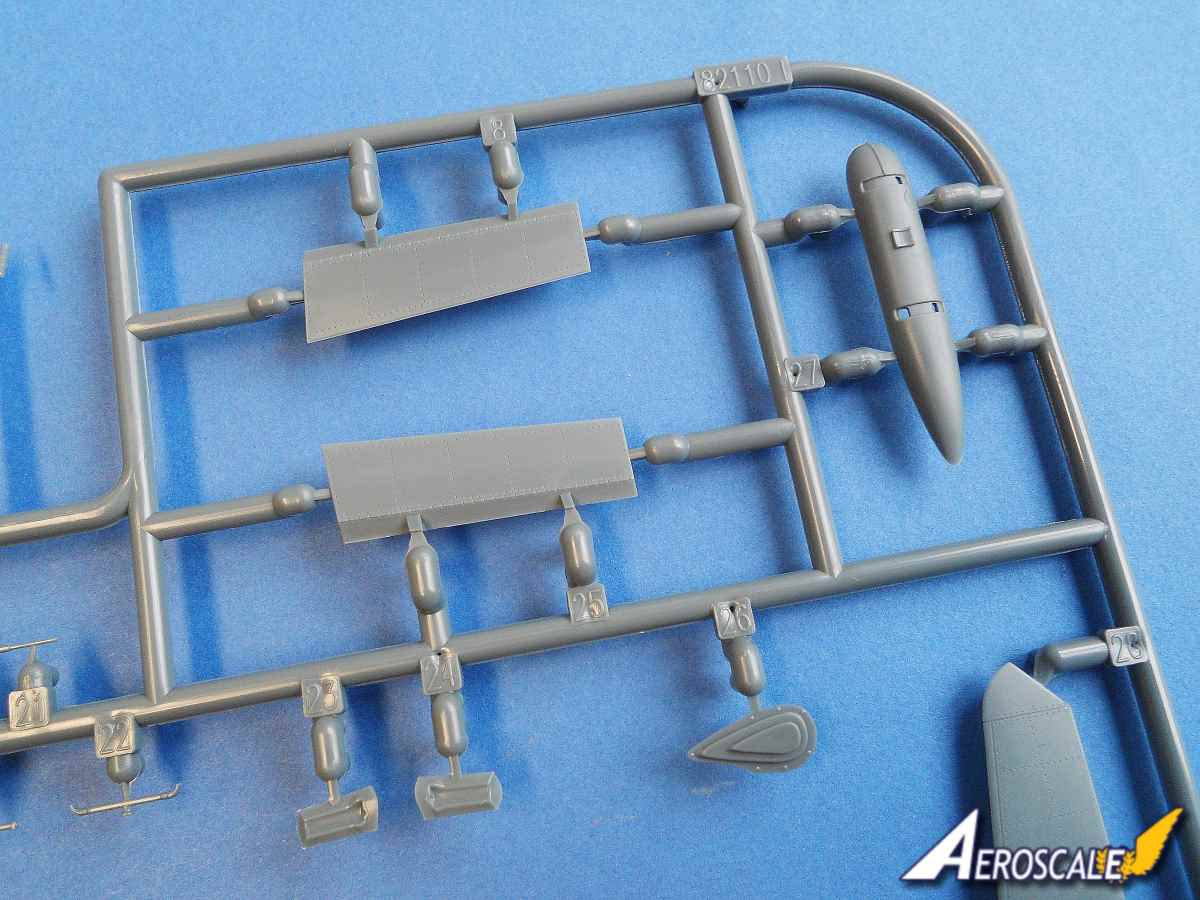
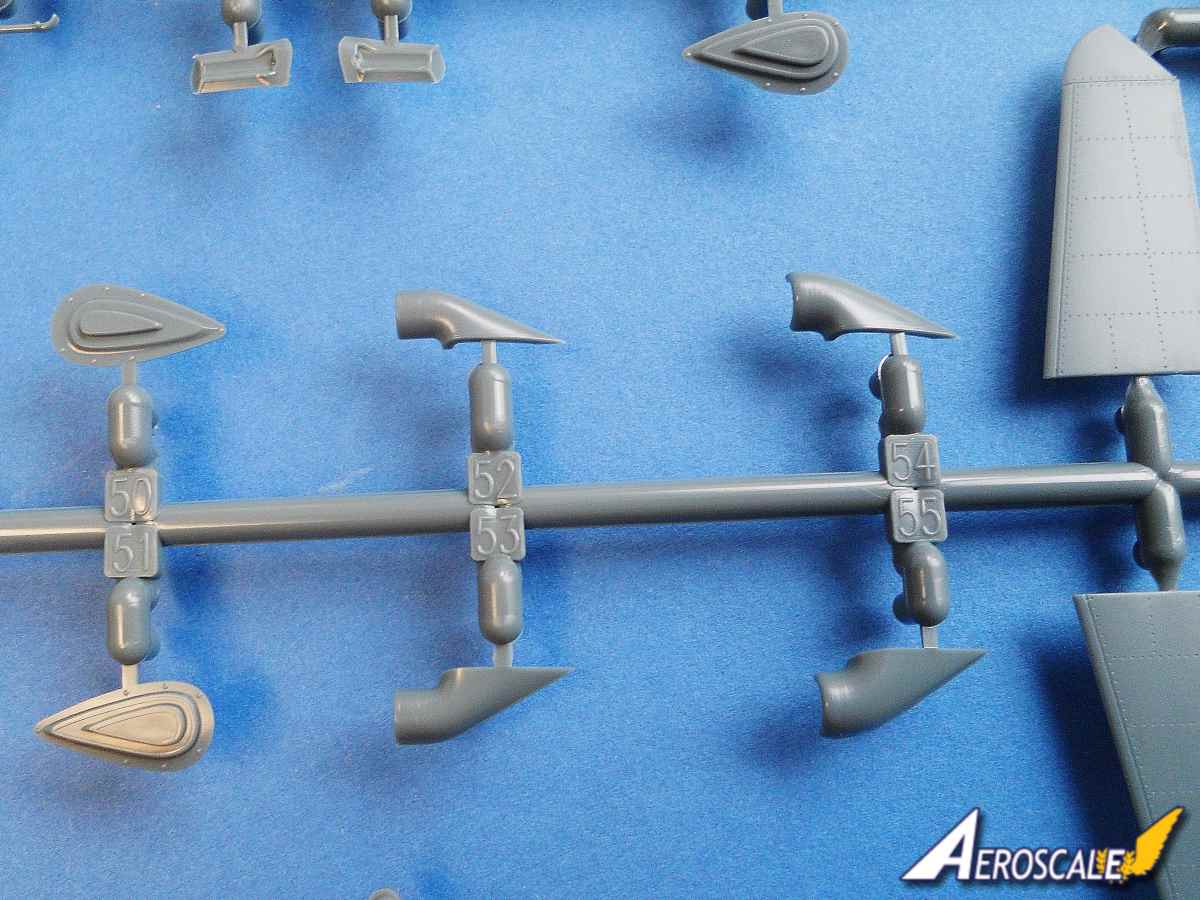
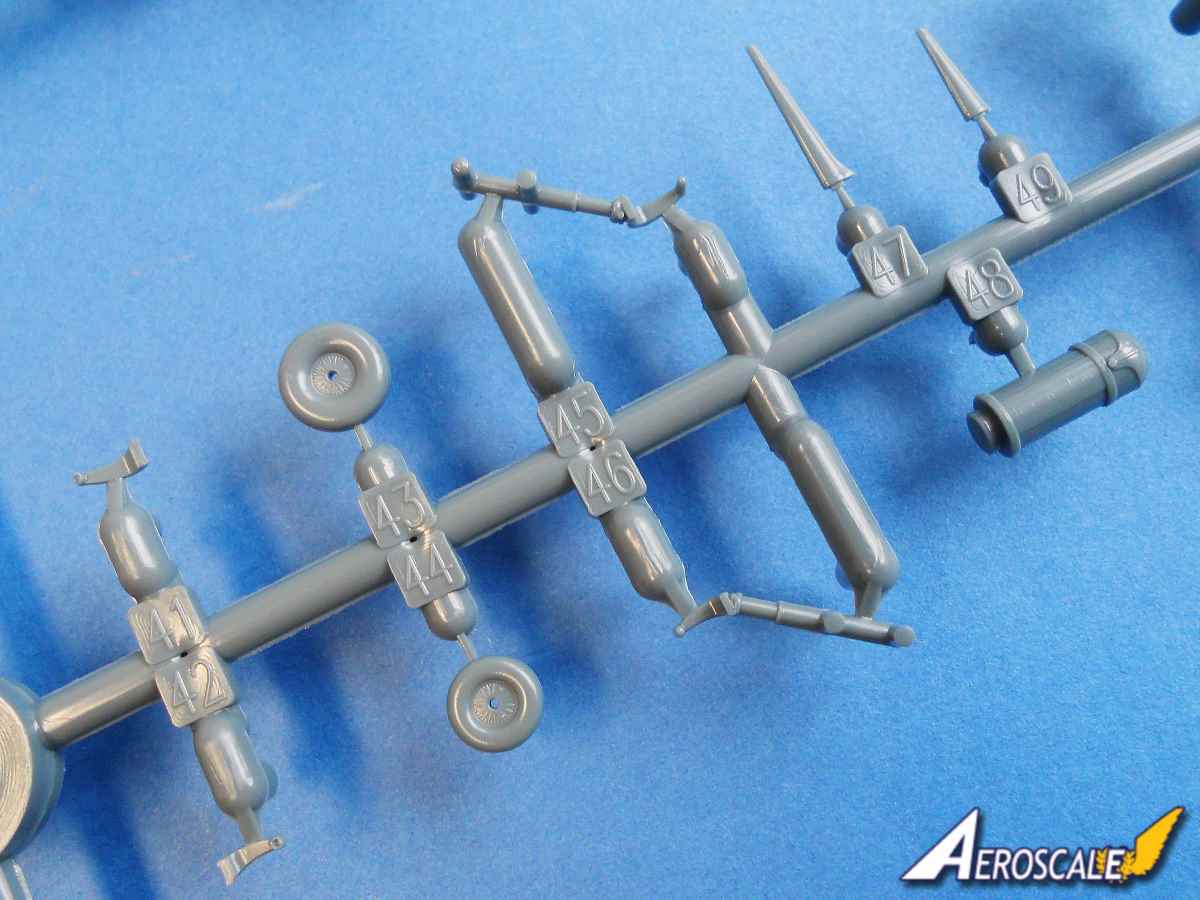
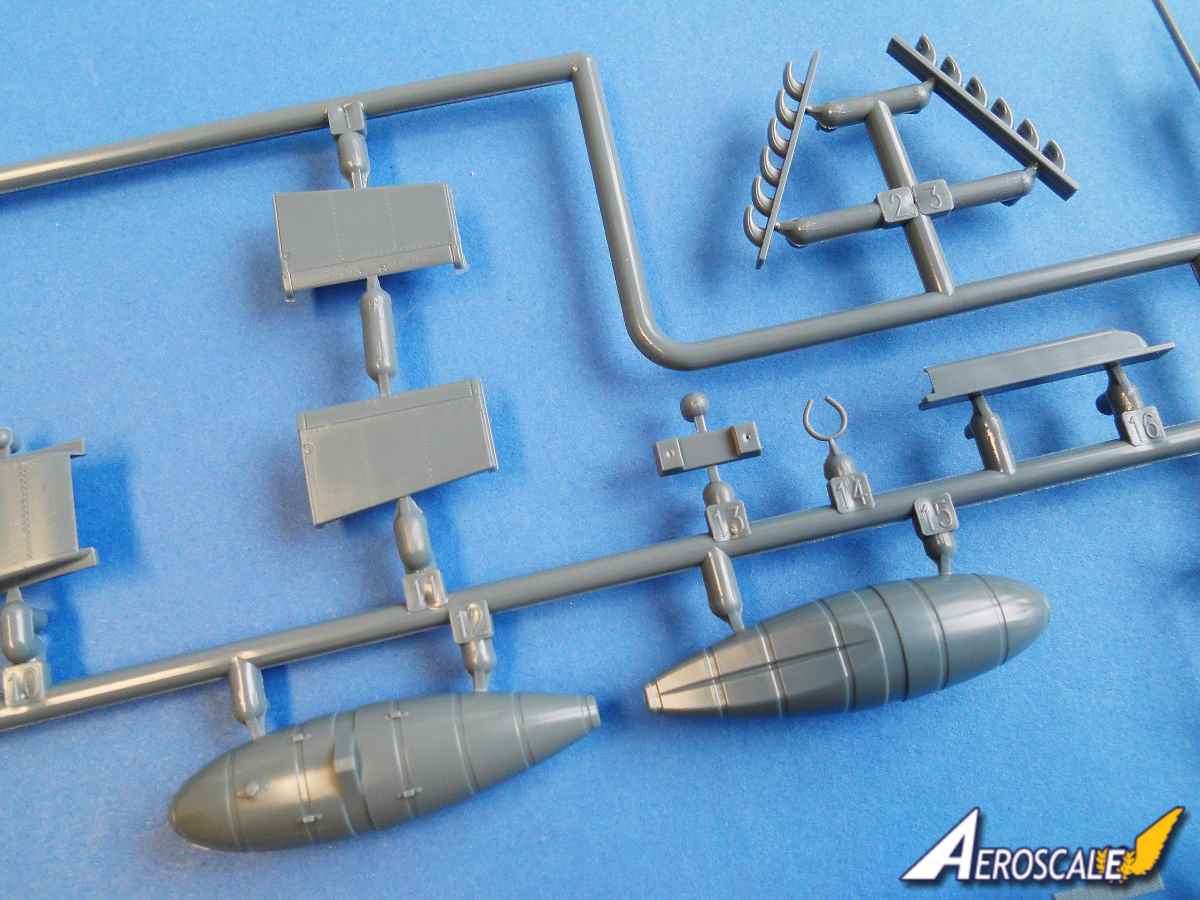
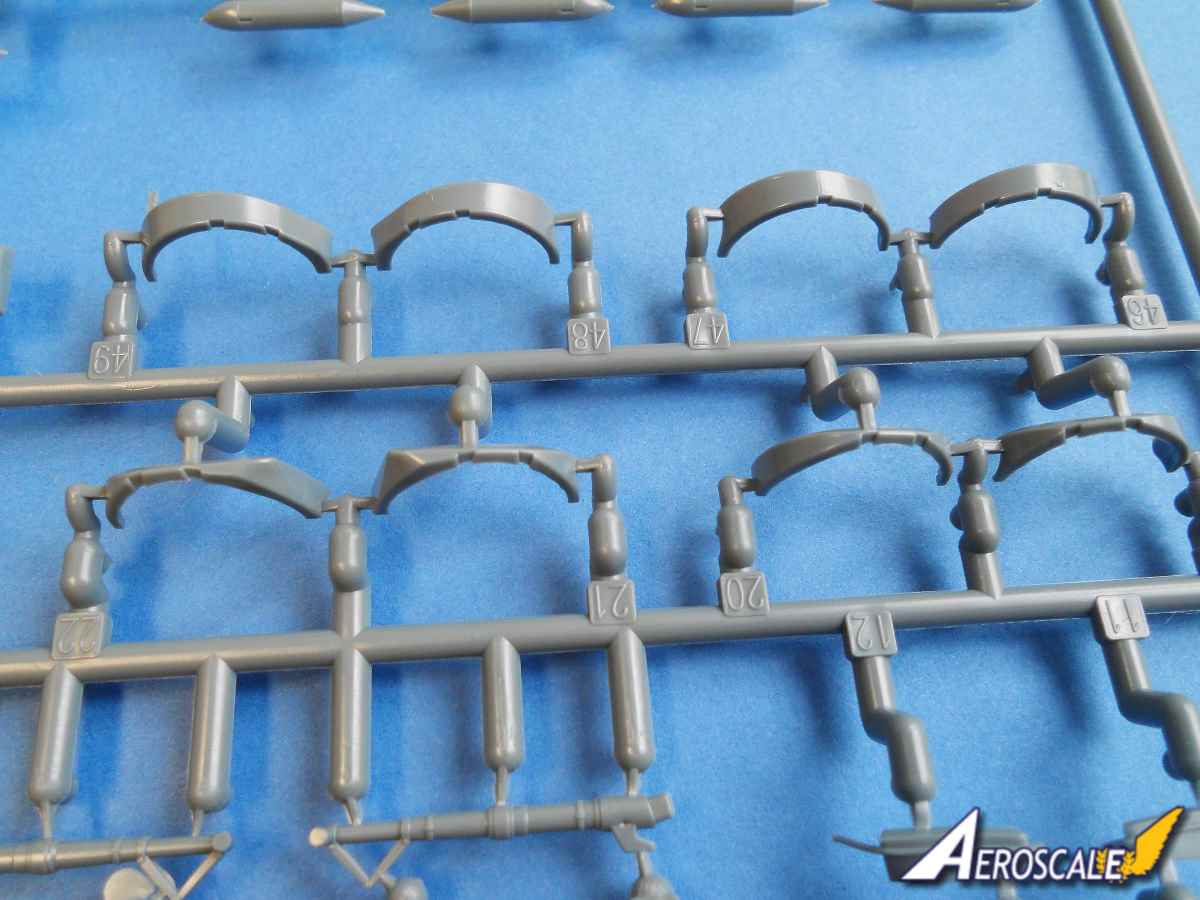
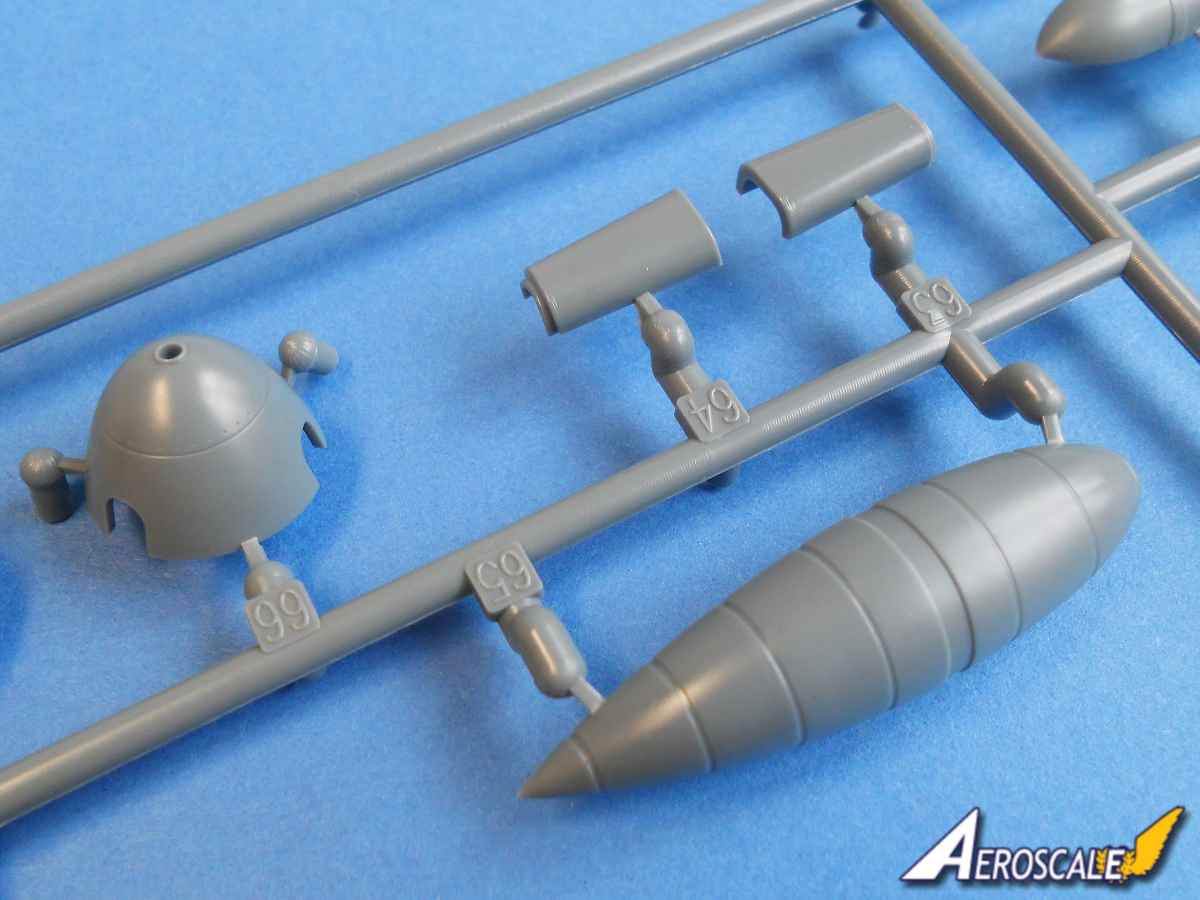
There is a choice of two sets of exhausts. No dallying with marking options here as they need to be fitted from inside the fuselage. There are the normal exhausts and exhausts with a glare guard for the pilot. The detail is excellent with the end of the pipes having recesses. If you are building option C then you need to add the tail wheel before joining the fuselage halves. The fit of the fuselage halves is excellent. Once the glue is set you can add the cover on top of the nose and add the machine gun barrels. The cannon blisters can also be added. The large air intake on the left side of the nose is made up from three parts. Again the fit is excellent. There are two choices of vertical tail surface and rudders. Its a little confusing in the instructions regarding the rudder. Not that it matters as the shape of the chosen vertical surface dictates the choice of rudder. A quick look at the painting guide helps clear up any uncertainty. I would have liked to have seen a guide on the angle of the tail planes in the instructions. Easy enough to reference if like me youre not an expert on the 109.
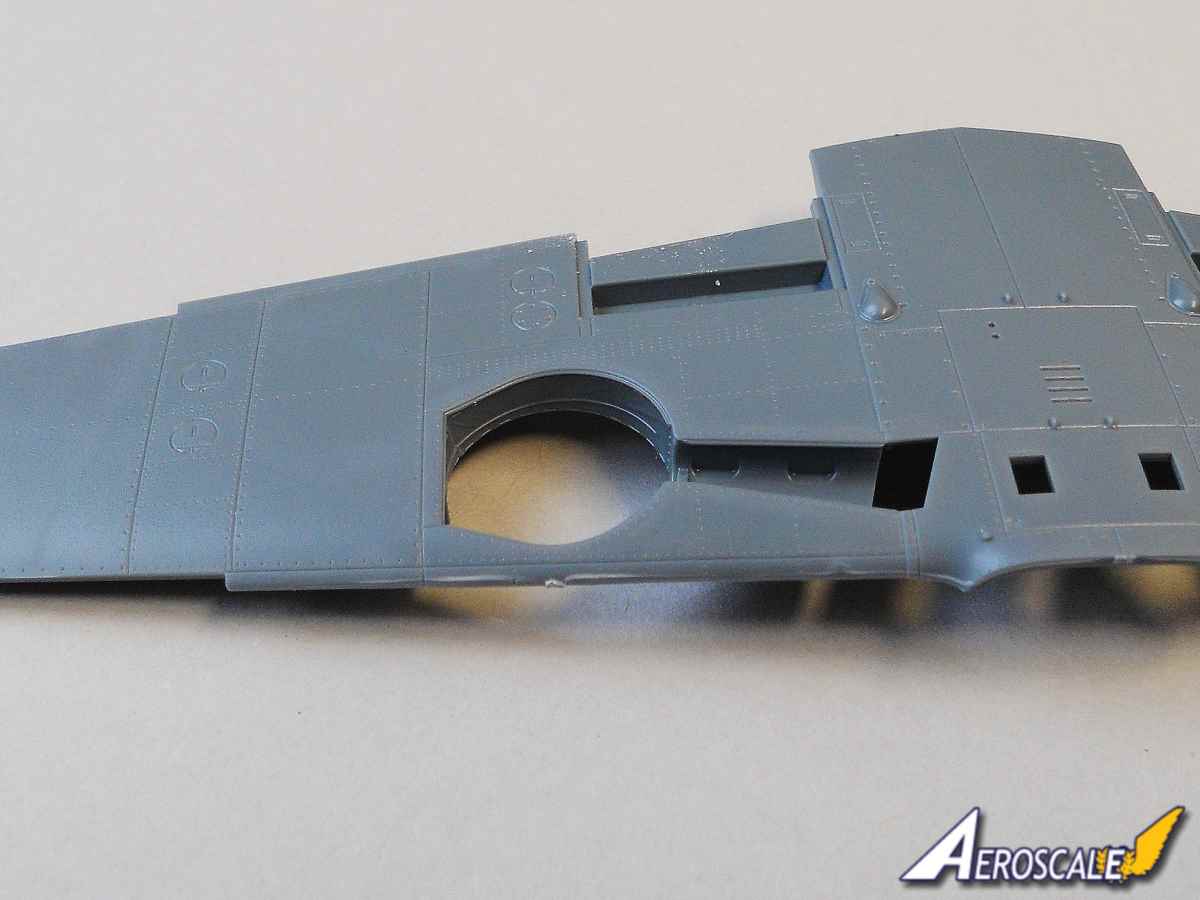
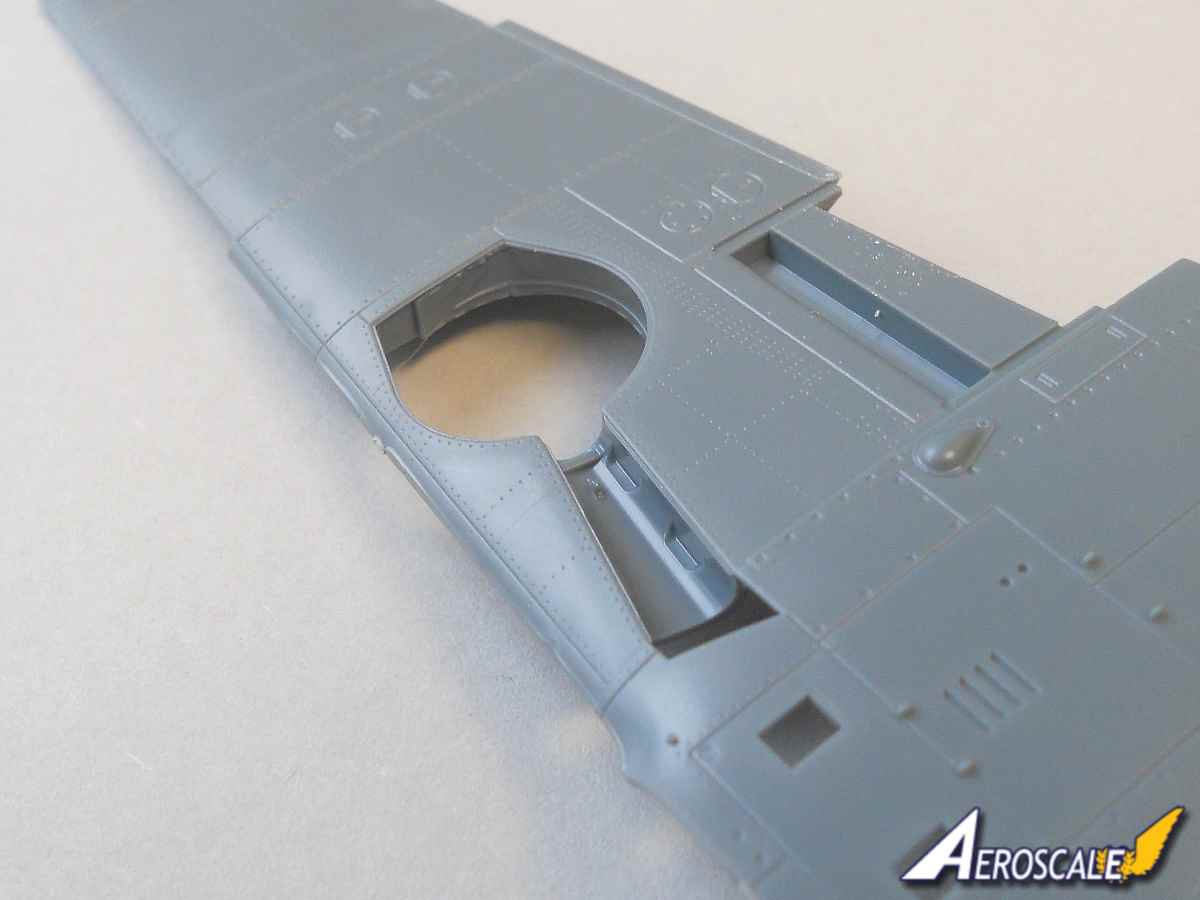
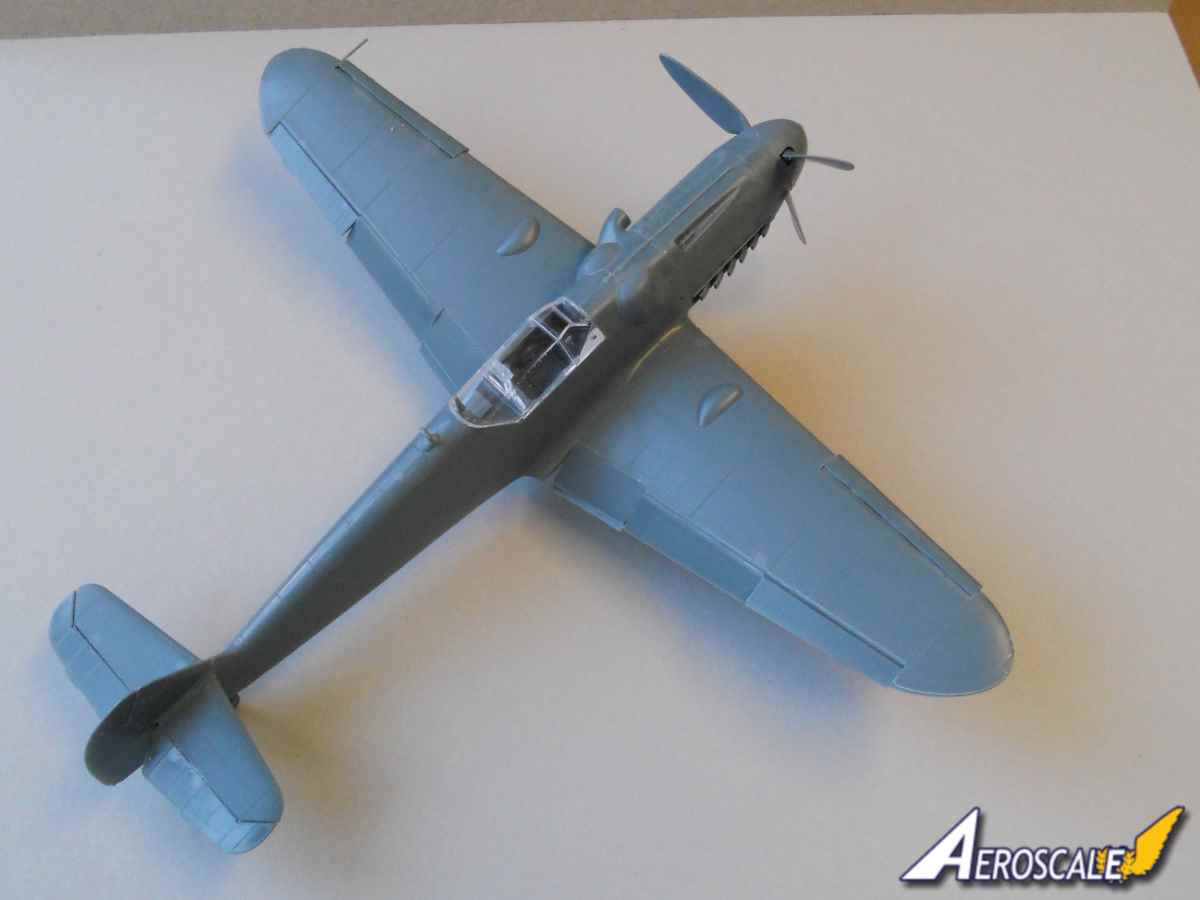
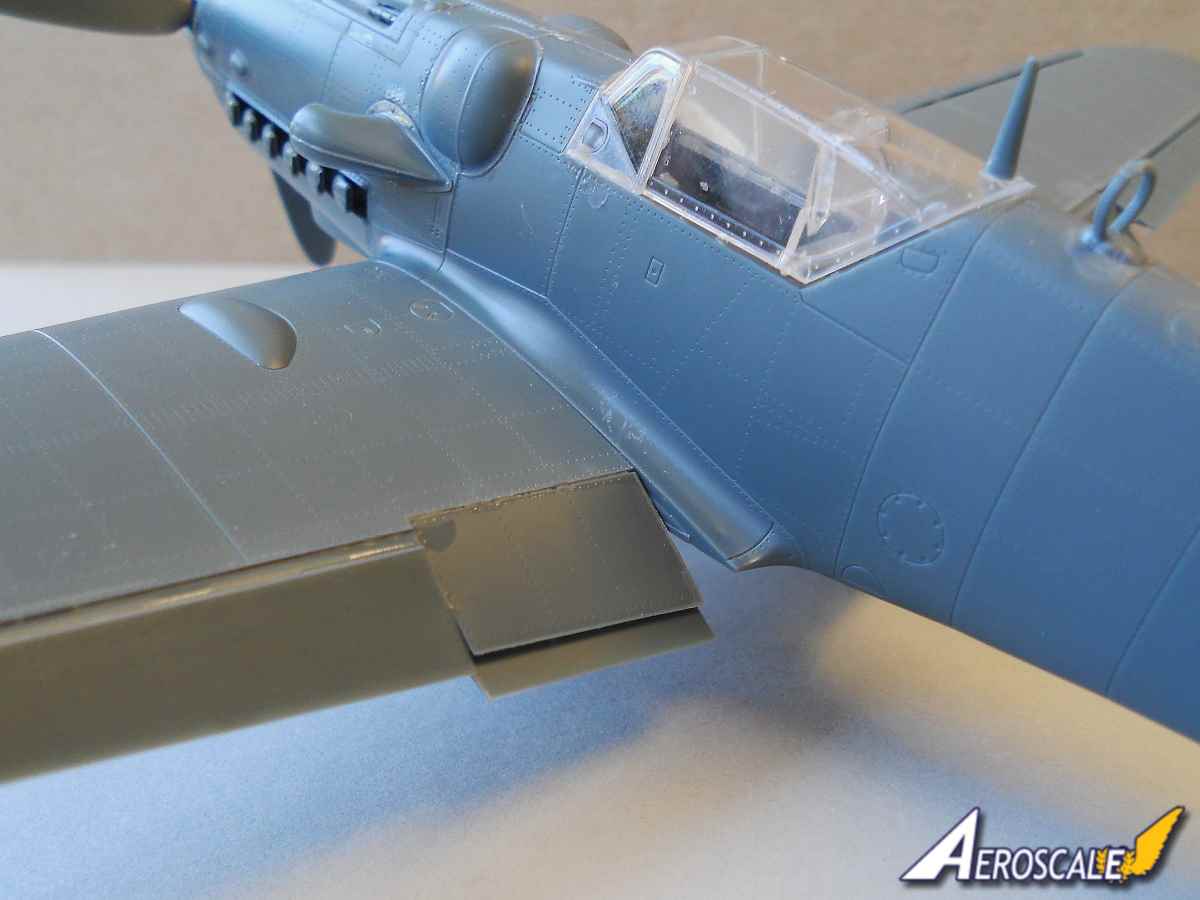
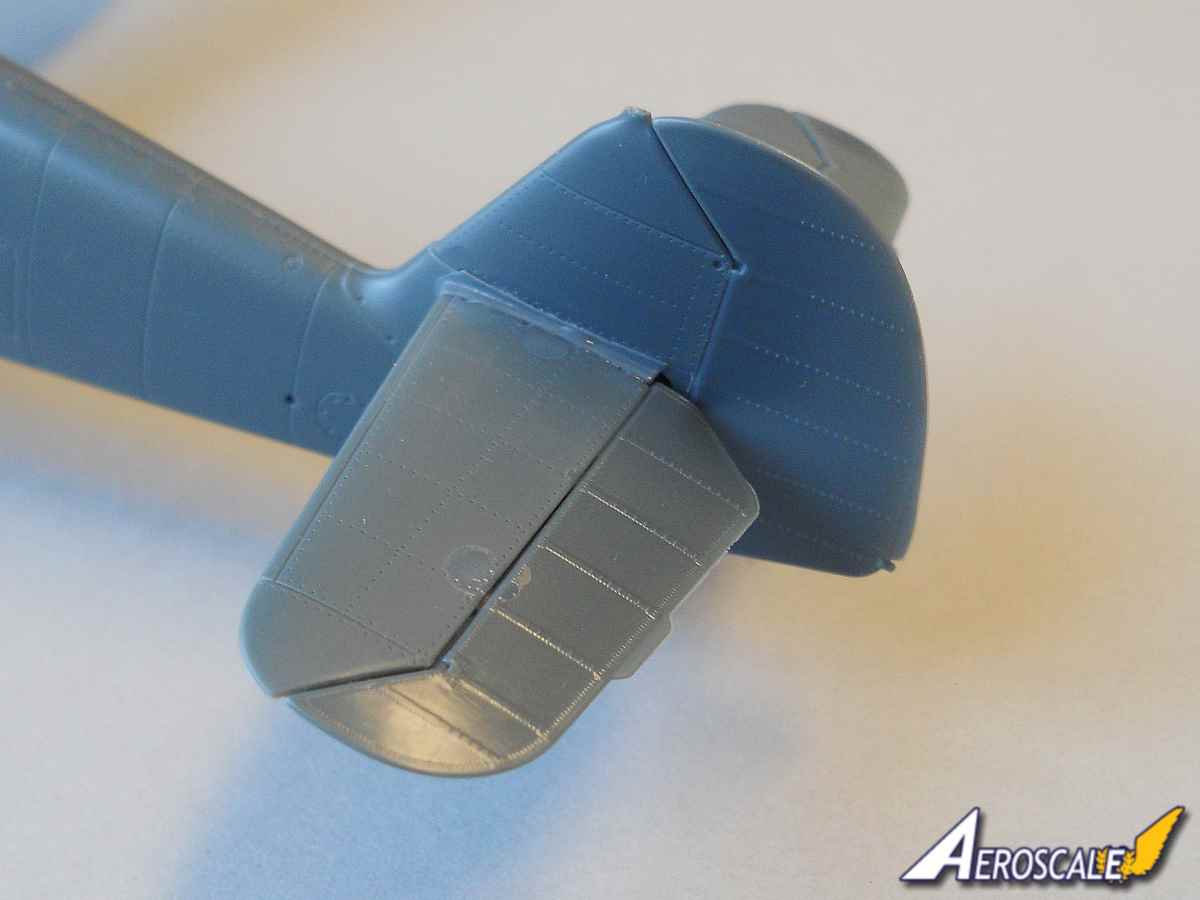
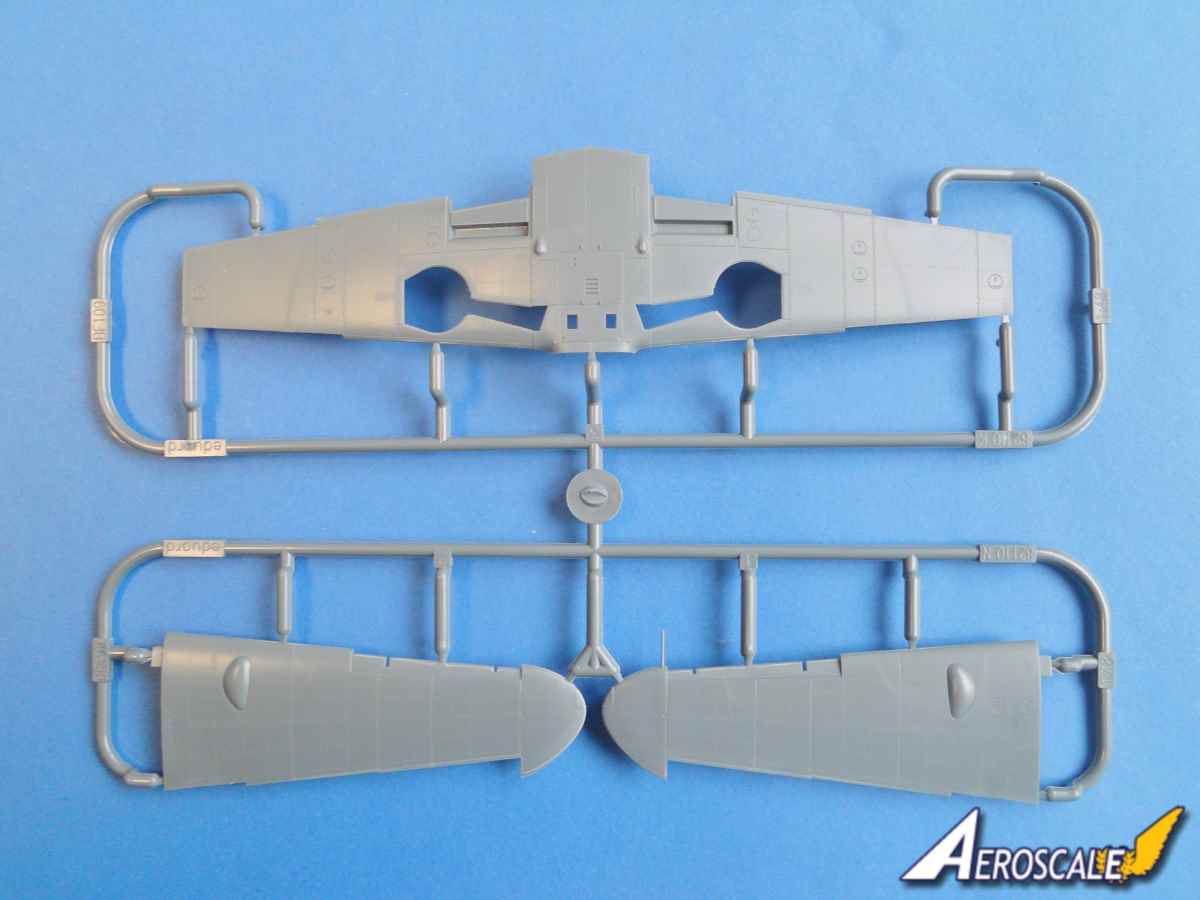
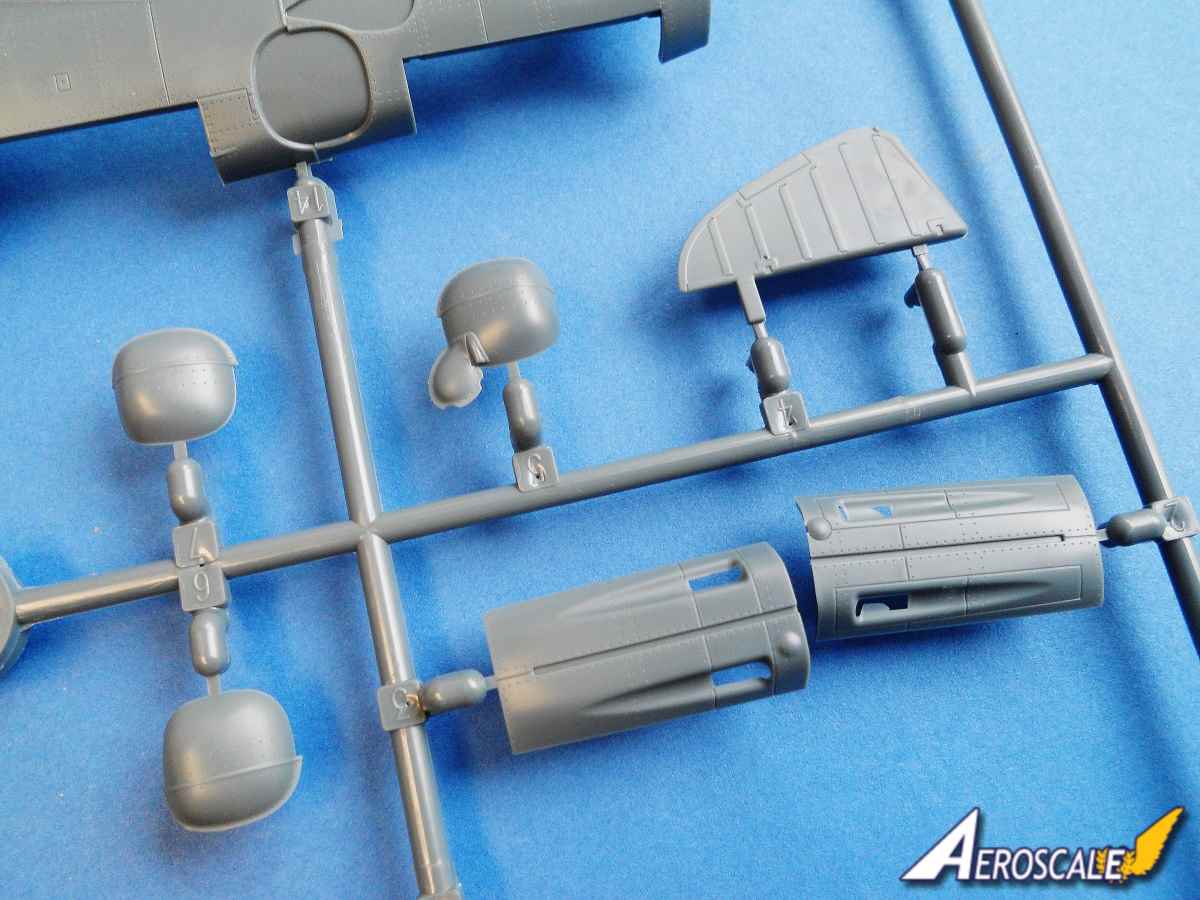
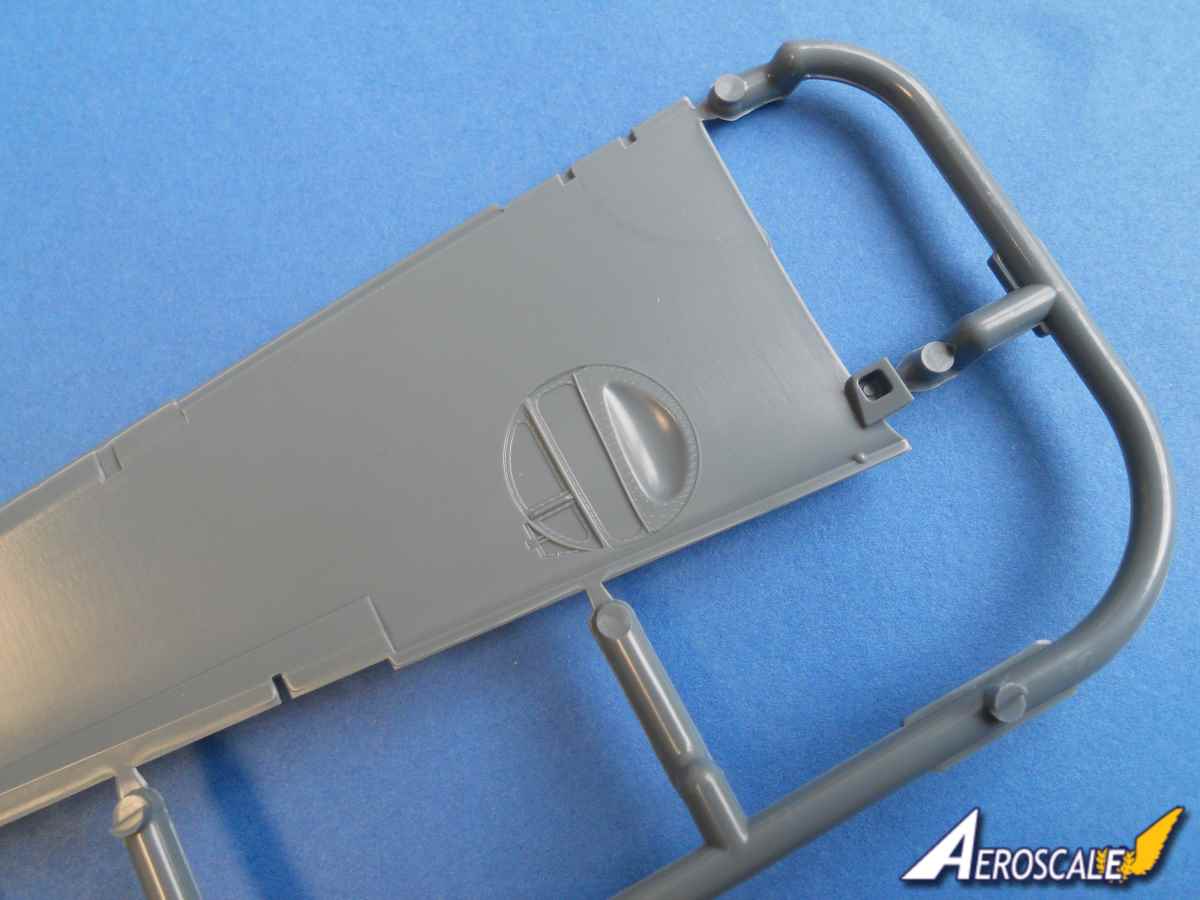
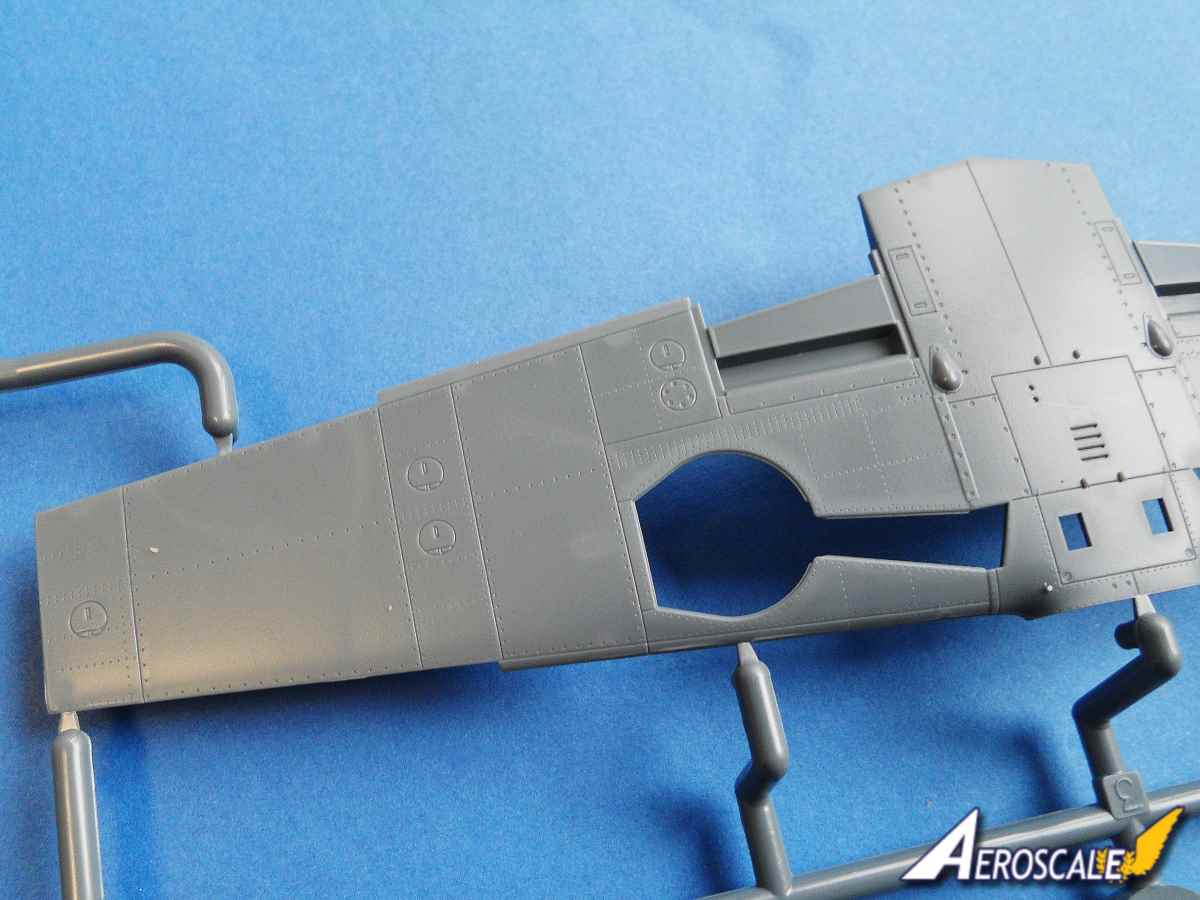
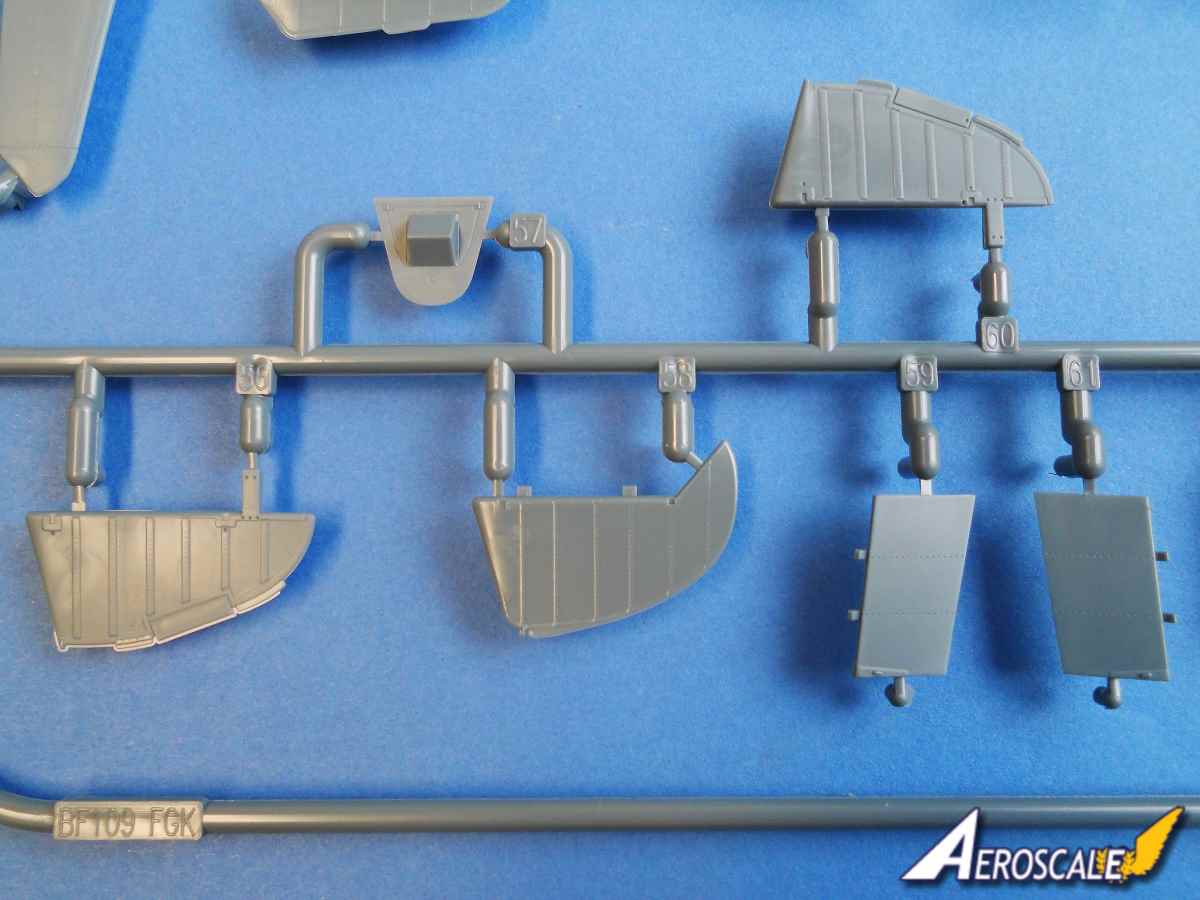
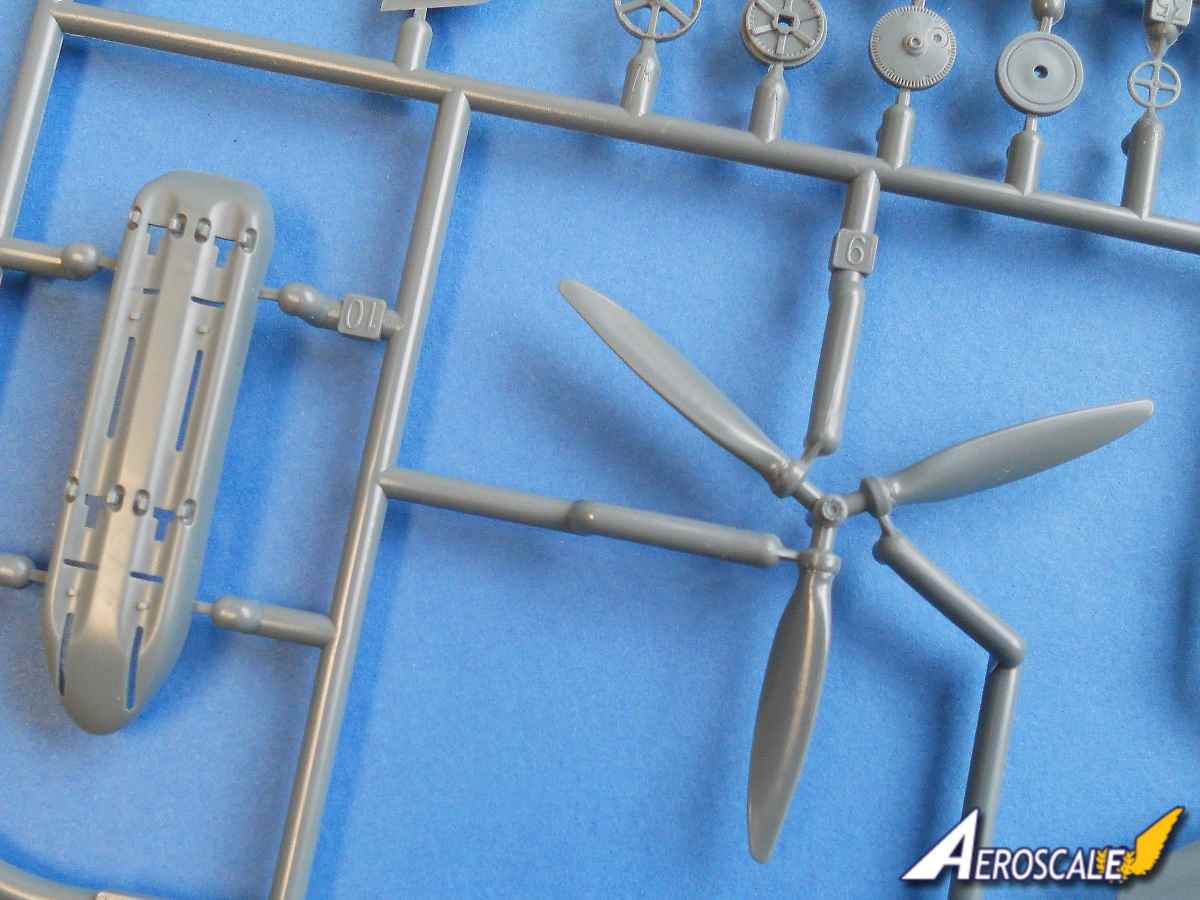
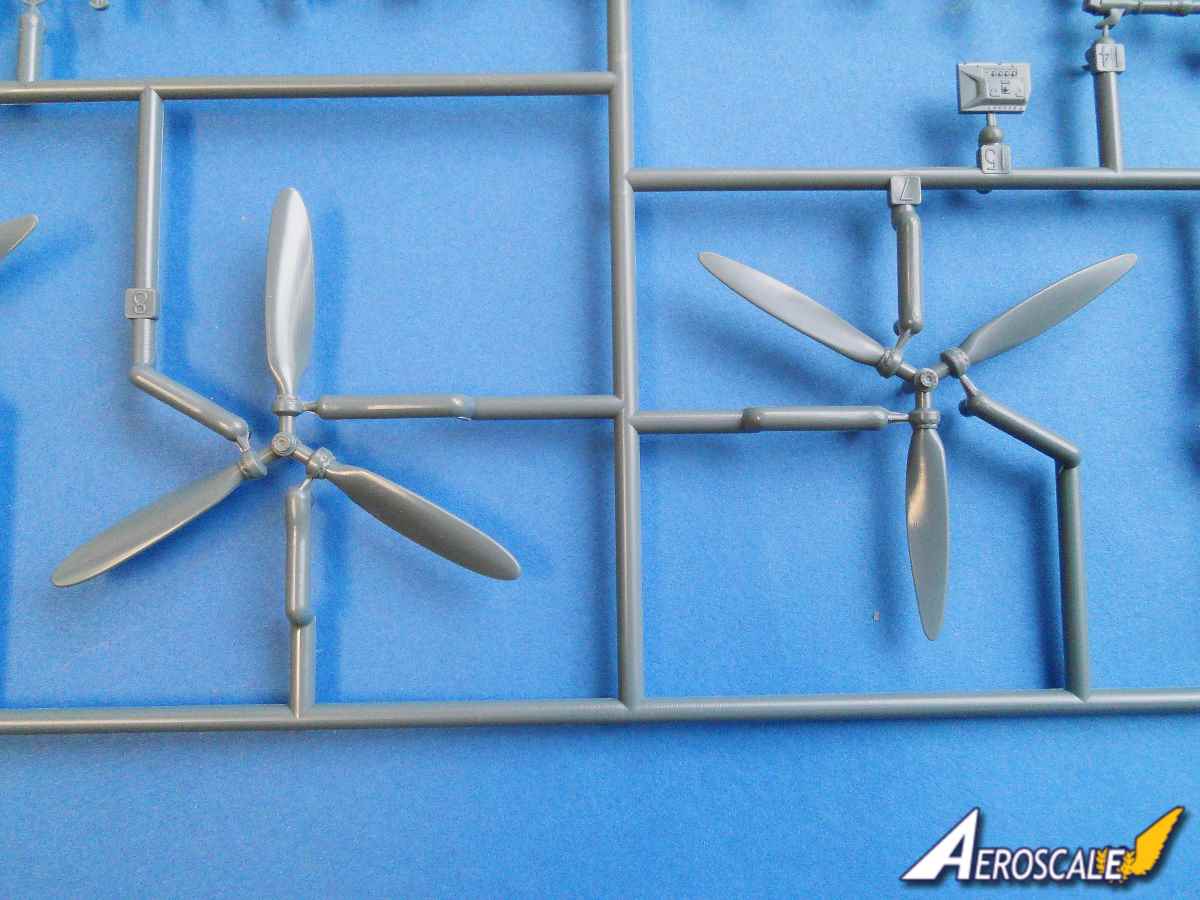
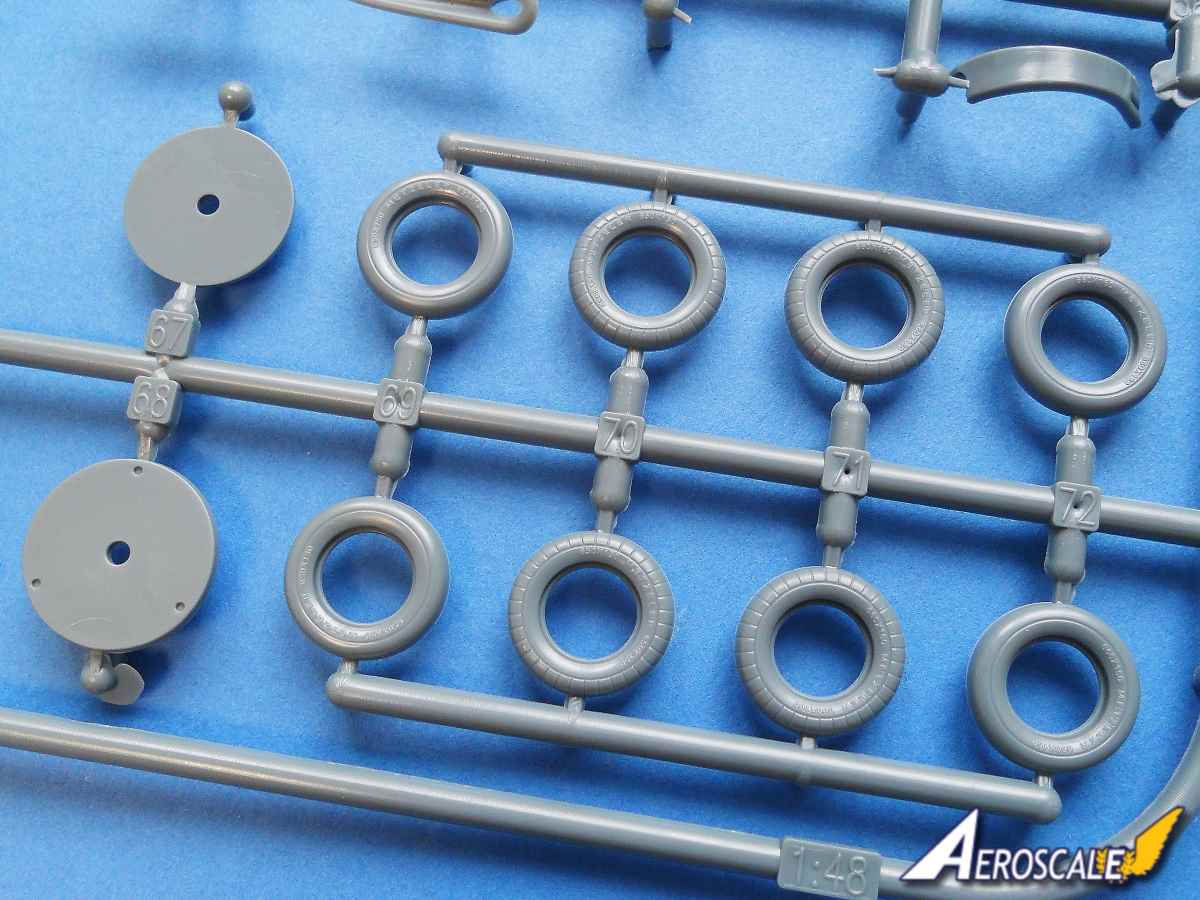
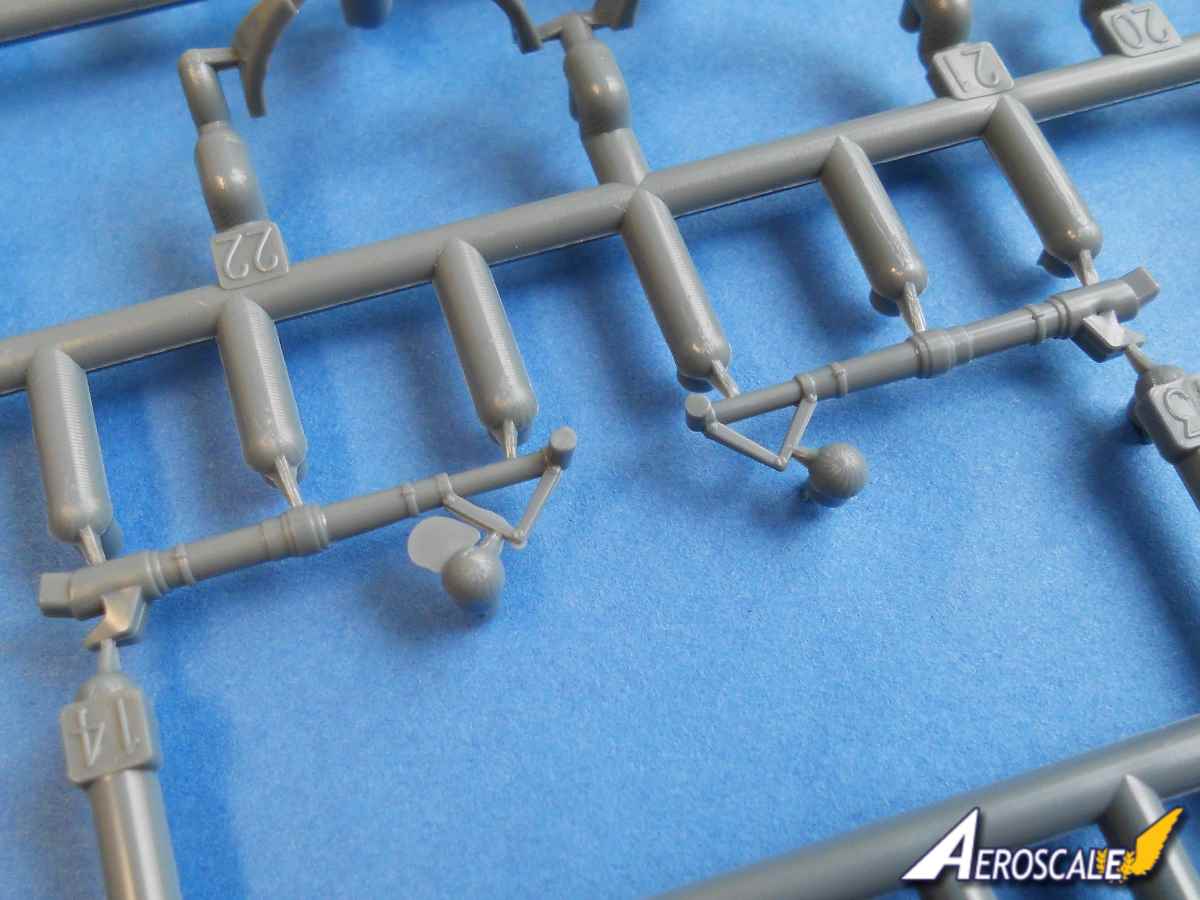
Moving on to the wings, the covers for each of the undercarriage bays need to be constructed from four parts. There is a hint of a fold or two representing the leather that made up part of the wall. The recess inside the wing provides a helpful guide on where to fit the parts. Joining the upper part of the wings to the lower half was the only element of this build to present a problem. I could not achieve a tight fit at the leading edge of the wing. Normally this is not a problem as the slight gap can be filled. Once the glue had set the wing was then glued to the fuselage with no problems at all. The control surfaces and underwing and nose radiators were added. The faces of the radiators are nicely detailed and the radiator fairing and flaps were easy enough to build. The main undercarriage is easy enough to create and the tail wheel is made up from three parts. There are four types of tyres for the main wheels, but only two are relevant for this boxing. The canopy and windscreen were attached using PVA. The canopy has a clear plastic armoured back plate to add. Finally the prop and aerials were added.
Conclusions
The parts go together really well and the use of Tamiyas Extra Thin Adhesive speeds things up. As mentioned the quality of the parts and the detail is excellent and the fit is first class. Just be careful taking the parts of the sprues. I used a new sprue cutter and it still left a slight mark in the styrene that needs cleaning up. I was a little confused with the some of the parts numbering in the instructions and a couple of times found myself looking at the painting guide for the correct parts. All in all an excellent building experience. One of the easiest and most pleasing kits I have ever put together. It actually took me longer to write this than build the kit.
What a superb experience building this beauty. It took me around three evenings over the Easter weekend to put this beauty together. In fact it took me longer to write this review than build the thing. I am not a huge fan of the Bf 109, but I do like the Gustav series of this classic fighter. This will be painted at some point in the future, but its sitting proudly on my desk at the moment. It has certainly whetted my appetite to acquire some decals and a couple more G-14s from Eduard and try out some of those interesting camouflage schemes. Could you classify this as a shake and bake? Well almost, there is the wing joint that may need a little liquid filler and some of the sprue attachment points need cleaning up. Nothing major though.
SUMMARY
Highs: Superb kit from Eduard, best kit I have ever put together.Lows: Some slight confusion with the instructions.Verdict: Hats off to the folk at Eduard for producing this stunning kit. Go out and buy one or two or three
Our Thanks to Eduard! This item was provided by them for the purpose of having it reviewed on this KitMaker Network site. If you would like your kit, book, or product reviewed, please contact us.
Tim, super work. I really appreciate what you wrote about writing the review took longer than the build. That is important to those of us who have little time.
The model goes together and features wonderful surface detail. And that clear plastic cockpit fuel line - very cleaver of Eduard.
I am very interested to build one of these models now!
cheers Fred. I really enjoyed building this kit as you may be able to tell. Eduards Weekend Bf-109G series would be a good choice to restore anyone's building mojo. tim


Comments