Introduction
I love to model subjects that have an interesting backstory and they dont get much more interesting than the Soviet Dive Bomber Petlyakov Pe-2 Peshka. When Zvezda released their new 1/48 kit I jumped at the chance to review it here on KitMaker Network.
Originally conceived as a high-altitude escort fighter, the Pe-2 served competently in multiple combat roles including as a light bomber, heavy fighter, reconnaissance platform, and night fighter.
Vladimir Petlyakov, who was imprisoned in 1937 when Stalin suspected he was deliberately delaying design work on the Tupolev ANT-42 bomber, led the team that designed the aircraft, which originally featured a pressurized cabin, superchargers, and other advanced features. The airplane underwent operational testing in May of 1940 and its rumored that Petlyakov and his prison design team may have watched from inside the prison walls.
Shortly before full-scale production, the Soviet Air Force ordered a complete redesign of the aircraft to meet the role of a tactical bomber. Petlyakov and his team were given 45 days to complete the redesign. Cabin pressurization, and other advanced features were eliminated and a bombardiers position and dive brakes were added. The resulting aircraft performance so pleased Stalin that he freed Petlyakov and allowed the plane to be named in his honor. The aircraft went on to become one of the most successful bombers of the war with 11,427 units produced.
Contents
Zvezdaa kit comes in a large, two-part box consisting of a colorful outer sleeve depicting the aircraft in flight on the front and model photos on the back.
Inside the sleeve is a protective flip-top cardboard carton.
Inside the box youll find 391 pale gray plastic parts (there are an additional 21 that are not used), 17 clear styrene parts, a decal sheet offering 3 different schemes, a 12-page black and white instruction manual, and a small slip sheet that warns you not to put the bags on your head in numerous languages (apparently stupidity isnt just a local problem).
Parts are packaged in three large and one smaller bag.
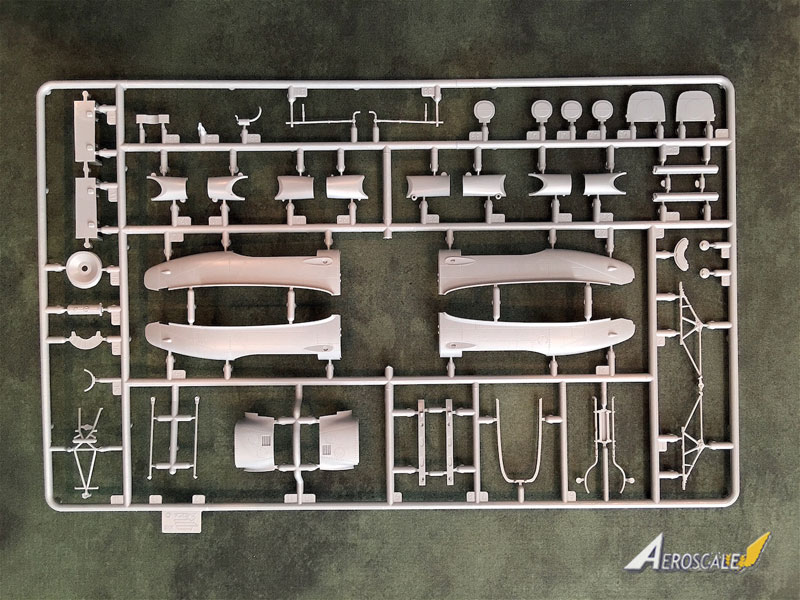
- Bag 1 contains sprues A and B,
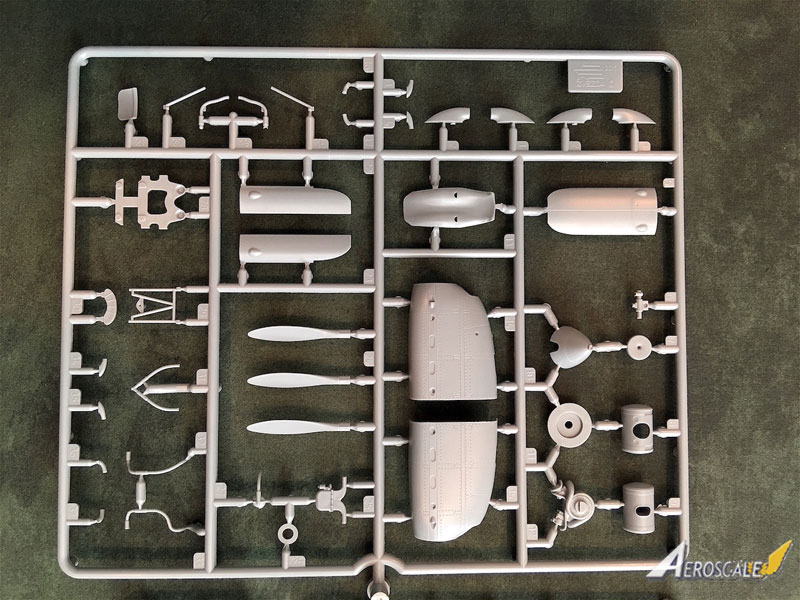
- Bag 2 contains 2 x three-part sprues labeled C-G-H and a third sprue labeled J in the instructions (but I swear it looks like a C),
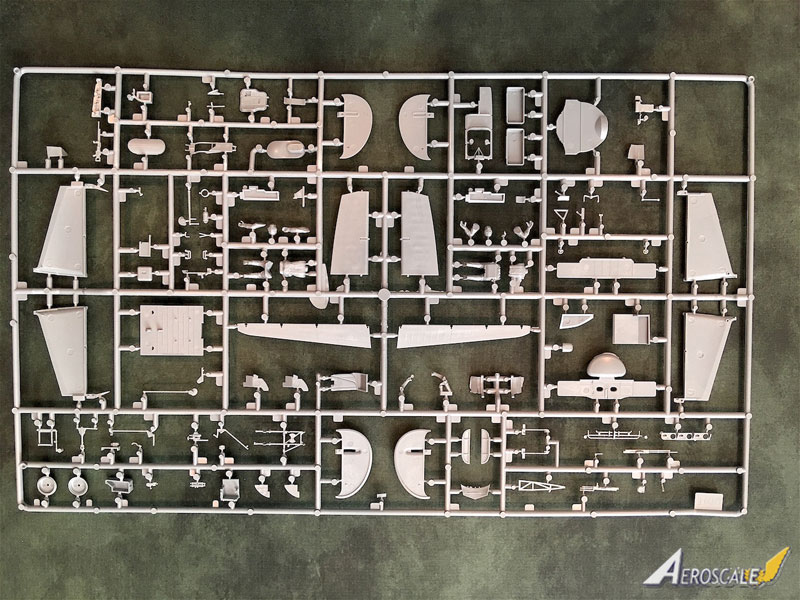
- Bag 3 contains sprues E and F,
- Bag 4, the smaller bag contains the decals and the clear sprue labeled D.
The kit offers a number of options such as, landing gear up or down, the ability to expose one of the engines, and open or closed bomb bay doors
General Impressions
The plastic appears to be of good quality, neither soft nor brittle.
The molding is crisp and clear with no signs of flash but a few prominent mold lines that will have to be removed (scraping with a hobby knife is my favorite method).
There are quite a few ejector pin marks but it looks like Zvezda designed the kit so that most of them will be hidden after assembly. However, there are a few that need to be filled in pretty tough to sand spots.
Engraved panel lines and rivets are very finely molded and should take a pin or sludge wash beautifully.
There are quite a few very fine parts (all amazingly well molded) that have rather heavy sprue attachment points. These will require careful removal but with a little care will greatly enhance the appearance and realism of the kit.
The clear parts in my kit are nice and thin but appear blurry which is quite disappointing (hopefully they will polish up clear or the internal detail that Zvezda has included, along with the Eduard aftermarket I bought, will be obscured and mostly lost).
The Kit
Looking at each of the sprues reveals a fantastic level of detail and some wonderful engineering on the part of Zvezda.
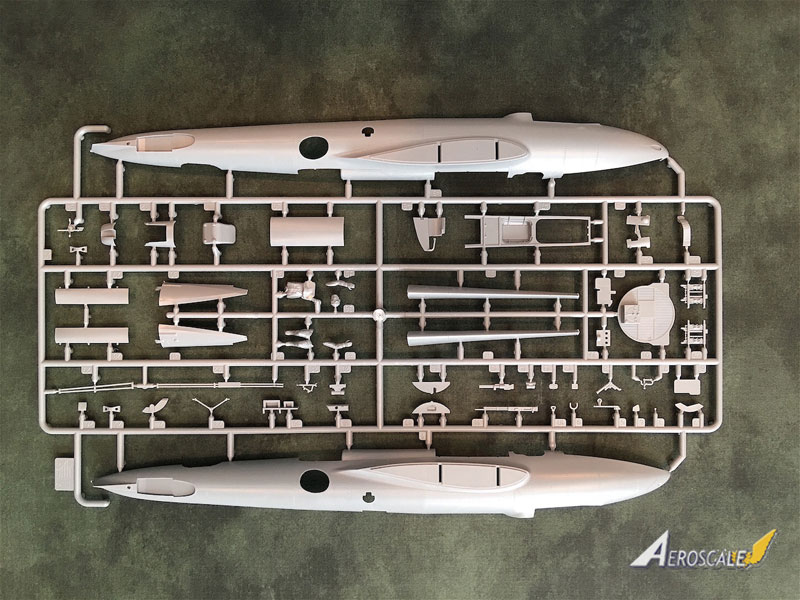
- Sprue A contains the fuselage halves, inner bulkheads, cockpit floor, landing gear doors, wing leading edges, bomb bay doors, a number of internal and cockpit parts, and a pilot figure.
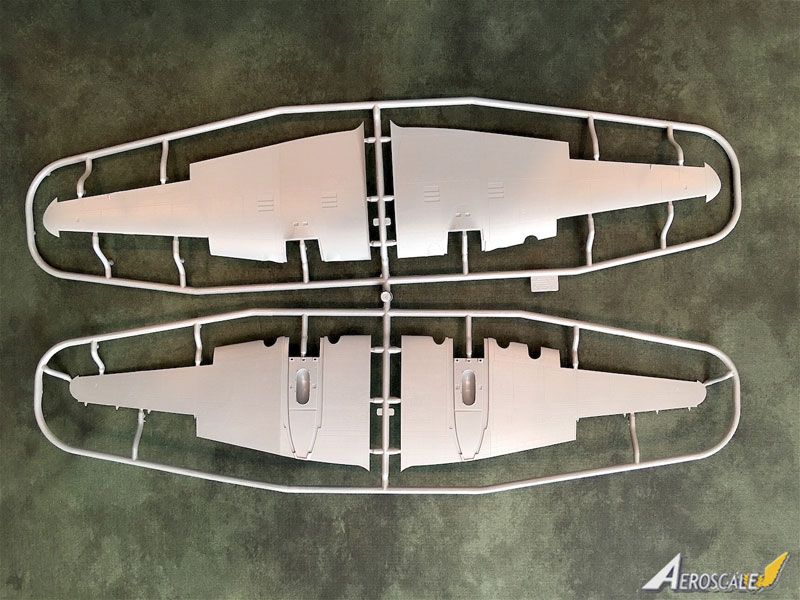
- Sprue B includes the upper and lower wing halves. The wings are molded with separate ailerons.
- Sprue C (x2) include the engine nacelle fronts, propeller blades, spinners, landing gear doors, and landing gear braces.
- Sprue D contains the clear parts, which as mentioned earlier are quite blurry in my kit you can actually make out a very fine weave pattern on the plastic itself.
This is certainly the low point of the kit.
- Sprue E includes the ailerons, stabilizers, elevators, wing spars, internal bulkheads, cockpit parts, internal details, and two figures.
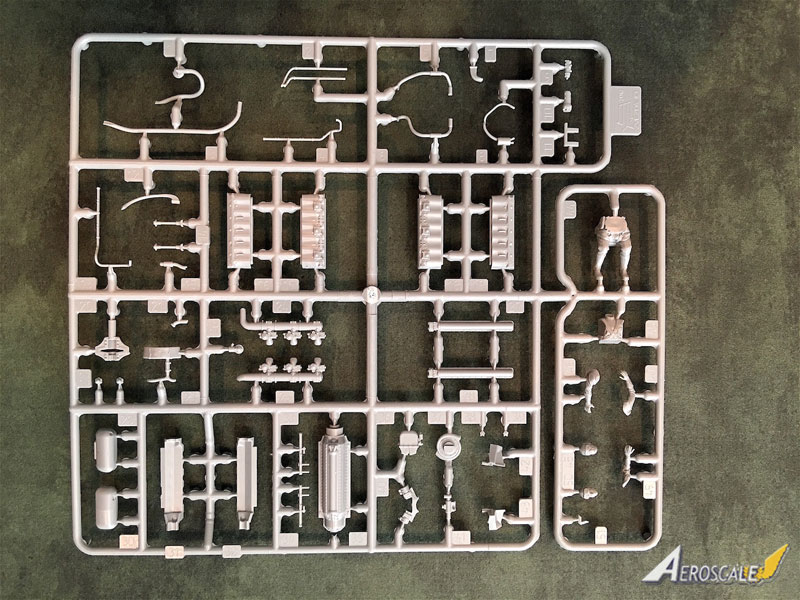
- Sprue F encompasses nacelle parts, landing gear parts, and some external details.
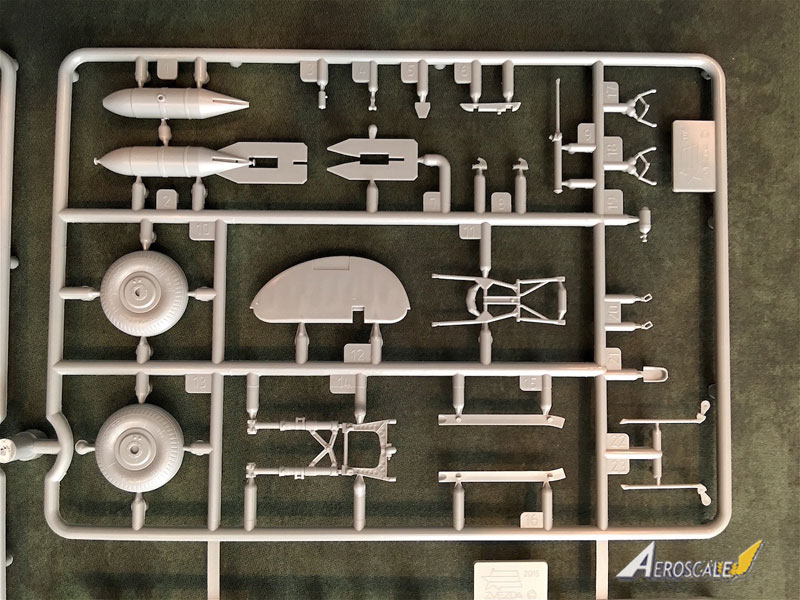
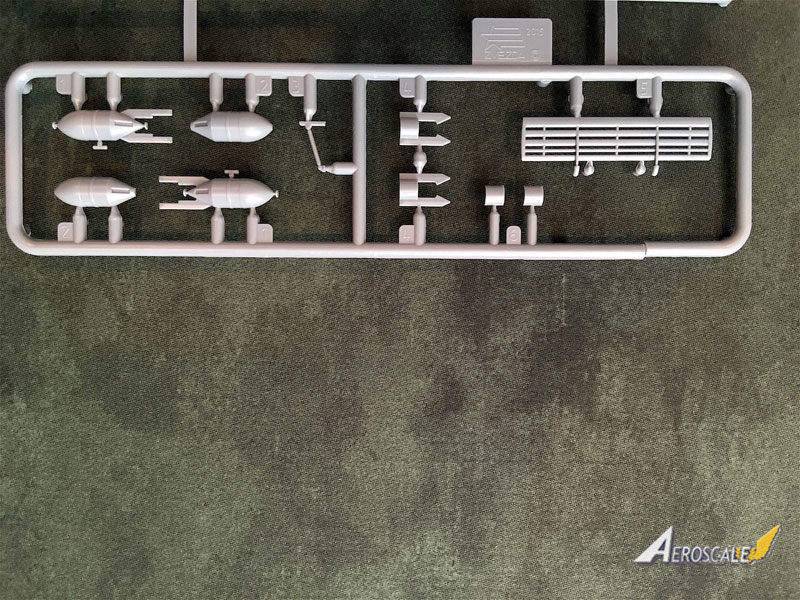
- Sprues G (x2) include landing gear parts, some ordnance, rudders, and the wheels.
Interestingly, Zvezda molded the wheels so that you can sand one side of the tire flat to simulate weighting (however, it still wont look like a weighted tire since it will be missing the prototypical bulge).
- Sprues H (x2) contain the smaller bombs and dive brakes.
- Sprue J includes the engine parts and a bombardier figure.
Decals
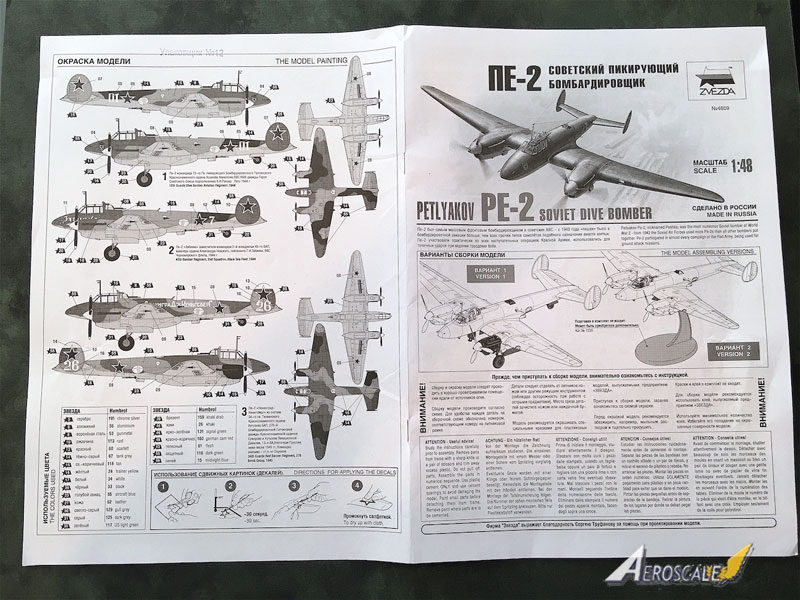
- Scheme 1: 12th Guards Dive Bomber Aviation Regiment, 1944
- Scheme 2: 40th Bomber Regiment, 2nd Squadron, Black Sea Fleet 1944
- Scheme 3: 34th Guards Red Banner Regiment, 276 Bomb Group, 1945
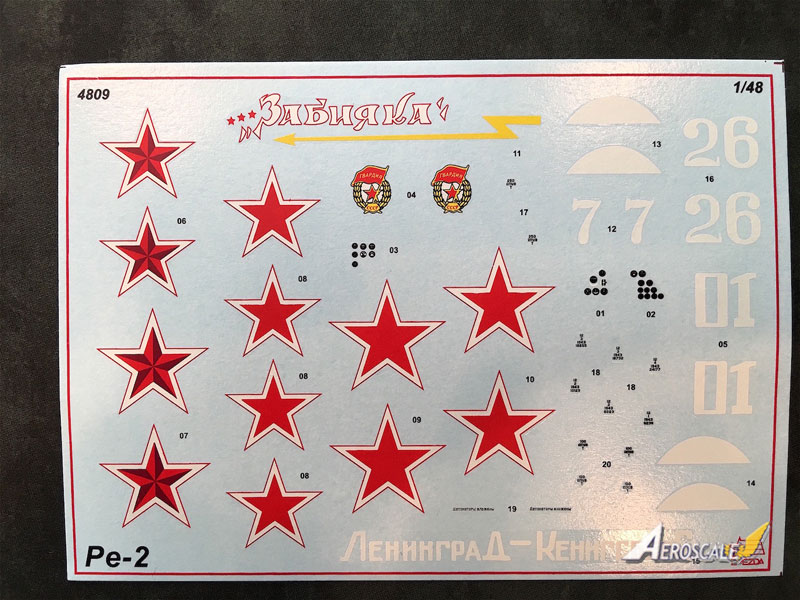
Decals appear quite thin and in register but in my kit, one of the stars for paint scheme 1 has a blemish.
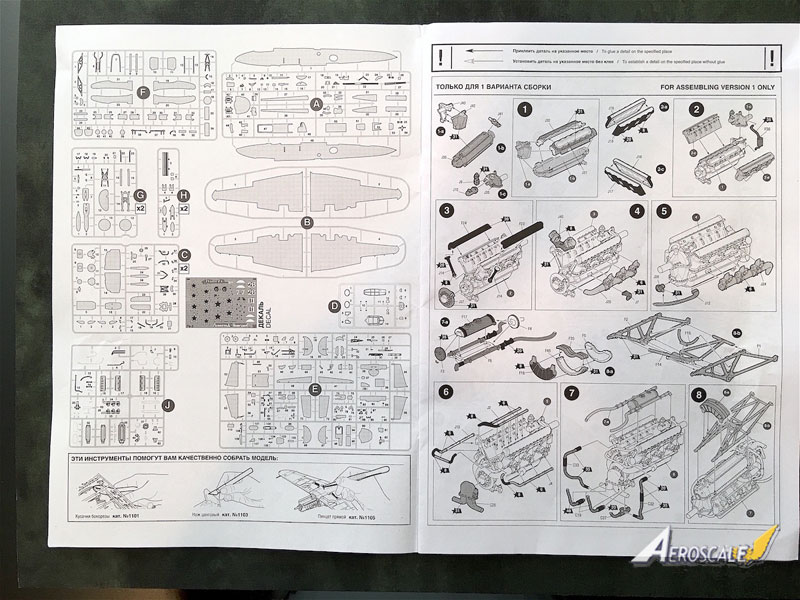
Instructions
The instructions include 42 steps that clearly depict alternatives for the available options (engine on display, gear up vs. gear down, etc.).
Each step identifies the part by both sprue letter and part number.
Part placement and gluing locations are clearly depicted Color callouts are prominent but only include Humbrol color references if you use a different brand of paint like I do (Vallejo, AK Interactive, or Tamiya) youll need to cross-reference the colors before starting the build. The last page of the instructions includes camouflage painting and decal placement diagrams in black and white.
Three different schemes are included in the painting instructions and on the decal sheet.
Test Fit
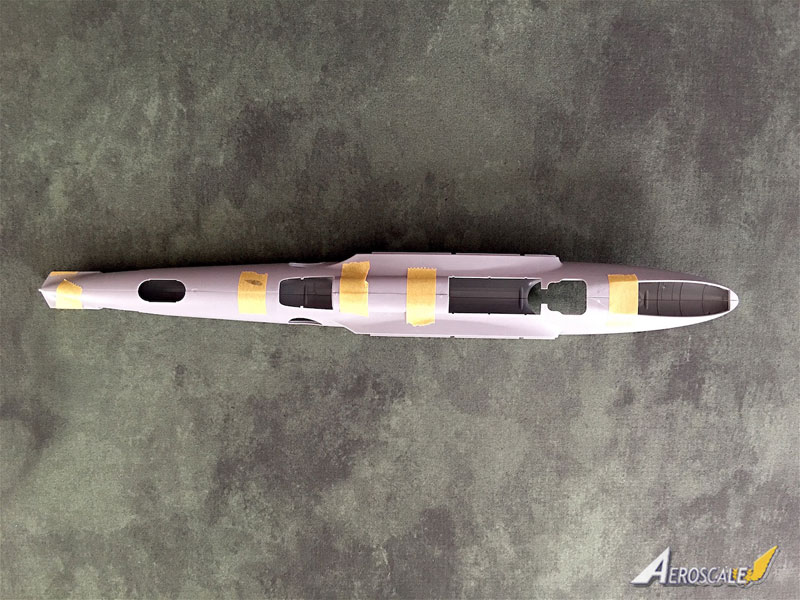
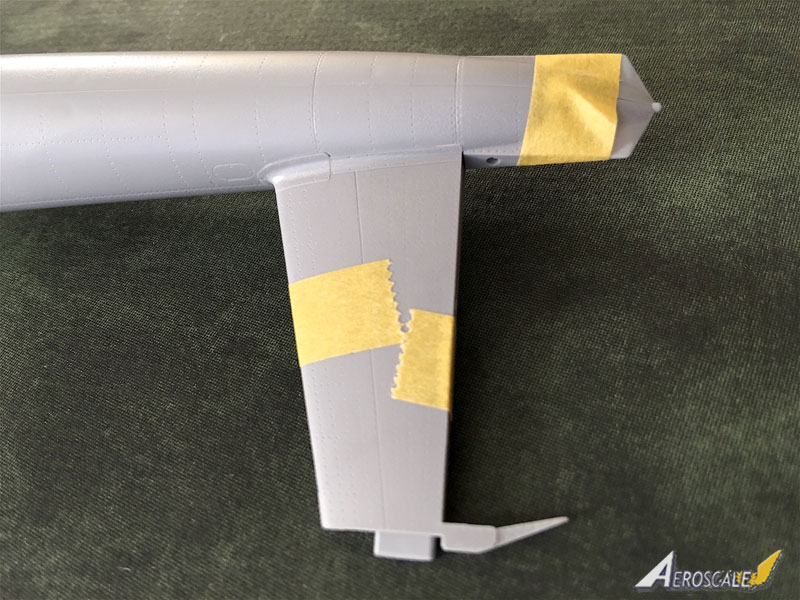
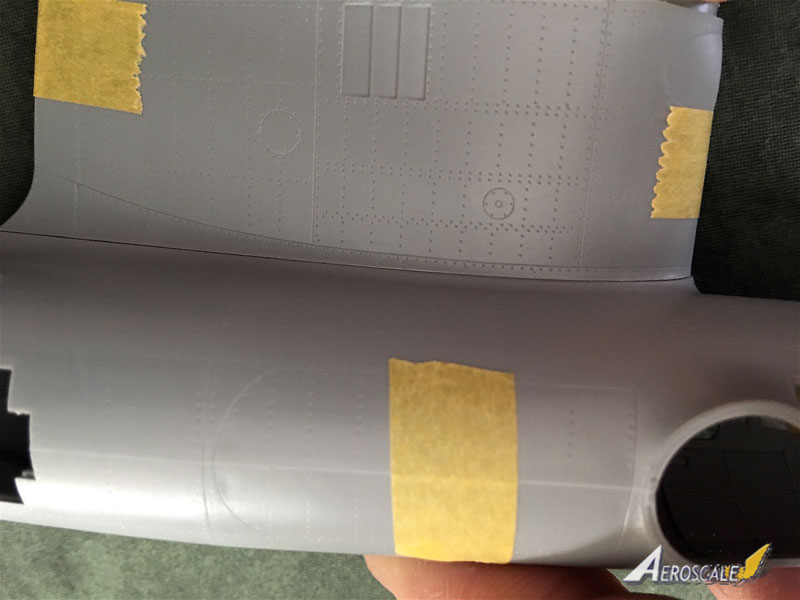
I test fit the fuselage, wings, and horizontal stabilizers by cleaning up any sprue attachment points and joining them using masking tape.
Fuselage The fuselage halves fit together like a dream and it appears that after an application of Tamiya Extra Thin Cement and a light press fit they wont require any filler.
Always a plus since it will require minimum sanding and re-scribing, two tasks I personally dont enjoy.
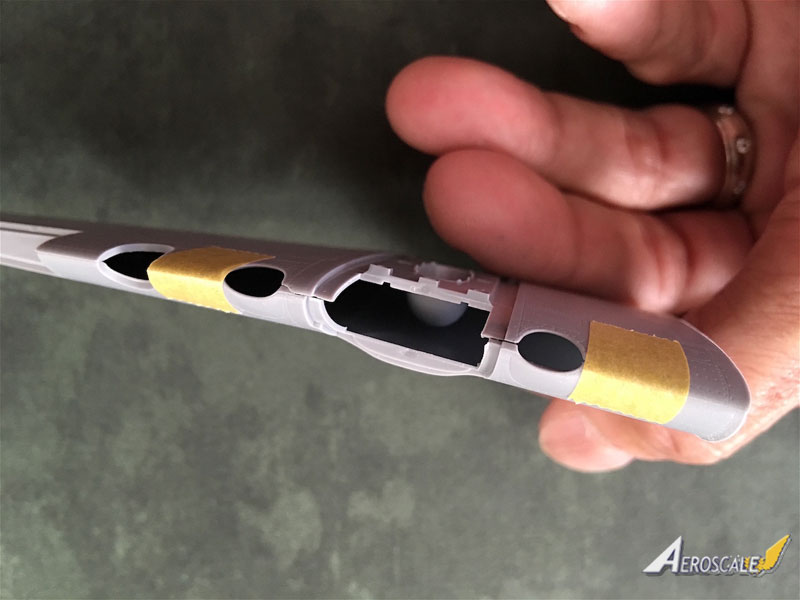
Wing Halves Zvezda has engineered the wing halves so that the bottom trailing edge and wing tip slot into the top wing, which should preserve the beautifully thin edges.
The fit of the wing halves on my kit is perfect and again, should require no filler and minimum cleanup after gluing.
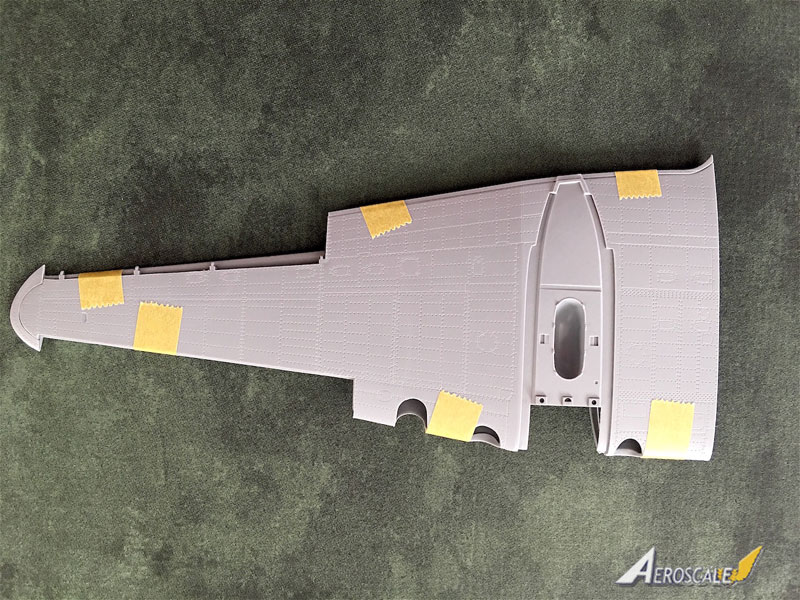
Wing Roots I wasnt able to completely test the join of the wings to the fuselage because attaching them requires assembling the wing spars into the fuselage halves. However, an initial test fitting by pressing the wings to the fuselage indicates the same excellent fit that I see on the previous components.
Horizontal Stabilizer Zvezda engineered the horizontal stabilizers to slot into the fuselage, which as with the previous components produces an excellent fit that should produce a filler free joint.
Please remember, when contacting retailers or manufacturers, to mention that you saw their products highlighted here - on
Aeroscale.


Comments