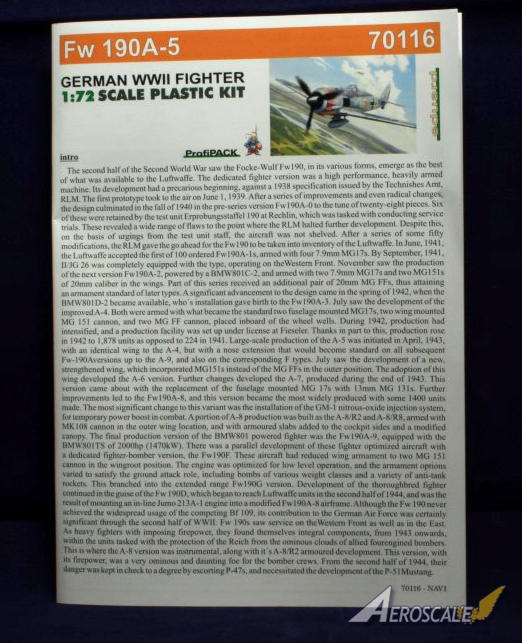
History
The second half of the Second World War saw the Focke-Wulf Fw 190, in its various forms, emerge as the best of what was available to the Luftwaffe. The dedicated fighter version was a high performance, heavily armed machine. Its development had a precarious beginning, against a 1938 specification issued by the Technishes Amt, RLM.
The first prototype took to the air on 1st of June, 1939. After a series of improvements and even some radical changes, the design culminated in the fall of 1940 in the pre-series version Fw 190A-0 to the tune of twenty-eight planes built. Six of these were retained by the test unit Erprobungsstaffel 190 at Rechlin, tasked with conducting service trials. These revealed a wide range of flaws to the point where the RLM halted further development. Despite this, on the basis of urgings from the test unit staff, the aircraft was not shelved. After a series of some fifty modifications, the RLM gave the go ahead for the Fw 190 to be taken into inventory of the Luftwaffe.
In June, 1941, the Luftwaffe accepted the first of 100 ordered Fw 190A-1s, armed with four 7.9 mm MG 17s. By September, 1941, II/JG 26 was completely equipped with the type, operating on the Western Front. November saw the production of the next version Fw 190A-2, powered by a BMW 801C-2, and armed with two 7.9 mm MG 17s and two MG 151s of 20 mm calibre in the wings. Part of this series received an additional pair of 20mm MGFFs, thus attaining an armament standard of later types. A significant advancement to the design came in the spring of 1942, when the BMW 801D-2 became available. With installation of this power unit the Fw 190A-3 was born and July of the same year saw the development of the improved Fw 190A-4.
Both versions were armed with what became the standard two fuselage mounted MG 17s machine guns, two wing mounted MG 151 cannons and two MG FF cannons, placed outboard of the wheel wells. During 1942, production had intensified, and a production facility was set up under license at Fieseler. Thanks in part to this, production rose in 1942 to 1,878 units as opposed to 224 in 1941. Large scale production of the Fw 190A-5 was initiated in April, 1943, with an identical wing to the Fw 190A-4, but with a nose extension that would become standard on all subsequent Fw-190A versions up to the A-9, and also on the corresponding F types.
July saw the development of a new, strengthened wing, which incorporated MG 151s instead of the MG FFs in the outer position. The adoption of this wing meant Fw 190A-6 version birth. Further changes developed into the Fw 190A-7, produced during the end of 1943. This version came about with the replacement of the fuselage mounted MG 17s with 13mm MG 131s. Further improvements led to the Fw 190A-8, and this version became the most widely produced with some 1,400 units made. The most significant change to this variant was the installation of the GM-1 nitrous-oxide injection system for temporary power boost in combat.
Part of A-8 production was built as the A-8/R2 and A-8/R8, armed with MK 108 30 mm cannon in the outer wing location, and with armour slabs added to the cockpit sides and a modified canopy. The final production version of the BMW 801 powered fighter was the Fw 190A-9, equipped with the BMW 801TS of 2000 HP (1470 kW). There was a parallel development of fighter optimized aircraft with a dedicated fighter bomber version, the Fw 190Fs. These aircraft had reduced wing armament to two MG 151 cannon in the wing root position. The engine was optimized for low level operation, and the armament options varied to suit better to the ground attack role, including bombs of various weight classes and a variety of anti-tank rockets. This branched into the extended range Fw 190G version.
Development of the thoroughbred fighter continued in the guise of the Fw 190D, which began to reach Luftwaffe units in the second half of 1944, and was the result of an in-line Jumo 213A-1 engine installation into a modified Fw 190A-8 airframe. Although the Fw 190 never achieved the widespread usage of the Bf 109, its contribution to the Luftwaffe was certainly significant through the second half of WWII.
Fw 190s saw service on the Western Front as well as in the East. As heavy fighters with imposing fire power, they found themselves integral components, from 1943 onwards, within the units tasked with the protection of the Reich from the ominous clouds of allied four engined bombers. This is where the Fw 190A-8 was instrumental, along with A-8/R2 armoured version, with fire power very daunting for the bomber crews. From the second half of 1944, the danger of Fw 190s was kept in check to a degree by escorting P-47 Thunderbolts and excellent P-51D Mustangs.
Info from the Eduard instruction sheet
In the box
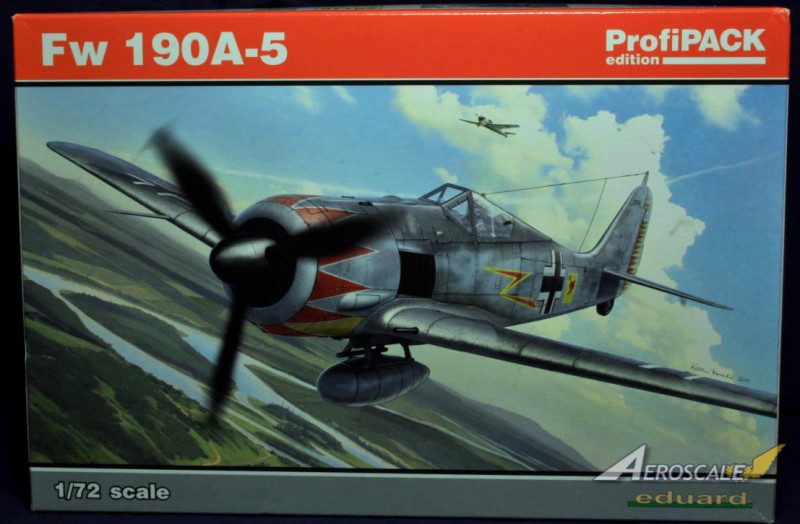
Eduard's ProfiPack Edition Fw 190A-5 first impressions of the art work on the box is fantastic, and reminded me of the good old days of looking forward to seeing another piece of Roy Cross's box art helping to sell the kit.
After opening the box inside you find the following.
- 1 Instruction book
- 3 Grey moulded sprue's
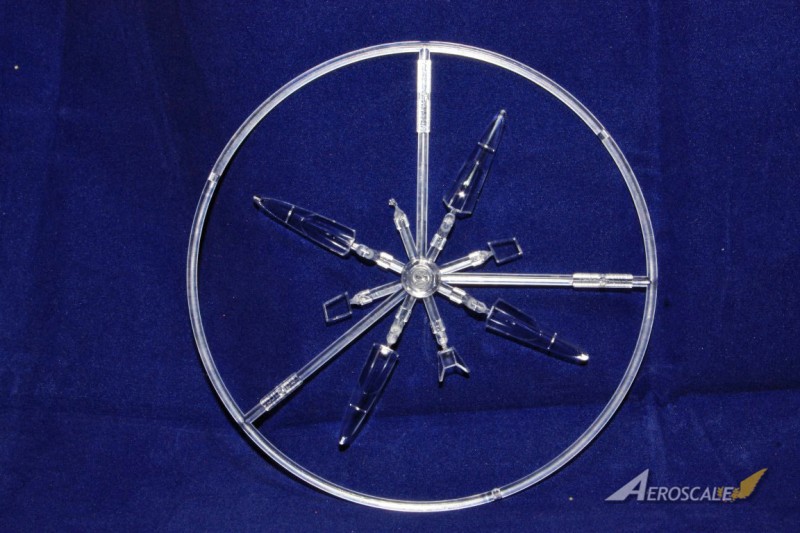
- 1 Clear sprue with lots of different cockpit options
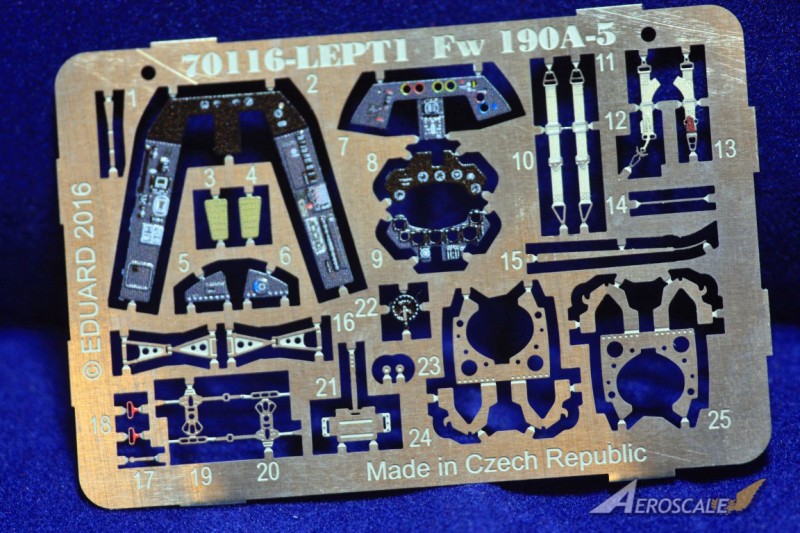
- 1 Photo etch sheet
- 1 Mask
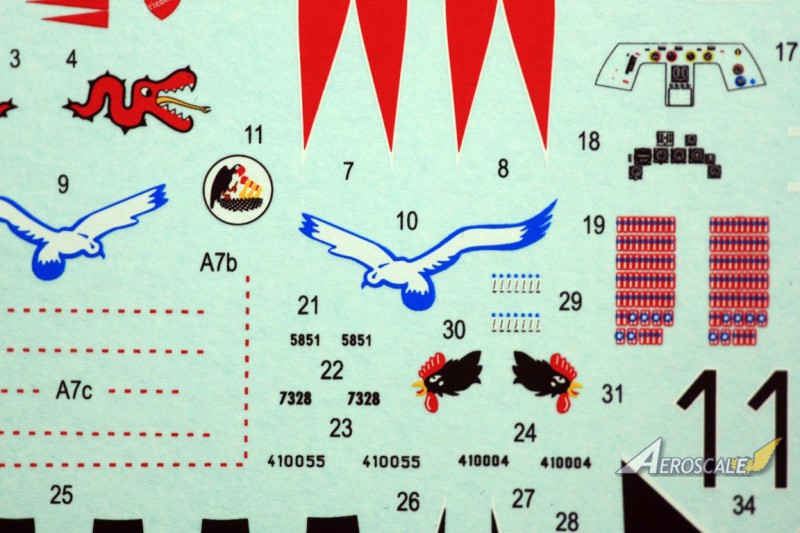
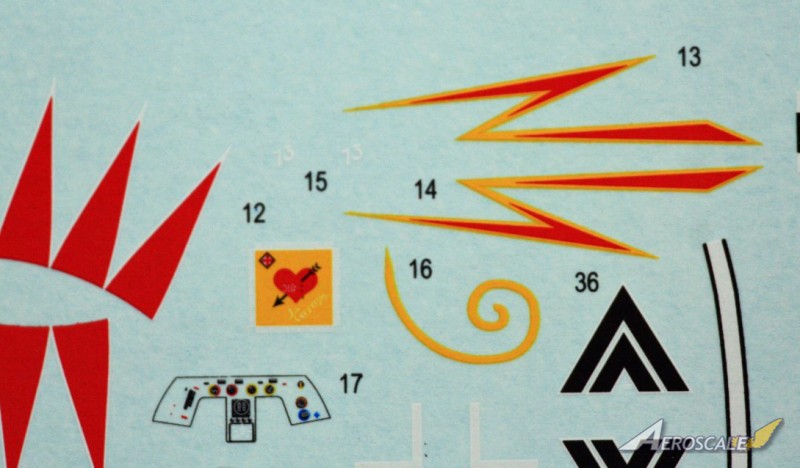
- 1 Decal sheet
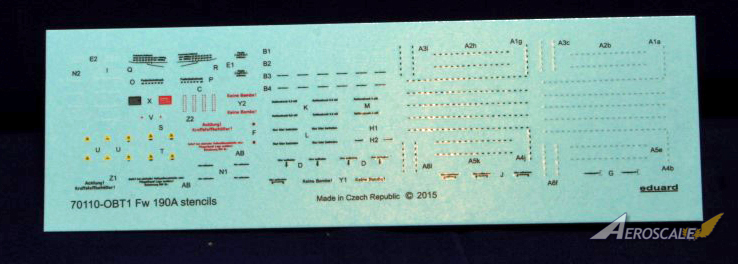
- 1 Stencils sheet
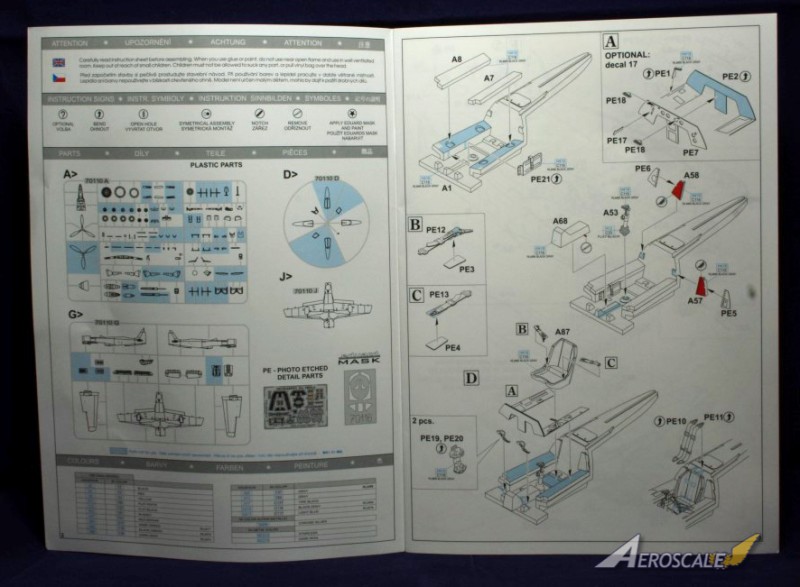
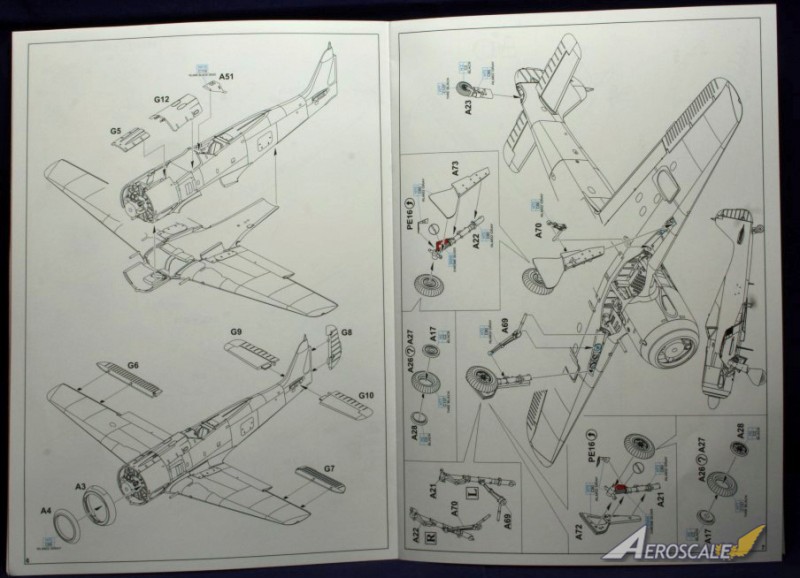
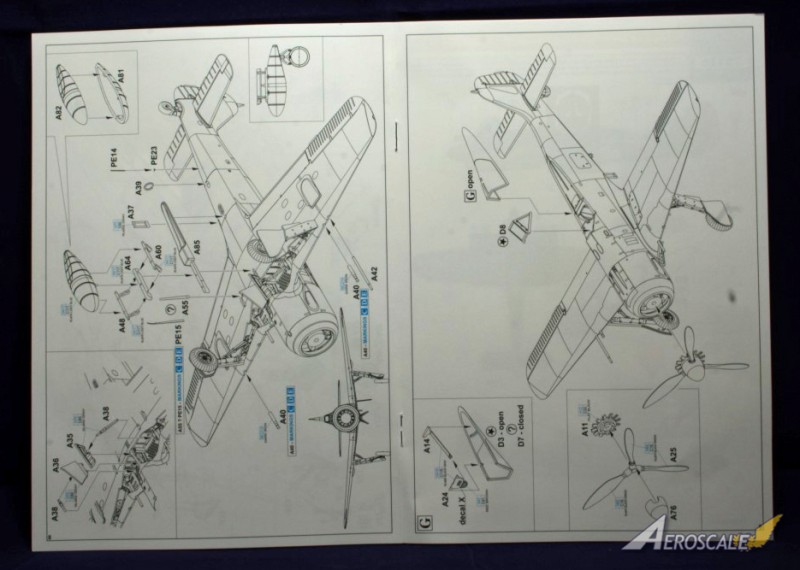
The instruction book is to the usual very high standard as you find in most of the Eduard kits, certainly in the more modern Royal classes, Profipacks and limited run editions.
On opening the book and looking at the first page you realise that everything is laid out in front of you in a very clear and precise way that even a beginner can pick this kit up and not feel overwhelmed with over complicated instructions. Page 3 is the first of the build sequence. The cockpit area is just amazing at how much goes into the detail in the moulds. The amount of different parts making up the controls, seat, gauges and PE parts certainly does make the old kits of a seat a pilot and joystick seem to be long gone now and way back in the past. Although it would be nice for some of the companies to produce some pilots for their kits would be good, and save you some pennies from having to buy the aftermarket ones allowing you to spend more money on the kits themselves.
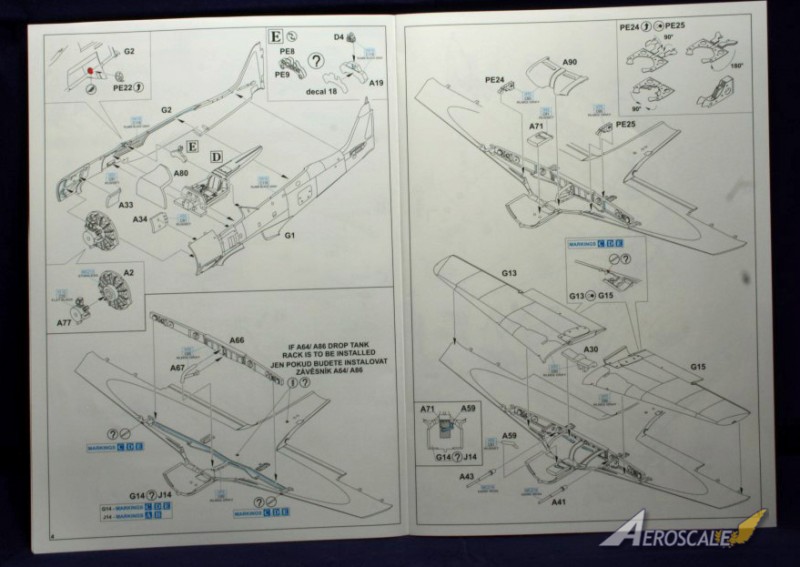
Each step gives you the assembly and also colours that need to be added as you go on the building process, these are based on the Gunze range of Aqueous and Mr. Colour. There are now a wealth of sites and apps that you can download on your computer, phone or pad that will give you a colour conversion match to all the different brands of paints on the market allowing you to be able to use your favourite paint.
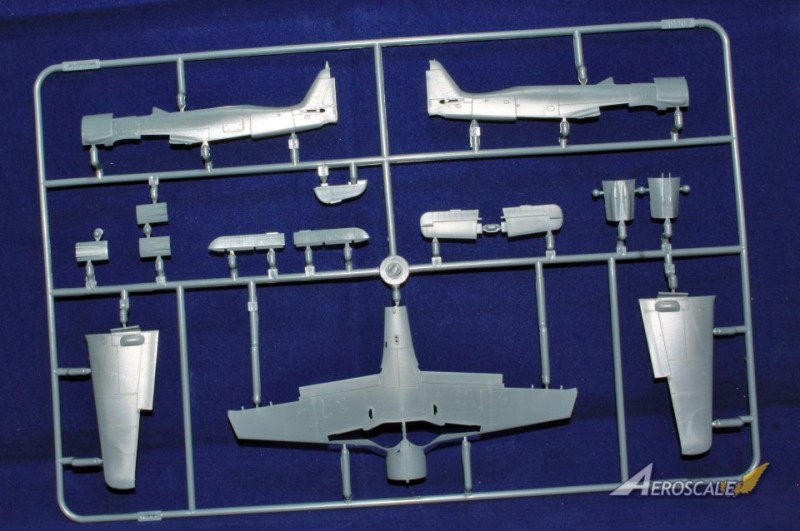
The sprues are moulded in a mid colour grey, two are wings and fuselage for two different Fw 190A-5. There is an option to buy overtrees that allow you to make both versions. The third sprue contains everything else engine, propeller, landing gear, etc.
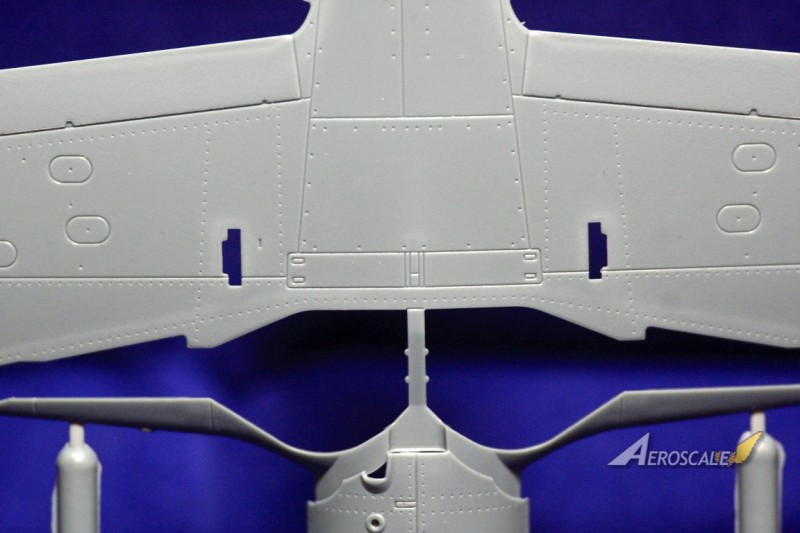
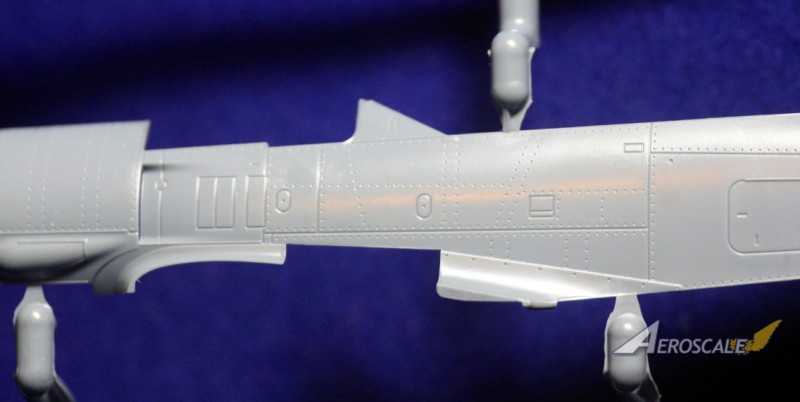
The first sprue I looked at was 70110-J which is the wings and fuselage for options A-B of the decals option, this wing was the same as the A-4 version but with a nose extension that would follow all the way along the A productions until the A-9.
Ok, first impressions are the panel lines are very crisp and show great detail, the rivets look right and not to big. The service panels on the fuselage are superb and with a bit of patience you could cut them out have it open for a service diorama. The cowling was also crisp and was a great dry fit with no need for any filling or sanding on the inside of the fuselage. The injection pin marks are minimal and should not be seen once the two halves are together. Another nice touch is the neat detail in the underside of the top wing for the wheel bays/ landing gear. Each piece I dry fitted just seem to line up with very little effort and sealed without any need for any work on these. One minor and I do mean minor mark on the top of the left wing was a mark that looks like a scratch or some kind of mis-mould. I said it looks like a scratch because it does, but it has not broke the surface in anyway shape or form and once painted you would never know. It could be a one off too.
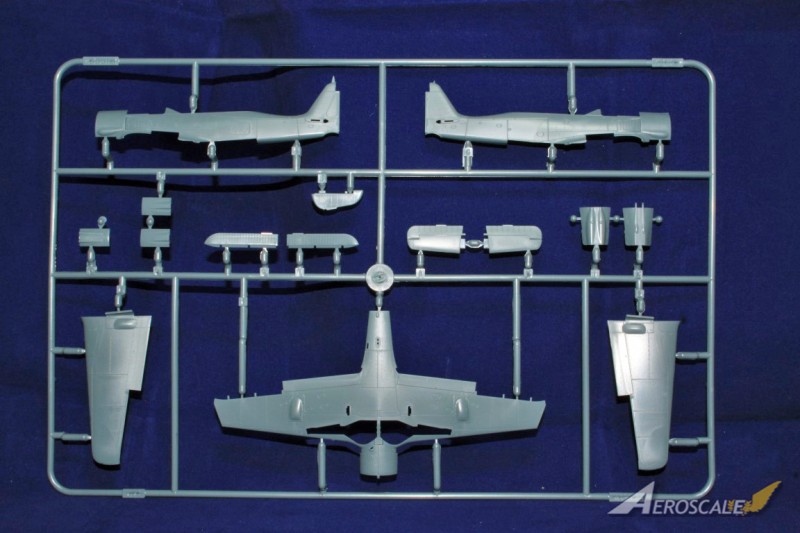
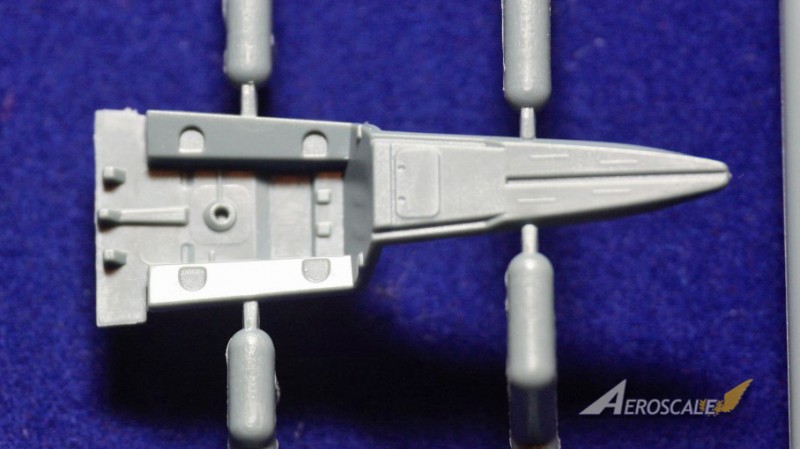
The second sprue I picked up to have a closer look at, was 70110-G, this sprue is for options C-D-E of the decal sheet and contain the strengthened wing for use with the MG151 instead of the MG FF's. Apart from the strengthened wing all the rest of the parts on the sprue are identical to the first sprue. The new covers on the bottom of the wing with its bulge is a good touch.
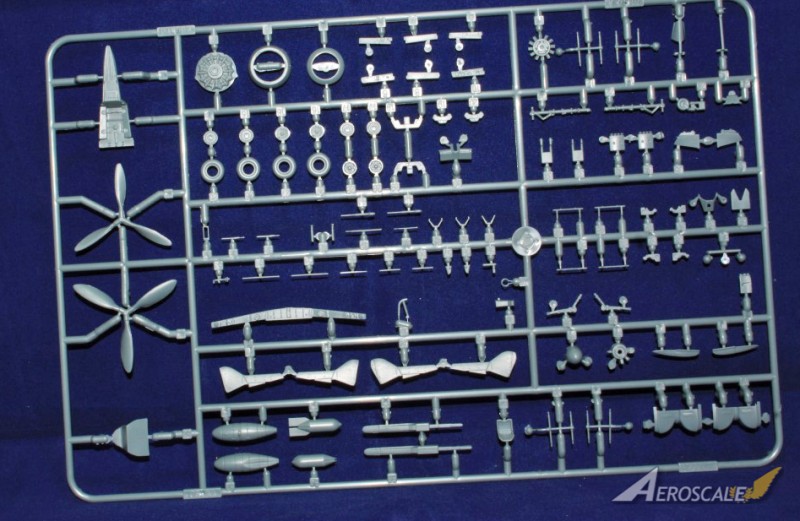
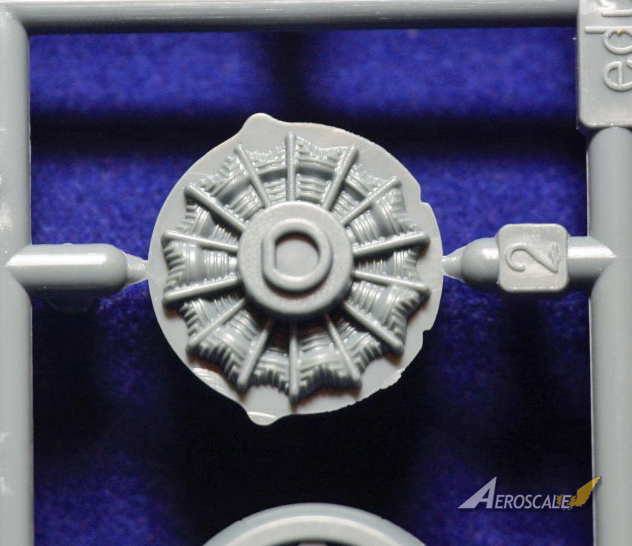
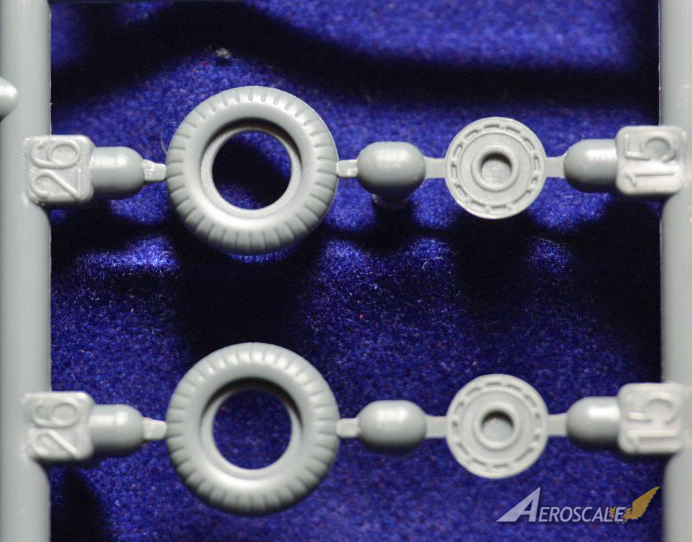
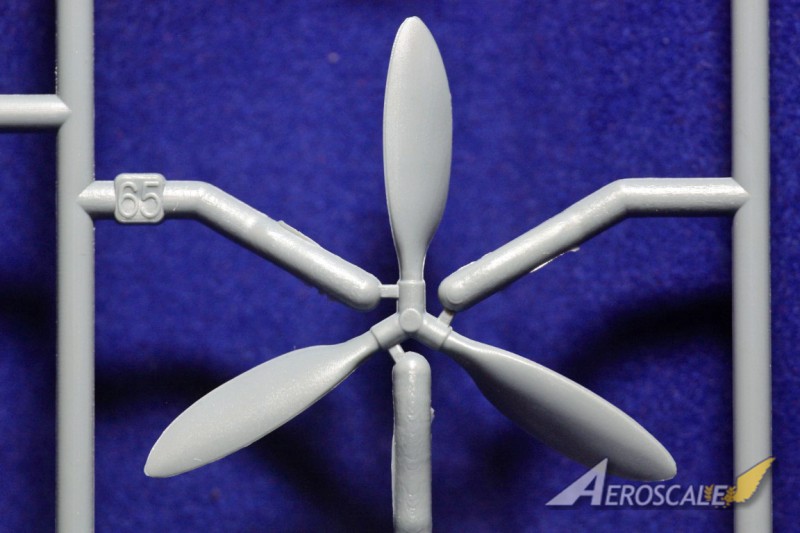
The third Sprue is 70110-A. Starting numerically on the sprue, the cockpit tub or seating and control area depending on what you like to call them is nicely done with crisp moulding for a part so small. Next came the engine, it was ok, with some nice raised heads. I am not sure why but I was looking for more detail. Further along you get some of the control panels and surfaces, now this has good detail with minute little switches. The tyres have good detail with the wheels having different patterns. The landing gear legs are with good detail and again with a dry fit fitted well. Everywhere you look around the sprue is a new tooled kit that really is full of detail. There is some minor sink marks and injector pin marks but it is very minor and is very unlikely to be seen once the kit is together.
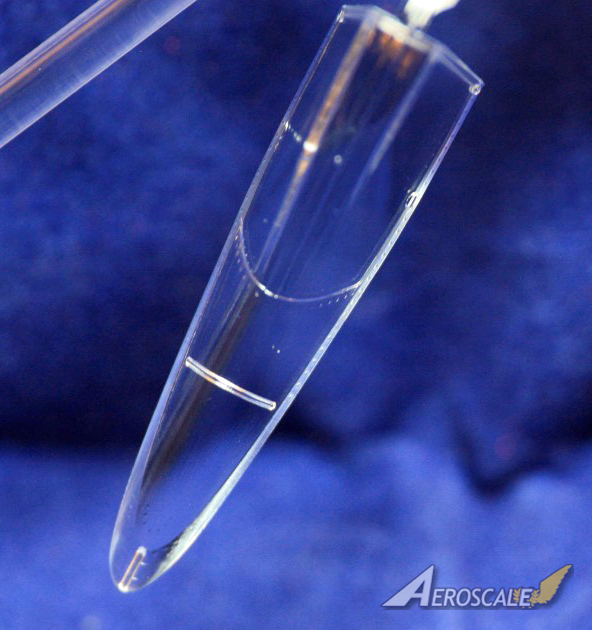
The forth sprue has all the clear parts. All of the glass is very clear with no defects that I can see at all, so far so good. As with a lot of the Eduard kits you do get some extras that you don't need to use these could of course always come in handy especially if like me you are a diorama builder.
The Photo Etch is very clear, the pre-painted control panel and gauges are so good you can see all the different switches and control surfaces. I know from my experience with the 1/48th scale the etch is superb and very clear but to be able to do the same in such a small scale and see it all in detail. The etch for the wing and wheel bays looks more tricky than it actually is and again is full of detail.
Instructions and decals
The instruction booklet is a 16 page guide that so long as before you build the model settle on what version you want to build it is quite easy to follow even for a beginner, with each part of the build having a different option box for different versions. It also gives you a guide to what needs painting as you go, these being using the Mr Colour Aqueous range. All the etch parts are on there with a PE mark next to it and all the different versions in a blue colour box. It is very easy to follow and build.
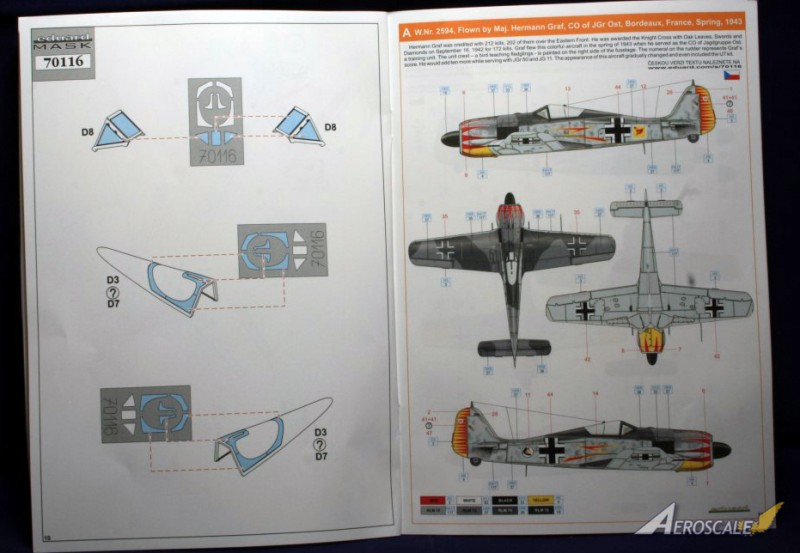
You also have the pre-cut masks for the cockpit glass allowing the painting without to many issues.
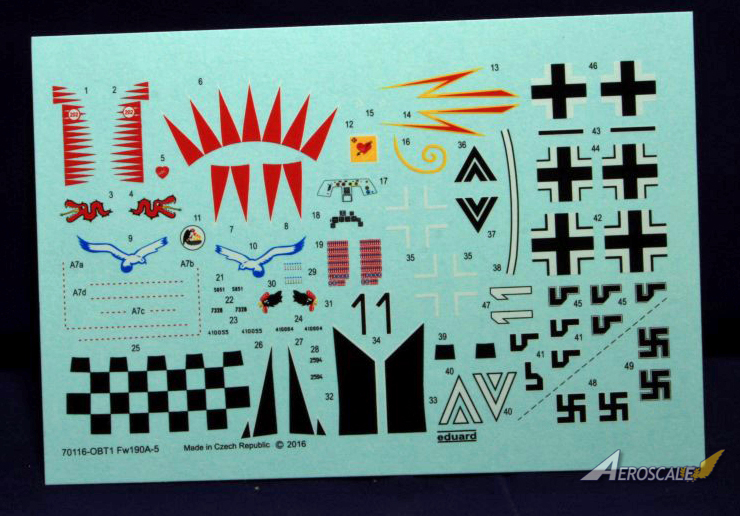
Decals for five different planes are included -
- A. W.Nr. 2594 Flown by Maj. Hermann Graf, CO of JGr Ost, Bordeaux, France, Spring 1943 Hermann Graf was accredited with a total of 212 kills, 202 of them over the Eastern Front.
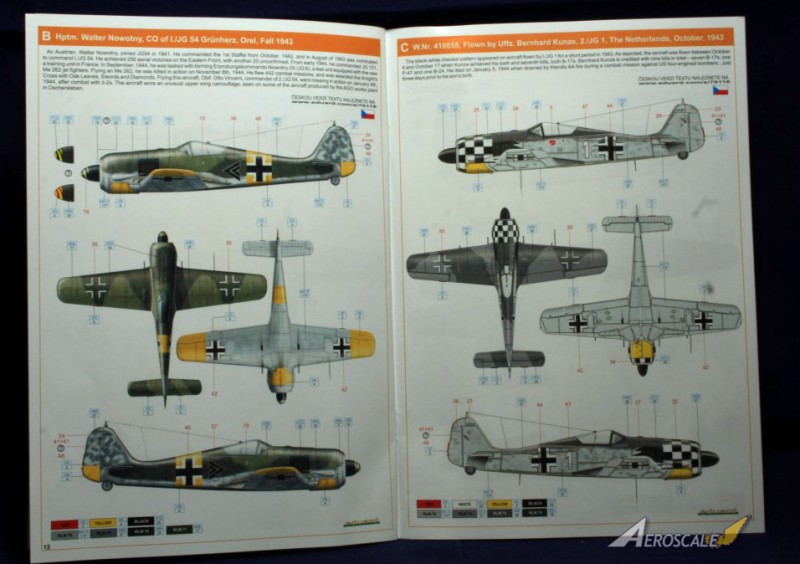
- B. Hptm. Walter Nowotny, CO of JG 54 Grunherz, Orel, Fall 1943 AN Austrian, Walter Nowotny, joined JG54 in 1941.
- C. W.Nr 410055 Flown by Uffz. Bernhard Kunze, 2./JG 1, The Netherlands, October, 1943. The black and white checker pattern appeared on aircraft flown by I./JG 1 for a short period in 1943.
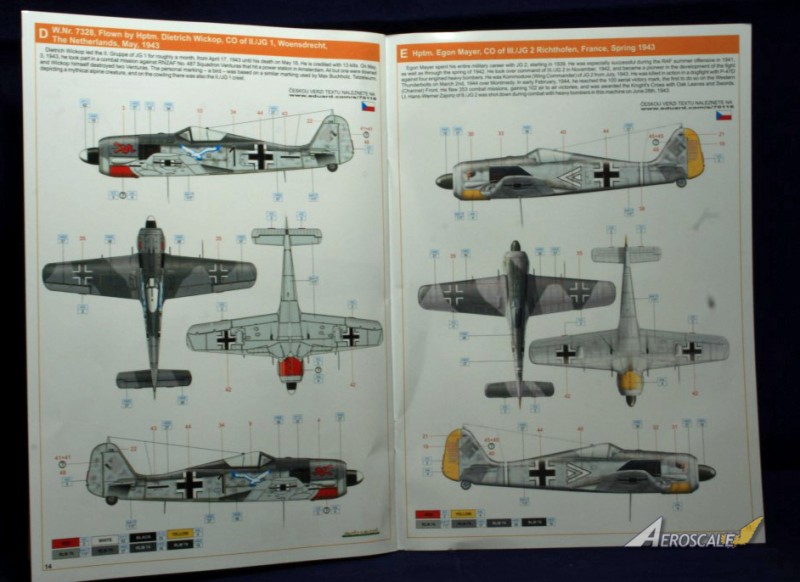
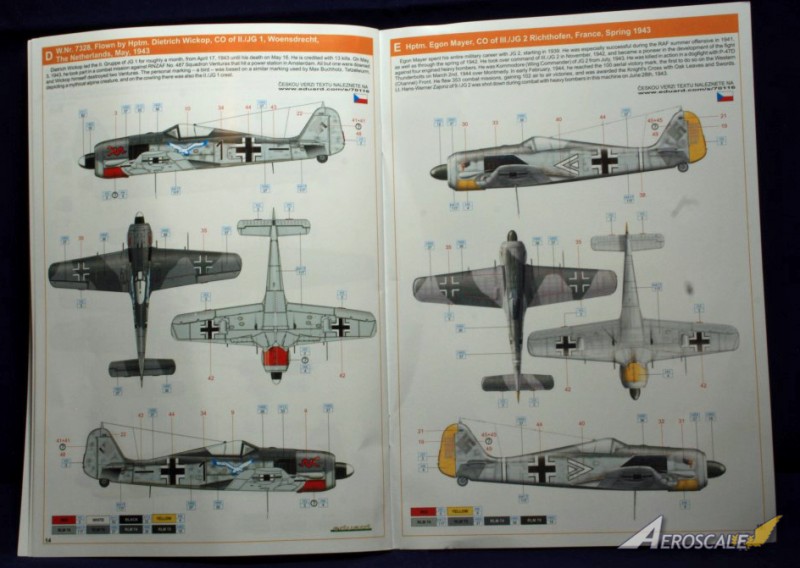
- D. W.Nr. 7328, Flown by Hptm. Dietrich Wickop, CO of II./JG 1 Woensdrecht, The Netherlands, May, 1943 Dietrich Wickop led the II Gruppe of JG 1 for roughly a month, from April 17, 1943 until his death on May 16.
- E. Hptm. Egon Mayer, CO of III./JG 2 Ricthofen, France, Spring 1943 Egon Mayer spent his entire military career with JG 2, starting in 1939.
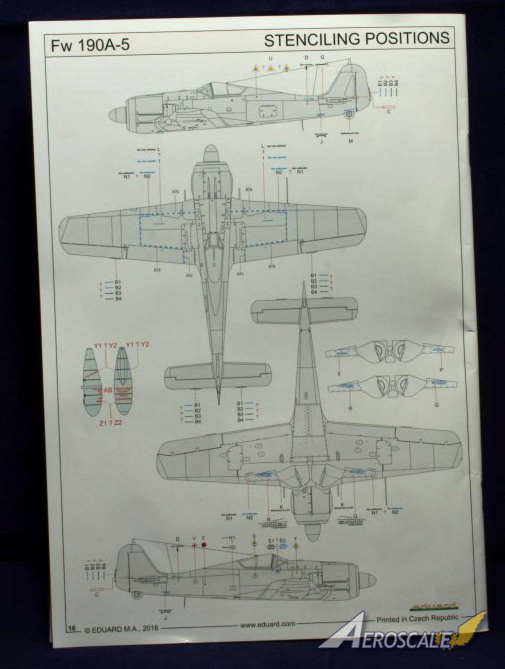
The stencils are for all the different versions and again are clear and very precise.
Please remember, when contacting retailers or manufacturers, to mention that you saw their products highlighted here - on
AEROSCALE


Comments