This much anticipated release of the
Saab Viggen from
Tarangus Models has been delayed for some time now. The challenging nature of creating the mould has been chronicled on the companys website for all to follow. Well at last we have it and lets see if it has been worth the wait and all the hard work by Fredrik Zetterberg and the team at Tarangus Models.
Background
The distinctive looking Saab JA37 Viggen was a Swedish single-engine, short-medium range combat aircraft, manufactured between 1970 and 1990. The Viggen was developed to fulfil a number of roles including strike fighter, aerial reconnaissance, maritime surveillance and a two-seat trainer. In the late 1970s the all-weather fighter interceptor, the JA 37 was added and is the subject of this kit. The Viggen was initially developed as a replacement for the Saab 32 Lansen in the attack role and later the Saab 35 Draken as a fighter.
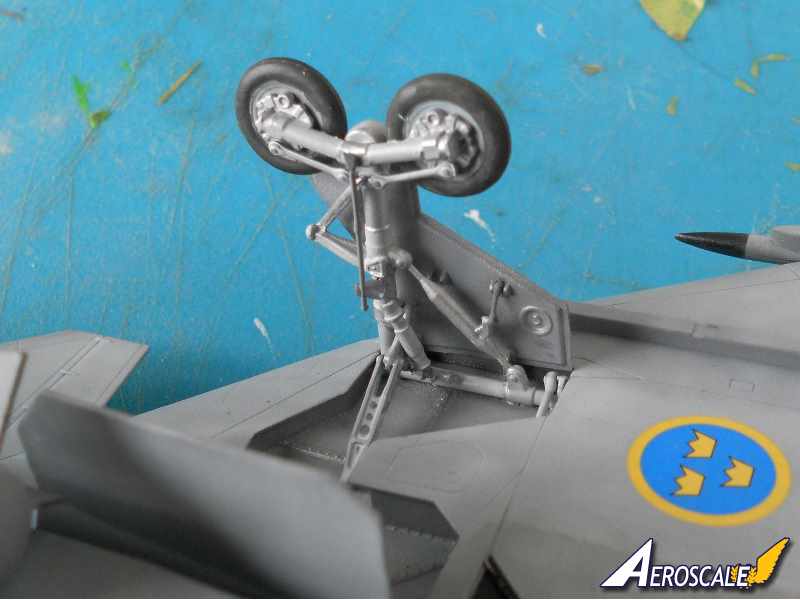
The performance requirements of the design to a large extent dictated the choice of the engine: the Volvo RM8 turbofan engine. The RM8 engine was basically a licence built Pratt & Whitney JT8D, an engine used on many commercial jets of the time. An afterburner was fitted and reverse thrust was also incorporated. The airframe turned out to be quite bulky compared to contemporary slimmer designs with turbojet engines. The first prototypes had a straight midsection fuselage that was later improved with an area rule "hump" on the dorsal spine for reduced drag. The wing had the shape of a double delta with a dogtooth added to improve longitudinal stability at high incidence angles. Each dogtooth was also used as a fairing for a radar warning receiver (RWR) antenna. The tandem wheel arrangement of the main landing gear was unusual. The thinner tyres allowed the wing to be kept as thin as possible and without resorting to bumps in the wing.
A weapons load of up to 7,000 kg could be accommodated on nine hard points; one centreline wet pylon, two fuselage pylons, two inner and two outer wing pylons and two pylons behind the wing landing gear. The centreline pylon was the only wet pylon and was usually occupied by an external fuel tank.
JA 37
This release from Tarangus depicts the final Viggen production variant: the JA 37 interceptor entering service in 1979. The last of 149 JA 37s was delivered in 1990. Differences from the previous models included an improved and more powerful RM 8B engine, new interception radar, updated computers, HUD, ECM and some other subsystems. The new engine required a small extension to the fuselage. To supplement the missiles a KCA 30mm Oerlikon cannon was carried in a conformal pod under the fuselage. Rocket pods could be carried for the secondary role as a ground-attack aircraft. The centreline pylon was almost exclusively used to for carrying a semi-permanent fuel tank, which was jettisonable in the event of a dogfight.
In 1987, the more advanced all-aspect RB 74 [AIM-9] air-to-air missile was introduced for the JA 37. In 1997 the JA37 was upgraded to the JA37D and with it came the ability to carry four RB 99 [AIM-120] missiles on the fuselage- and inner wing pylons. In addition, a U95 ECM pod could now be carried under the right wing in place of an AMRAAM. Chaff and flare dispensers were fitted on a pair of pylons just behind the main landing gear on each wing.
The kit
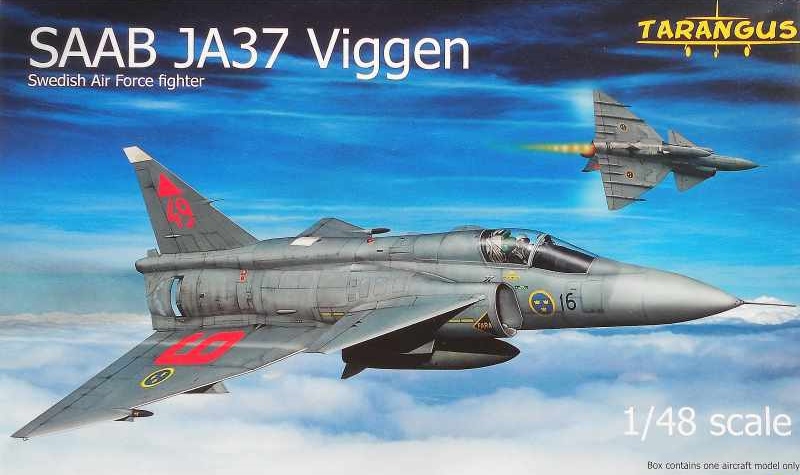
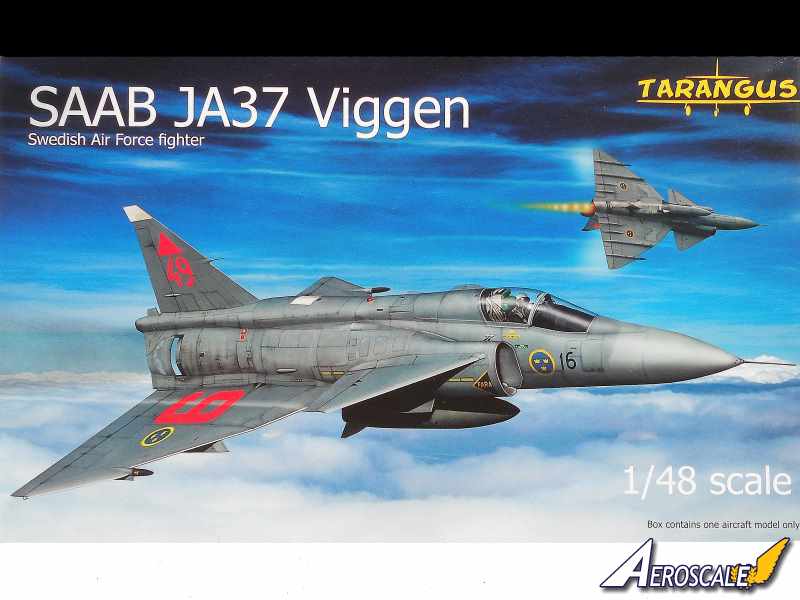
The top opening box looks sturdy enough; the lid has a rather spectacular image created by Tor Karlsson Visby of one of the subjects of the kit. Be careful scouring your local Hobby shop for this kit as one end of the box marks this kit as a SAAB JA32, which of course is the Lansen.
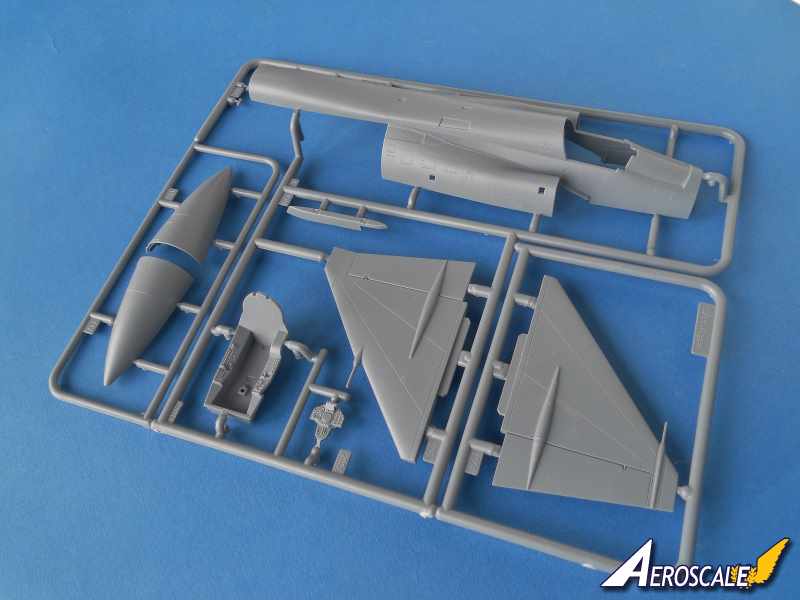
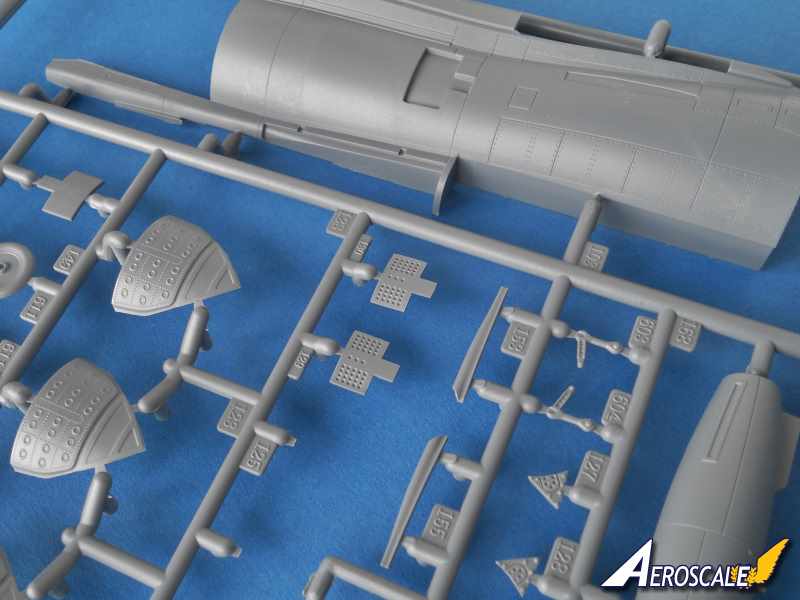
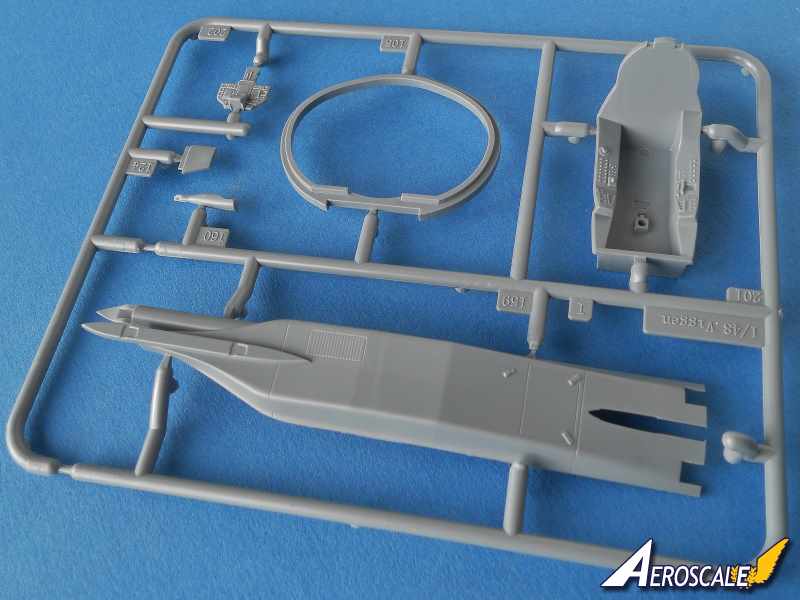
Gone is the rather shiny plastic of previous releases from Tarangus. The plastic with this release is grey, matt and slightly soft with finely recessed panel lines, access hatches and fasteners. All eight of the grey plastic sprues are placed in one large plastic bag for security. There are a few light scuff marks on some parts were the plastic has rubbed against each other. The clear parts and the decals are bagged separately.
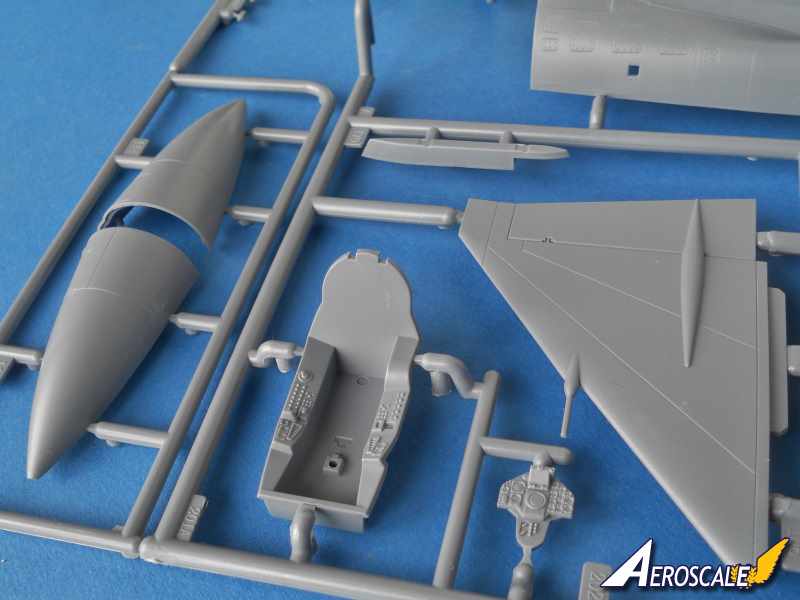
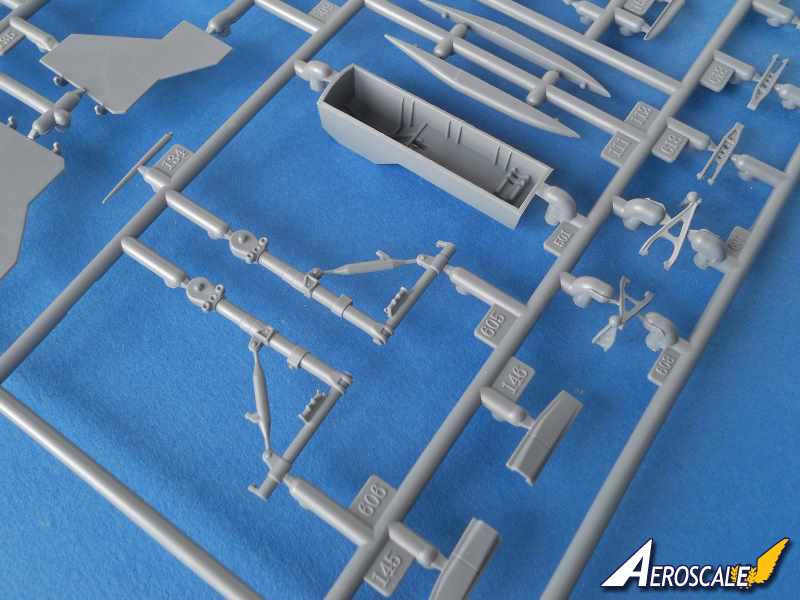
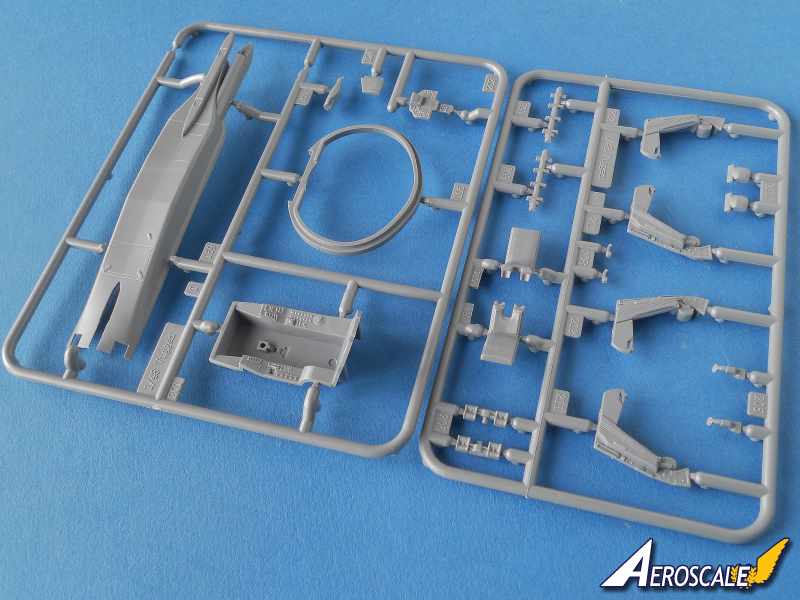
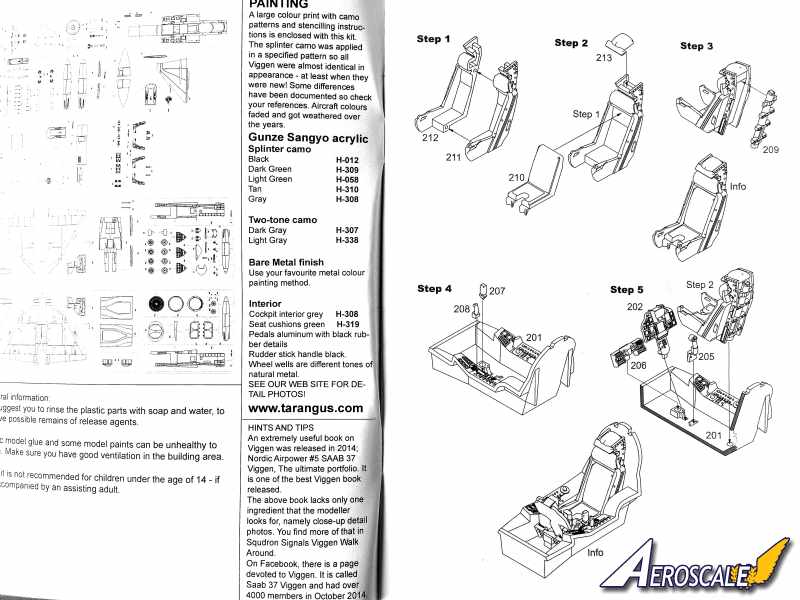
The cockpit
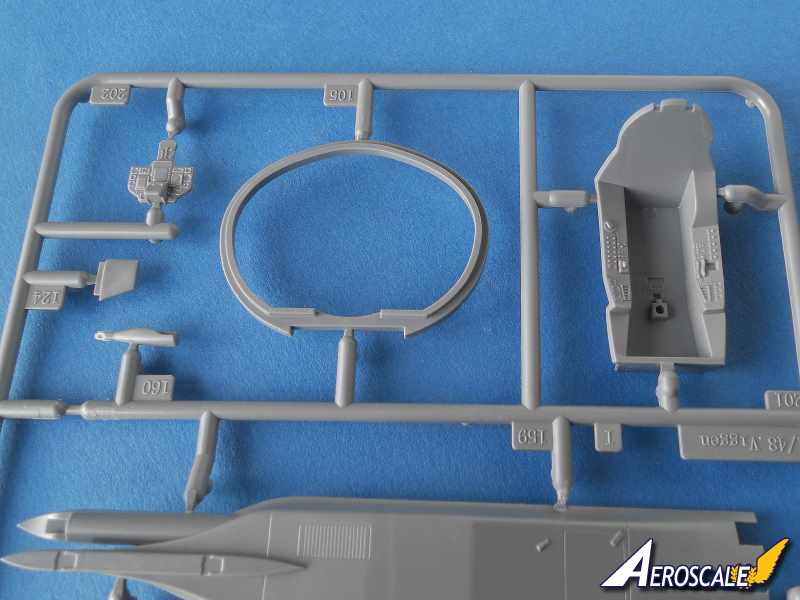
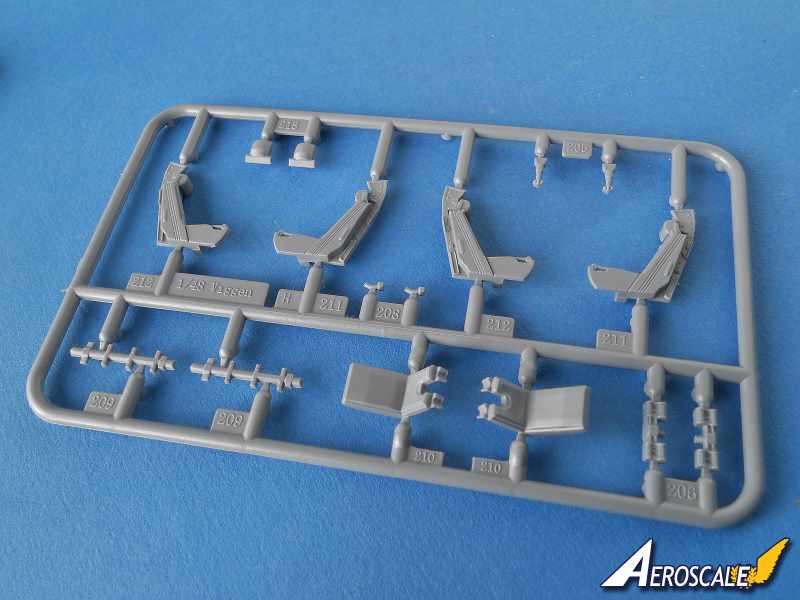
The Raketstol 37 (literally rocket chair) ejection seat is built up from five parts and represents the real thing very well. The join for the two halves of the seat unfortunately falls in the middle of the headrest. The rest of the join is hidden by the backside and lumbar cushions. There are no harnesses included with the kit. So if you want to fit harnesses either make your own or wait for the aftermarket companies to supply some. Interestingly there are two ejection seat supplied with this kit. So perhaps a two seat Viggen is in the works from Tarangus. The cockpit itself is made up from eight parts. The tub has the side console moulded onto it. The separate instrument panel like the side consoles has some lovely raised detail, just crying out for some careful highlighting. There are no decals for the instruments so you will have to refer to the excellent online reference material linked to the Tarangus website to paint and detail them. There are two different cockpit tubs and oddly the instructions indicate using tub part number 201, yet the illustration in the instructions looks more like part number 201A.
The canopy
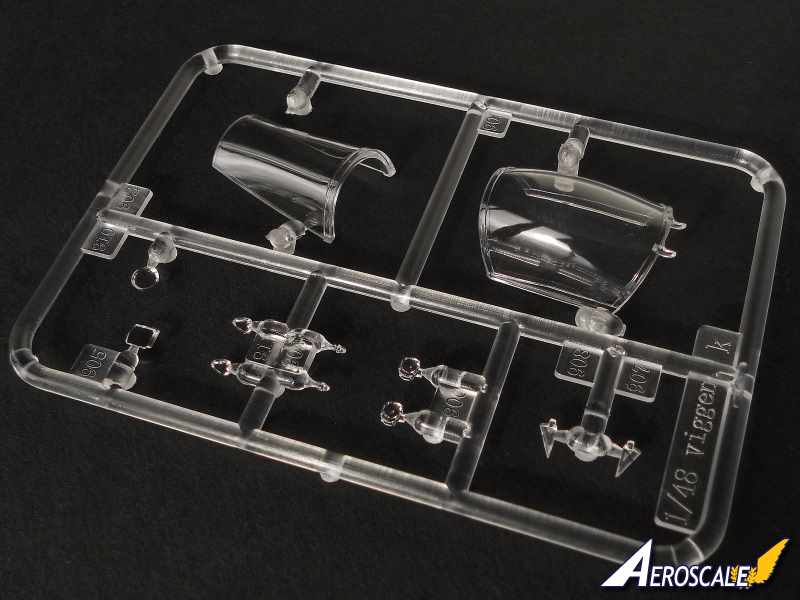
The windscreen and canopy are separate parts so the canopy can be displayed open if you like. The parts are beautifully clear and the framing is raised just enough to help with the masking. The hinges for the canopy are generous in size making the fitting of the canopy in the open position so much easier.
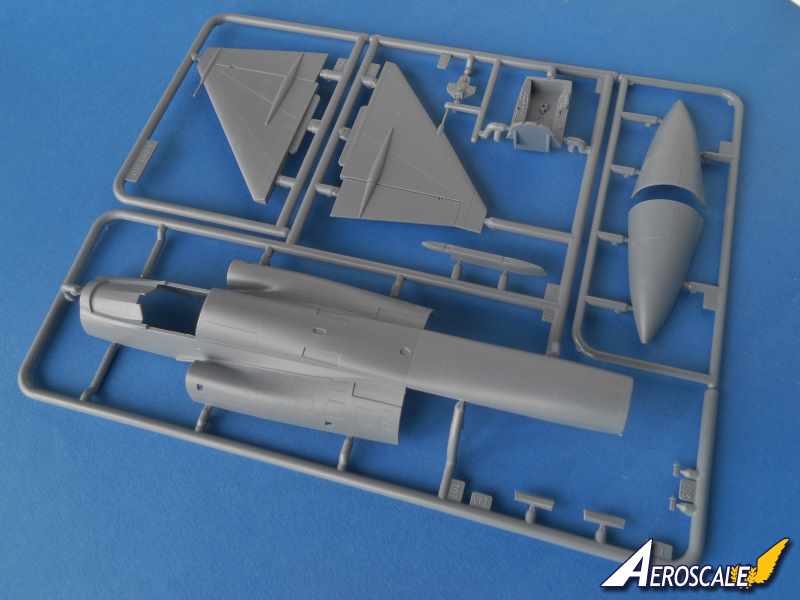
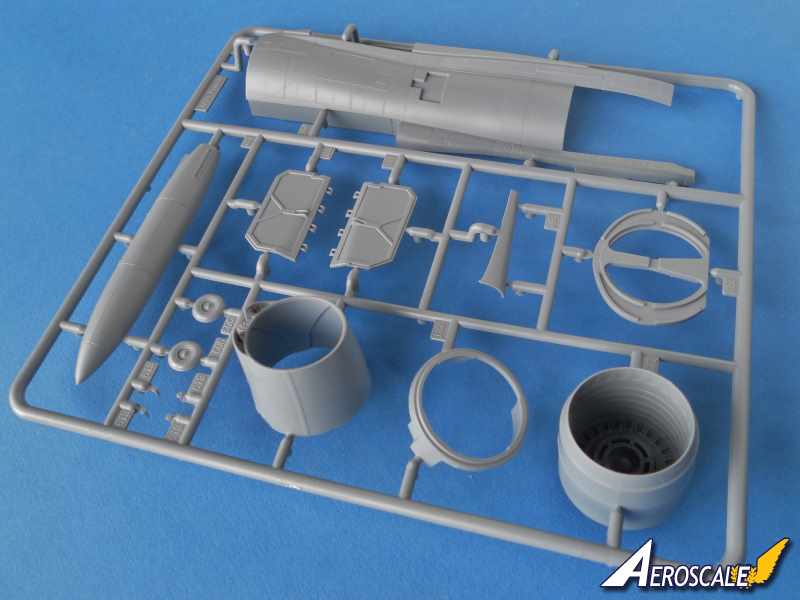
The fuselage
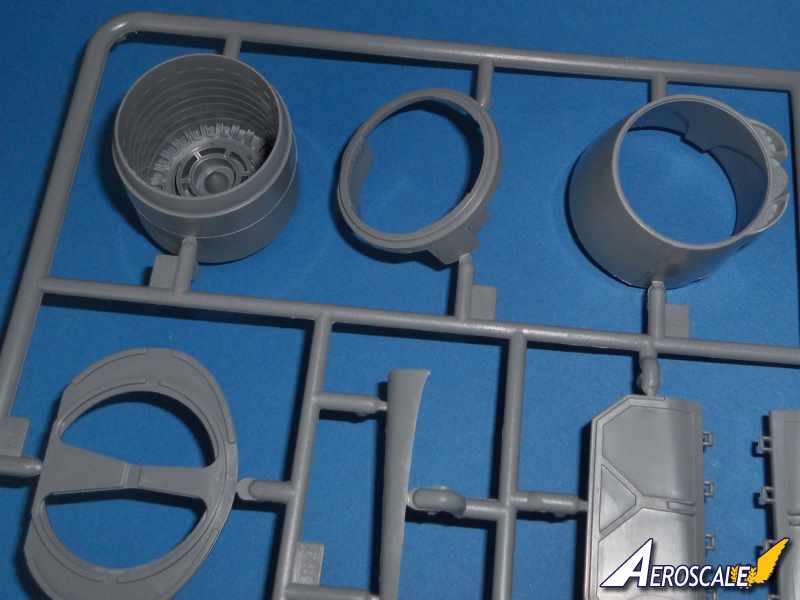
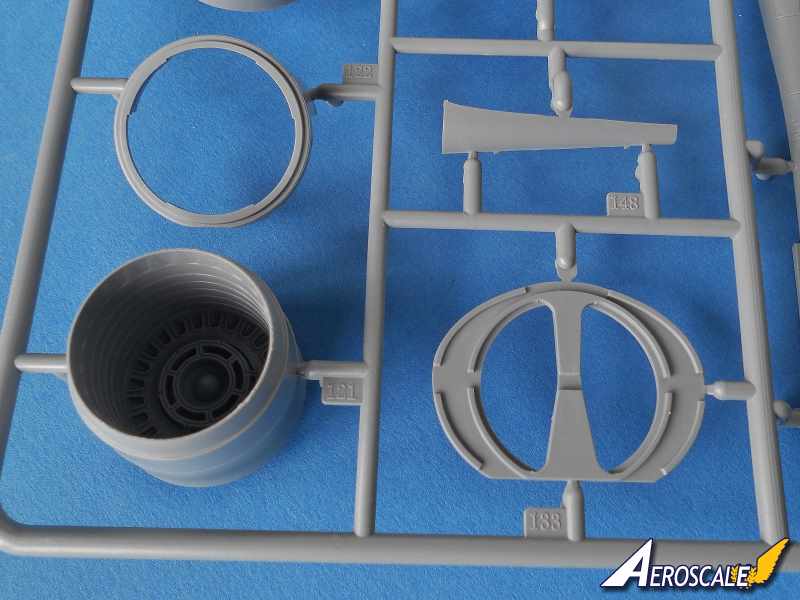
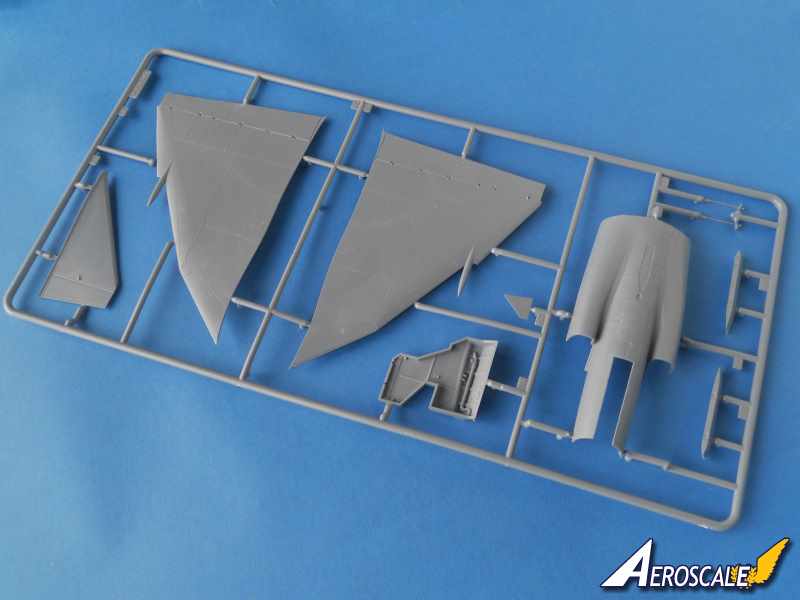
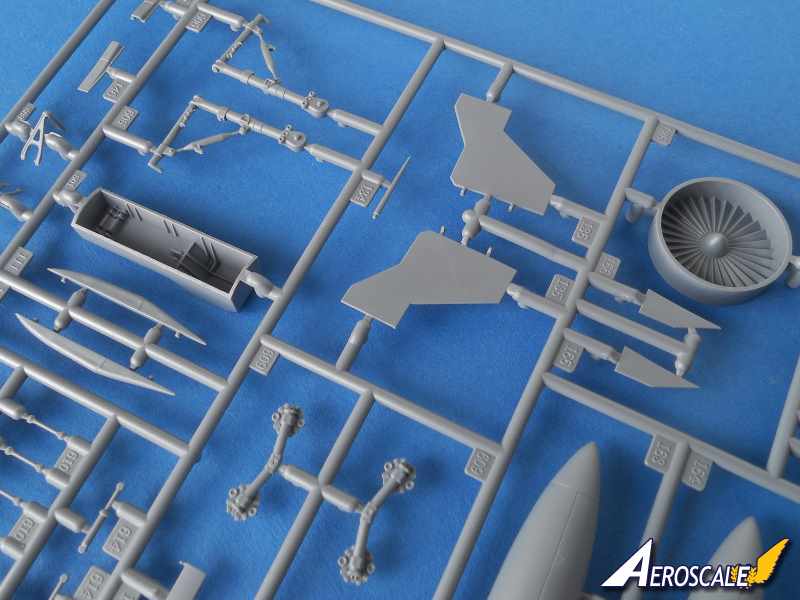
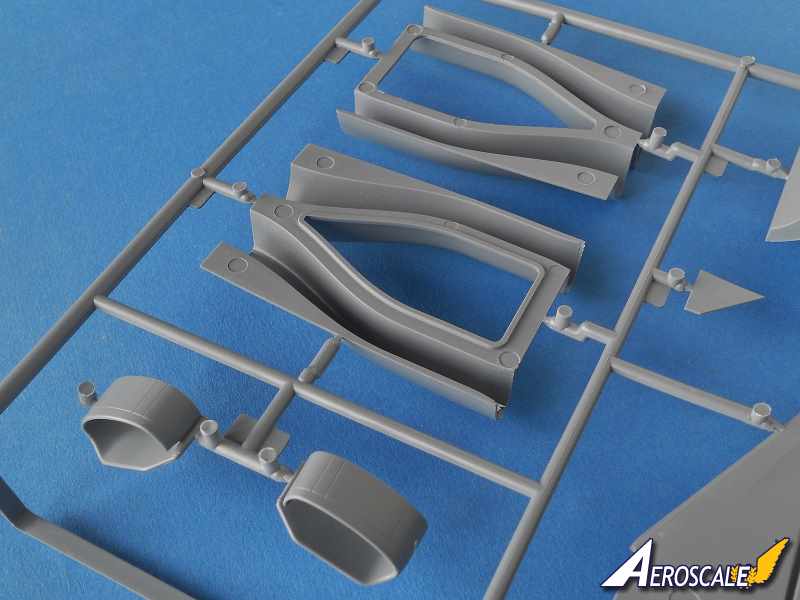
The full length intake ducts for the Volvo RM8 turbo fan engine comes in two horizontally split parts. The primary compressor fan of the engine is nicely depicted, although I doubt you will see much of it when its buried in the fuselage. There is a substantial bulkhead that the ducting and fan assembly attaches to which will provide substantial support not only for the air ducts, but also to the fuselage itself.
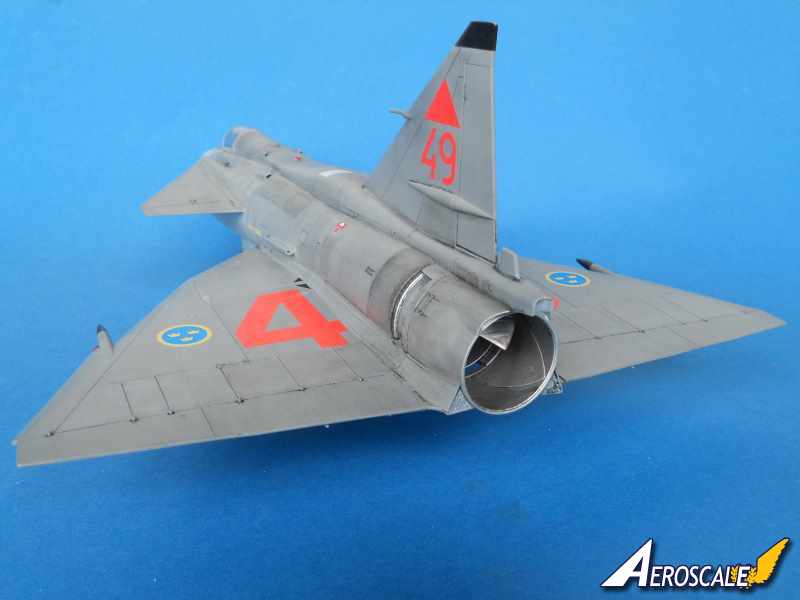
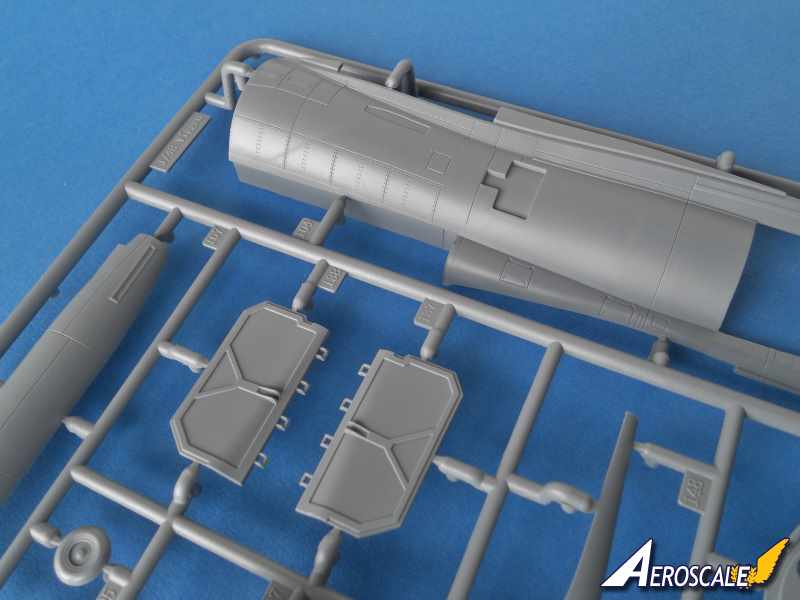
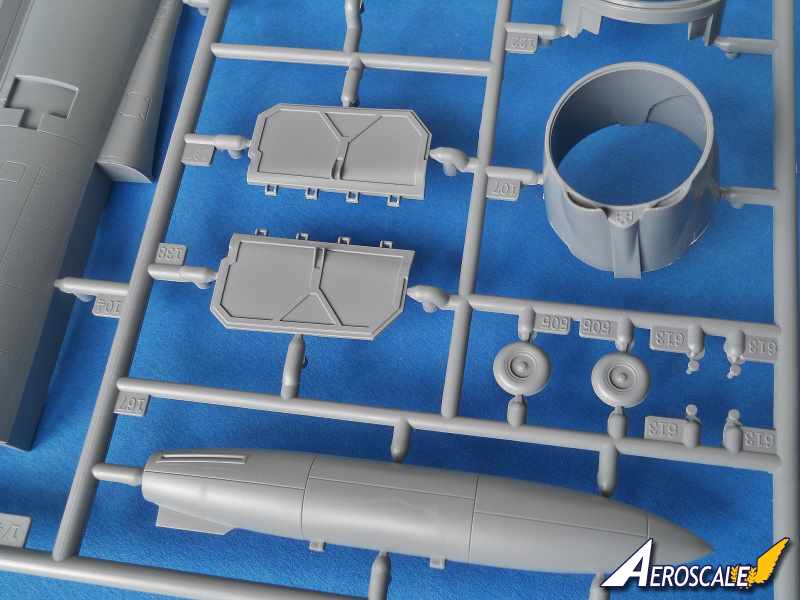
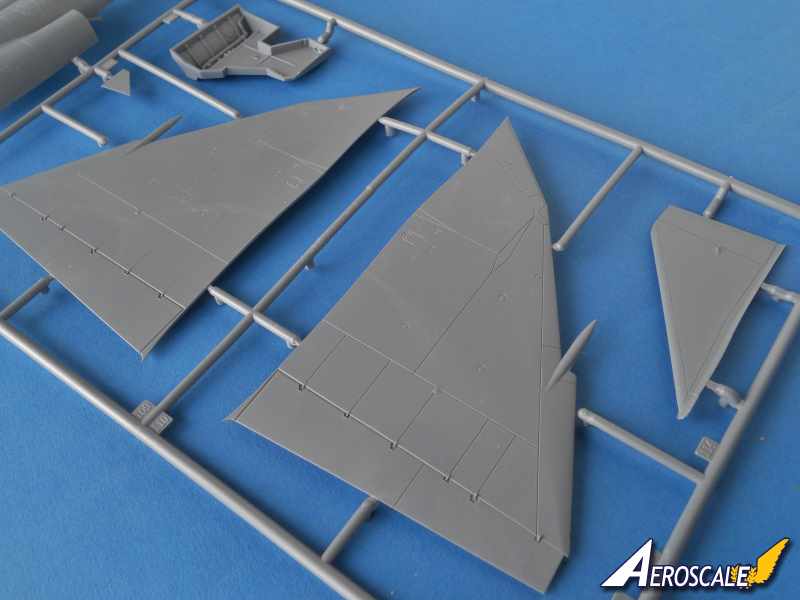
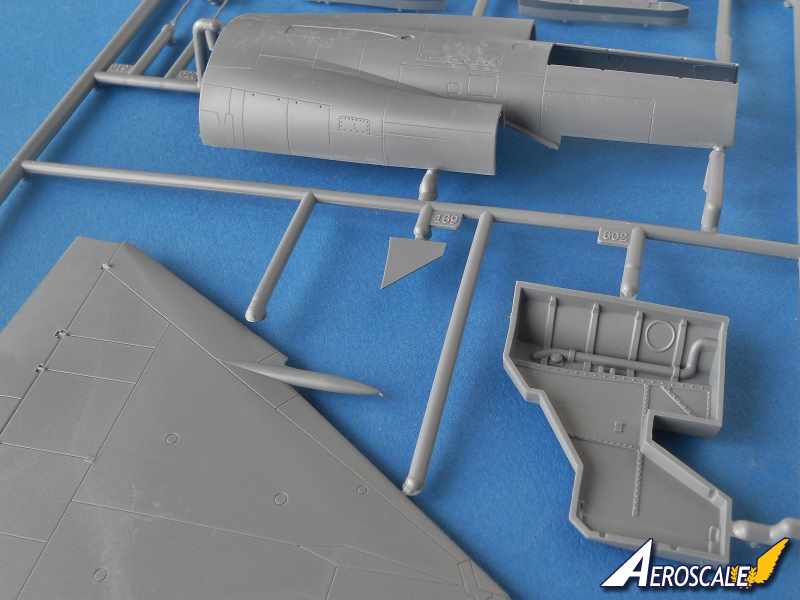
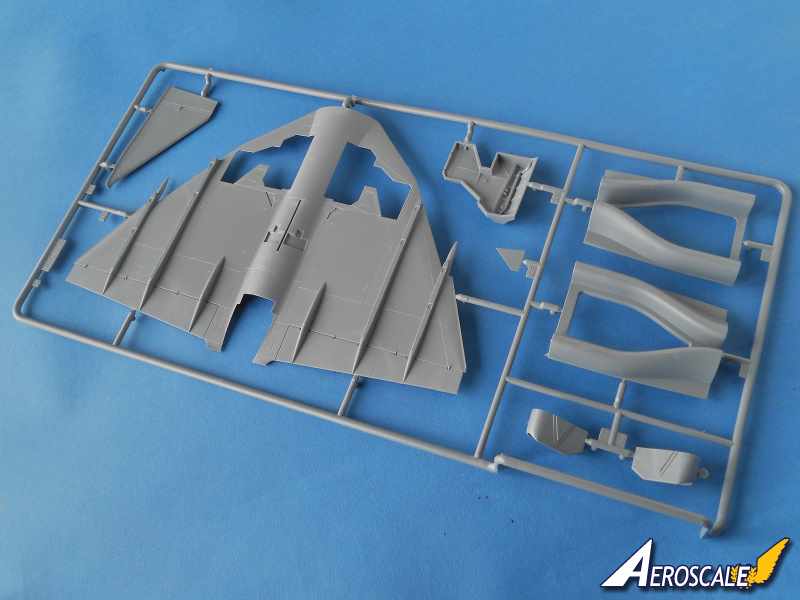
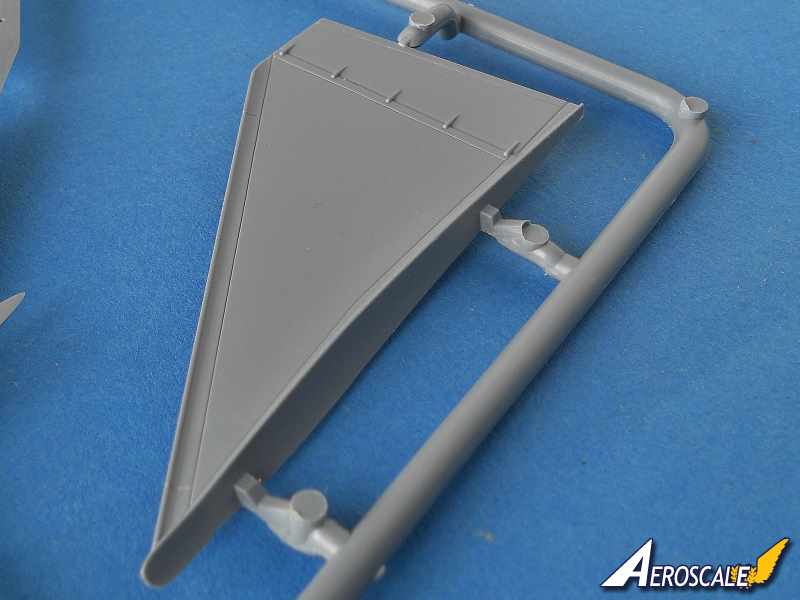
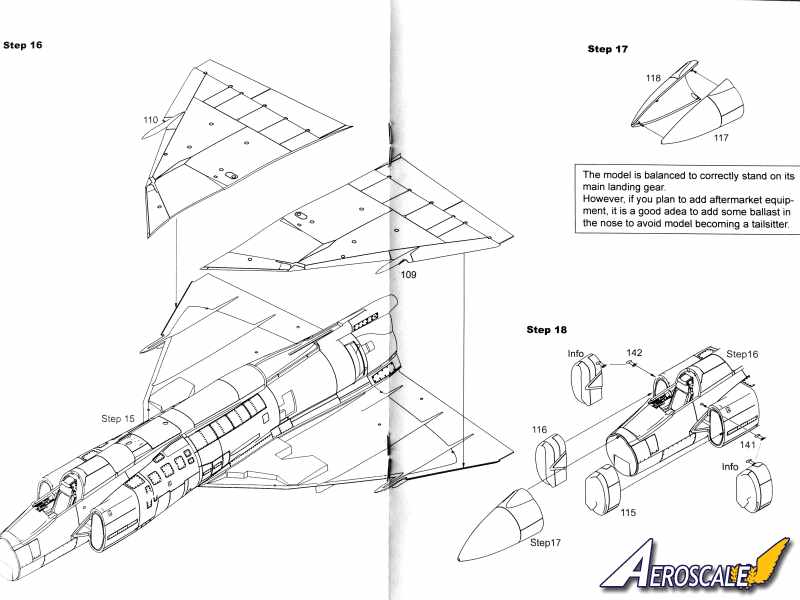
The fuselage comprises of four main parts, and a circular one piece plug which forms a small section of the exterior around the primary fan. To finish off at the back there is a three piece section including the jet pipe. The reheat matrix moulded into the jet pipe looks superb; it has the look of a aftermarket resin product. The reverse thrust unit is made up from separate three petals with some raised detail. The petals can be posed open, partially open or closed. Normally I am a bit dubious about constructing a fuselage using multiple sections, but in this case the breakdown of the parts has been well thought out. I dry fitted the fuselage parts and I was impressed with the results. The construction of the air intake trunks and the jet pipe add real strength to the fuselage. The inlets for the intakes are one piece and the lip is commendably thin, whilst the plastic at joining surface is quite a bit thicker. This not only covers the internal ducting it also provides a generous contact area for gluing. The joint along the upper spine of the rear fuselage is hidden by the extended section to the rear of the cockpit and the vertical stabilizer. Other joins fall mostly on panel lines of the Viggen. Also moulded into the fuselage pieces are locating holes and pins which will prove very helpful for lining parts up. Something you dont see often on limited run kits. Another hint of possible future releases is the inclusion of two separate vertical tail surfaces. The slightly taller tail is for this kit and the slightly shorter tail is for the earlier Viggens. There are quite a few separate vents and intakes to add to the fuselage. An interesting note on the instructions is that the model straight out of the box will not need any additional ballast in the nose. But I will imagine a few folk placing some weight into the two piece nose just to be on the safe side.
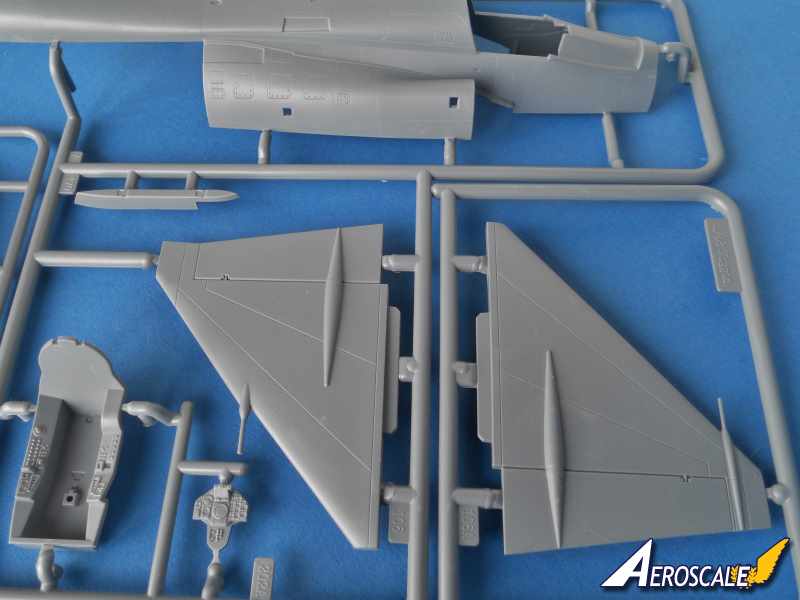
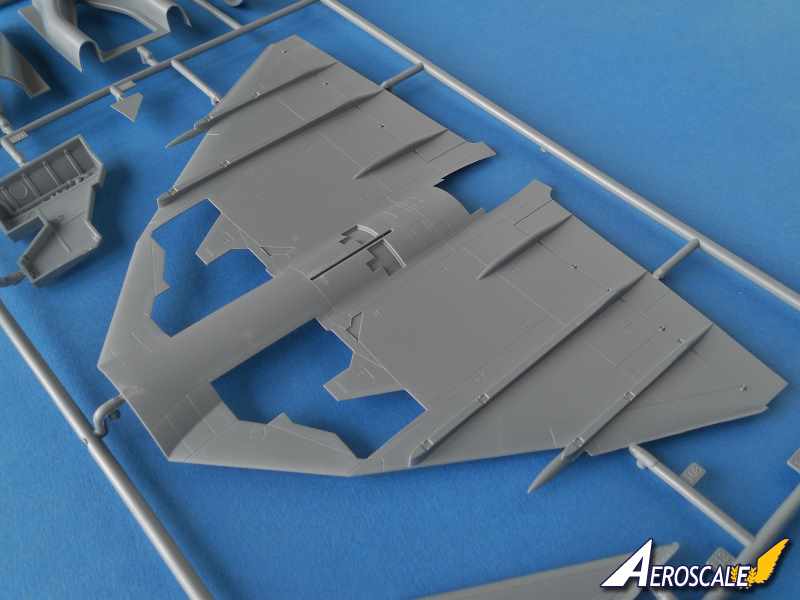
The wings
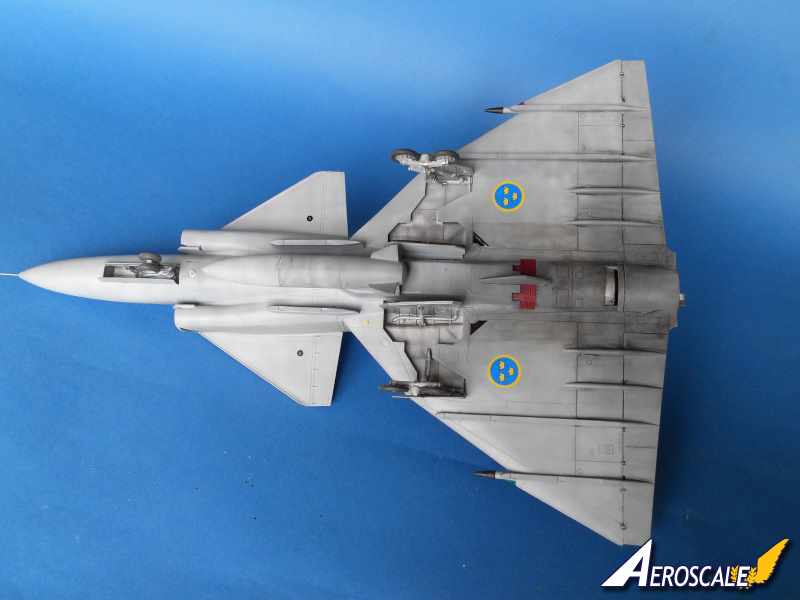
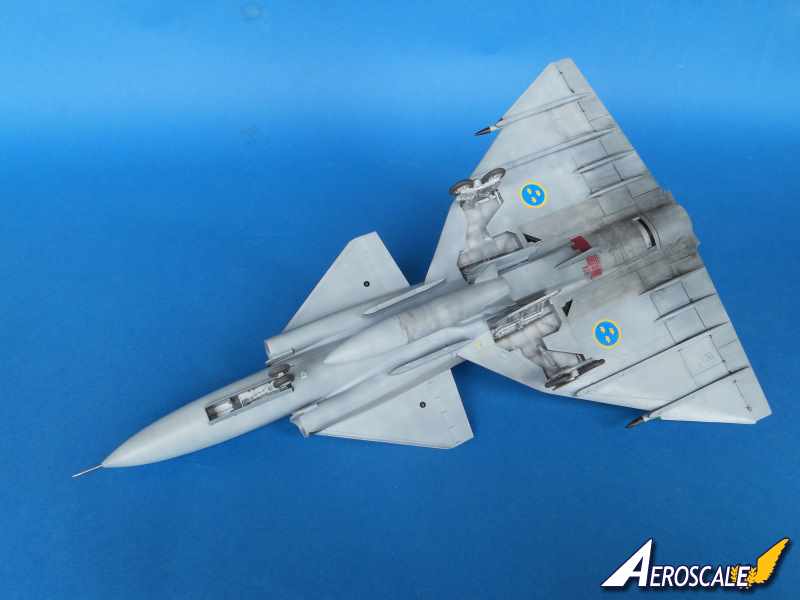
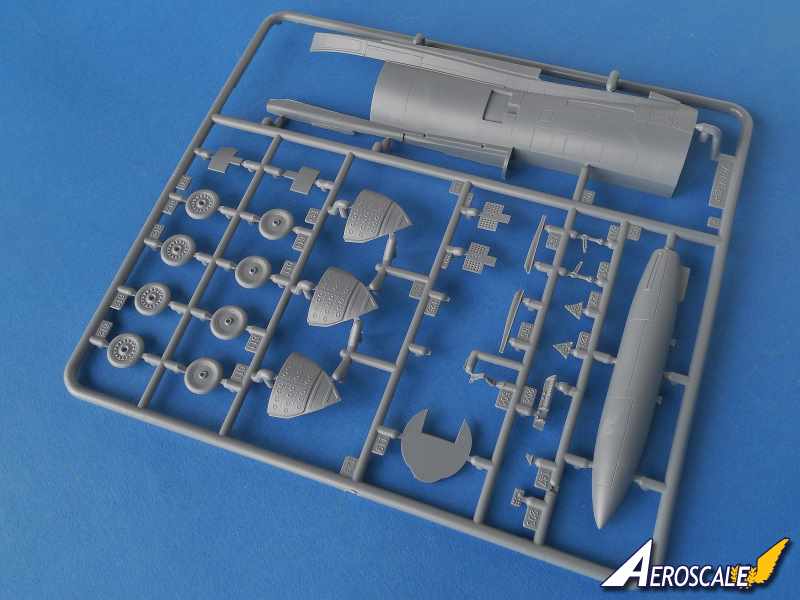
The three part double delta wing features a one piece full span under surface. The separate main undercarriage bays simply slot neatly into place. Detail in the undercarriage bay is nicely done, although there is always more scope to super detail the area. The undercarriage bay also provides support for the wing and the fuselage join. All the hard points are already moulded to the lower wing. All thats left to attach are a couple of fairing for the elevon actuation gear and a couple of speed brakes under the belly. Holes need to be drilled to fit the housing before the wing is assembled. The airbrakes are separate and give the appearance of being perforated. The subtle curves of the canard wings have been beautifully represented. The fit of the parts for the wing looks very good. Each canard has been beautifully moulded in one piece although you may want to thin the trailing edges down a tad. The canards have a couple of small pins that locate into holes around the engine air intakes. They may look small, but the pins secure the canard into the fuselage very well indeed. The pins form part of the attachment point on the sprue so be careful you do not cut them off.
The undercarriage
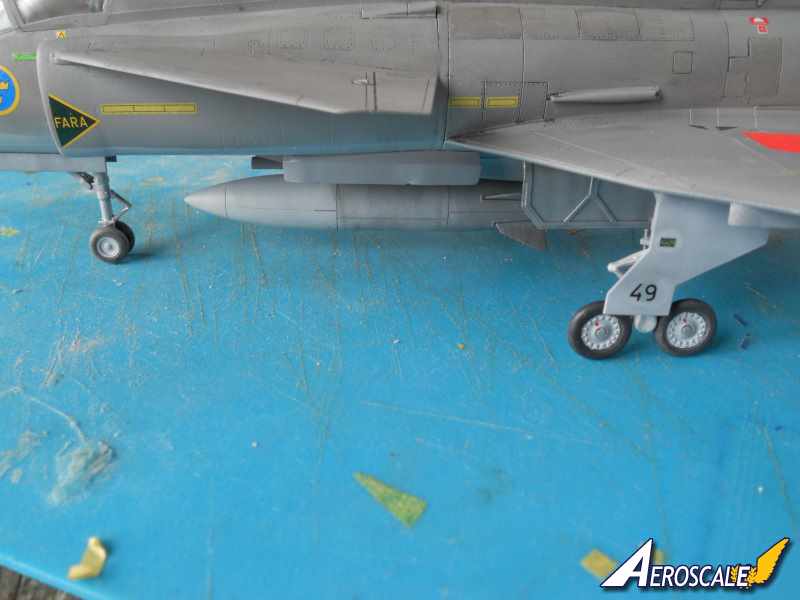
The nose gear is created from three parts; the nicely detailed wheels are each one piece. The two nose gear doors have single actuator arms to fit. Each main gear is made up from around twelve parts and they look as rugged as the real things. The nicely detailed wheels each come in two parts. Despite the number of parts the main load bearing parts look sturdy enough. Its just the various actuating arms and jacks that add to the parts tally. The thinner than usual tyres are accurately depicted as not weighted as they were pumped up to high pressure. The main gear doors look huge and they have some good detail on them. The inner door was lowered only during rotation of the gear, but did drop over time when the hydraulics pressure reduced. The outer gear doors are attached directly to the legs and the inner doors have the hinges moulded on that act as attachment points. I like the way the hinges line up with the framework within the gear bay. The hinges will need to be cut off if you are depicting the doors closed.
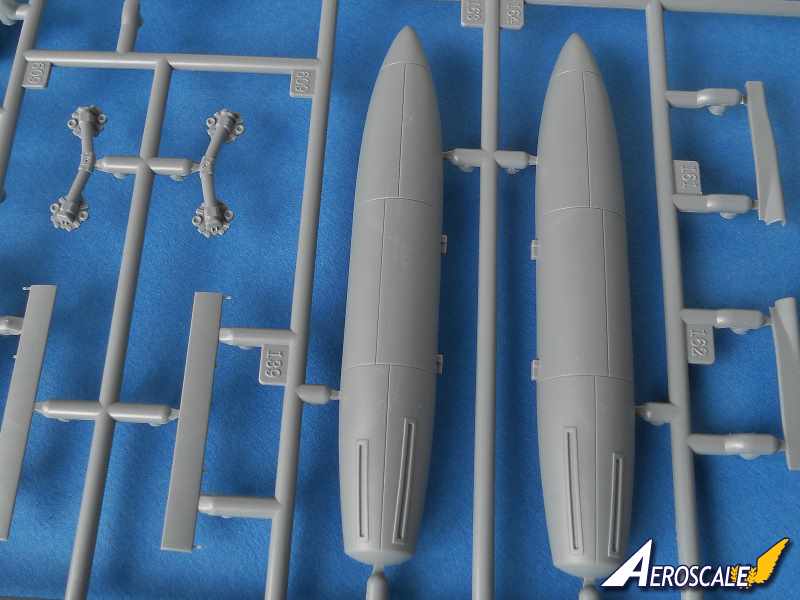
The ordinance
There are a couple of fuel tanks included, but only one is used with this particular release. The belly tank is hung on conformal pod which forms the housing for the KCA Oerlikon gun. There is a notable lack of any other ordinance, even though the Viggen could carry AIM-120s, AIM-9 Sidewinders and Skyflash as well as a host of indigenous weaponry. There are a couple of pylons that fit alongside the belly tank included. These are for Sidewinders, but you will have to find an alternative source for your AAMs. Apparently in reality the Viggen carried little hardware in order to extend the fatigue life of the airframe. To be fair there are few images of the Viggen loaded with ordinance, but the belly tank seems to be a permanent fixture.
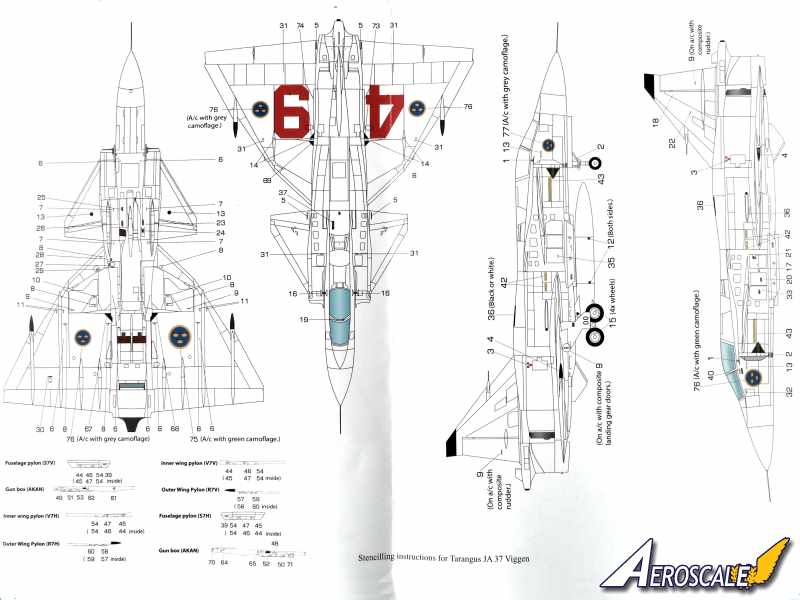
The markings
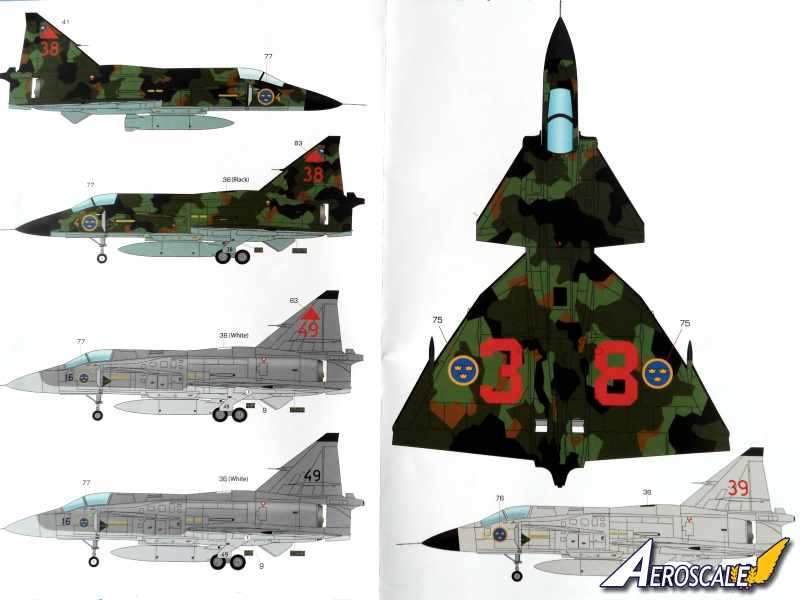
Decals are supplied for three aircraft:
37351 F-17 Wing - All over bare metal, with no 39 in red on the tail.
37378 F-4 Wing Upper surfaces are black, dark green, light green and tan with light grey under surfaces. A large red number 38 is painted on the upper wings with a smaller red no 38 on the tail. This aircraft is preserved at Vidsel Air Force base. This aircraft is listed in the instructions as 37338 so dont be confused.
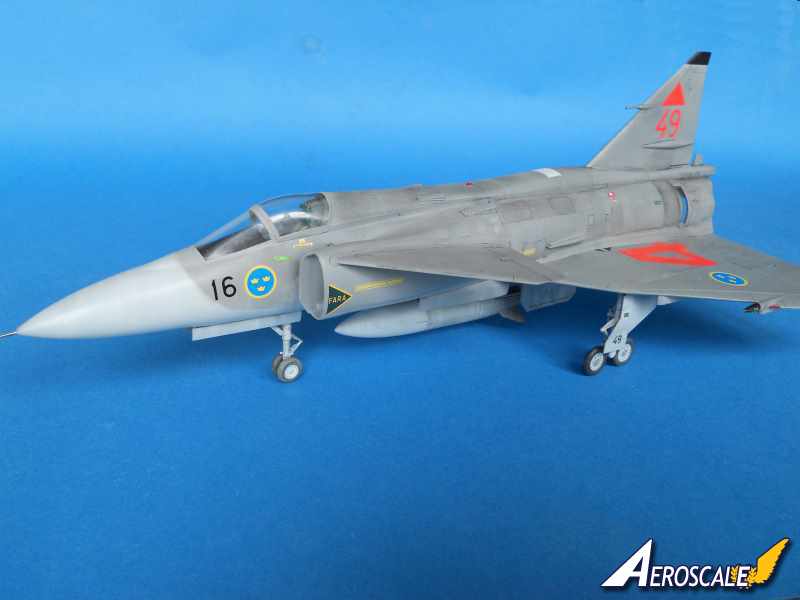
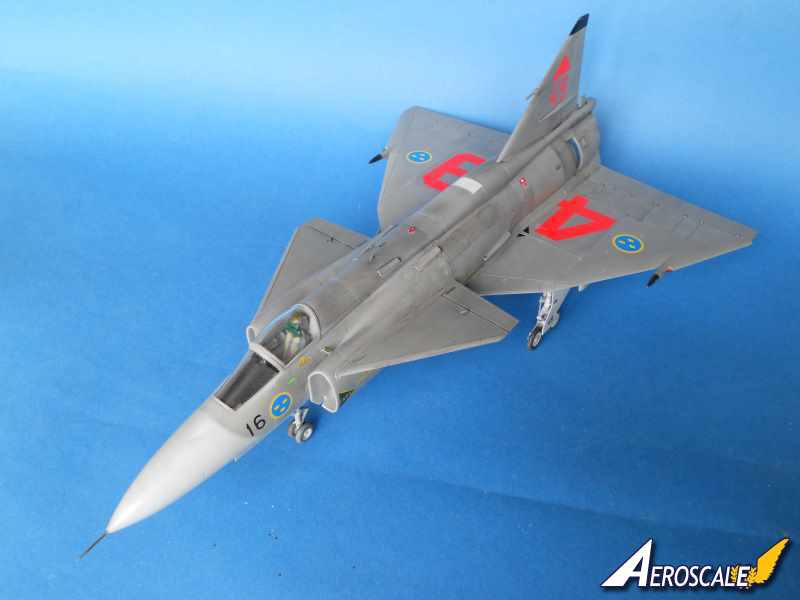
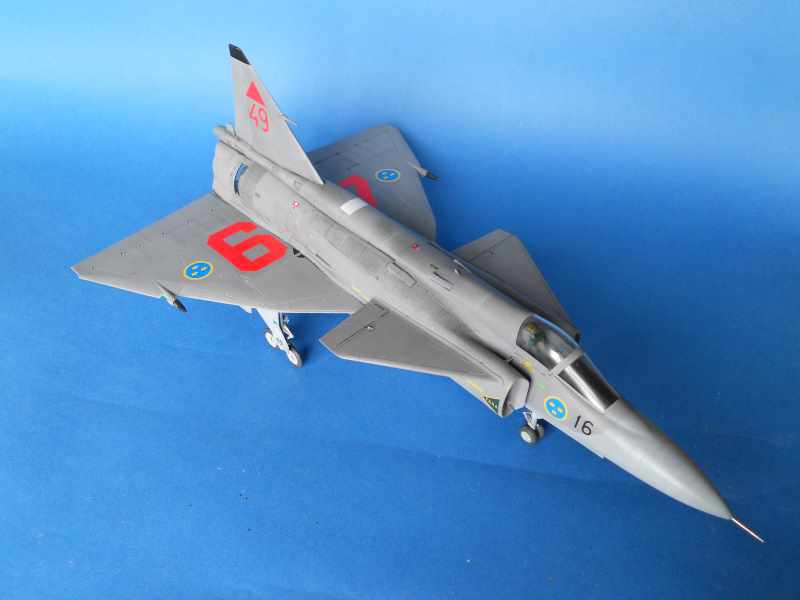
37449 F-16 Wing - Medium grey with light grey undersides and nose, with no 49 in either a red or black. Red 49 has large numbers painted on top of the wing. This aircraft is preserved at the Air Force Museum in Linköping.
The 37378 is the most spectacular scheme, but will require some patience creating your own masks for the four colour camouflage. Or you could hopefully wait for one of the aftermarket companies to release a set. Whichever route you take to realise this scheme, it sure will draw some admiring looks when you take it to your local model club.
All the colours are matched to Gunze Sangyo acrylic paint range and for the metal colours well that is entirely your choice of favourite metallic paints.
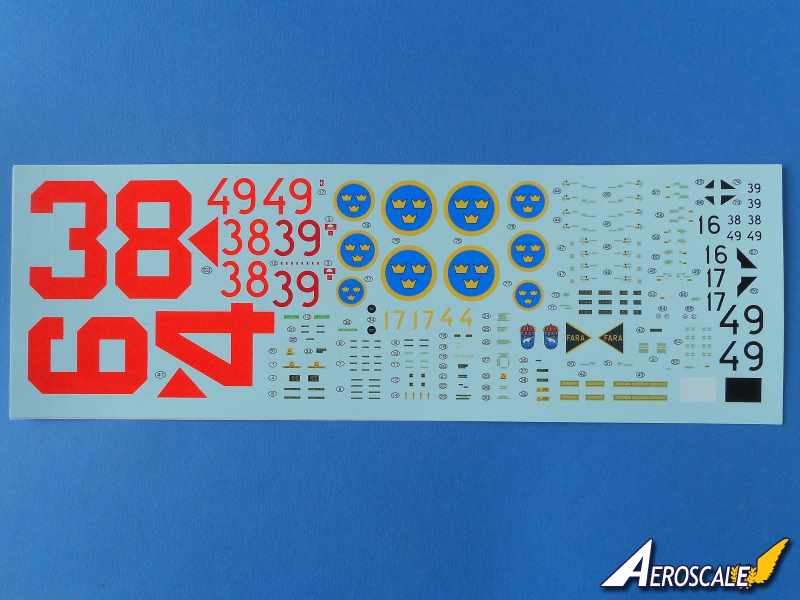
The decals
There are quite an extensive number of stencils with this release. There are also decals for the panel on top of the fuselage and slim lights are included too. The decals themselves look good with a minimum amount of carrier film, good colour density and register. Each one is numbered, which makes their location much easier. Interestingly the insignia on some Viggens look like decals themselves and do seem somewhat glossier than the surrounding matt paintwork.
The instructions
The A5 20 page booklet takes you through 35 steps of instruction. Before you start though its suggested that you give all the parts a wash with soap and water to clean off any surplus release agent. There is also a small list of references to help you build and finish this kit. I do like the multi view drawings of areas such as the cockpit and undercarriage that illustrate where parts go. Its not always clear where parts go with some instructions, but these are very good. Just watch out for the odd lapse though, as noted above the cockpit tub part number used with this release does not tally with the drawing.
Build
I found the build pretty straight forward, in fact I would go so far as to say its one of the easiest limited run kits I have assembled. One thing that was immediately apparent is how soft the plastic is. So you need to take great care separating the parts from the sprues. I would suggest using snips rather than using a blade. Fit of parts is generally good with some filler needed to blend the air intakes and the nose. The wing/fuselage join is particularly good.
The only real diversion from the instructions was the fitting of the reverse thrust petals. I found it was much easier to glue them into the recesses in the aft end of the jet pipe [part no 107] rather than attaching them to the rim of the jet pipe [part no 122]. I found that the seat I was a little too wide for the cockpit tub. The seat sits far too high so that you cannot show the canopy closed without some surgery. To remedy the problem sand some of the plastic from the sides of the seat and you will find the seat goes much further into the tub. The airbrake on the side of the fuselage is a tad to small for the recess it fits into. So I partially filled the gap to improve the appearance.
I have read that some modelers have found the undercarriage to be a bit complex. Well it is, but take your time and follow the instructions and you should have no problem. The only things I added to the kit were some homemade seat belts and I replaced the nose probe with a sewing pin.
There are some fascinating images of Viggens in mint condition and heavily weathered. So you have a huge amount of leeway regarding weathering. I played it a bit safe with the finish, but there are some fantastic grubby looking examples out there. I used Halfords acrylic primer, Humbrol aluminium and Tamiya paints throughout this build. The primer provides a very good base for the upper colour. Weathering was done with heavily thinned Tamiya paint.
The decals responded very well to Microsol, but make sure you apply plenty of Klear or your favourite glossy finish to your painted Viggen before applying the decals.
One thing I do regret not doing was cutting away and repositioning the control surfaces on the canard. There are plenty of images showing the control surfaces pointing down when the aircraft is sitting without power.
All in all this is an excellent release from Tarangus and I had a very good build experience. Are there any disappointments? Just one, there are no weapons included in the kit. The kit is highly recommended and when completed makes an interesting addition to your model aircraft flight line.
Conclusion
Well what more can I say other than thank you Tarangus models for persisting with this project. This was a real labour of love and I for one am totally grateful for this superb release. Its fantastic to see this Cold War warrior being realised with such good detail. I have not compared the kit to any plans, but I have gazed at many images and I cannot see any major flaws in the look of the kit. Yes the price is higher than your average 1/48 scale modern jet fighter. But this needs to be put into context. Tarangus cant produce thousands of kits the way Airfix, Italeri, Tamiya, etc, can. So unit prices are bound to be higher. Also Tarangus decided to use more expensive metal moulds to guarantee the quality of the mouldings over many years. The choice of markings is to be applauded as they as they are all very different. Those huge numbers on the upper wings are very eye catching. Hopefully we may see some other versions of this classic combat aircraft. I highly recommend this kit and it has leapt to the top of my build pile. So look out for the build log here on Aeroscale very soon.
Thanks to Tarangus Models for providing this review sample. Be sure to mention you saw it reviewed on Aeroscale
when ordering.


Comments