_GOTOBOTTOM
Early Aviation
Discuss World War I and the early years of aviation thru 1934.
REVIEW Gavia 1:48 Albatros D.I
JackFlash
_VISITCOMMUNITY
Colorado, United States
Joined: January 25, 2004
KitMaker: 11,669 posts
AeroScale: 11,011 posts
Posted: Tuesday, October 11, 2011 - 07:17 PM UTC


The top wing in place.
JackFlash
_VISITCOMMUNITY
Colorado, United States
Joined: January 25, 2004
KitMaker: 11,669 posts
AeroScale: 11,011 posts
Posted: Sunday, October 16, 2011 - 05:27 PM UTC
Rigging between the wings is done. Next the header / expansion tank, tail, landing gear, propeller and spinner. And in between these will be the decals and some touch up.


JackFlash
_VISITCOMMUNITY
Colorado, United States
Joined: January 25, 2004
KitMaker: 11,669 posts
AeroScale: 11,011 posts
Posted: Tuesday, October 18, 2011 - 12:42 PM UTC
The Albatros drawer in my spares box is yielding some additional parts not found in the Gavia kit.

GhostHawk
_VISITCOMMUNITY
Cordoba, Argentina
Joined: January 27, 2011
KitMaker: 268 posts
AeroScale: 264 posts
Posted: Tuesday, October 18, 2011 - 02:57 PM UTC
Hello everybody...!

Excellent kit, and Excellent built...!

Here I let you a link to my Facebook album, from my D.I built a last year....

my build

I hope you like it...

Thanks...!
JackFlash
_VISITCOMMUNITY
Colorado, United States
Joined: January 25, 2004
KitMaker: 11,669 posts
AeroScale: 11,011 posts
Posted: Tuesday, October 18, 2011 - 09:32 PM UTC
Nice work Diego! Thanks for sharing. Thumbs up!

Here we are almost ready to finish. Expansion tank and decals next


JackFlash
_VISITCOMMUNITY
Colorado, United States
Joined: January 25, 2004
KitMaker: 11,669 posts
AeroScale: 11,011 posts
Posted: Wednesday, October 19, 2011 - 09:53 PM UTC
While the decals set, I will show you the basic modification for the top of the early production water header / expansion tank in 1:48.

JackFlash
_VISITCOMMUNITY
Colorado, United States
Joined: January 25, 2004
KitMaker: 11,669 posts
AeroScale: 11,011 posts
Posted: Thursday, October 20, 2011 - 09:55 PM UTC
Finally we are close enough to call it finished. I highlight the ailerons, elevator and rudder and some dirt and dust on the tires I am bringing this to you as done.

I started replacing most 1:48 kit landing gear parts with brass rod or extruded brass many years ago. With the Eduard Albatros kits you can go to my past Feature here at Aeroscale and see the differences it makes. Wish I had done it to all of them. Both the Gavia & Eduard 1:48 Alb. D.I & D.II kits I have worked on here use this technique.

The whole undercarriage is replaced with brass. Vee-strut legs, stabilizer behind the axle and the axle. I include my technique in most of the kit reviews on my site and have mentioned it a few times here in my reviews. I use Cyano & when sitting at the right angle I add some Zip kicker accelerant. When the whole affari is solid I tightly wrap the axle and the undercarriage in upholstery thread and use a small drop of Cyano to permantently bond the threads. Tremendouly strong. I'll include some shots in my next post.

The wing crosses for the kit have the crosses backed by white fields. But by the time the Prince had acquired this early production machine the wing cross fields were painted down to just borders.


Here is the end of our tale. Thanks to you all for dropping by to watch.
JackFlash
_VISITCOMMUNITY
Colorado, United States
Joined: January 25, 2004
KitMaker: 11,669 posts
AeroScale: 11,011 posts
Posted: Saturday, October 22, 2011 - 04:36 PM UTC
One more item I forgot to mention was the airspeed incicator - Anemometer attached to the forward pilot's right interplane strut. This is a DML / Dragon item augmented with an Eduard guage face. The kit landing gear legs were replaced with Aeroclub "STRUTZ" yellow tipped extruded brass. The last of my supply until my new sets arrive.
JackFlash
_VISITCOMMUNITY
Colorado, United States
Joined: January 25, 2004
KitMaker: 11,669 posts
AeroScale: 11,011 posts
Posted: Monday, October 24, 2011 - 06:07 PM UTC
Now, lets discuss the German "Death's Head".

"Use of the symbol as a military insignia began with the cavalry of the Prussian army under Frederick the Great. Frederick formed Husaren-Regiment Nr. 5 (von Rüsch), a Hussar regiment commanded by Colonel von Rüsch. These Hussars adopted a black uniform with a Totenkopf emblazoned on the front of their mirlitons and wore it on the field in the War of Austrian Succession and in the Seven Years' War.

In 1808, when the regiment was reformed into Leib-Husaren Regiments Nr.1 and Nr.2, the Totenkopf remained a part of the uniform. During the Napoleonic Wars, when Frederick William, Duke of Brunswick-Wolfenbüttel, was killed in battle, his troops changed the colour of their uniforms to black, with a Totenkopf on their shakos in mourning their dead leader (Other sources claim that the "Black Brunswickers" were so equipped while Friedrich Wilhelm of Brunswick lived, as a sign of revenge on the French.

The "death's head" continued to be used throughout the Prussian and Brunswick Armed forces until 1918, and some of the stormtroopers that led the last German offensives on the Western Front in 1918 used Death's Head badges . . ."

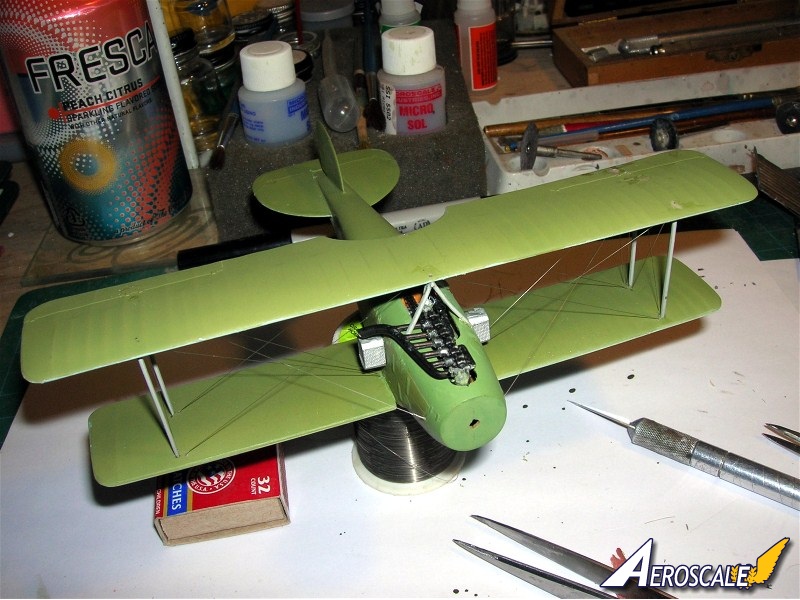
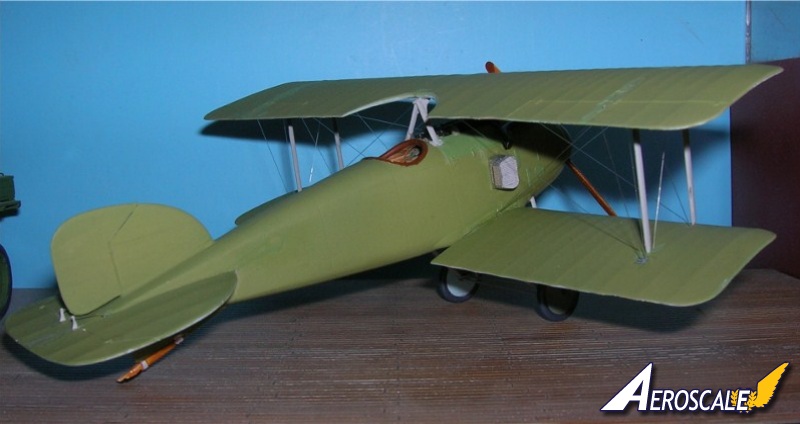
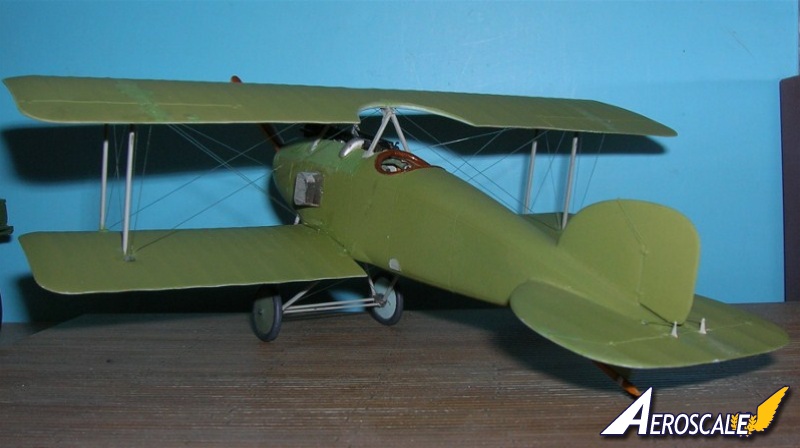
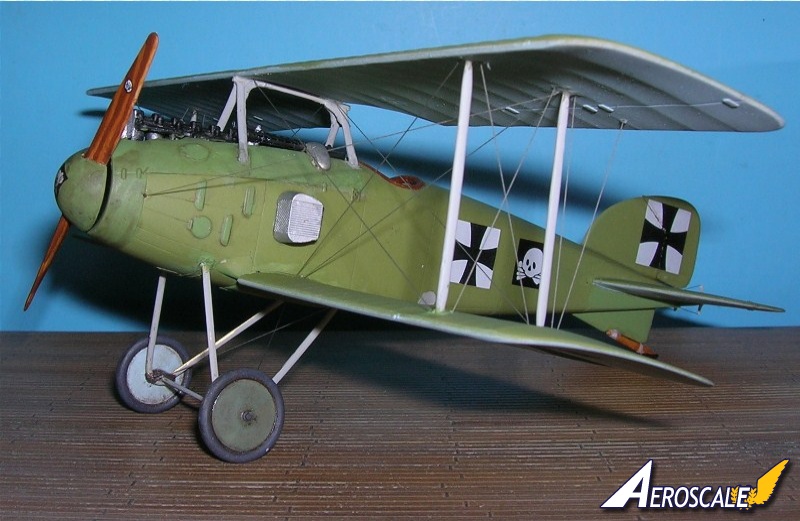
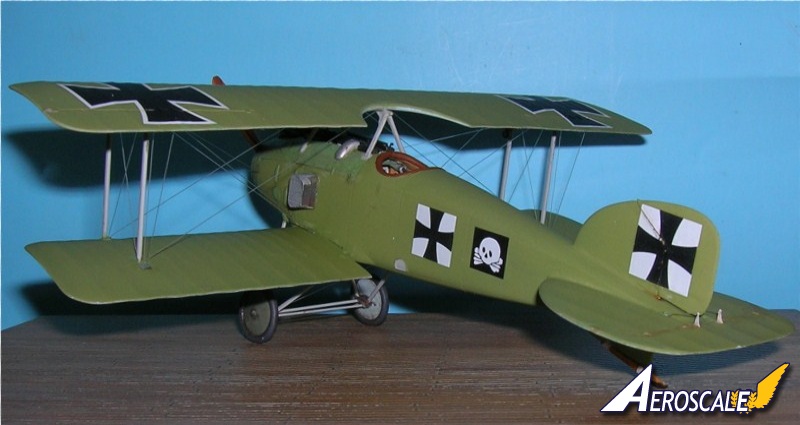
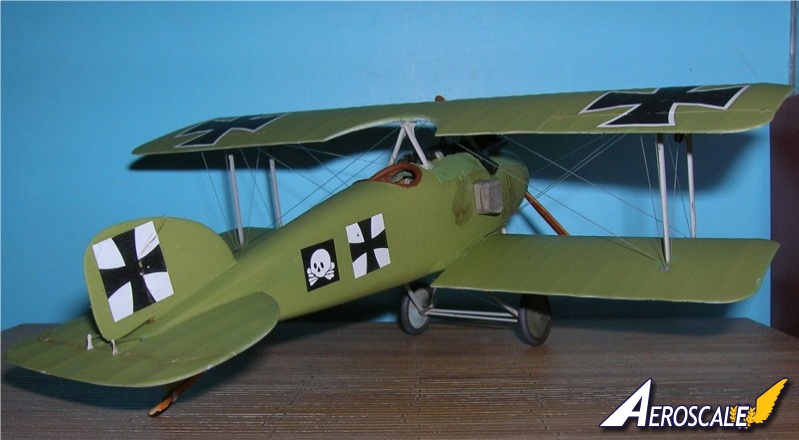
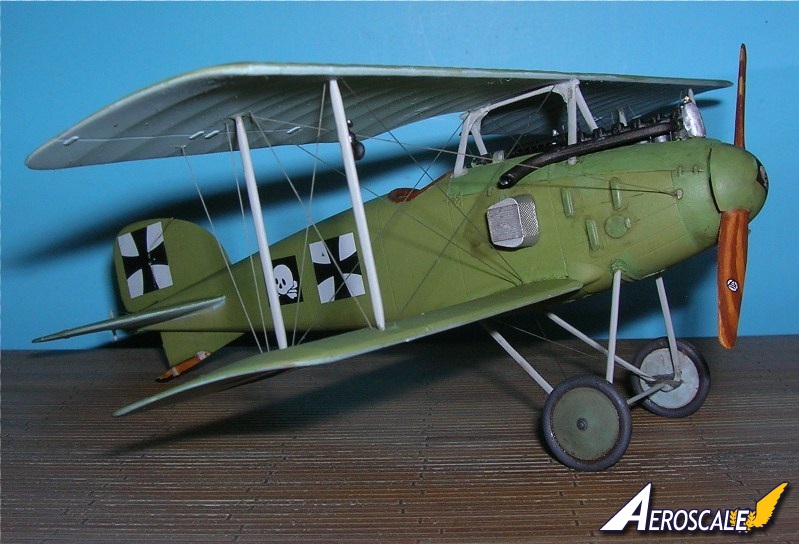
It is applicable to my builds here as Both the Gavia Alb. D.I kit and the Eduard Alb. D.II offer profiles with the "Deaths head". I chose to build these kits with these profiles.

". . .The Totenkopf is the German word for the death's head and an old symbol for death or the dead. It consists usually of the skull and the mandible of the human skeleton. Beyond that it can include two crossed long-bones (femurs). . ."

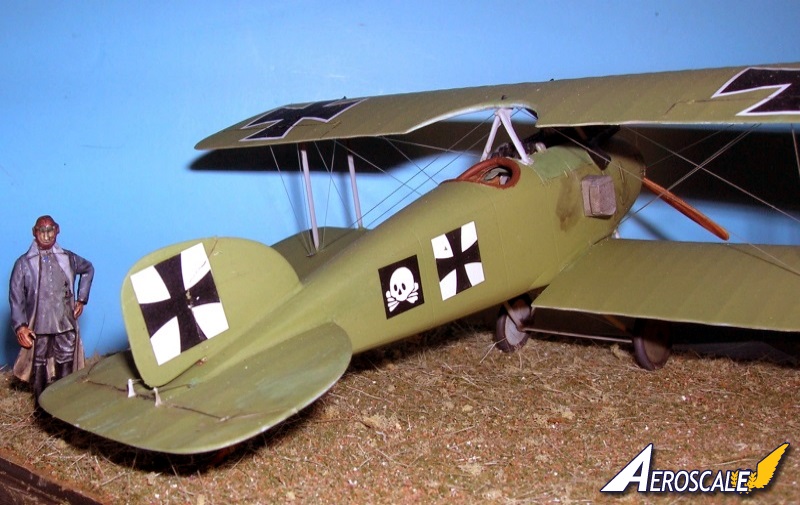
For the Prince the Totenkopf on the spinner and fuselage the skull & crossbones was on a black square field. It is shown as black in Imrie's "German Fighter Units 1914-1917". This black/white were the colours of Prussia, It is the cap badge of the Leib-Husaren Regiment . His first regiment. This cap badge originally appeared on a black cap.

lcarroll
_VISITCOMMUNITY
Alberta, Canada
Joined: July 26, 2010
KitMaker: 1,032 posts
AeroScale: 1,025 posts
Posted: Tuesday, October 25, 2011 - 06:20 AM UTC

Quoted Text

One more item I forgot to mention was the airspeed incicator - Anemometer attached to the forward pilot's right interplane strut. This is a DML / Dragon item augmented with an Eduard guage face. The kit landing gear legs were replaced with Aeroclub "STRUTZ" yellow tipped extruded brass. The last of my supply until my new sets arrive.


Stephen,
Very pretty build indeed. A plain scheme that stands out as a result.
Quick question: "extruded" brass; I looked up extruded in my dictionary and it defines it as "created, emerged, or ejected". Is it modified brass tube, solid rod, or something else? I mentioned on another thread that I see brass substitute as a possible remedy for "shakey" undercarriage on many of the WNW/Roden/etc. 1/32 Kits that I have. Although I pin most the undercarriage assemblies some (my Pup for example) are still very fragile.
Can you define this stuff and suggest sources?

Cheers,
Lance
JackFlash
_VISITCOMMUNITY
Colorado, United States
Joined: January 25, 2004
KitMaker: 11,669 posts
AeroScale: 11,011 posts
Posted: Tuesday, October 25, 2011 - 09:38 AM UTC
Greetings Lance,

I have used "STRUTZ" many times. It is a brass rod product with an ovoid crossection available in limited production from Aeroclub. It comes in various thickness' They come with about 5-6 sticks for each thickness. The tips colour coded. Each costs 7.90 GBP per packet. I will be doing a review on them in the near future.

See also my thread here.

and here.

The last thing I added to this and the other Albatros build was Grandtline bolt heads (series 98) to represent the struts ends and nuts evident on the top wing surfaces. In another thread they were called "doohickies."

see here.

JackFlash
_VISITCOMMUNITY
Colorado, United States
Joined: January 25, 2004
KitMaker: 11,669 posts
AeroScale: 11,011 posts
Posted: Friday, October 18, 2013 - 11:48 AM UTC
Below is an image of the Alb. D.I build at the IPMS National Convention August, 2013.
 _GOTOTOP