

1⁄48Supermarine Spitfire Mk.I Build
3
Comments
DECISIONS, DECISIONS
Since this is a build of a Tamiya kit sent to Kitmaker network for review purposes Ive decided to keep to their instructions and use their recommended paint callouts as closely as I can, and to use Tamiya products where possible. I will use the drawings Tamiya provides to create paper masks in order to paint the camouflage pattern. One exception will be in using Mr. Color Leveling Thinner in most cases, instead of Tamiyas X-20a thinner.
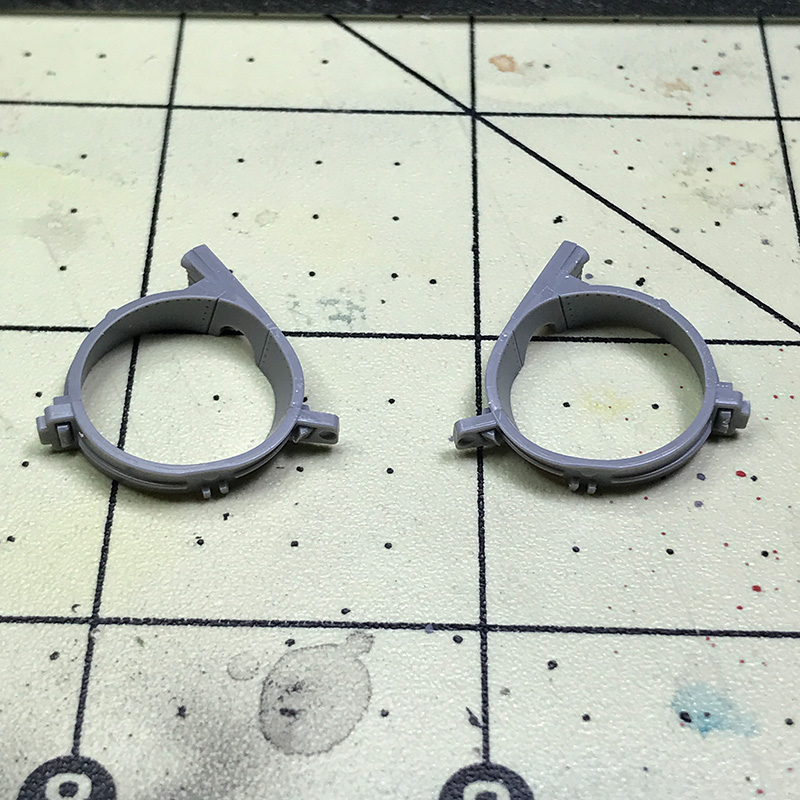
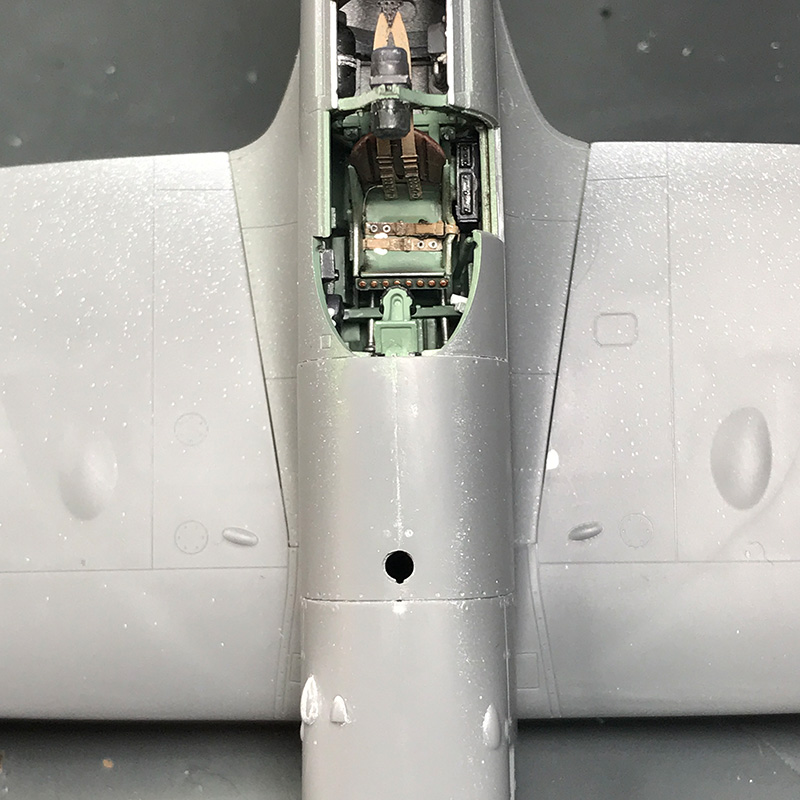
The first thing to decide is if the cockpit will be open or closed, as the very first step of the build is to glue the mid-fuselage insets. Once these insets are glued in place you are locked in to your decision since they differ where the open canopy will slide back. Since the cockpit is so lovely, Im building the open cockpit version.
The insets fits so snugly it is hard to see where the joint is. Can you find the seam? There is a generous lip on the insert to glue to. Dab a small amount of extra-thin cement from the inside so that the seam isnt flooded and the panel line obscured.
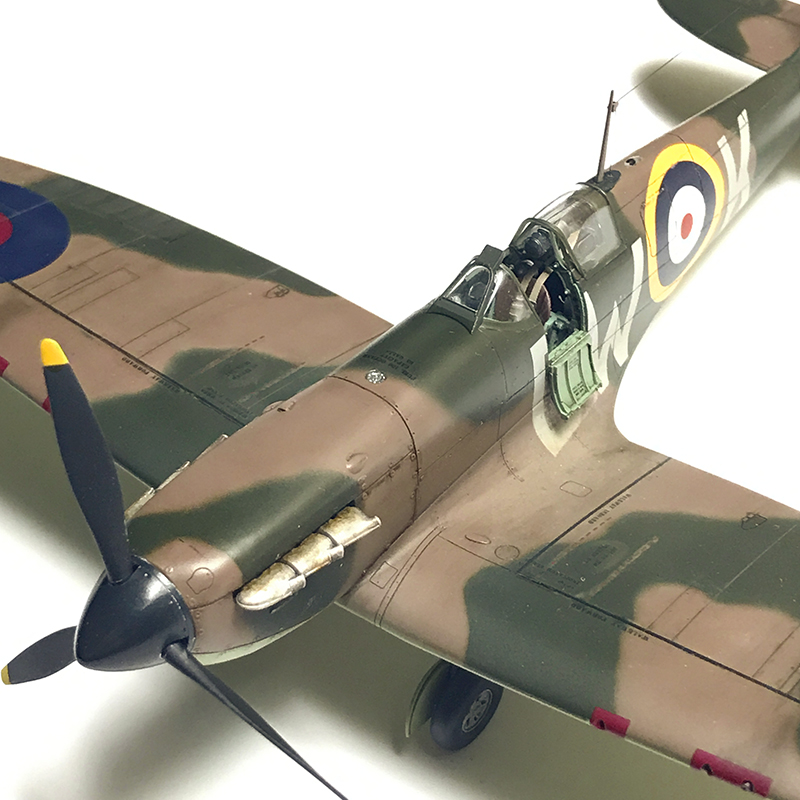
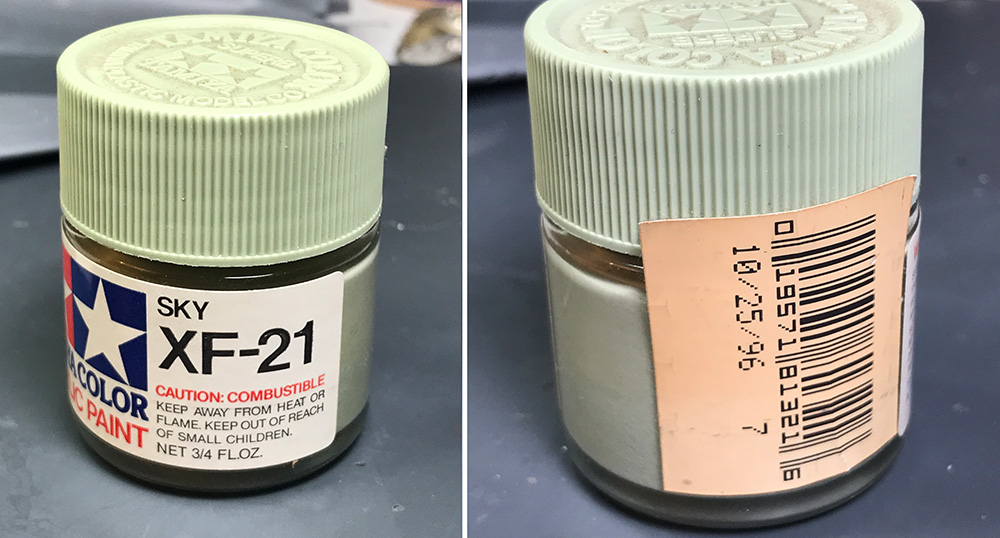
Your second decision will be which of the three versions to build. The first three pages of the manual outline building the cockpit, and small details vary depending on if you choose to build version A, B, or C. I have always loved the early Spits with one black and one white underwing (Version C). That would normally have been my first choice. But, I am going to build P9495 from the Battle of Britain (Version A) with the belly painted XF-21 Sky because I have a lot of it. And its old. Really old.
I picked up a 23ml bottle of XF-21 at one of those old hobby shops that you dont find much anymore. It had kits stacked up on the floor in the aisles, and you can tell from the clerks clothing that dusting was not high on their priority list either. It wasnt until I got home 130 miles later that I noticed the inventory date on the bottle.
THE COCKPIT
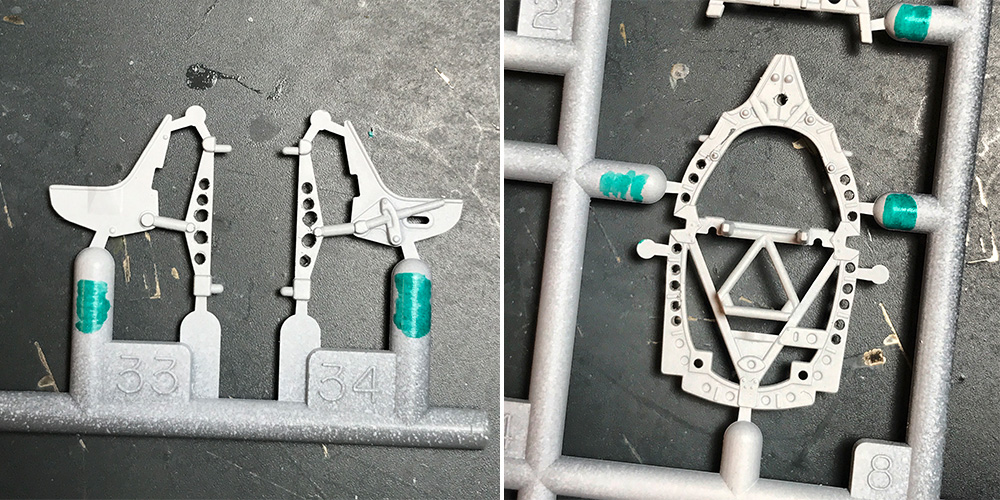
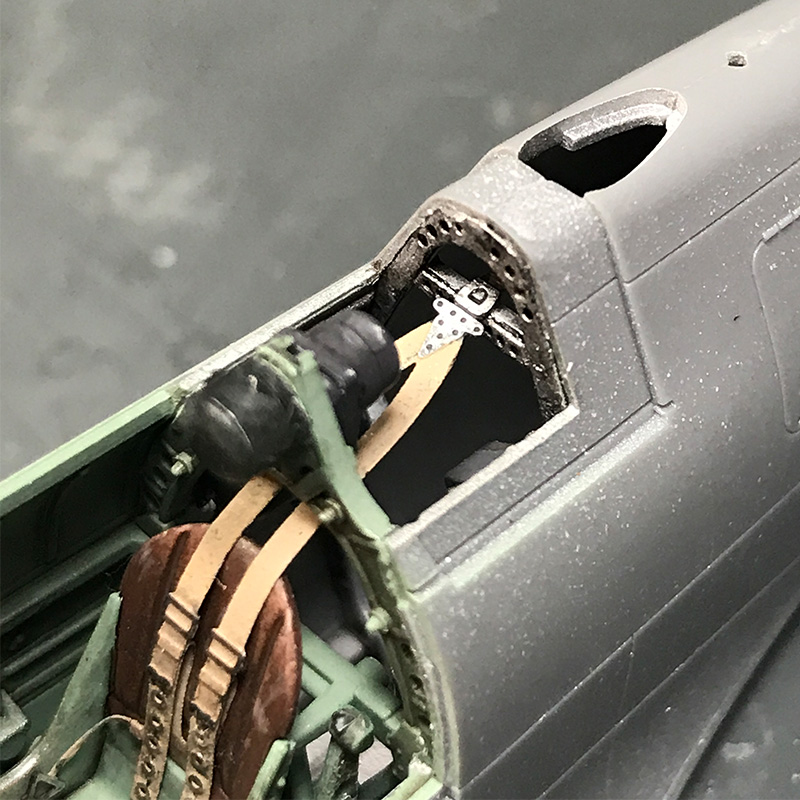
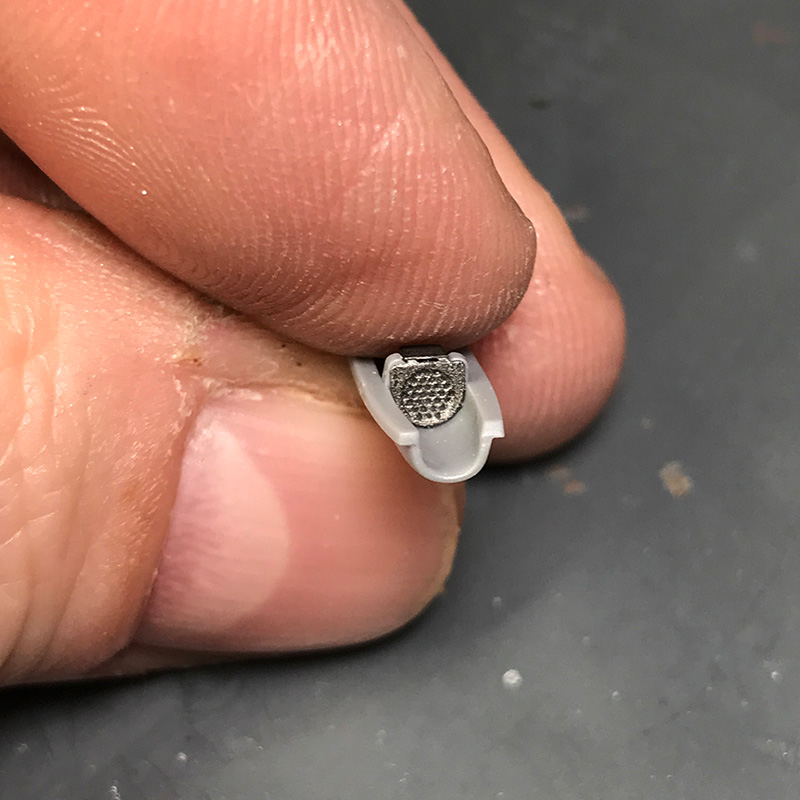
I took the time to drill out the holes in the seats side rails, and in the bulkhead that holds the seat. I think it is a small detail that makes a big impact.
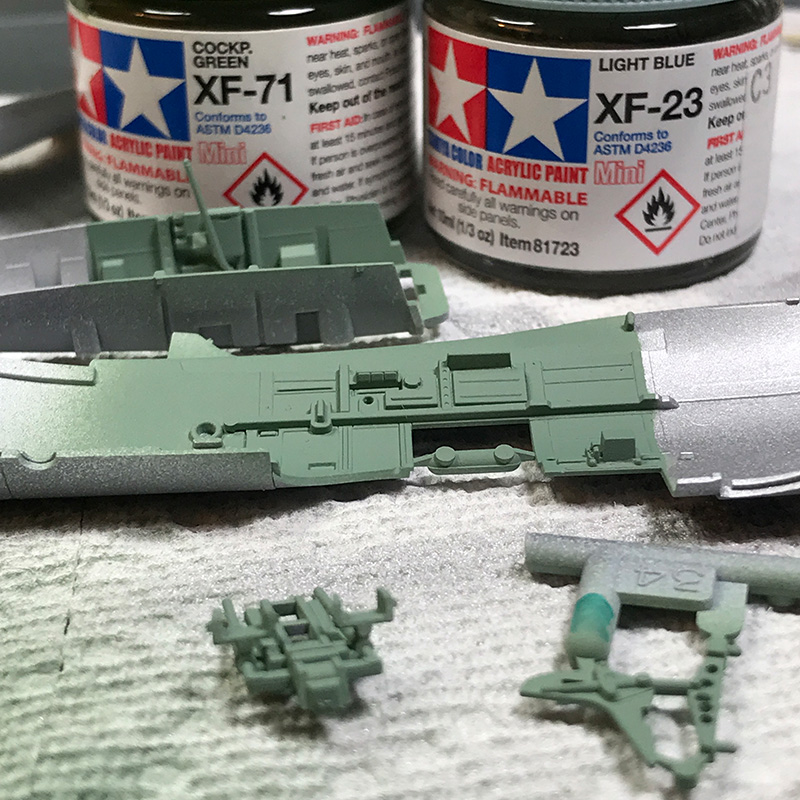
Now its time to paint the cockpit parts. I shot the photo-etch parts with Krylon auto primer, and primed the cockpit parts with white Badger Stynlrez. Since the cockpit is a dank enough place as it is, I dont like to mess around with gray or black primer in there. I want the colors as bright as so that you can see something in there when its closed up. Ive never really liked Tamiyas XF-71 Cockpit Green as I think it is too yellow when compared to most photo references Ive seen. So as my first act of defiance I mixed up my cockpit green own using XF-71 and XF-23 Light Blue. Im sorry that I dont have exact ratios to share with you, since I made a real mess of the mixing and resorted to eyeballing it. This better matches many of the photos I have, and would make me less nauseous if I were flying it.
The first of the thick Tamiya decals you need to apply are the dashboard gauges. I used Micro Set to help get them into place, and after three applications of Micro Sol they settled down pretty nicely between the raised gauge faces. This gives me hope for future decals in this kit.
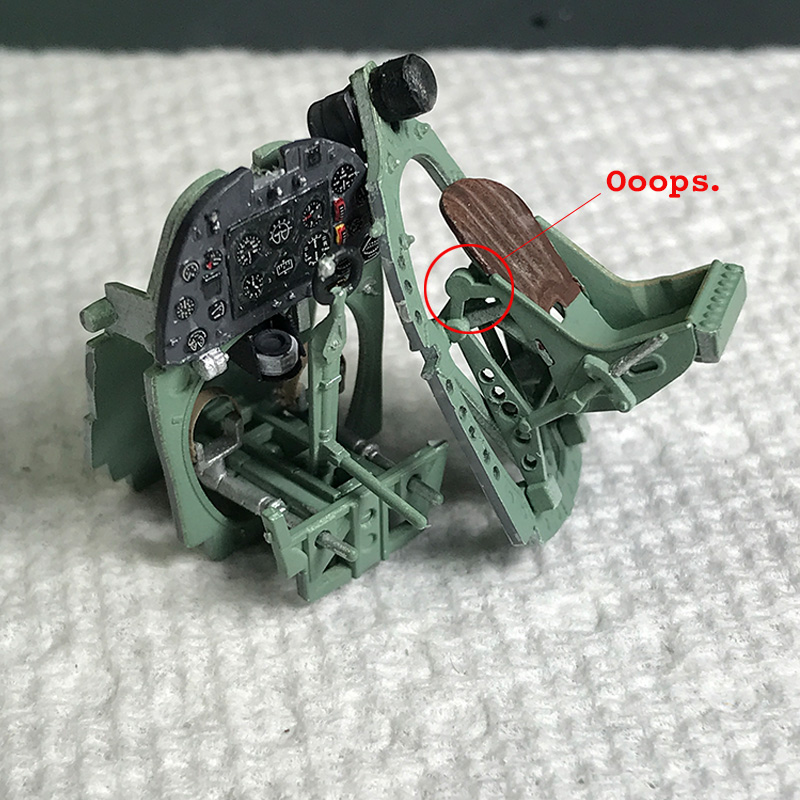
There are so many paint-callouts and parts-cleanups indicated in the instructions that its easy to miss something. I had the whole seat sub-assembly glued, painted and weathered before I noticed that I forgot to trim two supports off at the top of the rear of the seat. Fortunately it was easily done afterward.
The cockpit is a testament to the Tamiya engineers cleverness. Intricately molded parts pass through and around each other, yet still lock firmly in place. Not only are the joints precise, but they are strong as well. The fit tolerance of parts is tight, so you may have to scrape joints clean of paint for proper fitment. When finished, it is a marvel. It seems a shame to hide it within the fuselage. They even include a piece whos only purpose is as a jig to hold the two rear bulkheads the proper distance apart when glueing the seatbelt harness in place.
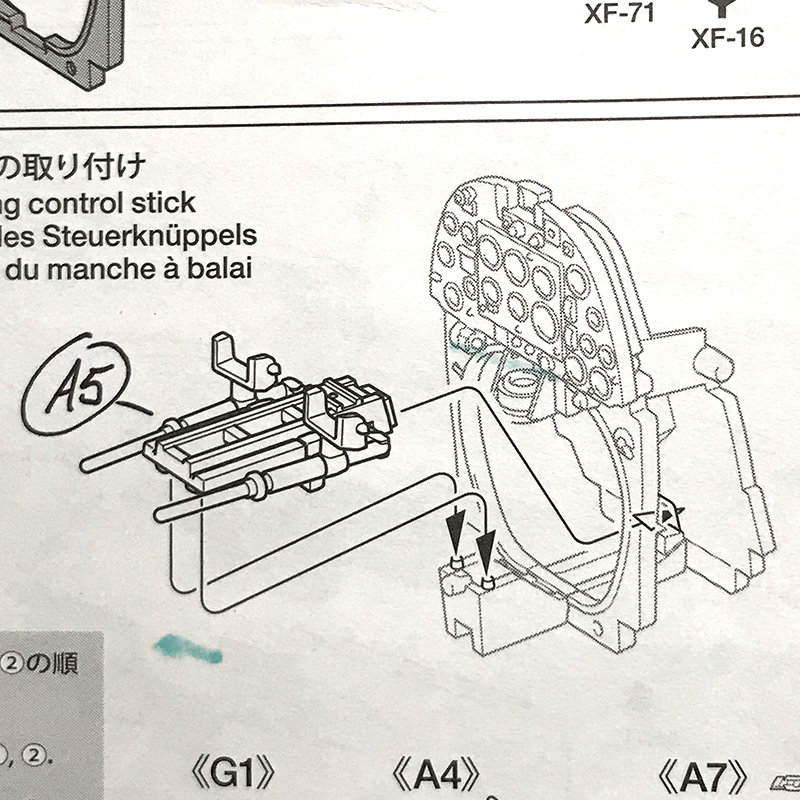
I only had one problem while building the cockpit. Part A5, which holds the rudder pedals, slides under the dashboard and tabs into the firewall at the front. I could not get that tab to slide into the hole made for it. I ended up trimming the tab off the front since it still glued up firmly at the front and back.
After all the painting and assembly I used both Tamiya Black and Brown Panel Liner to bring out some detail. I didnt spray any clearcoat first; it just isnt necessary in all cases. Cleanup with a cotton swab kissed with Testors enamel thinner didnt hurt the paint at all. Just be gentle.
CLOSING IT UP
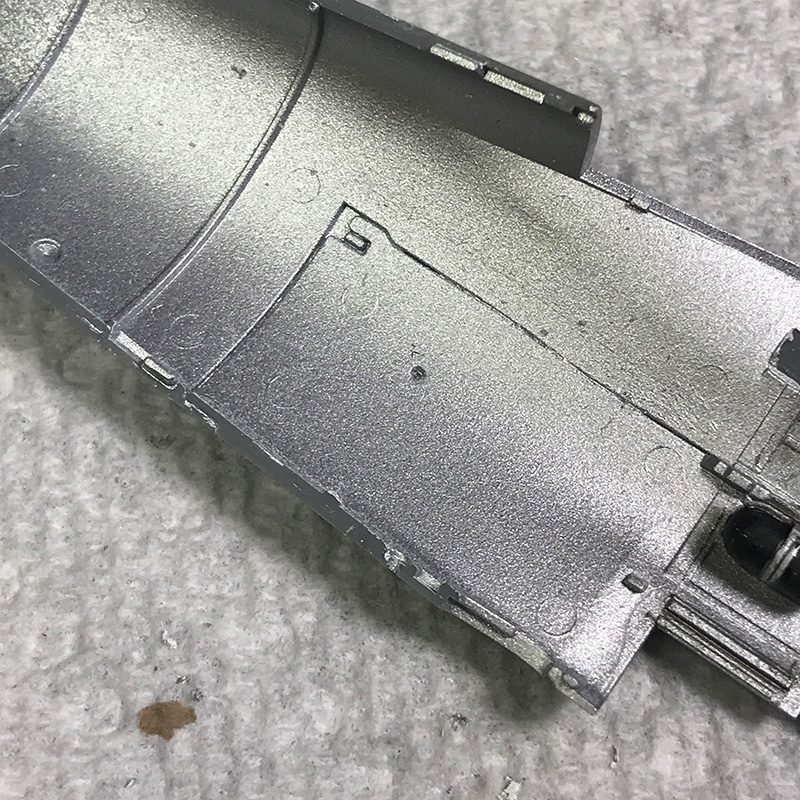
Before closing up the fuselage, dont forget to drill out the two holes on the right half of the nose. Nothing gets attached there, but they do exist on the real plane.
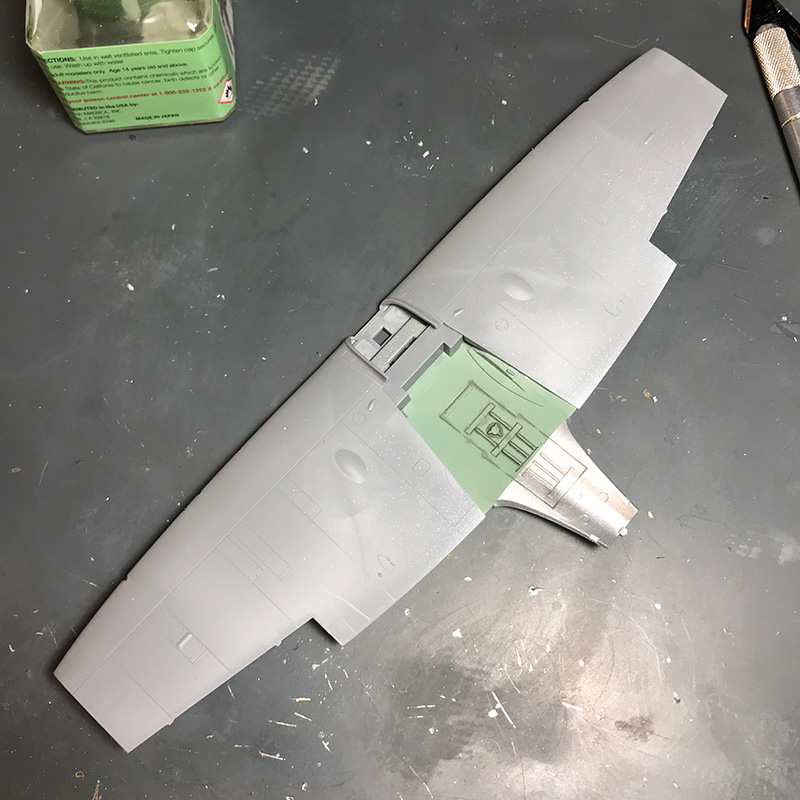
One part of a plane build that can drive me nuts is struggling to sandwich multiple fiddly parts in between the fuselage halves while without one of them getting out of alignment. This kit makes that step so easy. A few parts get glued right to the inside walls of the fuselage, but the bulk of the interior gets glued into a tub, so to speak. You are only left with one piece to glue between the halves. While this design is not exclusive to Tamiya, I appreciate it all the same.
The fuselage went together without drama, but be sure to tuck the rearmost cockpit bulwark behind the tabs in the fuselage. Otherwise it will tend to lean forward out of the fuselage a bit.
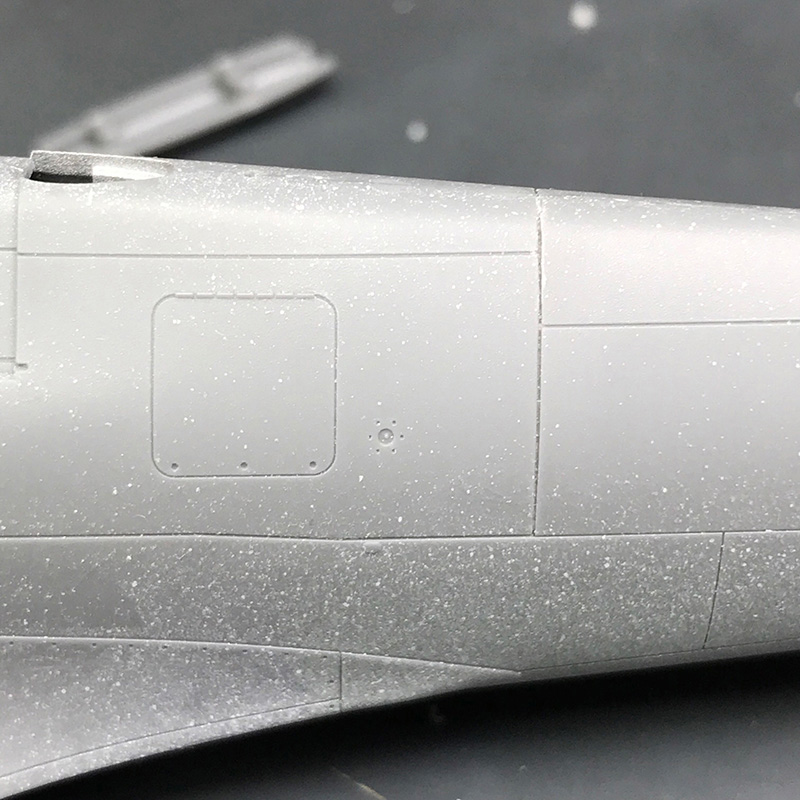
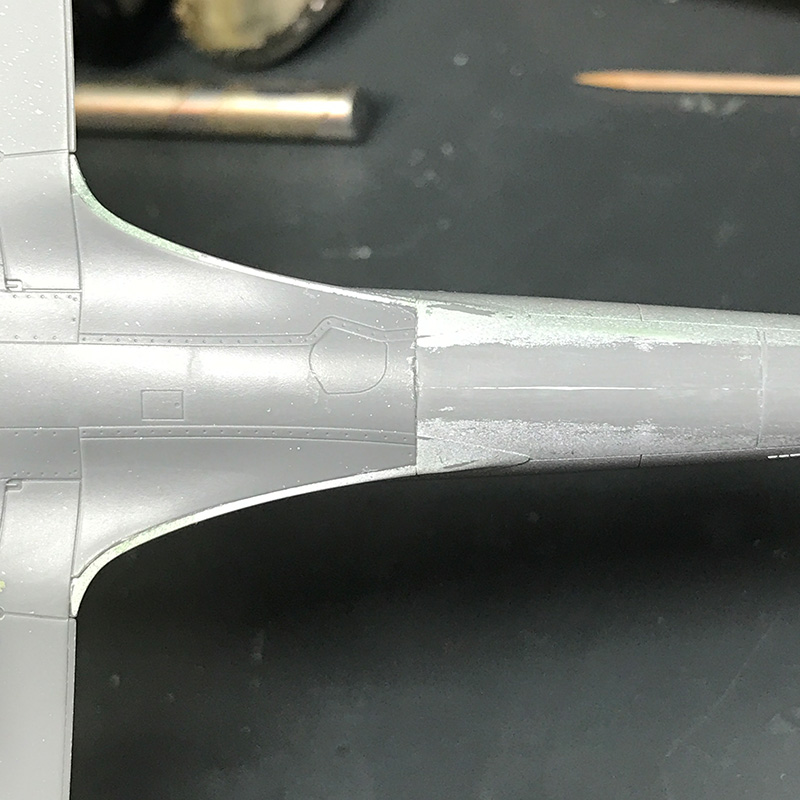
The fuselage seam needs just a kiss of filler along the top edge, but there was a bit of filling and sanding to be done along the engine cover where I found a slight height mismatch between halves. That could have been my fault. Also the very front edge of the nose is a separate piece. In some photos there is no seam here, and in some there is a fine panel line. I opted to fill it.
The first thing to decide is if the cockpit will be open or closed, as the very first step of the build is to glue the mid-fuselage insets. Once these insets are glued in place you are locked in to your decision since they differ where the open canopy will slide back. Since the cockpit is so lovely, Im building the open cockpit version.
The insets fits so snugly it is hard to see where the joint is. Can you find the seam? There is a generous lip on the insert to glue to. Dab a small amount of extra-thin cement from the inside so that the seam isnt flooded and the panel line obscured.
Your second decision will be which of the three versions to build. The first three pages of the manual outline building the cockpit, and small details vary depending on if you choose to build version A, B, or C. I have always loved the early Spits with one black and one white underwing (Version C). That would normally have been my first choice. But, I am going to build P9495 from the Battle of Britain (Version A) with the belly painted XF-21 Sky because I have a lot of it. And its old. Really old.
I picked up a 23ml bottle of XF-21 at one of those old hobby shops that you dont find much anymore. It had kits stacked up on the floor in the aisles, and you can tell from the clerks clothing that dusting was not high on their priority list either. It wasnt until I got home 130 miles later that I noticed the inventory date on the bottle.
THE COCKPIT
I took the time to drill out the holes in the seats side rails, and in the bulkhead that holds the seat. I think it is a small detail that makes a big impact.
Now its time to paint the cockpit parts. I shot the photo-etch parts with Krylon auto primer, and primed the cockpit parts with white Badger Stynlrez. Since the cockpit is a dank enough place as it is, I dont like to mess around with gray or black primer in there. I want the colors as bright as so that you can see something in there when its closed up. Ive never really liked Tamiyas XF-71 Cockpit Green as I think it is too yellow when compared to most photo references Ive seen. So as my first act of defiance I mixed up my cockpit green own using XF-71 and XF-23 Light Blue. Im sorry that I dont have exact ratios to share with you, since I made a real mess of the mixing and resorted to eyeballing it. This better matches many of the photos I have, and would make me less nauseous if I were flying it.
The first of the thick Tamiya decals you need to apply are the dashboard gauges. I used Micro Set to help get them into place, and after three applications of Micro Sol they settled down pretty nicely between the raised gauge faces. This gives me hope for future decals in this kit.
There are so many paint-callouts and parts-cleanups indicated in the instructions that its easy to miss something. I had the whole seat sub-assembly glued, painted and weathered before I noticed that I forgot to trim two supports off at the top of the rear of the seat. Fortunately it was easily done afterward.
The cockpit is a testament to the Tamiya engineers cleverness. Intricately molded parts pass through and around each other, yet still lock firmly in place. Not only are the joints precise, but they are strong as well. The fit tolerance of parts is tight, so you may have to scrape joints clean of paint for proper fitment. When finished, it is a marvel. It seems a shame to hide it within the fuselage. They even include a piece whos only purpose is as a jig to hold the two rear bulkheads the proper distance apart when glueing the seatbelt harness in place.
I only had one problem while building the cockpit. Part A5, which holds the rudder pedals, slides under the dashboard and tabs into the firewall at the front. I could not get that tab to slide into the hole made for it. I ended up trimming the tab off the front since it still glued up firmly at the front and back.
After all the painting and assembly I used both Tamiya Black and Brown Panel Liner to bring out some detail. I didnt spray any clearcoat first; it just isnt necessary in all cases. Cleanup with a cotton swab kissed with Testors enamel thinner didnt hurt the paint at all. Just be gentle.
CLOSING IT UP
Before closing up the fuselage, dont forget to drill out the two holes on the right half of the nose. Nothing gets attached there, but they do exist on the real plane.
One part of a plane build that can drive me nuts is struggling to sandwich multiple fiddly parts in between the fuselage halves while without one of them getting out of alignment. This kit makes that step so easy. A few parts get glued right to the inside walls of the fuselage, but the bulk of the interior gets glued into a tub, so to speak. You are only left with one piece to glue between the halves. While this design is not exclusive to Tamiya, I appreciate it all the same.
The fuselage went together without drama, but be sure to tuck the rearmost cockpit bulwark behind the tabs in the fuselage. Otherwise it will tend to lean forward out of the fuselage a bit.
The fuselage seam needs just a kiss of filler along the top edge, but there was a bit of filling and sanding to be done along the engine cover where I found a slight height mismatch between halves. That could have been my fault. Also the very front edge of the nose is a separate piece. In some photos there is no seam here, and in some there is a fine panel line. I opted to fill it.


About the Author


FROM: PENNSYLVANIA, UNITED STATES
Like a thousand others here, I've returned to the sport after a 20 year hiatus, primarily building planes. The first kit I ever built with my dad was MPC's 1/16 Petty Charger with the clear body. I'd love to have that kit again. I am thrilled to see how the hobby has grown, and the generosity of its...
Comments

Hi William.Beautiful construction and with correct details.Best wishes. Christos.
APR 21, 2019 - 08:31 AM

Thanks Christos, I learned a lot about Spitfires while building this kit.
APR 23, 2019 - 06:26 AM
Hey everyone,
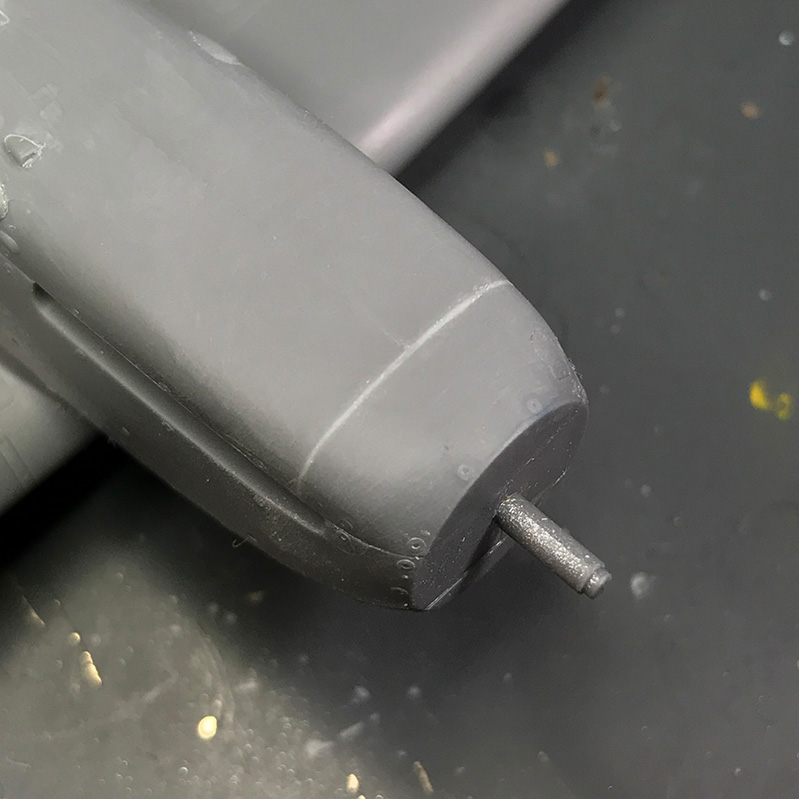
There is a paragraph I forgot to include during the Spitfire build. It goes along with the photo of the tail with a missing piece circled. Here is the explanation:
"And I have one last gripe. I hate when very fragile parts are molded right to the fuselage, thus daring you to break them off in the many hours of handling to follow. This kit is not immune. The radio wire insulator on the tail is one such part. It is fragile and wide-out in the open. I was hyper-aware of it, and managed to only bend it over once before painting began. While painting the belly, it snagged on my fleece, and I ripped it right off
never to be seen again."
APR 24, 2019 - 01:38 AM
Copyright ©2021 by Wiggus. Images also by copyright holder unless otherwise noted. The views and opinions expressed herein are solely the views and opinions of the authors and/or contributors to this Web site and do not necessarily represent the views and/or opinions of AeroScale, KitMaker Network, or Silver Star Enterrpises. Images also by copyright holder unless otherwise noted. Opinions expressed are those of the author(s) and not necessarily those of AeroScale. All rights reserved. Originally published on: 2019-04-18 00:00:00. Unique Reads: 15598

WEB HOSTING BY


Copyright ©2021 AeroScale and Kitmaker Network, a subsidiary of Silver Star Enterprises
All Rights Reserved. Please read our Conditions of Use and Privacy Policy.
All Rights Reserved. Please read our Conditions of Use and Privacy Policy.