

1⁄48IAR-80
7
Comments
4. Painting, Marking and Weathering
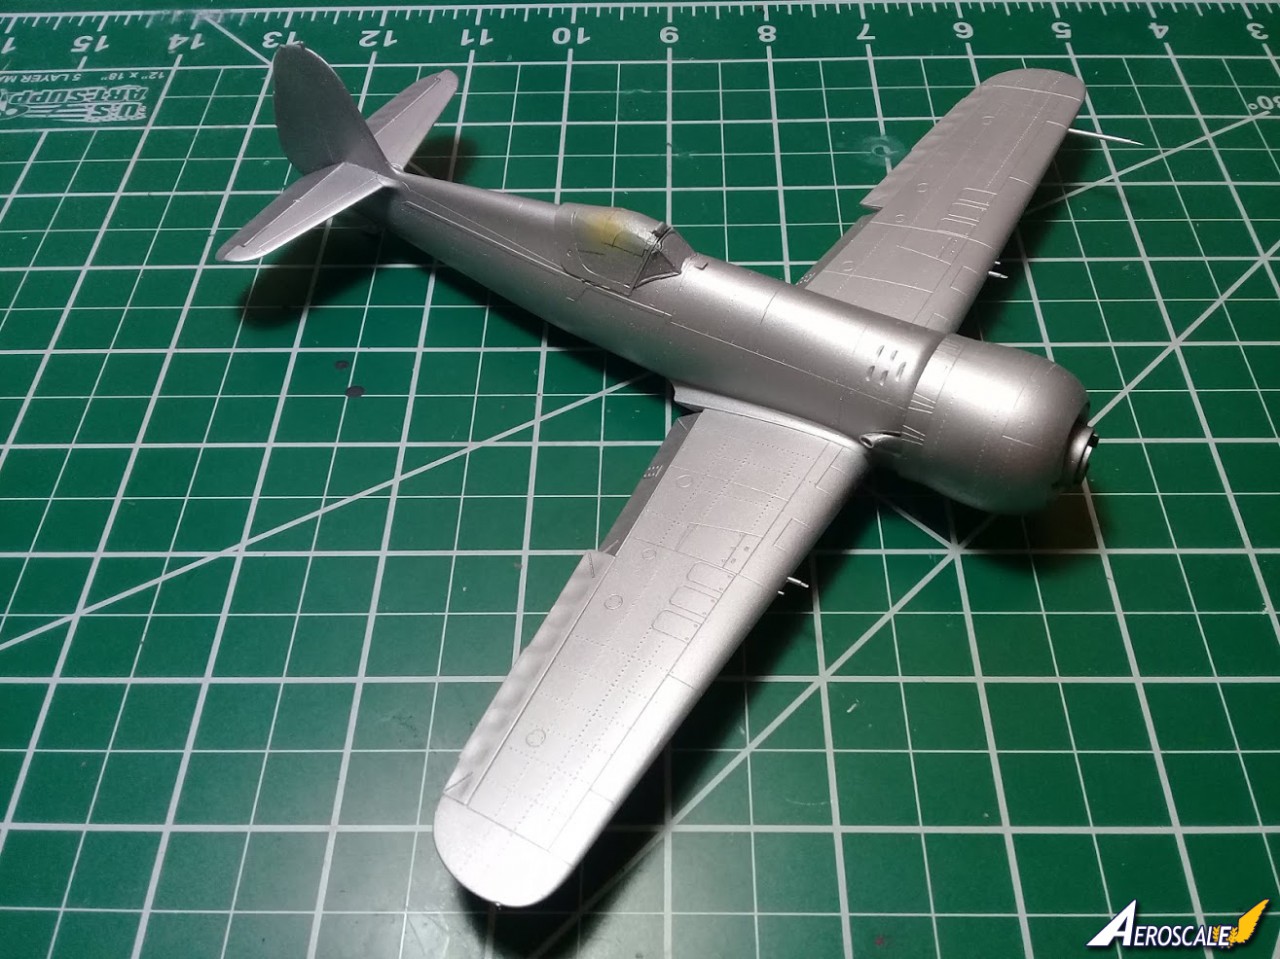
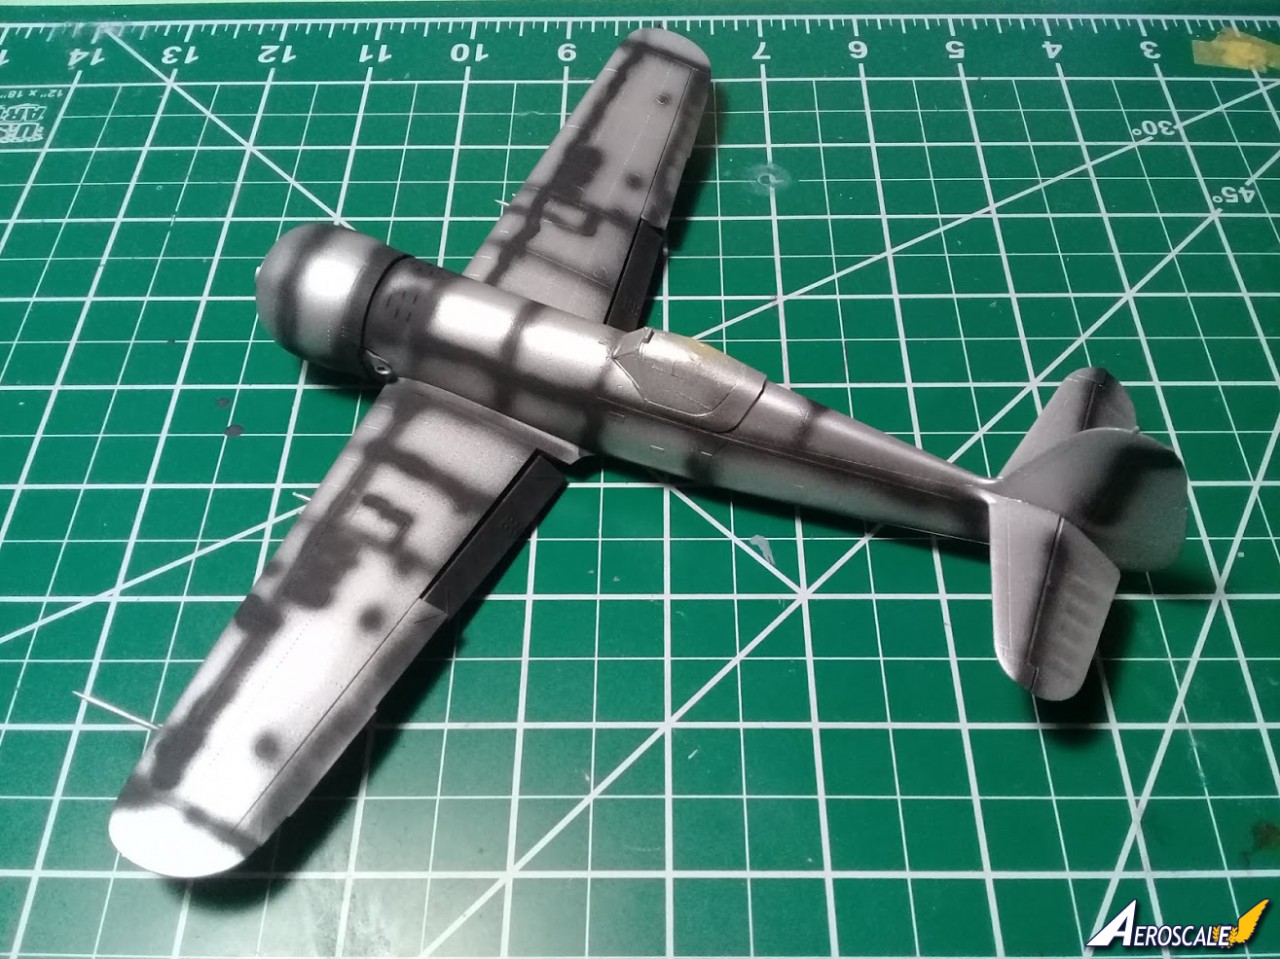
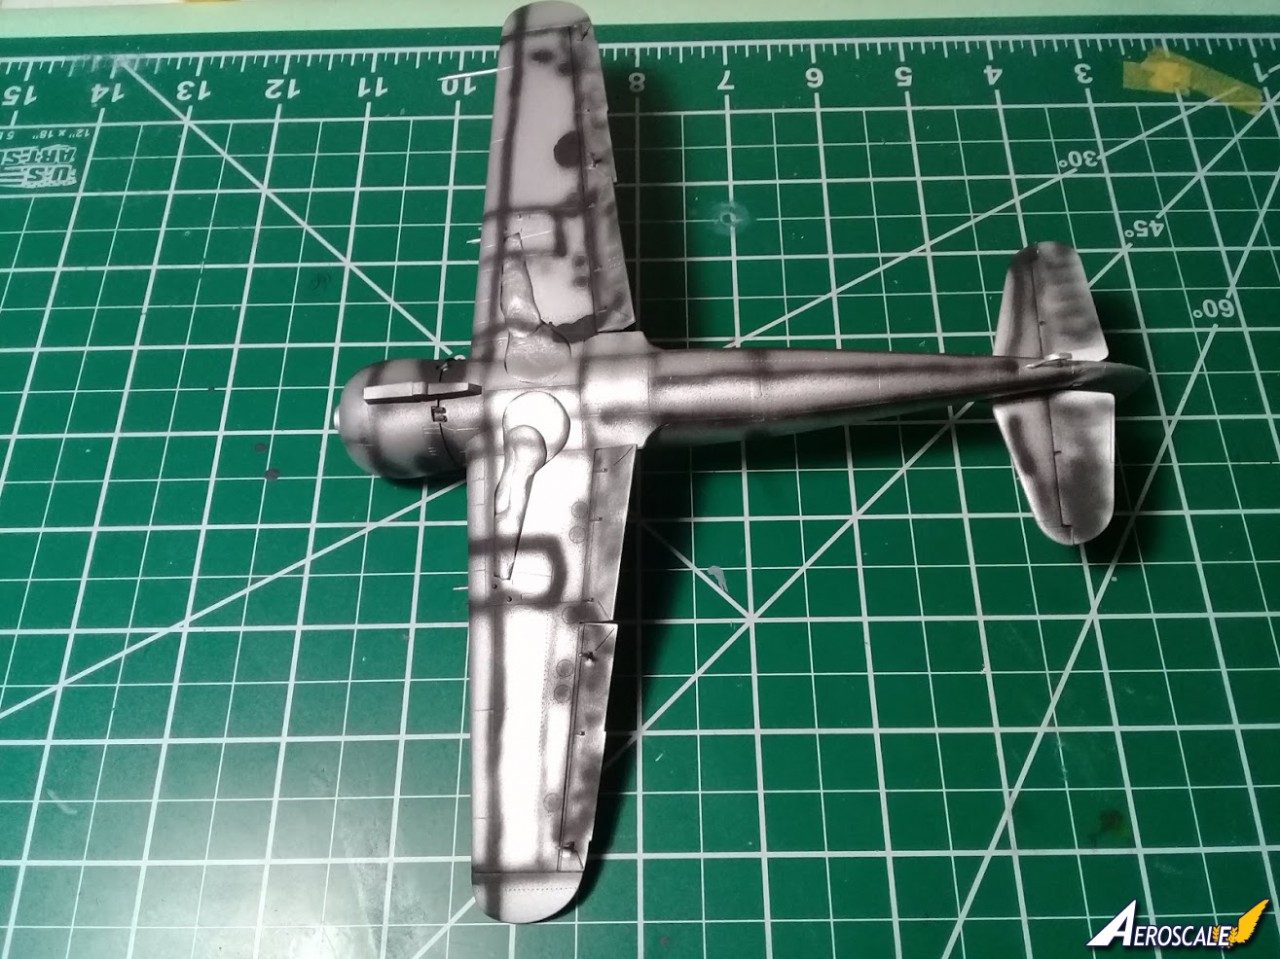
4.1. Priming and painting I painted the interior with the suggested colors: RLM02 (own mix) and RLM66 (Vallejo acrylic). The details (seat harness, levers, headrest, etc.) were picked out with various acrylic and enamel mixes. Everything received a wash of Van Dyck brown oil paint diluted with odorless turpentine.For the exterior painting I wanted to try a different method: priming with aluminum and painting with acrylics. Since long I wanted to try the method and I found that the right moment has come because I subscribed to Aluminum Cans campaign. I never before tried a bare metal finish and some practice was required. I chose to use Rust-oleum Aluminum enamel (#7715). I sprayed the first coat with a .2mm airbrush at low pressure and realized that the pigment is a little too heavy for such fine setting. The finish was satisfying though, very smooth and reasonably shiny with the exception a few loose grains here and there. Those dried pigment grains were easily removed after drying with a household sponge. No sanding was needed. Mindful to the first experience, I sprayed the second coat of primer with a .3mm setting that went impeccably on.
I applied further some pre-shading with black enamel paint.
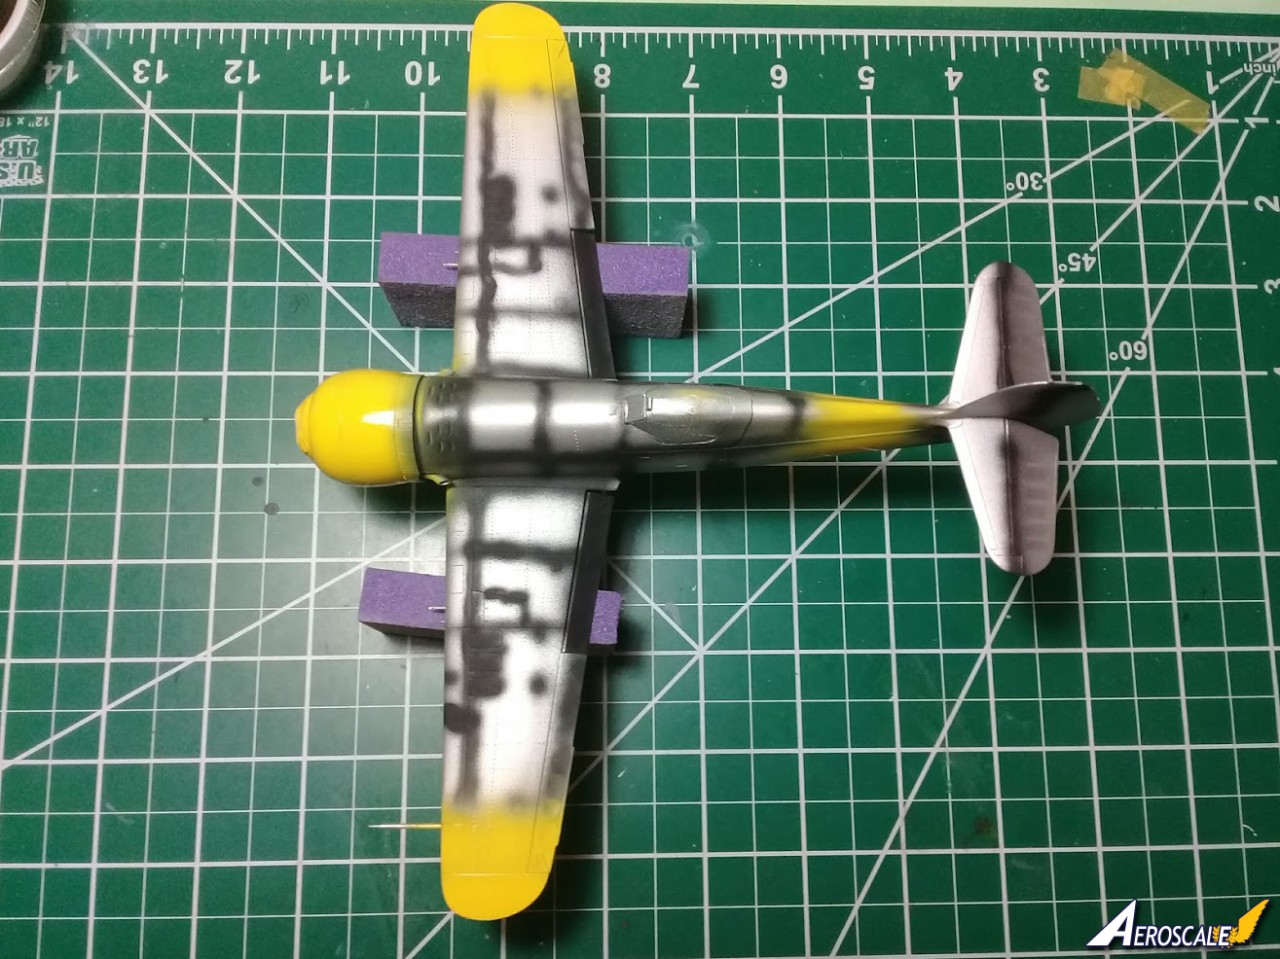
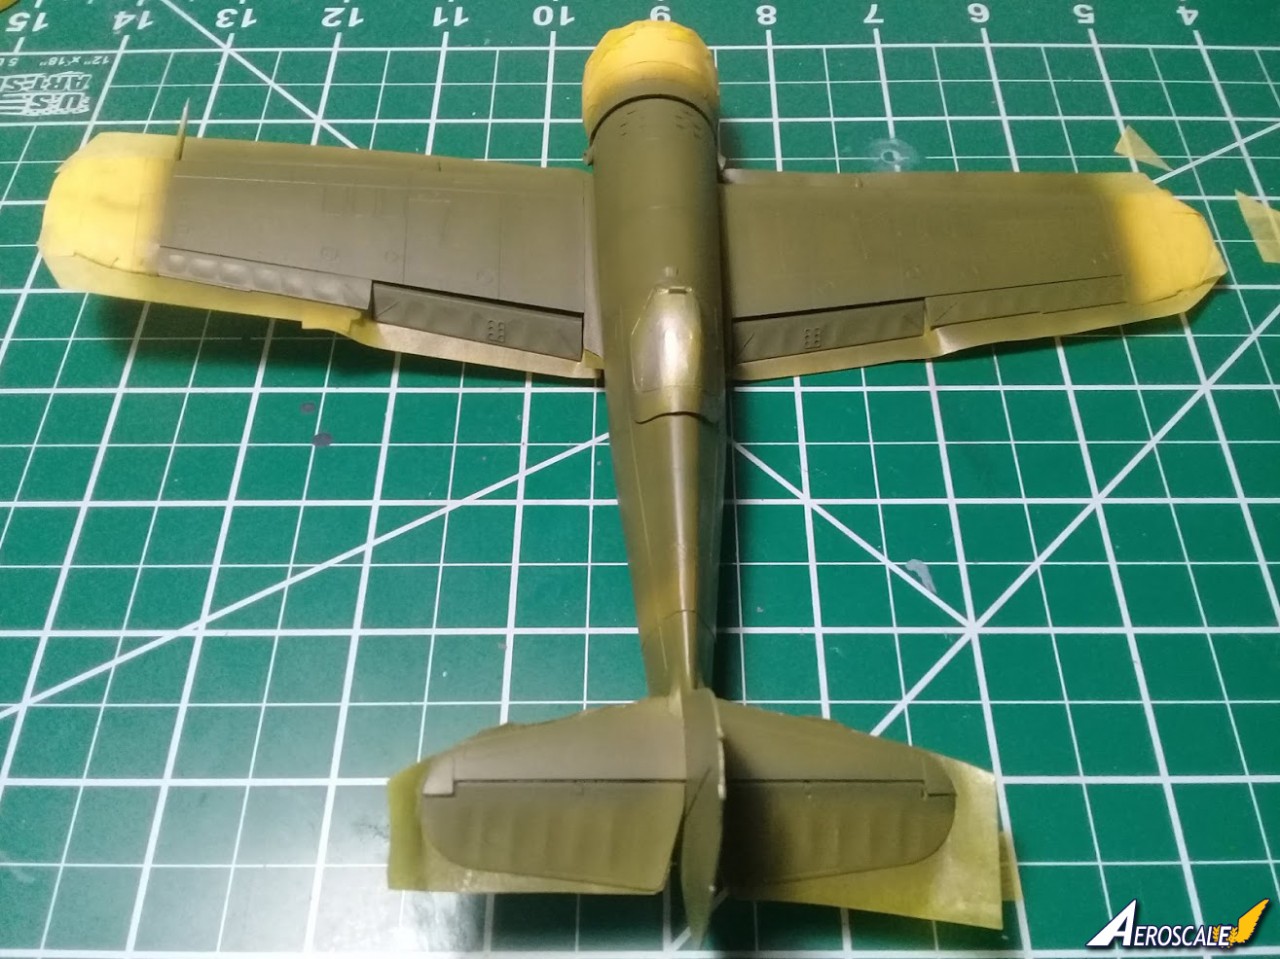
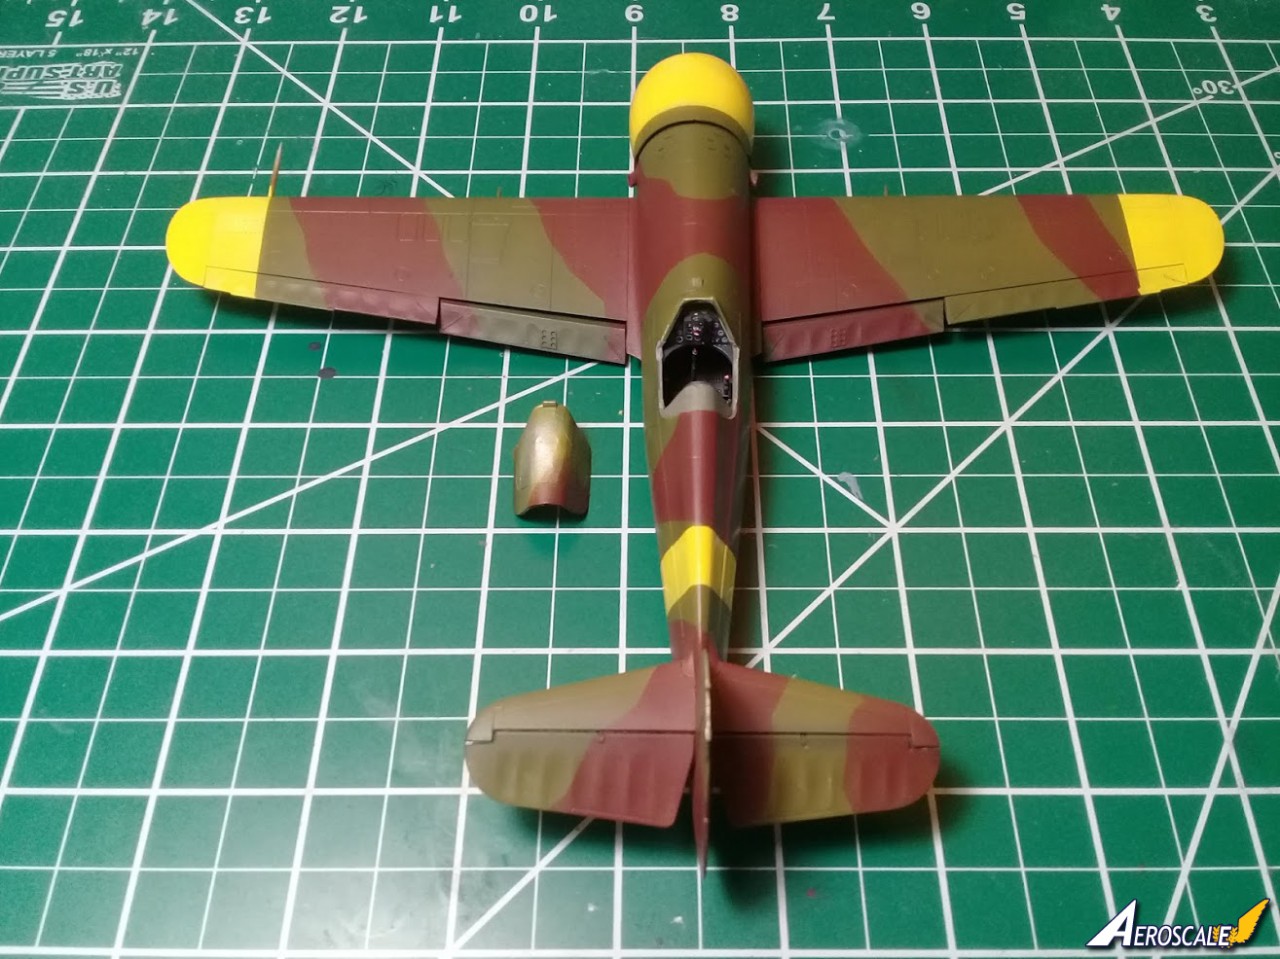
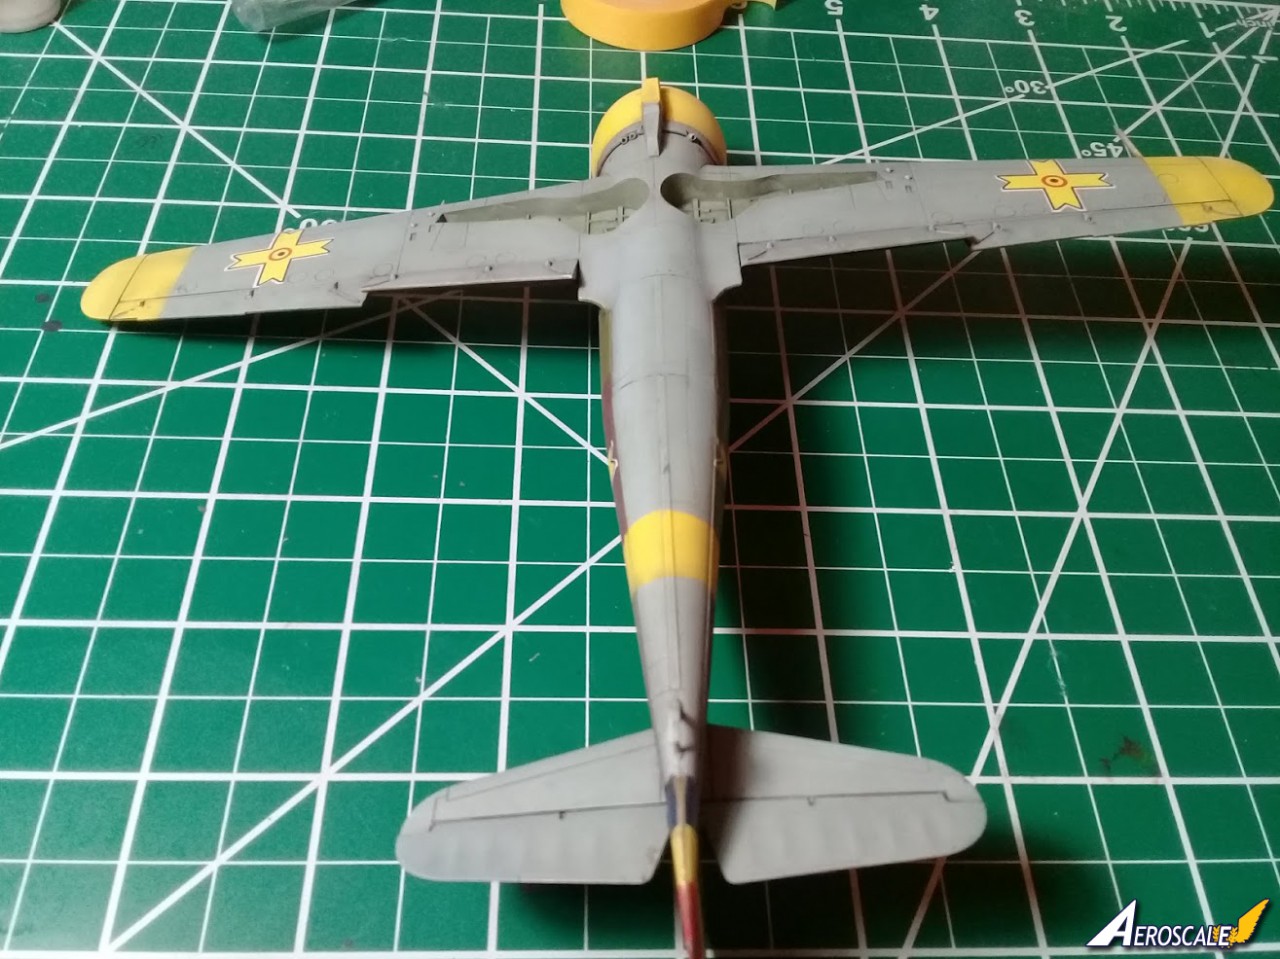
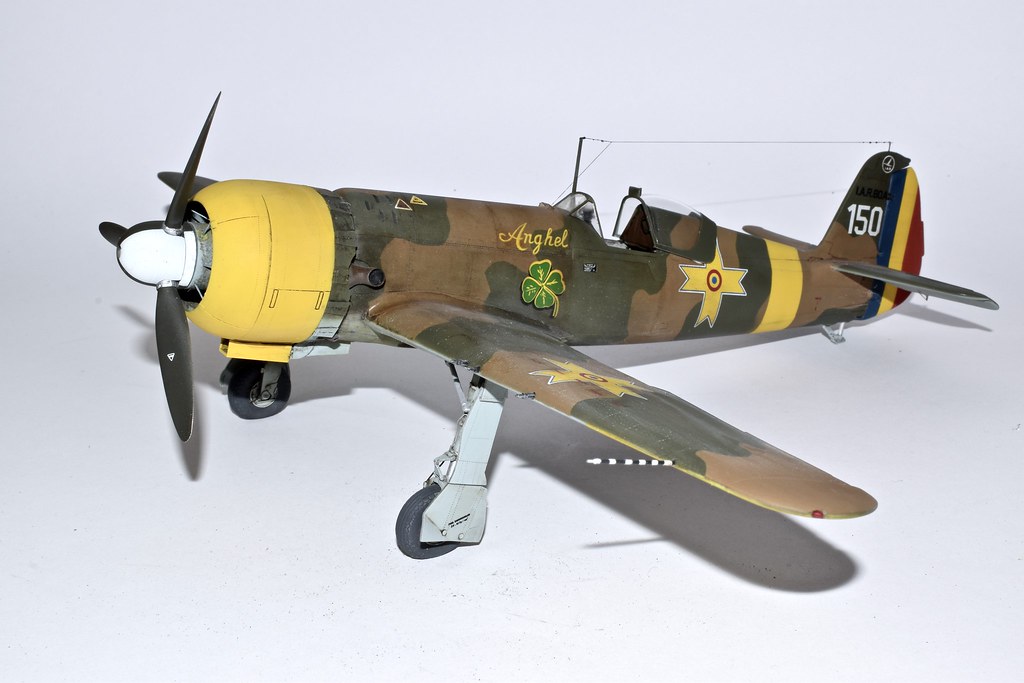
Next step was the application of eastern front markings: yellow cowling, yellow fuselage band, and yellow wingtips (upper and lower) with Rust-oleum sunburst yellow (i.e. chrome yellow) #7747. That paint really has some shine to it!
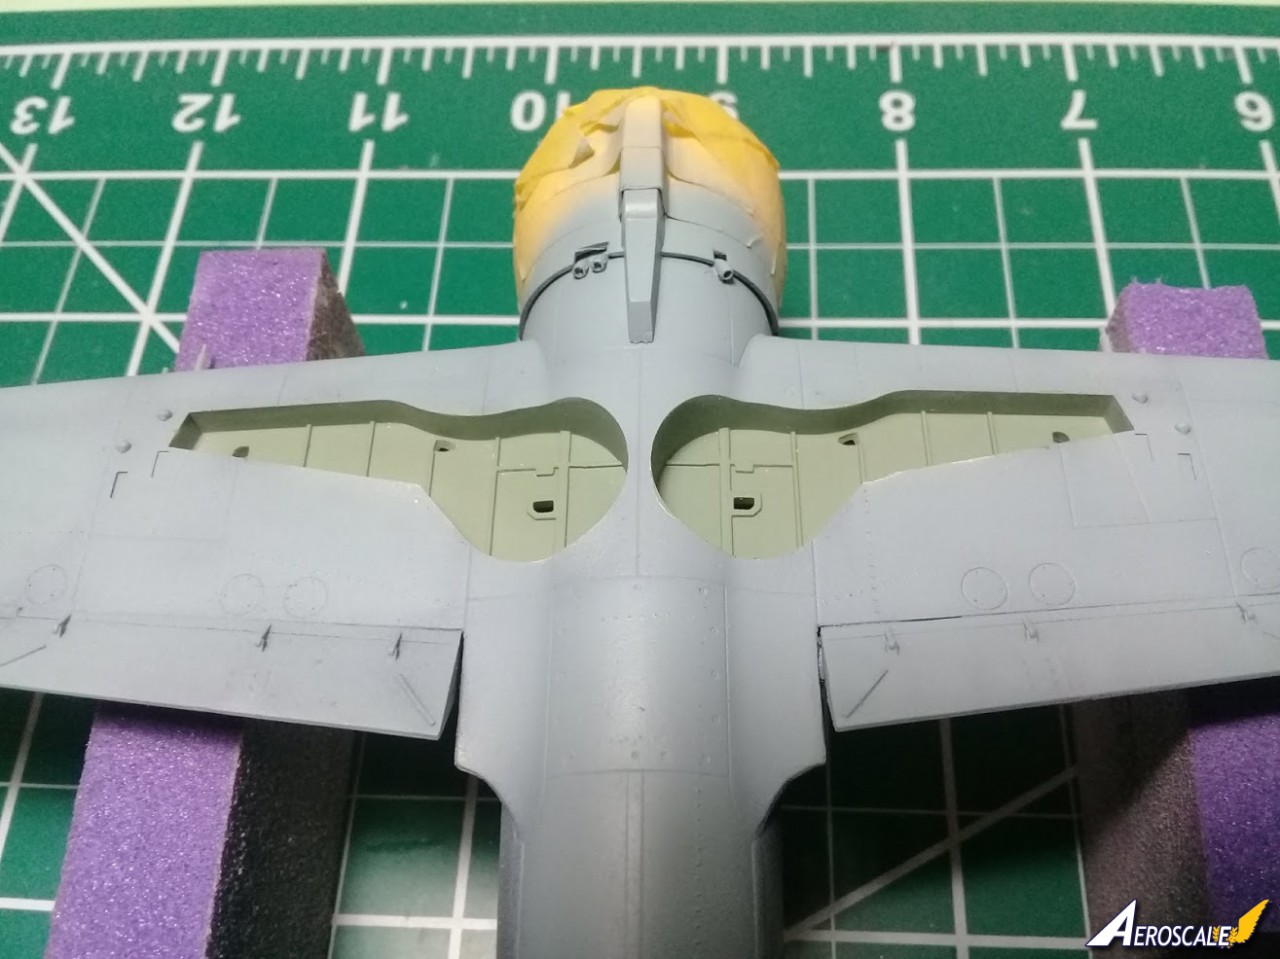
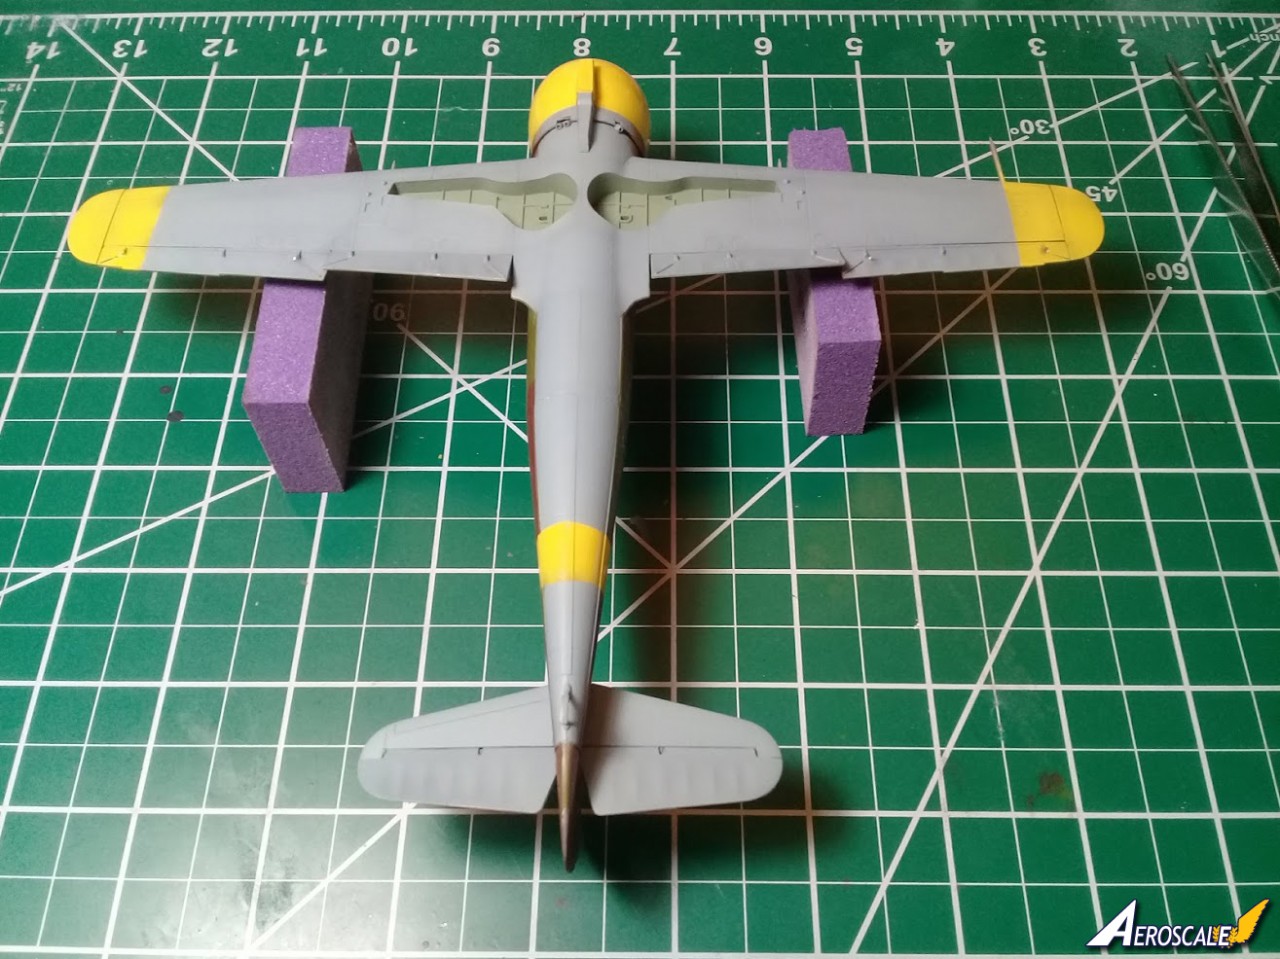
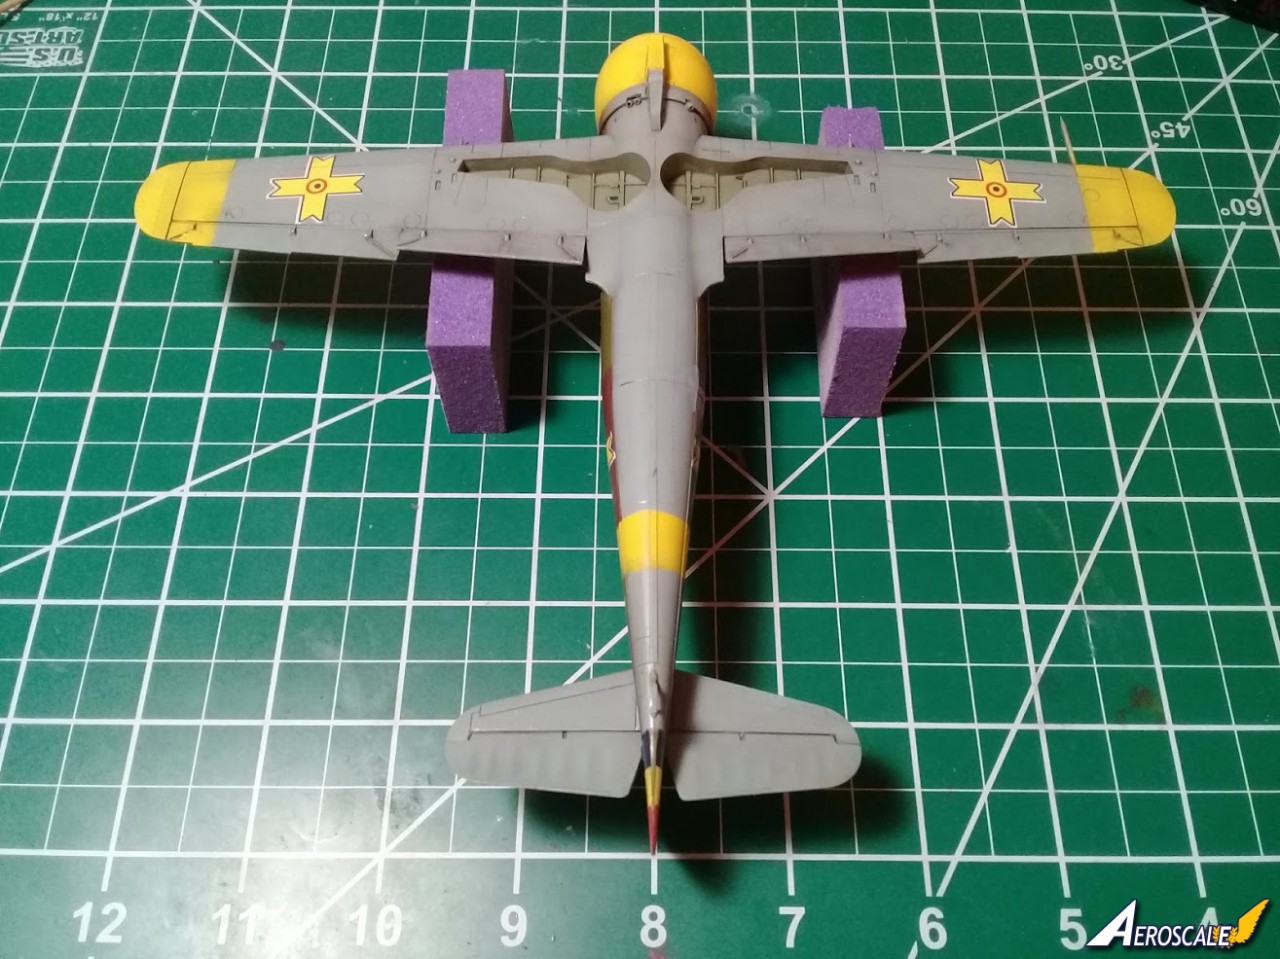
After the yellow markings were dry, I masked them off and went to apply the light blue undersurfaces with Vallejo RLM65.
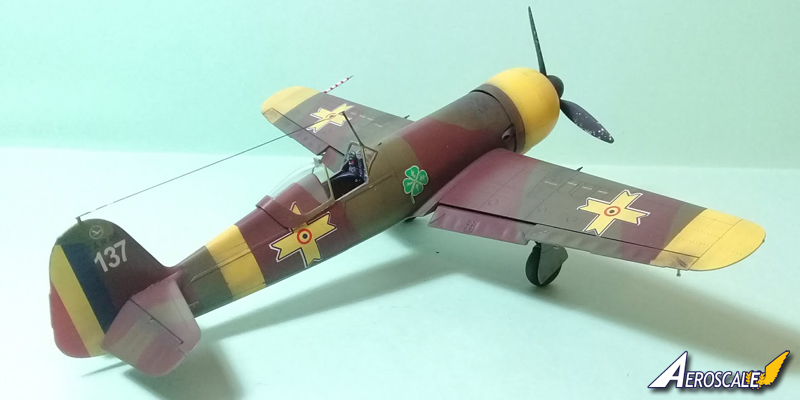
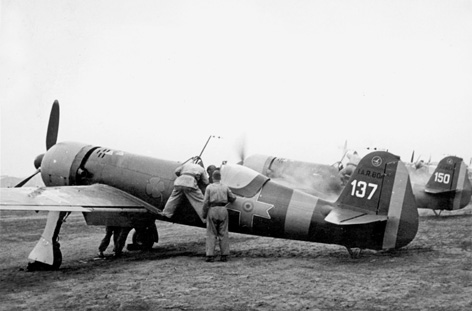
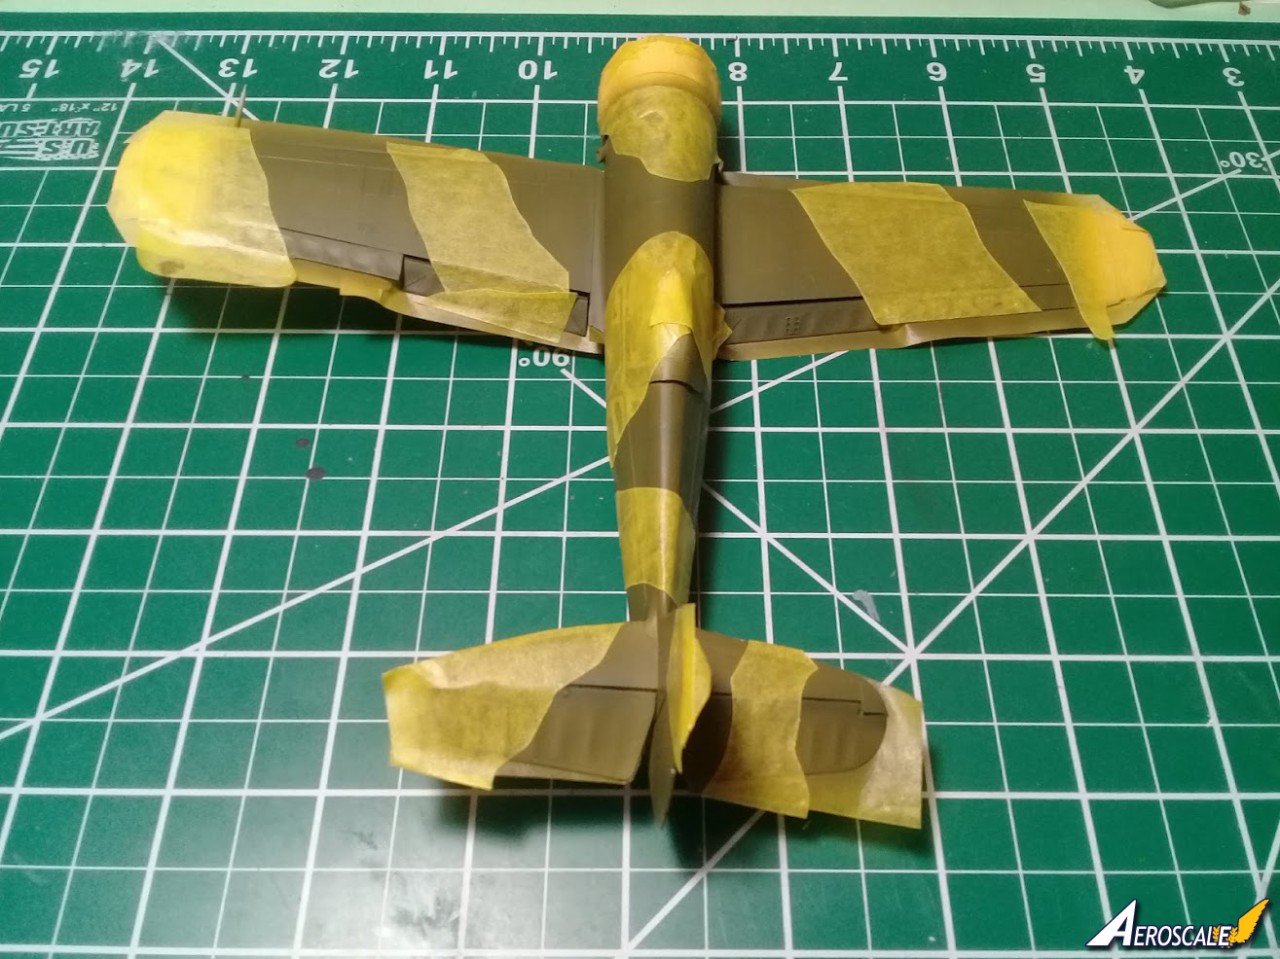
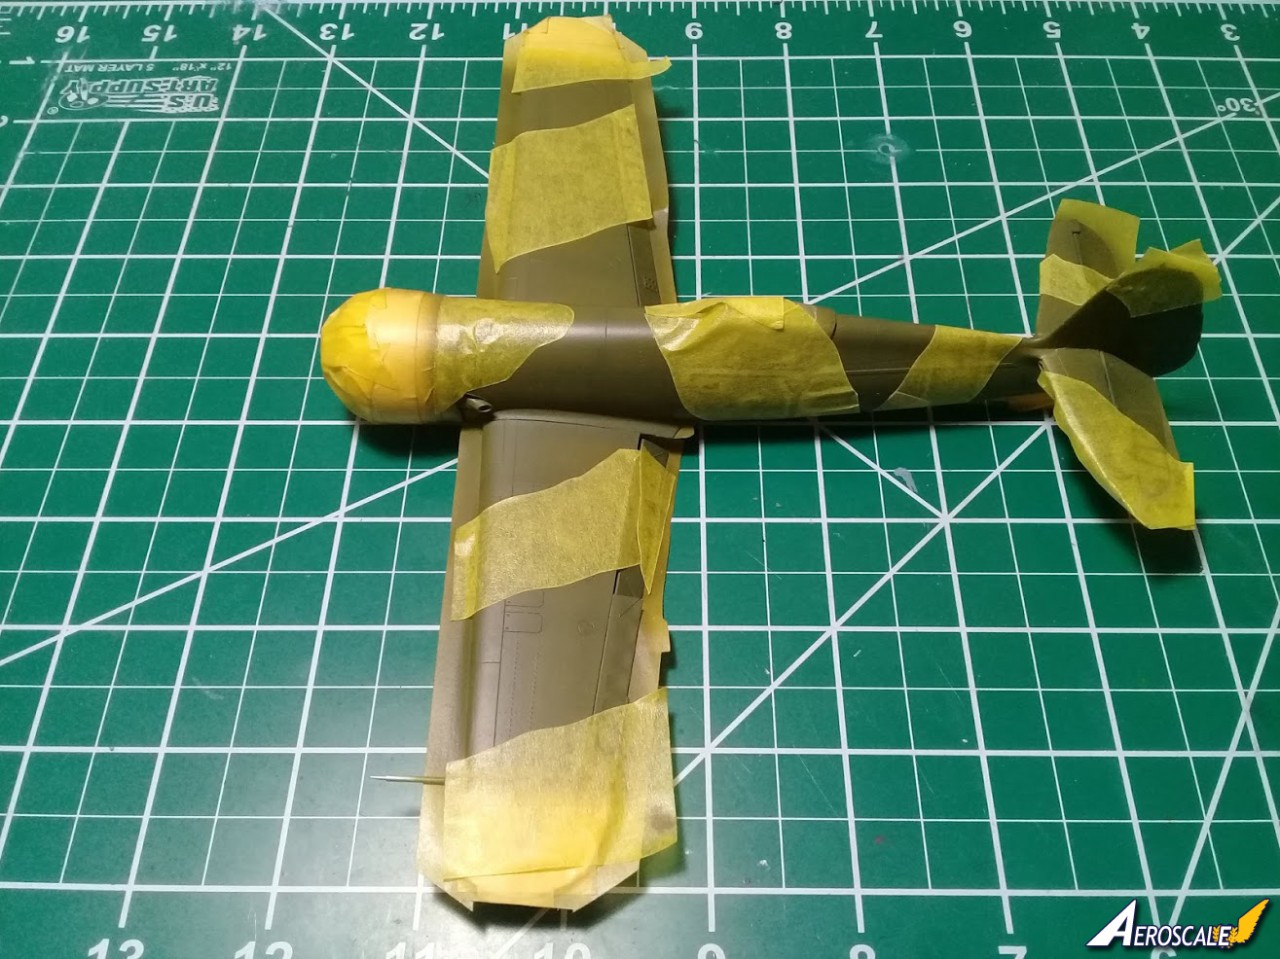
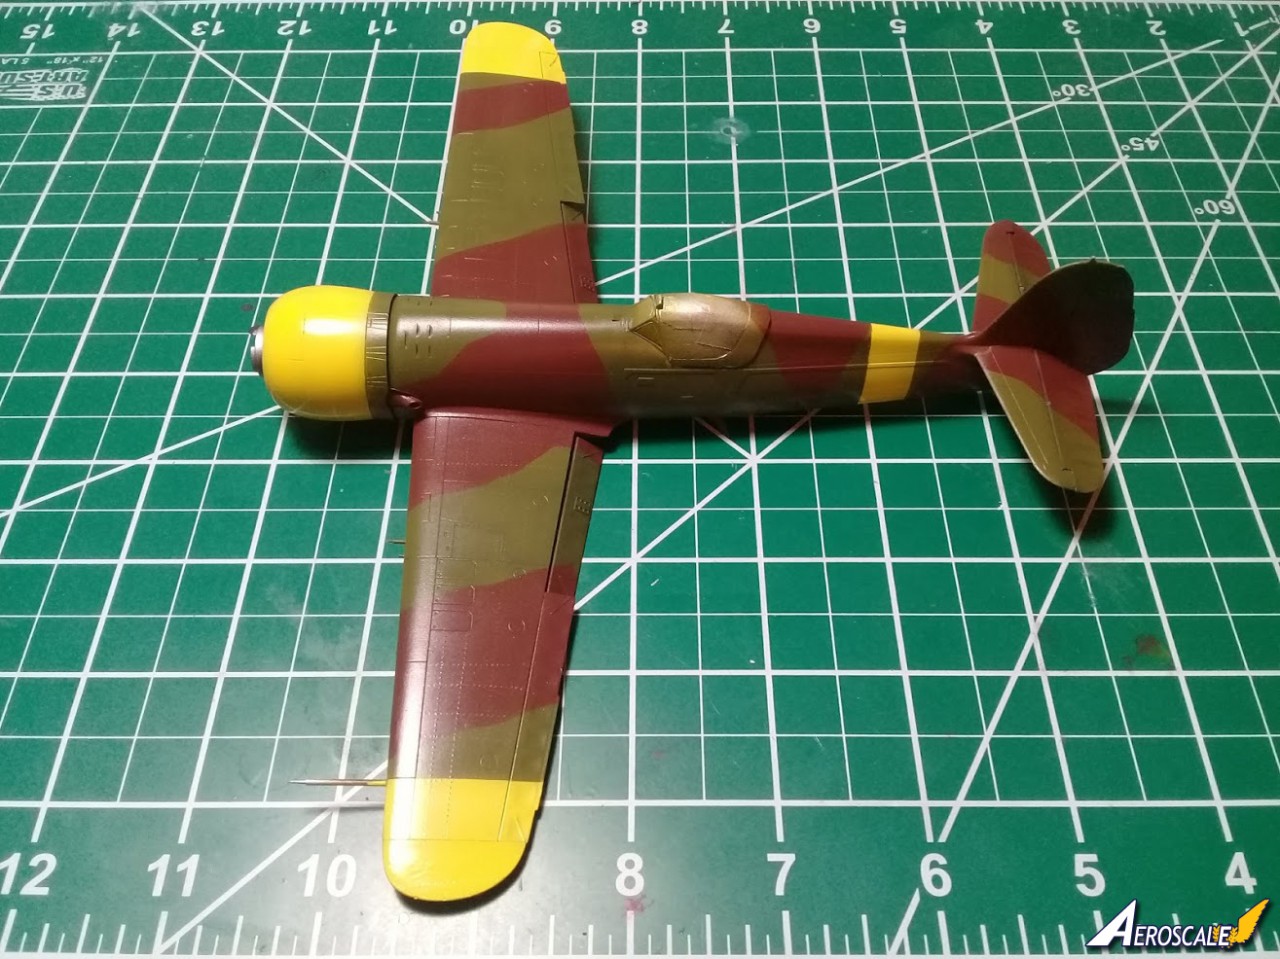
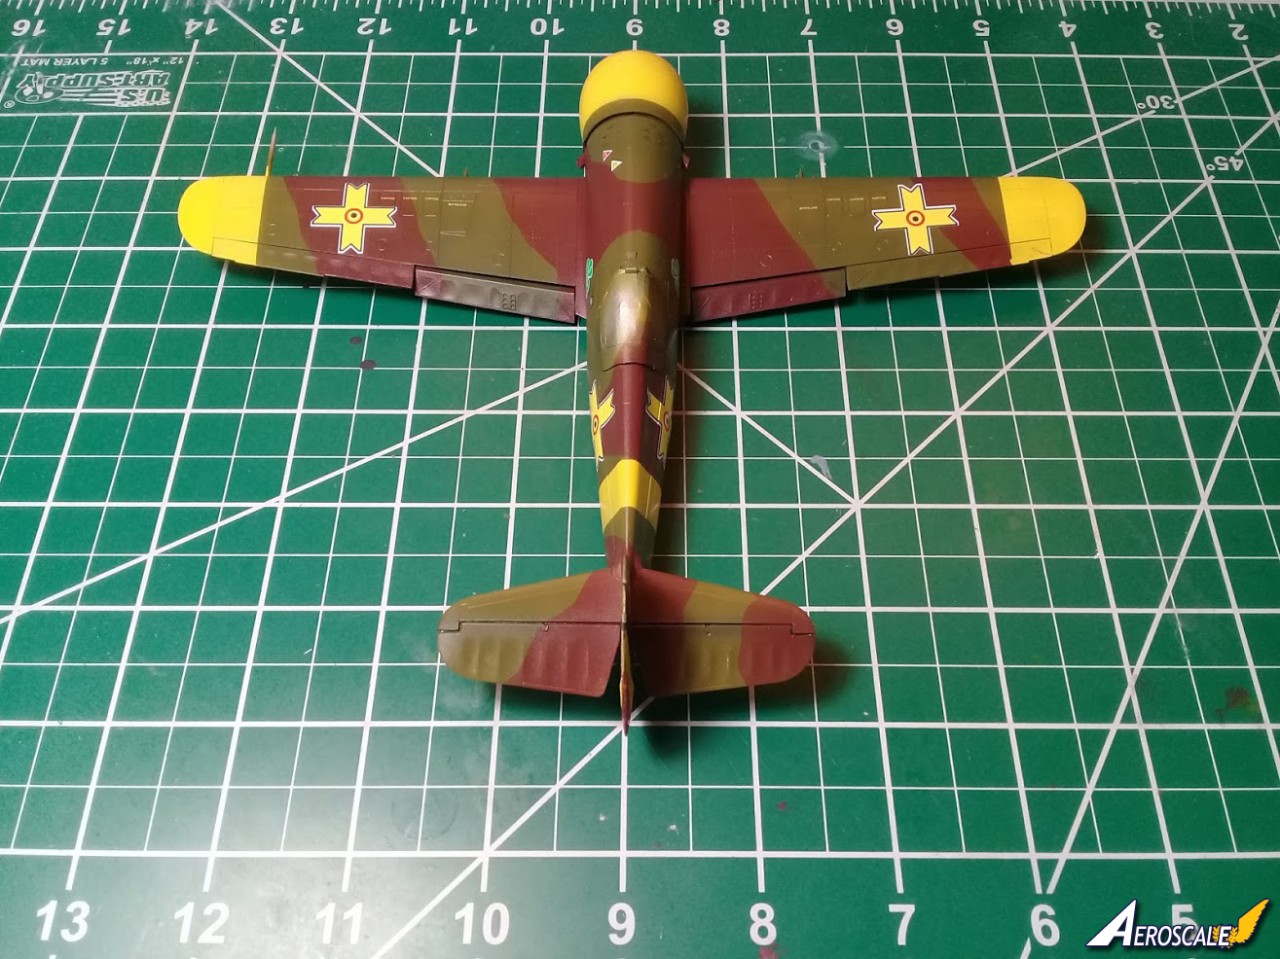
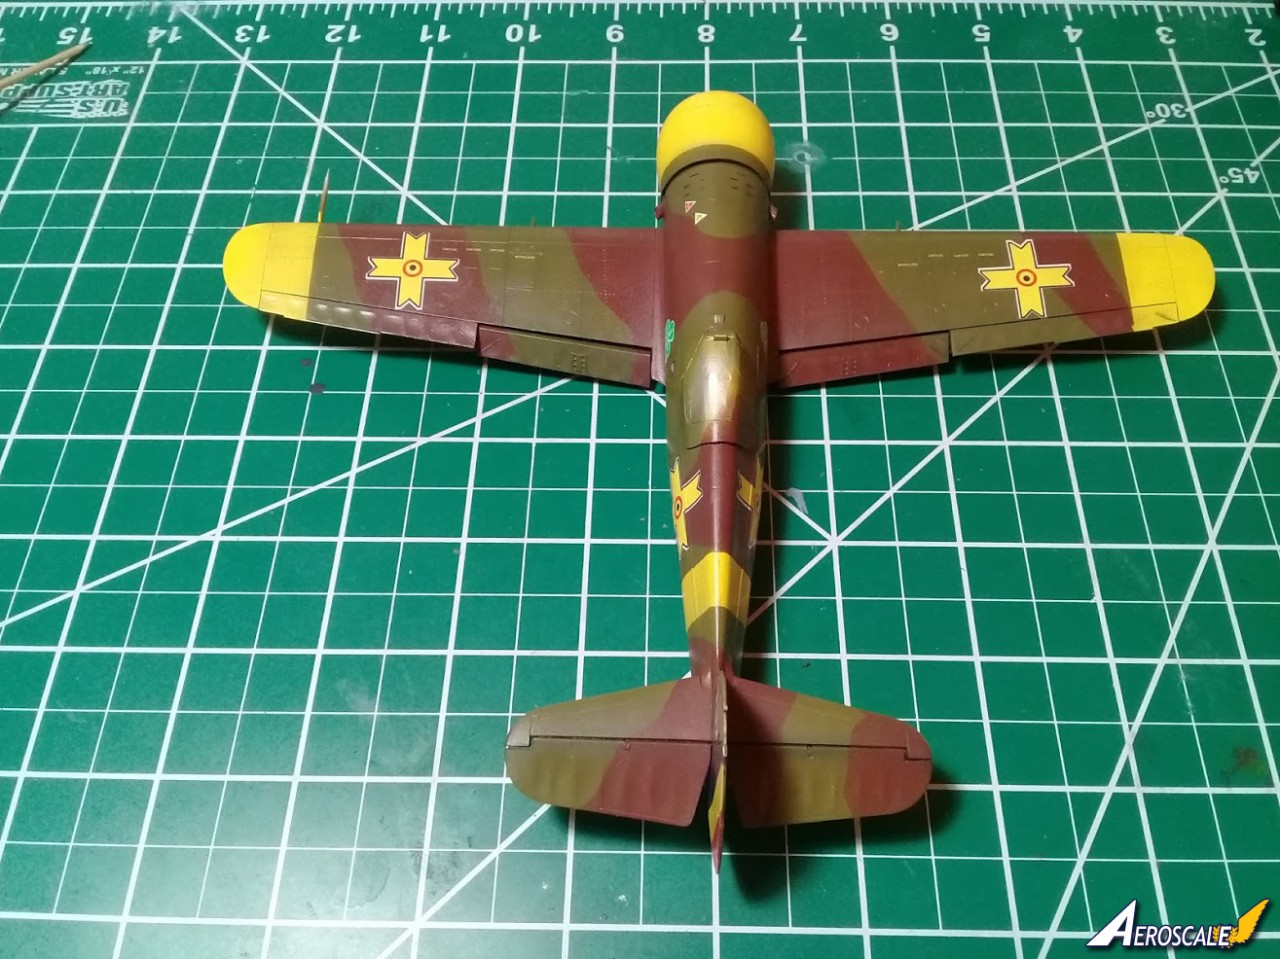
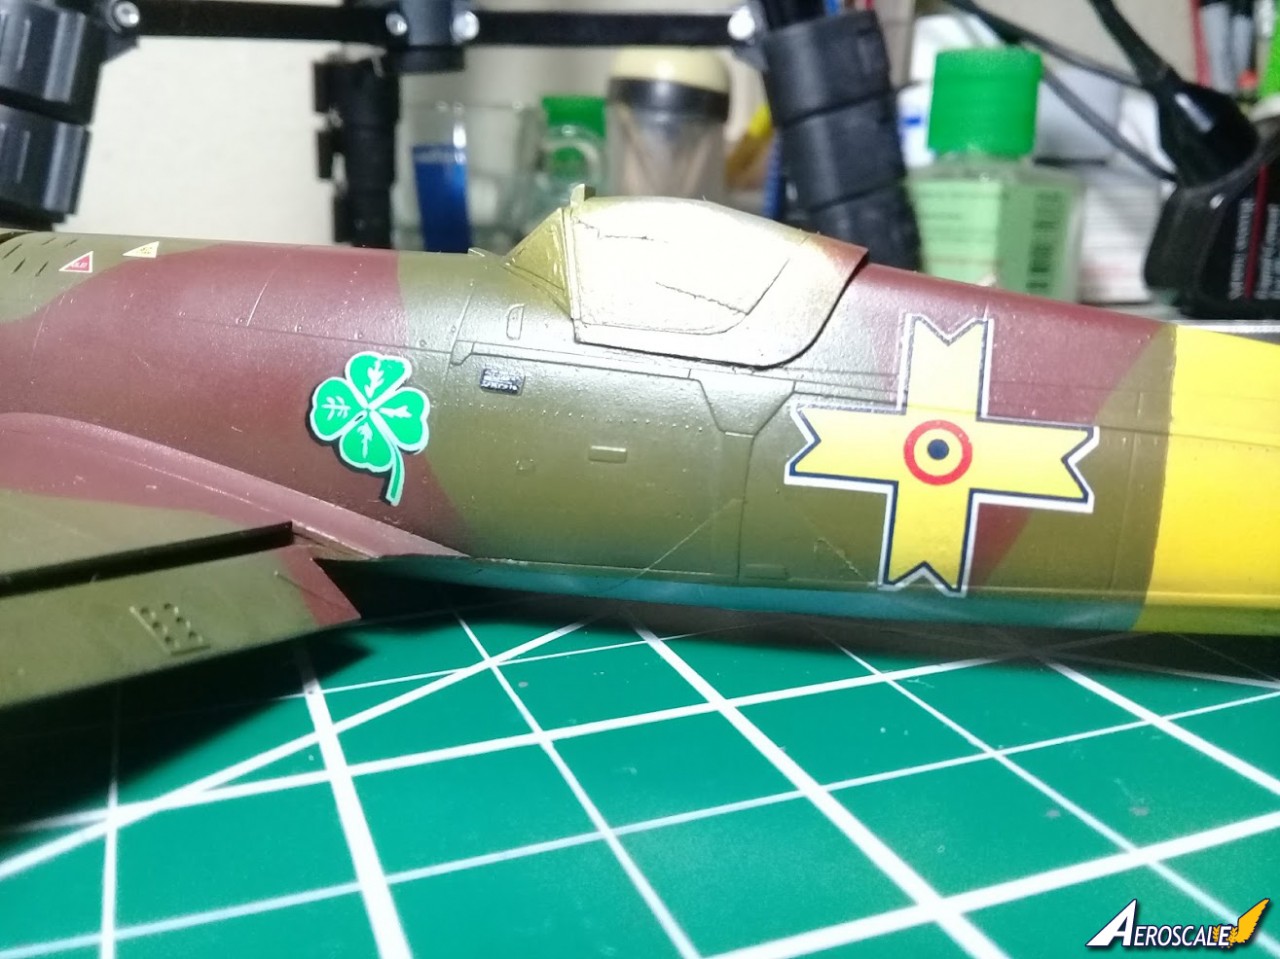
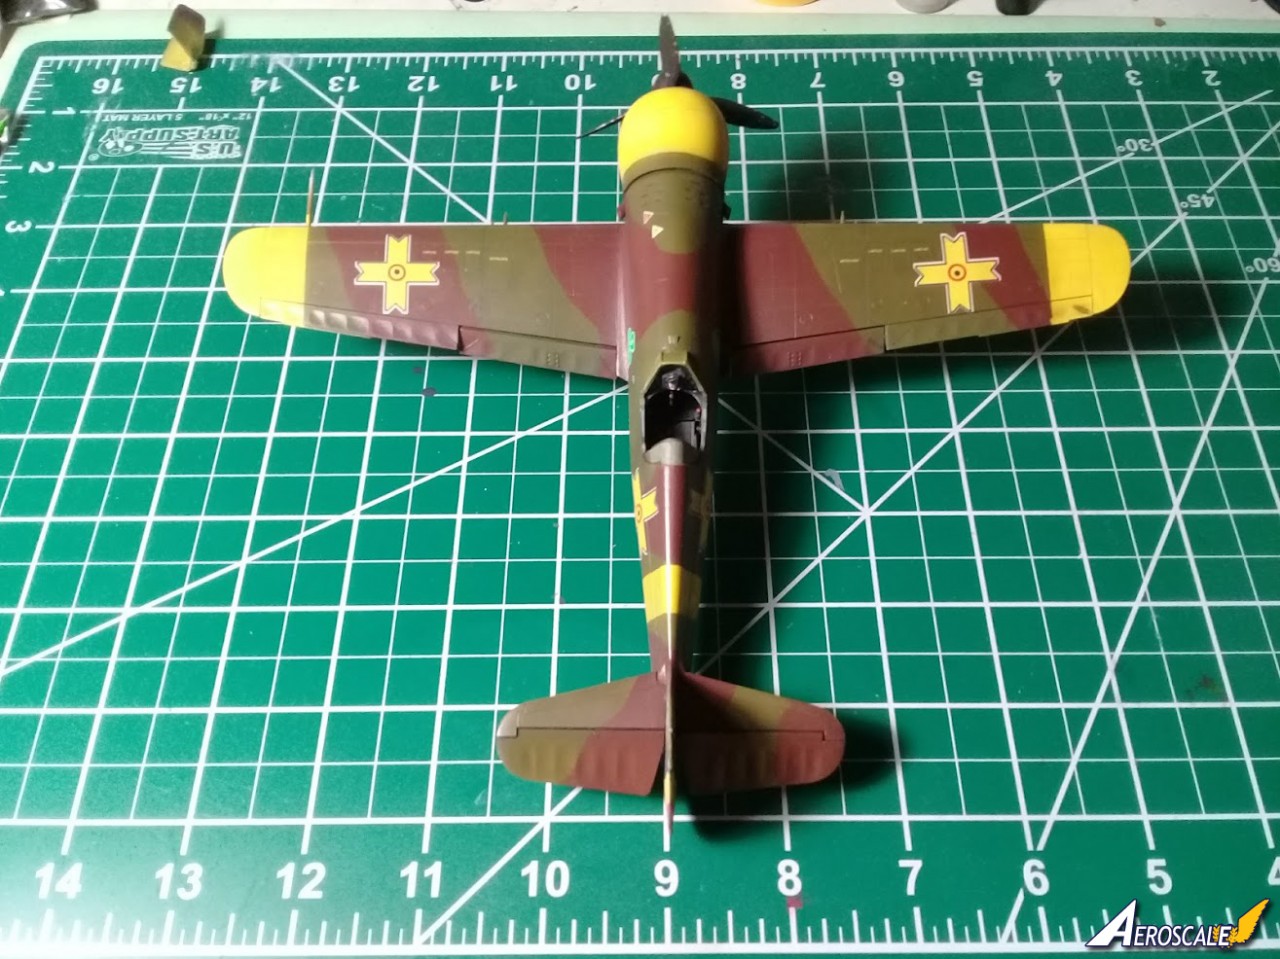
After masking the belly and the edges of the wings, I continued by applying the Romanian olive drab which I have mixed myself from Liquitex Soft Body acrylic and IPA 50%. As Panzergrau and Russian green 4BO, the Romanian green is subject of much controversy on Romanian forums with no definitive answer. I chose to apply a darker shade because, based on wartime photograph, the aircraft looks in pristine condition (probably the delivery to the operational unit was the occasion the picture was taken). I went for a light uneven coat, letting the aluminum to under-shine thru in some areas.
I completed the camouflage with terracotta brown, again quite dark shade, mixed as described above. No problems here other than few inherent airbrush splotches, easy to deal with.
I sealed everything with Micro Gloss and let it dry thoroughly.
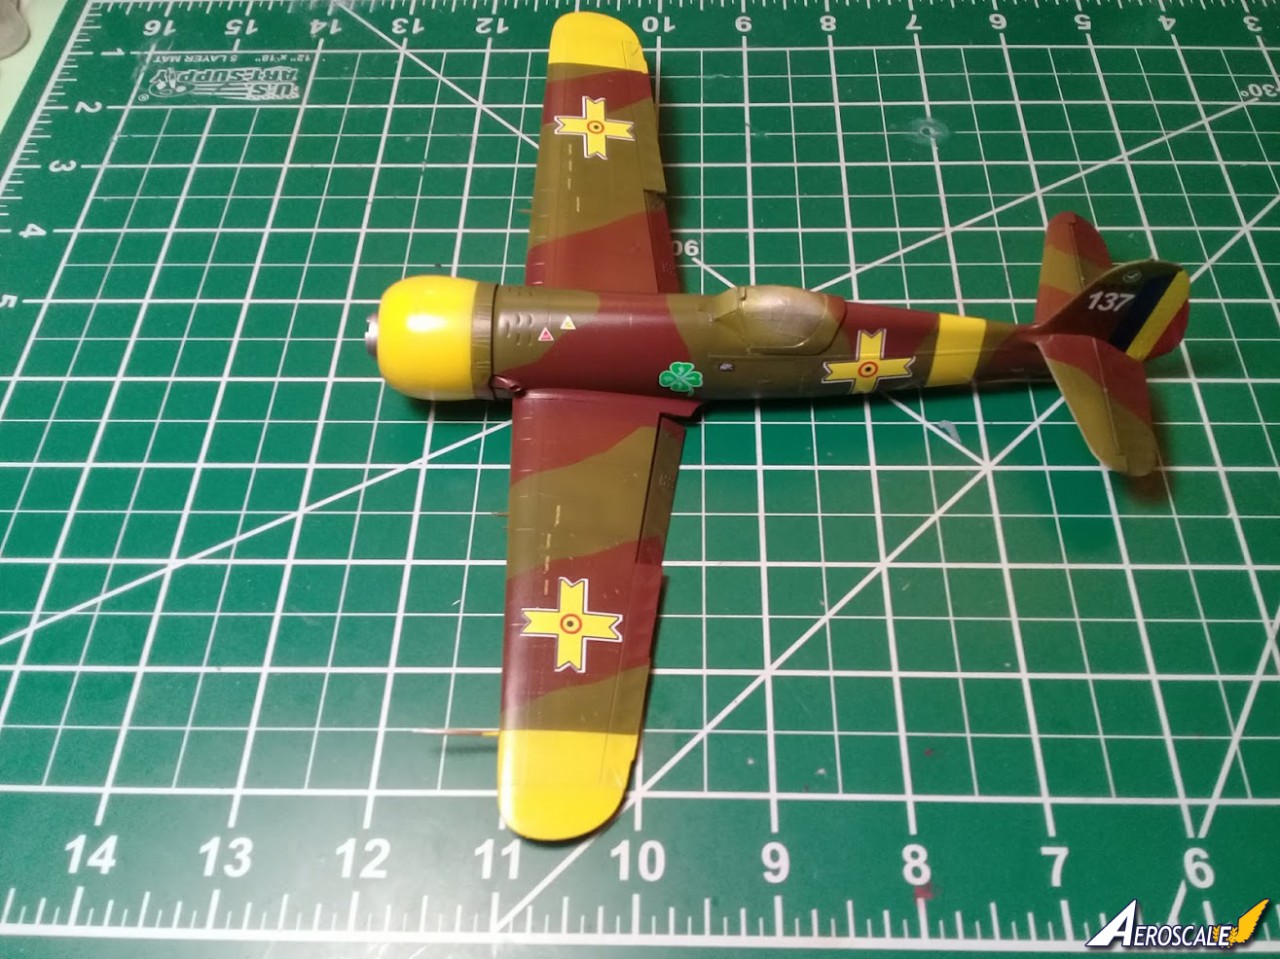
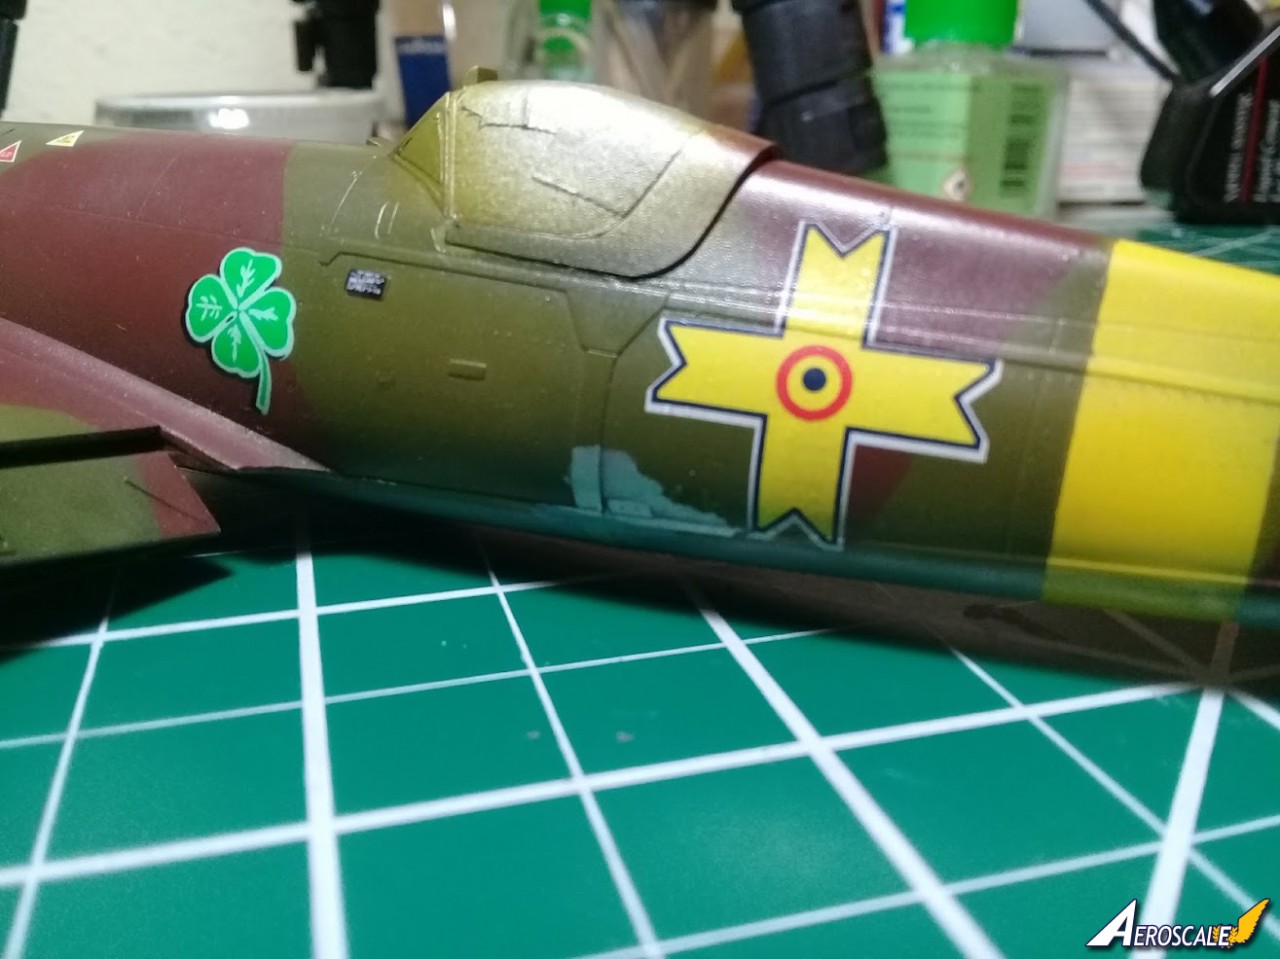
4.2. Decals application I had less problems than expected, but I revised the method. I dipped the decals just about two seconds in the water enough to slide from the backing paper but not enough to start curling. I affixed them to the model immediately. They behaved quite nicely this time and conformed well to the recessions and elevations. I brushed some Micro Set over them for good measure and the business was concluded neatly. Unfortunately, the good setting does not compensate for offsets and misspelling!
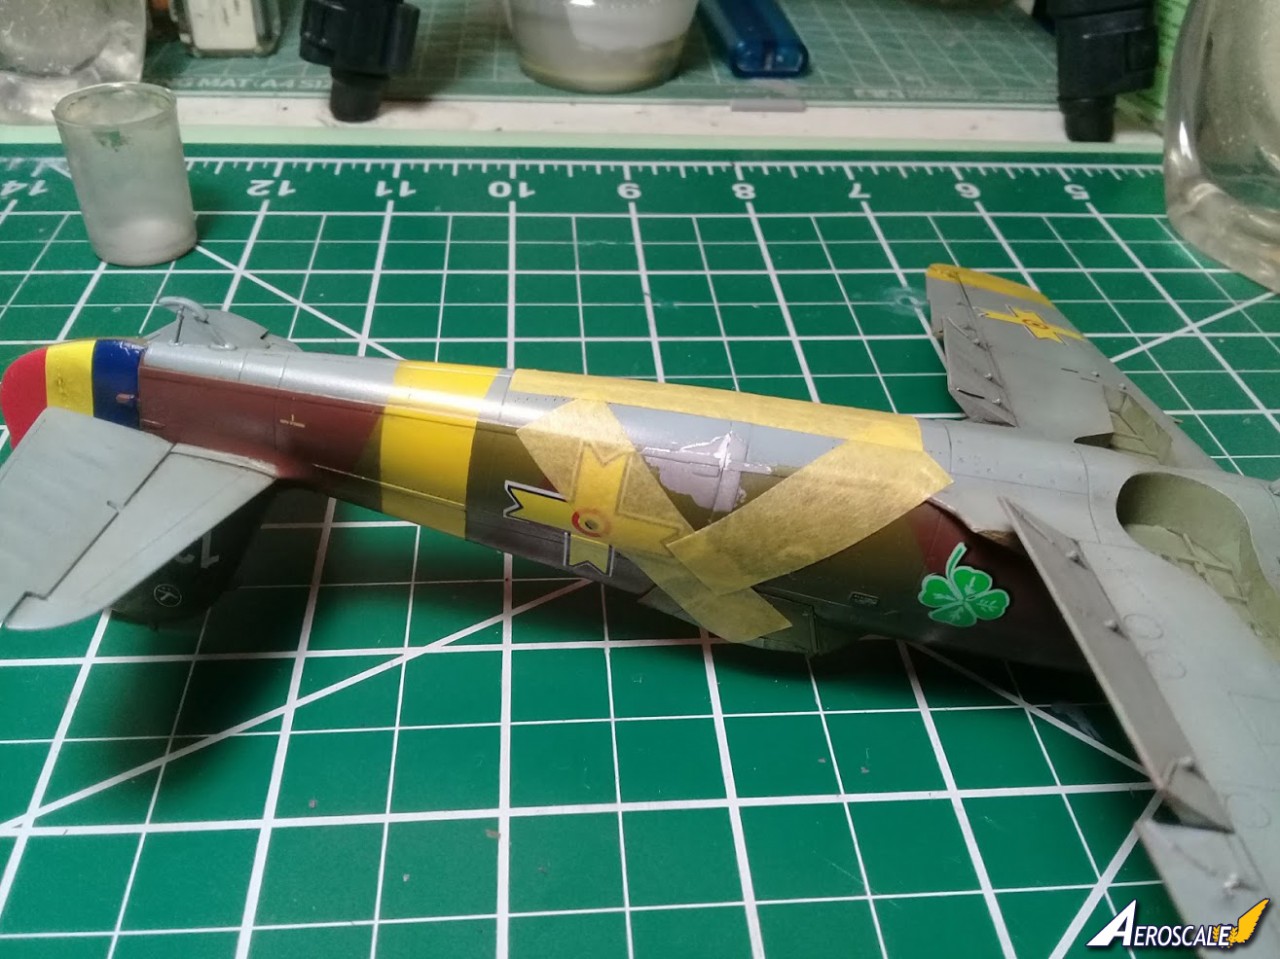
4.3. Weathering Another quick Micro Gloss followed, and I moved to weathering. The first step was to apply some dark wash. I used heavily diluted Van Dyck brown oil paint, applied with a soft blending brush. The undersurfaces went on just about perfect and I moved to the upper surface. I applied the same technique but I missed the fact that in a nook formed by the horizontal protruding rib with the fuselage the oil wash pooled up and wasnt dry. When I passed the paper towel to eliminate the pigment excess, the wet surface made the paper stick and I peeled off some paint from both above and under color demarcation line, exposing the bare aluminum! It could have made a nice chip if hadnt been that big! I knew I had a nice problem in my hands, because the proximity of Michaels Cross decal. I found no way around not masking in top of it. I bite the bullet and masked off the affected areas, sprayed RLM65, masked again the demarcation line and applied the Romanian green. I had some emotions when I removed the masks, but I was lucky this time. The only minor problem to deal with was now the raised accumulation of paint at the tapes edges. Careful sanding resolved the issue. I re-applied the oil wash in the required patches to regain the tone and that was it!
The only visible chipping on the wartime photo is the propeller and so I did, using silver chrome from Testors. Because the contrast between the propellers black and silver was too violent, I applied the same Van Dyck brown wash and it worked neatly. A few minuscule chips occurred during models handling were also tolerated for chipping.
I concluded the painting with the small exterior detail: antenna mast, antenna wire, pilot tube. The zebra pattern on the latest is quite troublesome because it has to be hand-painted.
Pretty much content with the way the IARs looked, I applied AK matte varnish.
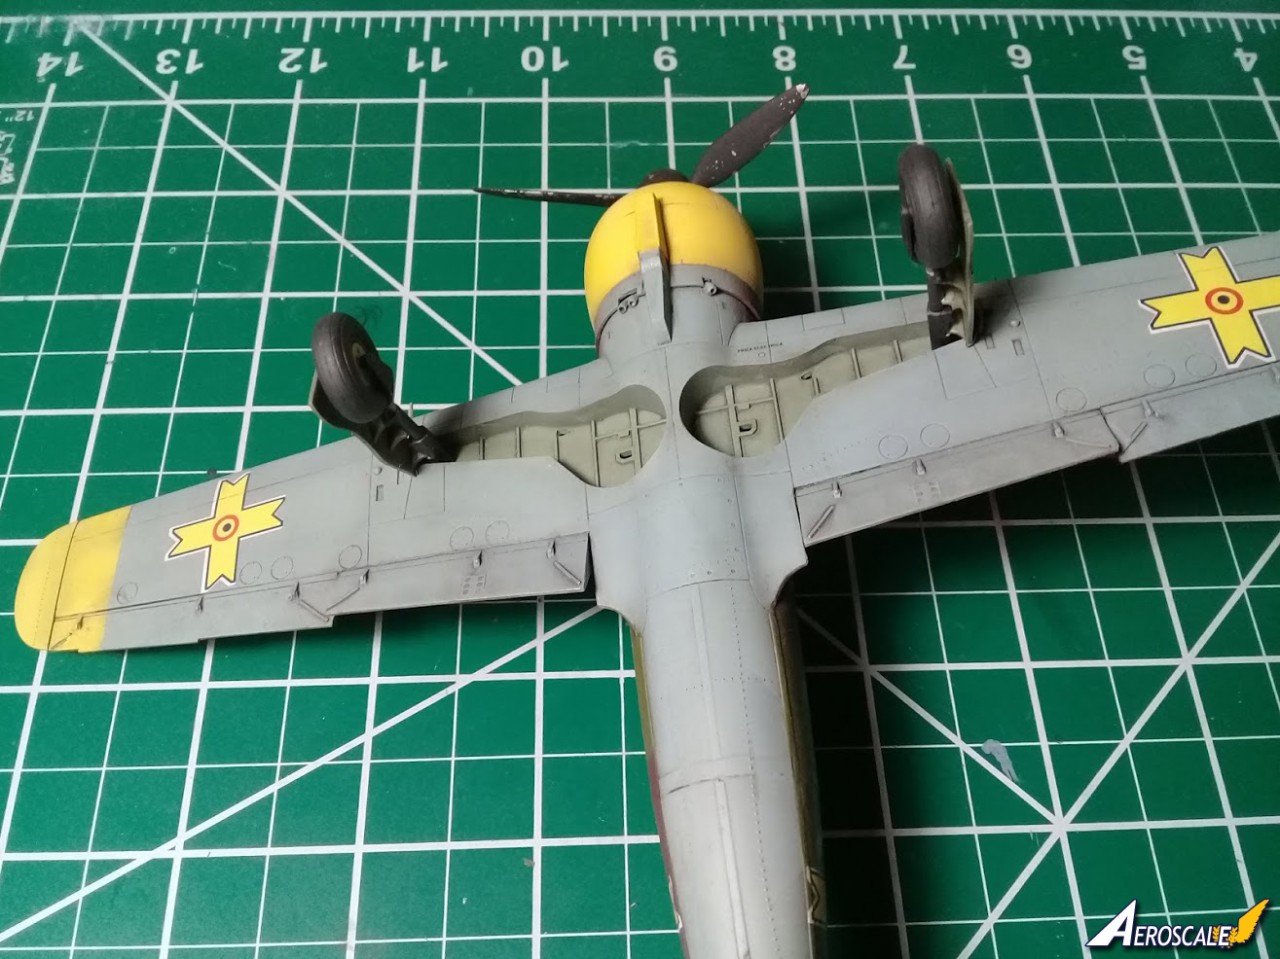
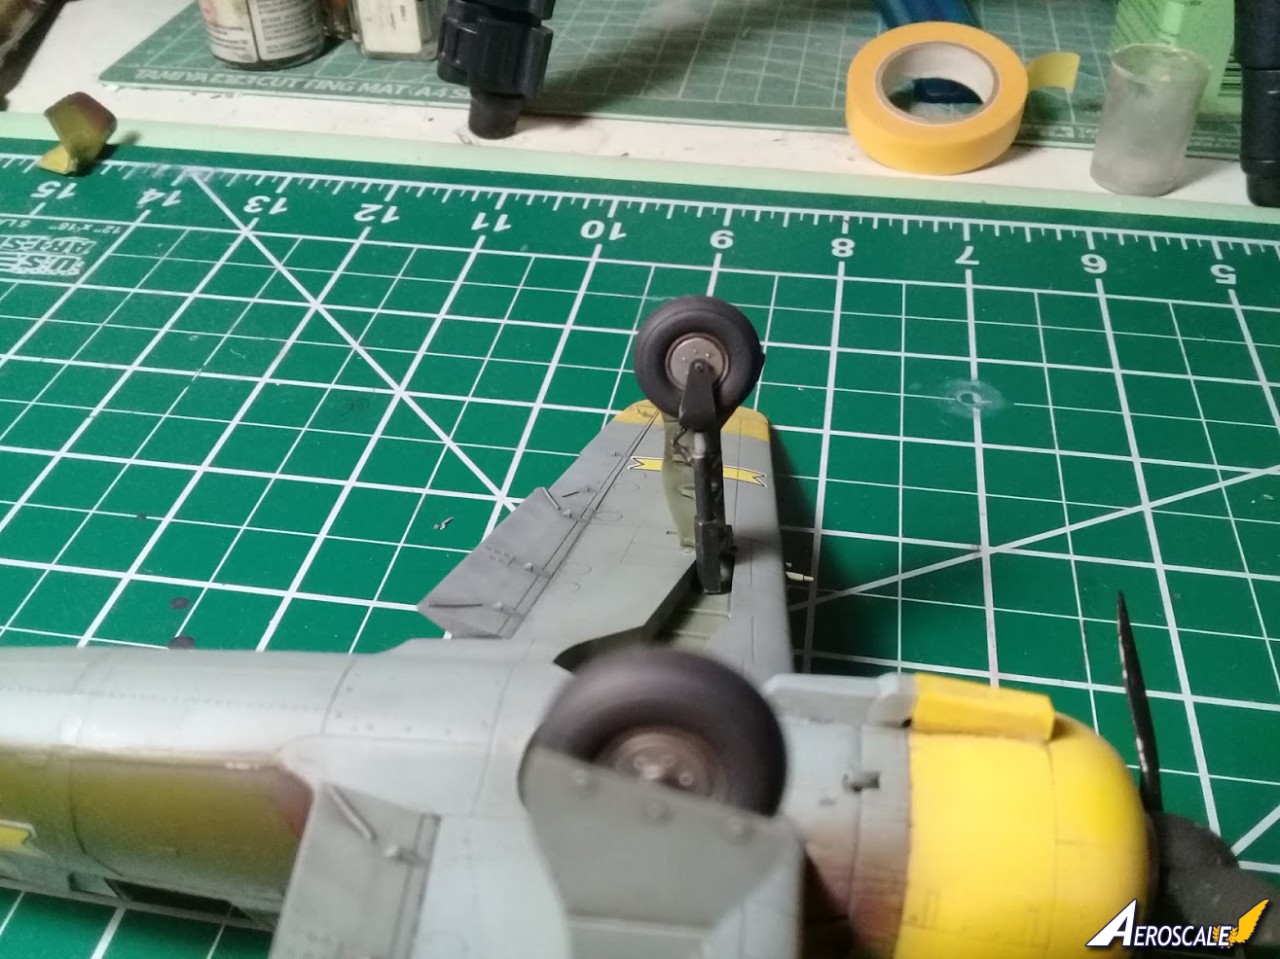
Last step was the application of pigments, grated from artists dry pastels. I added some gray to the wheels and wheel bay, and brown and black for MGs and engine smoke. I kept that to a modicum value, because the aircraft was supposedly like new.
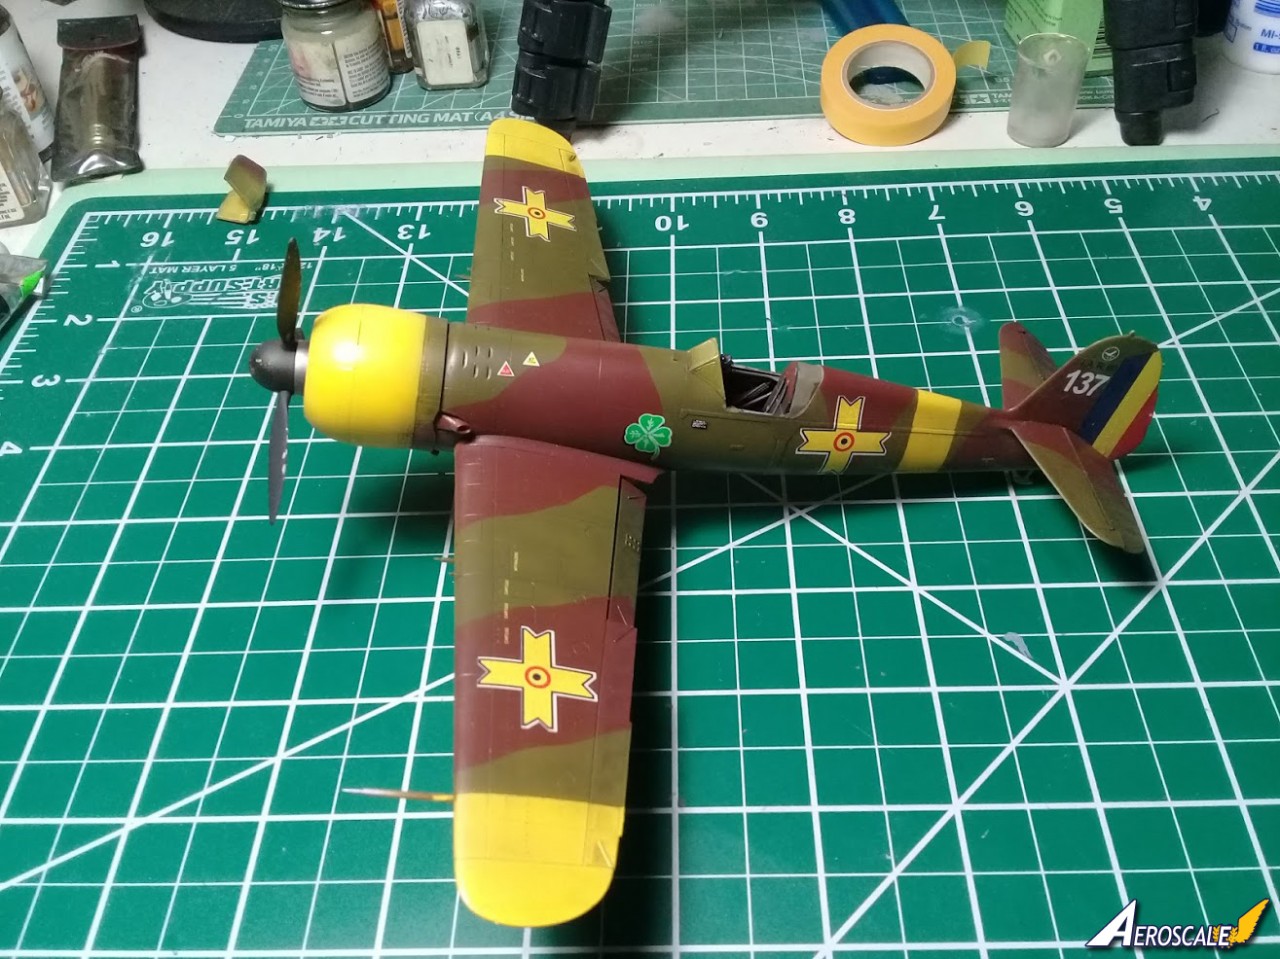
Conclusions to painting and weathering I really like the aspect the aluminum primer give to the finish. Im not sure how much my camera shows it, but the naked eye can guess the metal underneath, especially when the model is exposed to a strong light source. Definitely Im going to use it again!
Kit rating
The subject itself and the engineering deserve all the praise: trouble free building of an interesting aircraft: Beautiful! On the other hand, the paucity of suggested painting options (only two nearly identical finishing schemes) and the long list of errors from decal application guide and decals themselves drove me to make deductions from the final score. After much pondering, I found 85% mark its about right.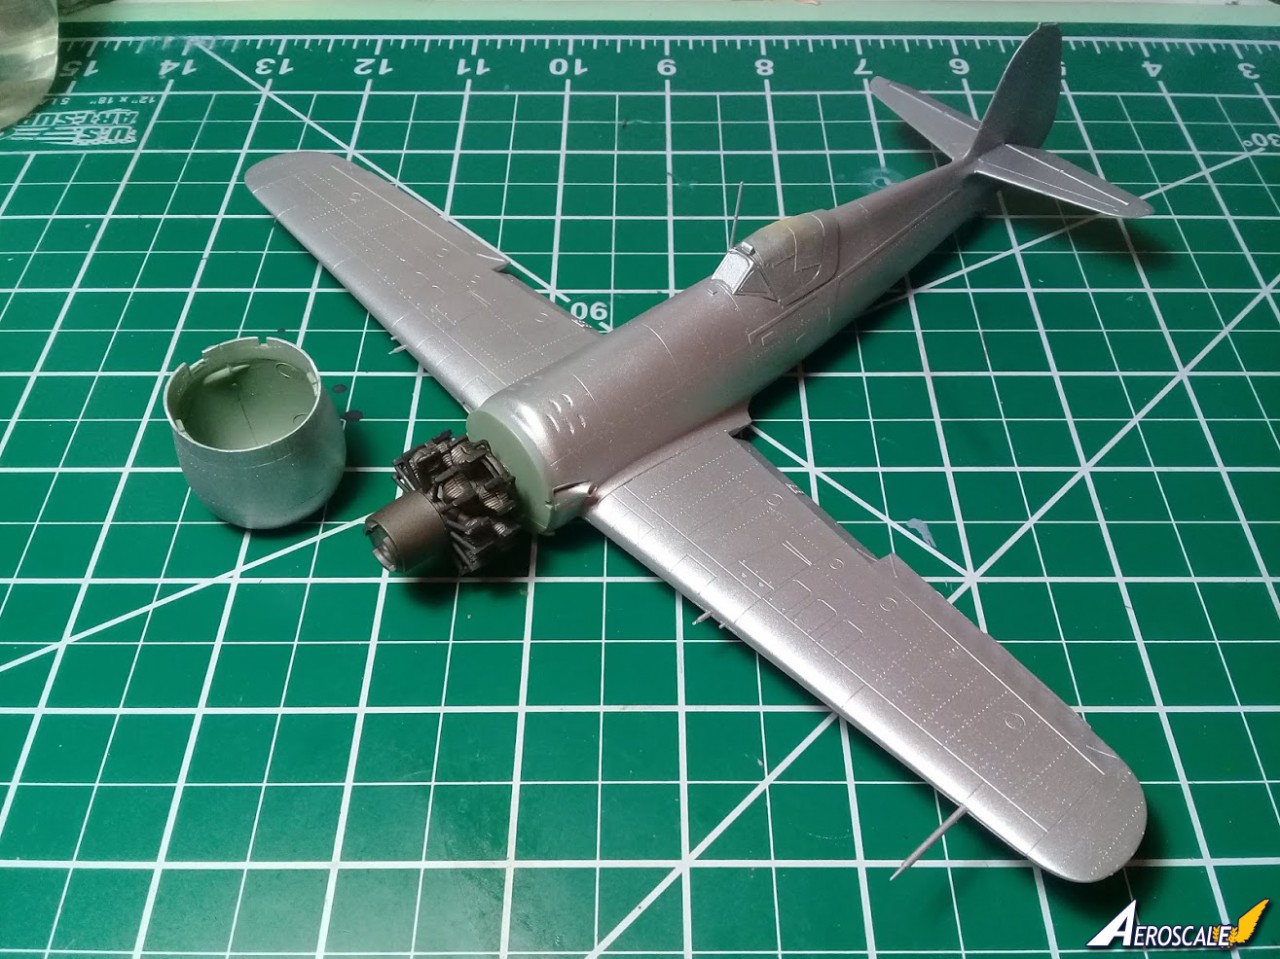


About the Author


FROM: NETHERLANDS ANTILLES
Born in Romania, from a German father. Classical studies, Latin teacher. Currently holding French residency, business owner in a Dutch island where currently spoken language is English. At home I speak Spanish, though. Interest in history and modelling: since babyhood, I grown with my father's stor...
Comments

A REALLY nice in depth review of one of my favorite, obscure AC. Too bad about the decals though. So, who will be the first after market company to offer correct markings ? Gotta add this one to the stash !
Thanks for sharing !
FEB 10, 2018 - 06:59 PM
An excellent feature article for sure. The aircraft history in relation to the Allied oil field attack was something I literally knew nothing about.
Quite an in depth step by step build that is an excellent reference for those planning on building this kit, as well as a honest and thoughtful review of the Hobby Boss kit. The only AM options I would now consider a must are turned Brass MGs (my preference over other options), and a more accurate set of decals.
Joel
FEB 10, 2018 - 09:13 PM
I was so inspired I went (or tried) shopping for one. Squadron, Sprue Bros. and Lucky Models nobody had one ! I'll keep looking
FEB 11, 2018 - 05:42 PM

Gabriel,
Great looking model and a great time also reading the story and your tribulations during the build.
Will be looking out for the next IAR you present here.
Thanks for sharing, keep them coming!
Cheers
Pedro
FEB 11, 2018 - 08:30 PM

Hi, guys!
Thank you for posting and sorry for late answer - I's still having internet access problems (!).
Ivanhoe6:
Thank you! I subscribed myself to Scale Hobbist product notification and I filled up the basket, safe this item. I will proceed to check-out when is re-supplied (it will be the third time - I missed the first shipment) I've seen it on Amazon, though.
Joel
The praise I received here from an experienced modeler like you made my day! Thank You, sir! To be honest, I have to share credit with Rowan Baylis (Merlin) because he has a very sharp editing eye and slapped my wrist (kindly) more than once when I went wrong. I should thank him for that for sure!
The episode described in the review, together with Tidal Wave, are the pride of Romanian Aeronautics during WWII (for the period they were under Axis control). I found additional info in Squadron Signal book on Lightning. "Hutch" was the only pilot of his squadron do return home ( ). He was credited, erroneously, with downing five FW 190 (at the best he can be credited with damaging two IAR-80, based on post-war analysis).
Aber makes excellent gun barrels and they're affordable.
RB Productions based in Ireland, owned by the Romanian modeler Radu Brinzan makes accurate decals for Romanian aircraft. Last time I checked his online store had no decals for early IAR-80 (see infra, addenda)
Pedro:
Thank you, sir! I'm very eager to start the new build on the same kit: after buying the IAR 80/81 book by Radu Brinzan, I discovered yet another few mistakes which I like to correct in my future build(s).
ADDENDA
As my good luck goes, I have received the IAR 80/81 book after I built the aircraft and sent the review. Oh, well...
There are a few other things you may like to consider:
- the colors I chose are quite good, the brown should be less red;
- the interior seems to have been painted with under-surface blue, not RLM02 (not 100% sure);
- the camouflage scheme should be wrap-around, with light blue only under wings and stabilizers, but not under the main fuselage;
- the number of the aircraft should be between 1 and 20, and no higher for this version. White 137 is an IAR 80A (it carries three pairs of MGs, not two);
- the yellow theater marking should by applied only under the wings, and on a longer span (one panel line more towards inside of the wing);
- the factory applied camouflage seems to have a loose pattern from NE to SW but not as broad as I sprayed them.
Thank you all!
Gabriel
FEB 12, 2018 - 09:52 PM

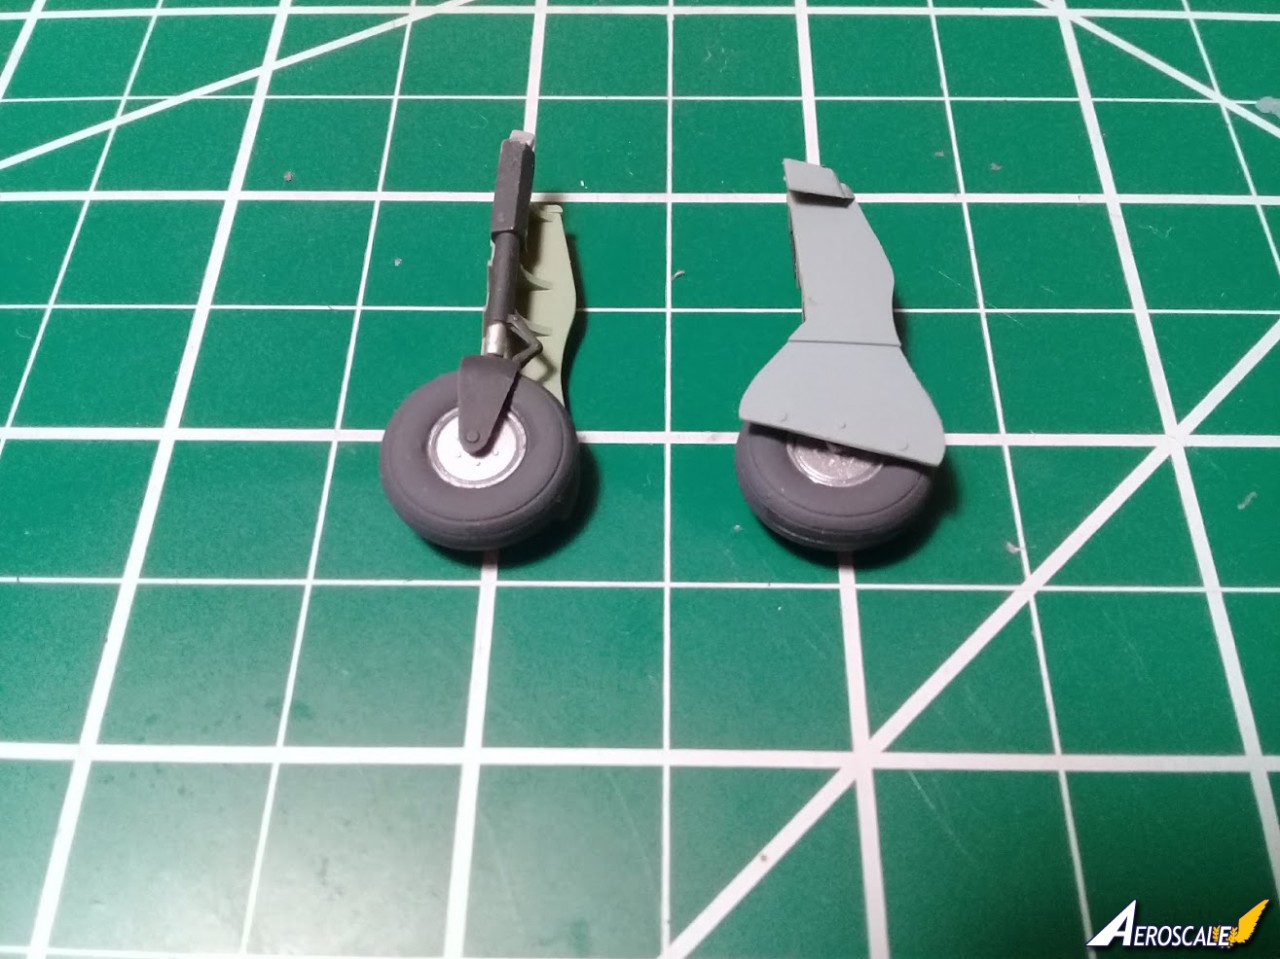
The colors should be the one of the RAF as there were used by the Romanian Air Force before and early in the war! You have put the legs covers the wrong way! Hobby Boss could and should have done a greater job considering the very good infos available with Radu Brinzan! So they have few excuses. Thanks for spending your time to share your analysis with us. I include here a pic of my IAR 80-A in 32nd from AZUR-FRROM! Cheers
 DSC_0002 by jean Barby, sur Flickr
DSC_0002 by jean Barby, sur FlickrAUG 20, 2018 - 04:18 AM
Hi, Jean!
Yes, I have received Radu's book too late and I followed the instructions, safe the decal application. If you read the whole article, you'll see I made a promise to re-do the build as I have better information now. The origin of the paints is a supposition and Radu insist on that but it's the only workable hypothesis... so it's good for now. Yes, I hace installed the wheels on the wrong sides - I have noticed it later and re-installed them. Stupid mistake on my side.
The Azur kit is made in collaboration with Radu and should be much more accurate at least regarding the markings / paint scheme.
Hobby Boss are just making up their painting instructions - none of their kits I ever build have the correctly done so yes, much caution is needed. It's a shame, because the aircraft I made has a couple of very good war time pictures... well, now I know better!
Your aircraft looks superb! Rowan (Merlin) is building one right now - he has the blog running and he does also a superb job!
Thank you for tuning in!
Gabriel
AUG 20, 2018 - 04:26 AM
Copyright ©2021 by Gabriel. Images also by copyright holder unless otherwise noted. The views and opinions expressed herein are solely the views and opinions of the authors and/or contributors to this Web site and do not necessarily represent the views and/or opinions of AeroScale, KitMaker Network, or Silver Star Enterrpises. Images also by copyright holder unless otherwise noted. Opinions expressed are those of the author(s) and not necessarily those of AeroScale. All rights reserved. Originally published on: 2018-02-11 05:01:00. Unique Reads: 13817

WEB HOSTING BY


Copyright ©2021 AeroScale and Kitmaker Network, a subsidiary of Silver Star Enterprises
All Rights Reserved. Please read our Conditions of Use and Privacy Policy.
All Rights Reserved. Please read our Conditions of Use and Privacy Policy.