

1⁄48Focke-Wulf Fw 190D - Eduard Review-Build #2
5
Comments


Changes
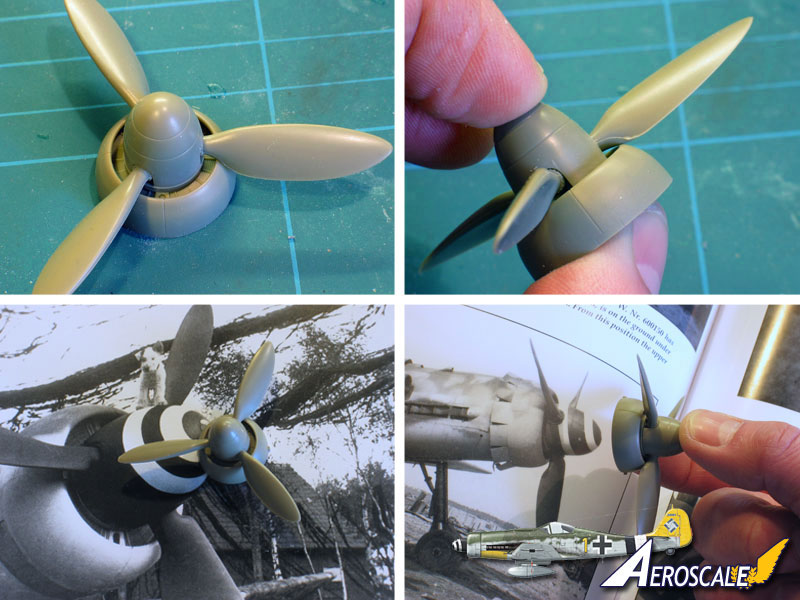
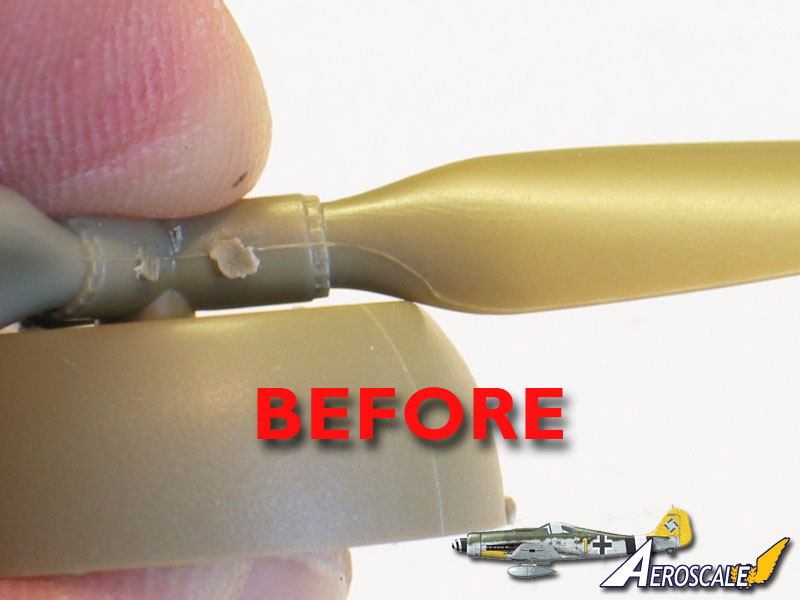
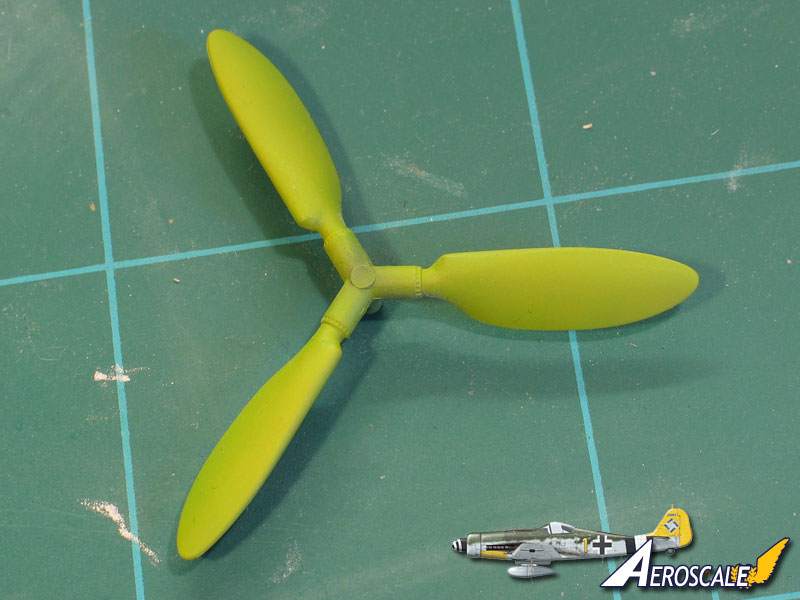
PropellerThe first problem that I noticed when checking the kit's parts was the propeller; it's nicely moulded, but doesn't have the distinctive notched appearance of the original. Test fitting the propeller and cowl revealed another issue - the rear of the blades actually hit the lip of the cowling. Comparisons with a couple of shots from Vol. 1 of Jerry Crandall's study of the Dora show what's amiss.
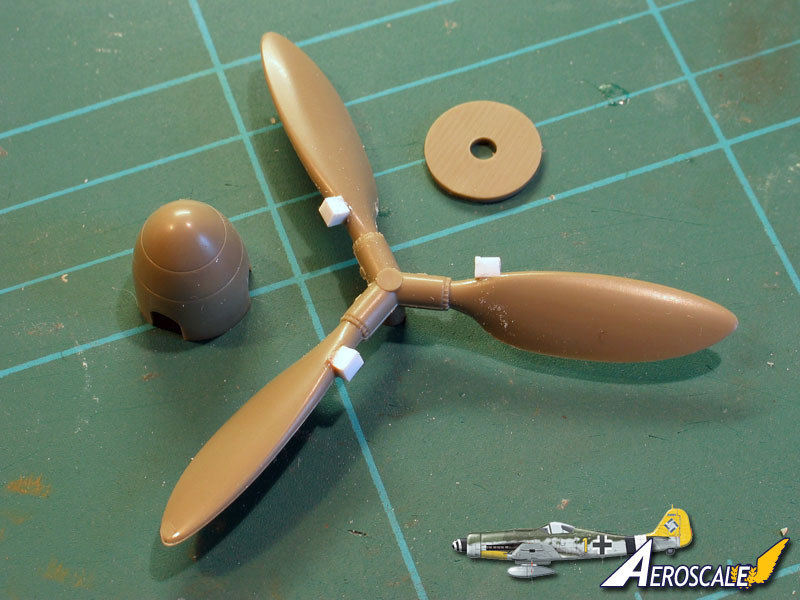
Fixing the rear of the blades was simple and there's actually a mould-line that makes a very useful guide to trim to. I tackled the front of each blade by filing out a notch and insetting a chunk of styrene. This was blended in with "superfiller" - a mix of CA adhesive and talcum powder.
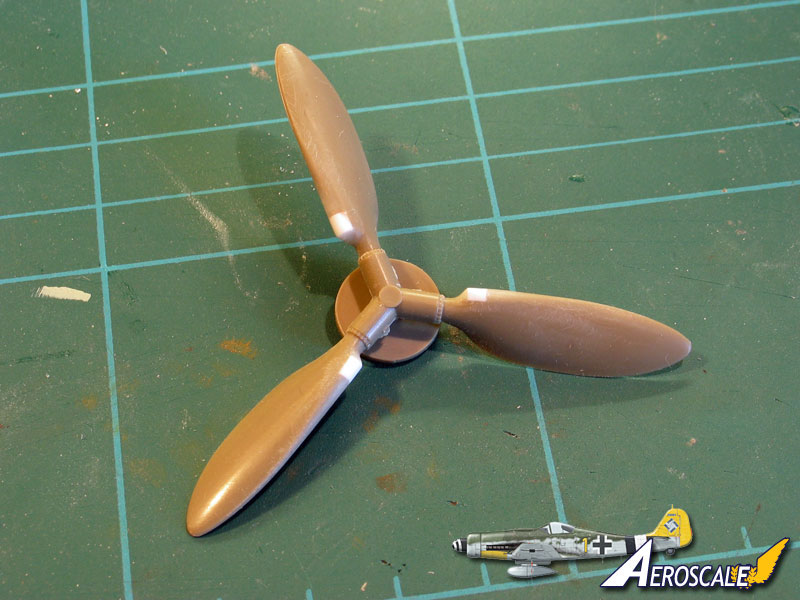
What's that hideous colour?!? Well, I was wondering how to weather the wooden propeller when I found photos in the JaPo Part 1 book on the Dora showing a propeller blade recovered from a crash site with a rather lurid yellow-green primer under the RLM 70. It would almost all be hidden on my model (just a hint on the leading edges of the blades to show this was a very well-used aircraft) but I couldn't resist spraying a full coat just to see what the effect was...
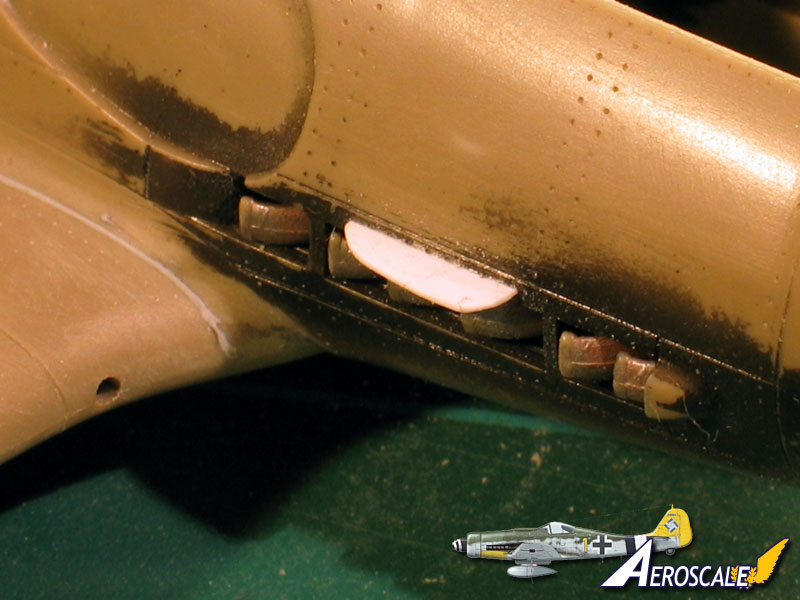
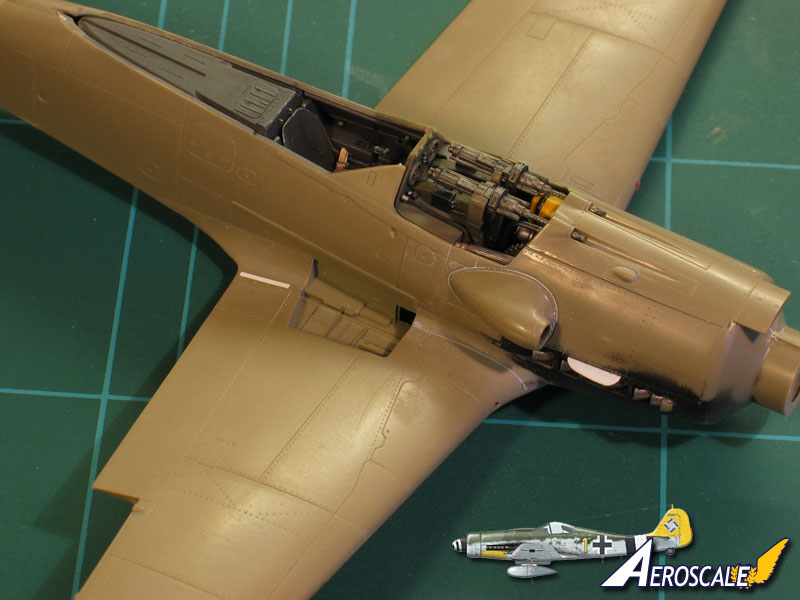
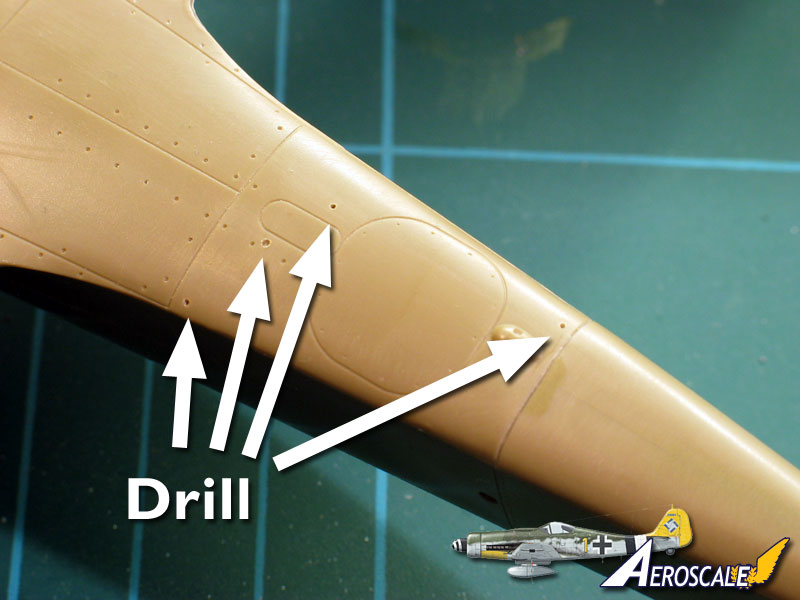
Under the wing
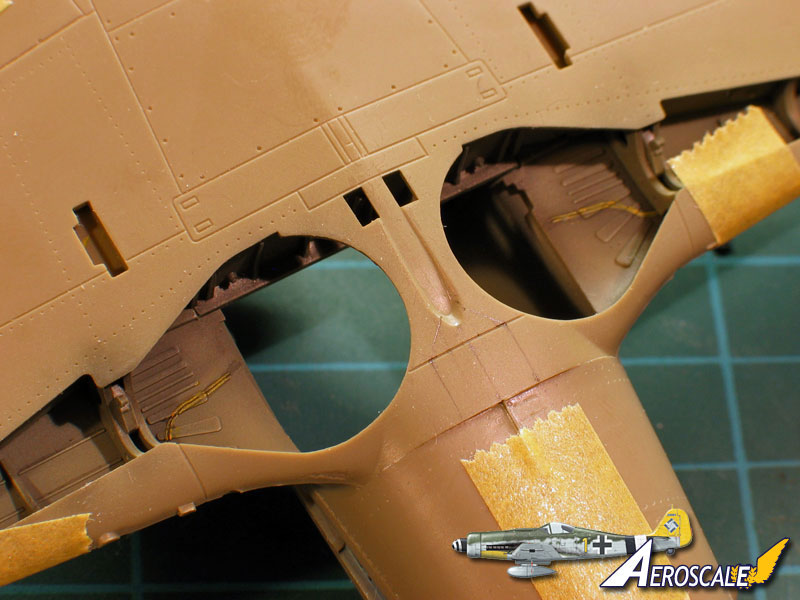
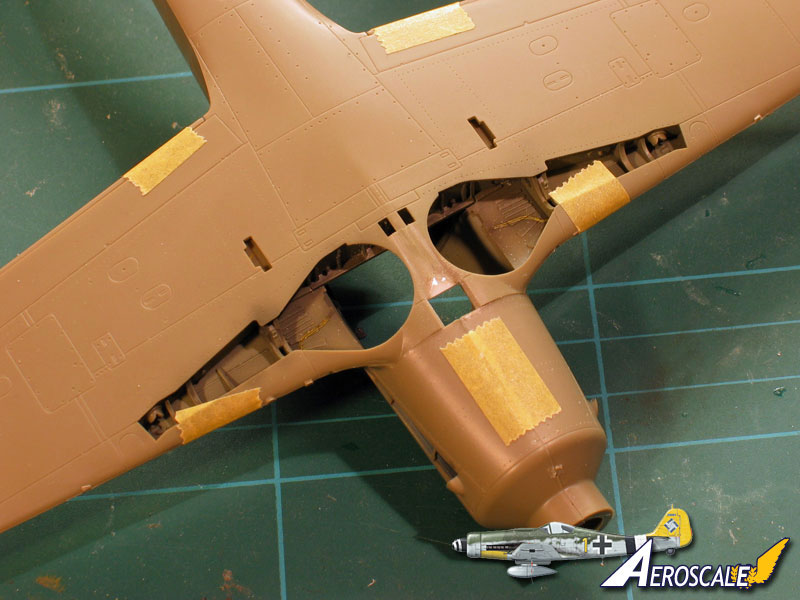
Another issue that grabbed a lot of attention in modelling forums was the underside of the wing ahead of the wheel well. Eduard seem to have arrived at something of a hybrid appearance - the area is smooth (as on a 'D-13), but with with shell-case ports of the 'D-9.
I've seen it suggested that late 'D-9s may have had a smooth panel too, and I certainly can't discount this, but it's usually seen with an inset channel so I plucked up my courage, found a photo of the real thing, took measurements from the drawings in Jerry Crandall's book and sliced away the area. I filled the notch in the Eduard wing with "superfiller" again, and made the basic channel with plastic card, chiseling around each wheelwell to create a lip. I certainly won't claim any absolute accuracy for the result (it still needs scribing in the accompanying photo), but it gives a reasonable impression of something "going on" there - and it will be partially hidden by the drop tank anyway.
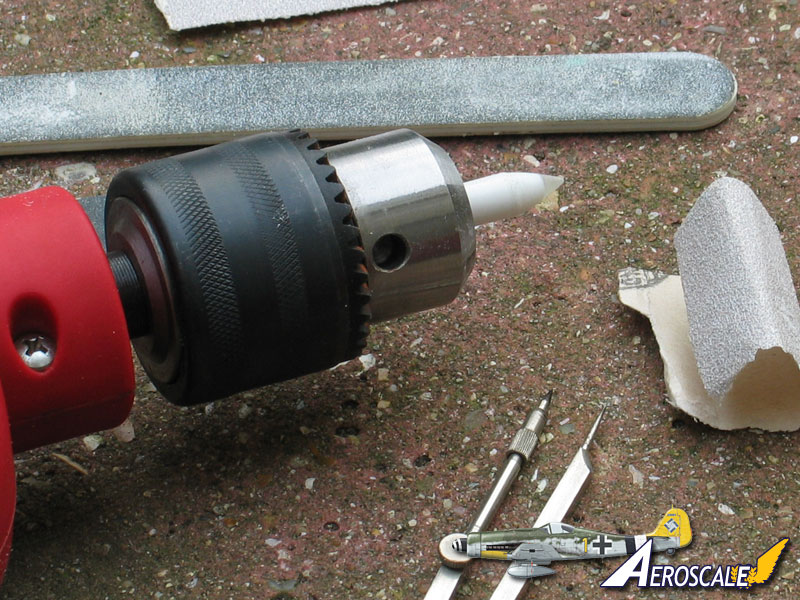
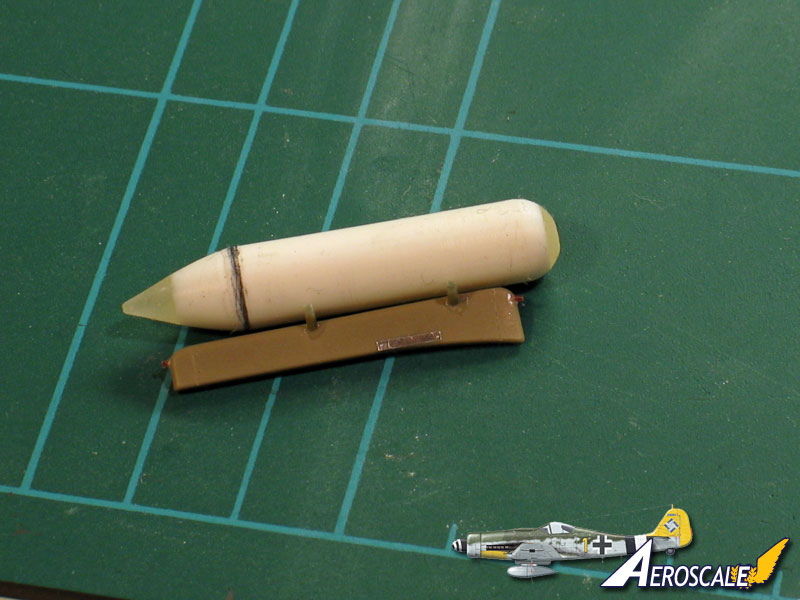
Drop tank
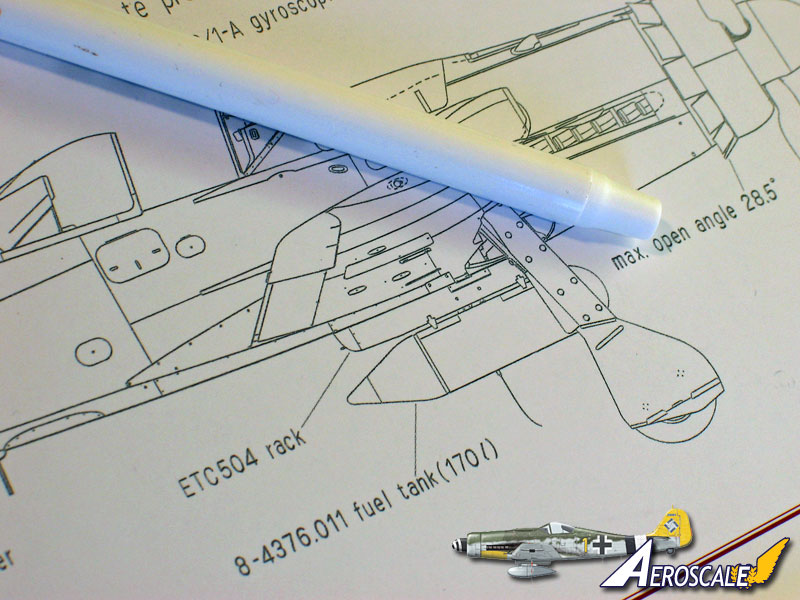
Eduard provide a ribbed style drop tank, whereas most pictures I have of Doras show a smooth teardrop tank or a plain cylindrical one. I thought it would be fun to scratchbuild the cylindrical type as it's a bit more unusual and seems to have been more prevalent right at the end of the war (which would be in keeping with my chosen colour scheme).
I found an old ballpoint pen body that matched the diameter in Jerry Crandall's drawings, so I filled it Araldite (epoxy glue) and let it set for a good few days. Once it was fully hard, I stuck it in an electric drill as a crude lathe and got to work sanding. In the in-progress shot, there's obviously a lot more work to do (the nose needs to be more rounded for a start), but the end result looked quite effective dressed up with "Keine Bombe" stencils
Supercharger intake
I must admit the intake defeated me, although I was never quite happy with its appearance. It just doesn't quite match my reference photos - again seeming to be something of a hybrid between the 'D-9 and 'D-13. The panel line runs slightly too high (probably to allow for the more bulbous later intake) but I left well alone in order to have half a chance of keeping up with Jean-Luc in his build.
Small additions
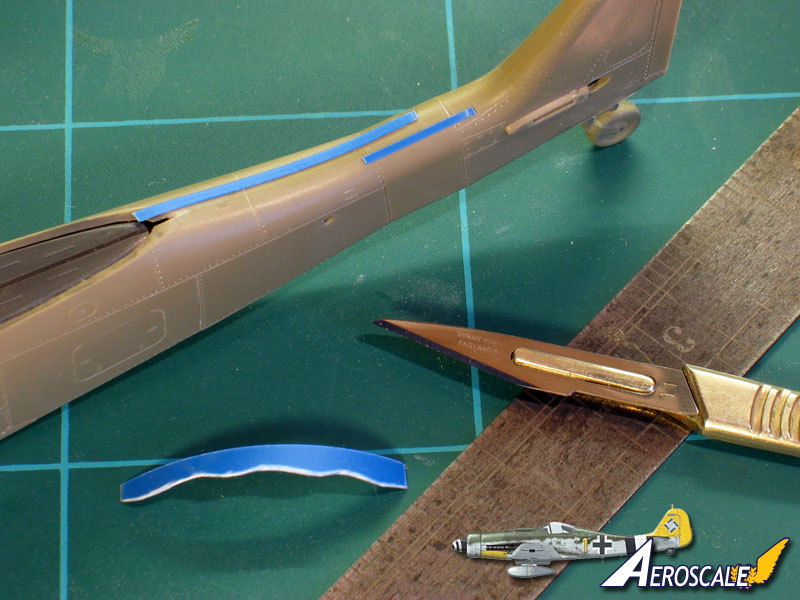
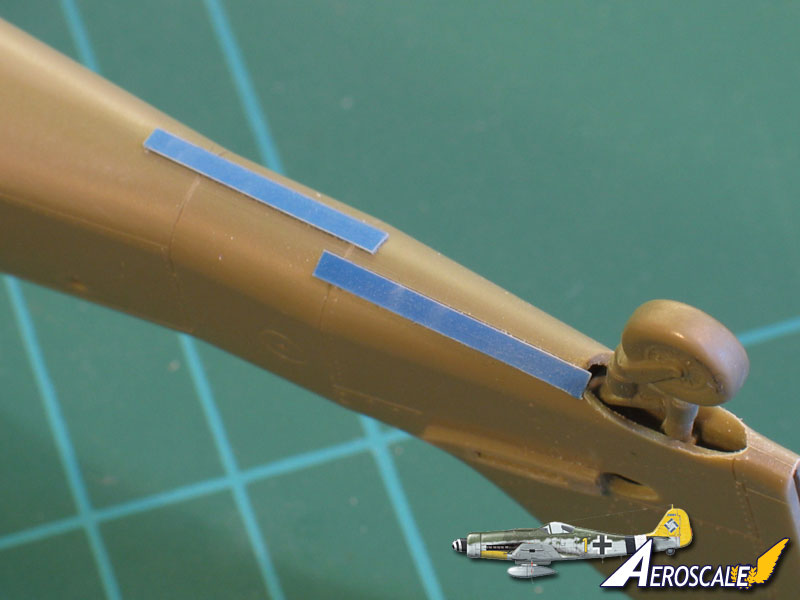
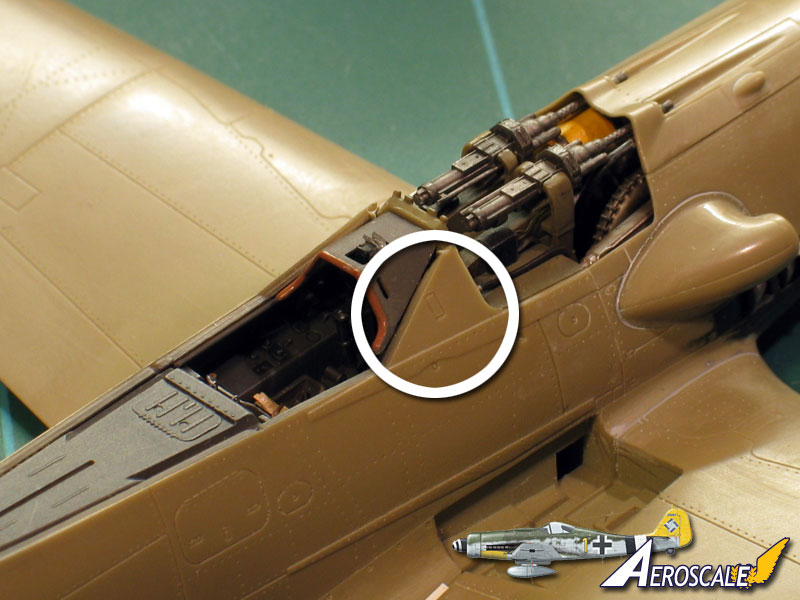
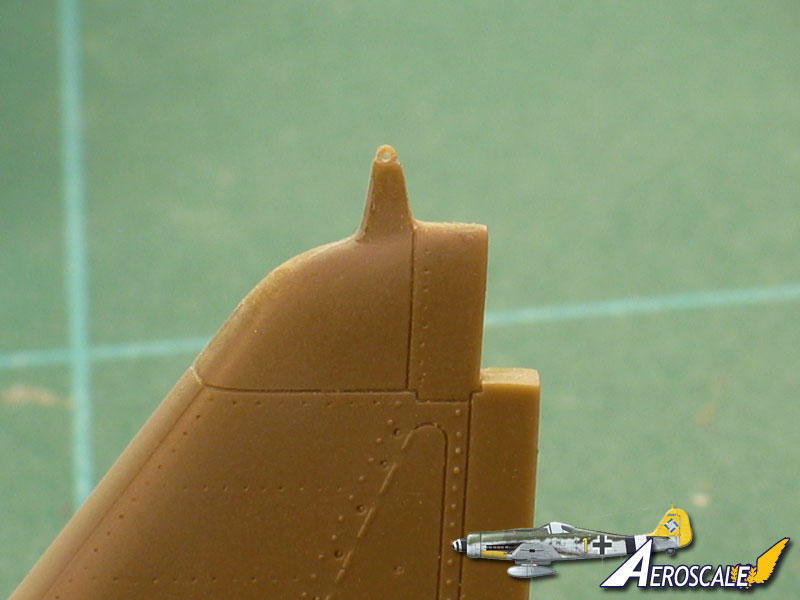
The instruments coaming should have a padded lip, so I masked it off and built one up from "supafiller". On the tip of the spinner there's a raised circular disk evident in photos, and, above the starboard exhausts there should be a small shield to prevent exhaust gases going into the intake above. Last but not least, I added the little strips riveted to the wing roots. Eduard will probably include both these and the exhaust shield in a future etched set.
With the main assembly completed, I re-scribed the fuselage seams lost in sanding. On the real aircraft the skin was overlapped slightly, resulting in the panel line being offset from the centre. According to the Jerry Crandall book's plans this offset was reversed on on the fuselage insert (perhaps for strength?). I filled some panels that don't appear in Jerry's book, and added some little drain holes under the rear fuselage.
My aircraft was refitted with a bulged canopy which I modelled open. This style of canopy lacked a tensioner for the aerial, so it went slack when it was opened. I used lead wire which draped quite convincingly. Eduard provide the same headrest for both the flat and bulged canopies, which I don't think is correct for the later style, but I left it unmodified.
Finally, I posed the cowl gun-cover open and added the catches from styrene card for a little interest.


About the Author


FROM: NO REGIONAL SELECTED, UNITED KINGDOM
I've been modelling for about 40 years, on and off. While I'm happy to build anything, my interests lie primarily in 1/48 scale aircraft. I mostly concentrate on WW2 subjects, although I'm also interested in WW1, Golden Age aviation and the early Jet Age - and have even been known to build the occas...
Comments
Here is the other great Dora
I can see some p-51D with blue nose (8th bomber command ) (I hate them ) approaching
Cheers Nick
APR 10, 2010 - 05:45 AM

Cheers Nick
Your kind words are much appreciated.
I'll have some more Luftwaffe and Regia Aeronautica stuff soon(-ish) which you might like, but you'll have to look away when I post my Spitfire and the Mustang which I have planned.
All the best
Rowan
APR 11, 2010 - 12:57 AM
Beautiful build, Rowan! The build by Jean-Luc is also stunning.
This Eduard kit is a must have in the collection. I will wait until they release the Royal Class edition.
Thanks for the detailed review of this kit.
APR 19, 2010 - 12:29 AM
Many thanks Jesper
I know Jean-Luc is working on a version with corrections for a magazine-build - that should be really spectacular!
All the best
Rowan
APR 19, 2010 - 04:59 AM

well I'm a bit late on this one - nothing like the arrival of the box on the bench to get you a little hot under the collar - but that is fantastic work. Thanks for the tips on the prop!
JAN 09, 2011 - 10:45 PM
Copyright ©2021 by Rowan Baylis. Images also by copyright holder unless otherwise noted. The views and opinions expressed herein are solely the views and opinions of the authors and/or contributors to this Web site and do not necessarily represent the views and/or opinions of AeroScale, KitMaker Network, or Silver Star Enterrpises. Images also by copyright holder unless otherwise noted. Opinions expressed are those of the author(s) and not necessarily those of AeroScale. All rights reserved. Originally published on: 2010-04-10 00:00:00. Unique Reads: 34780

WEB HOSTING BY


Copyright ©2021 AeroScale and Kitmaker Network, a subsidiary of Silver Star Enterprises
All Rights Reserved. Please read our Conditions of Use and Privacy Policy.
All Rights Reserved. Please read our Conditions of Use and Privacy Policy.